WMS Integration
This article introduces Warehouse Management System (WMS) integration, which allows you to connect a WMS for efficient inventory management. Item DI offers two configurable options for managing warehouses, but each merchant can only connect to one WMS system at a time.
Based on your plan, if it doesn’t include the service of WMS integration for inventory management, you can still handle orders manually in item OMS. This includes dispatching orders, creating shipping labels, and fulfilling shipments. For more details, refer to the Order Management (opens in a new tab) section.
Perquisites
Complete the following configurations before connecting to the warehouse system.
Creating a site (for item WMS)
- Sign in to item WMS with your account.
- Add the facility at Modules > Company & Facility (opens in a new tab).
Creating a site and generating an Authorization Code (for UNIS Wise)
- Sign in to UNIS wise with your account.
- Add the facility at Modules > Company & Facility > Facility Management. For more information, See Facility Management.
- Navigate to Modules > Foundation Data > Account Data Sync > Account Data Sync Authorization code.
- Click the NEW button, the pop-up window appears.
- Select the Customer (Default Customer), choose the facility, and enter the Alias for the customer (optional).
- Click the Generate Code & Save button.
- Copy the Authorization Code from the code list and make a note for later use.
Note: A Default Customer is set up for the admin account, you can also create customers at Settings > Organization. For more information, see Add Organizations.
item WMS Integration

To integrate with item WMS:
- From the left panel, switch to item DI.
- Navigate to Merchants > select the desired merchant > Connectors.
- Select WMS under the Live Channels section.
- Click + New Channel. The channel list window will appear.
- Choose the WMS category and select item WMS from the channel list. The new channel pop-up window appears.
- Enter the Channel Name and select a Customer from the drop-down.
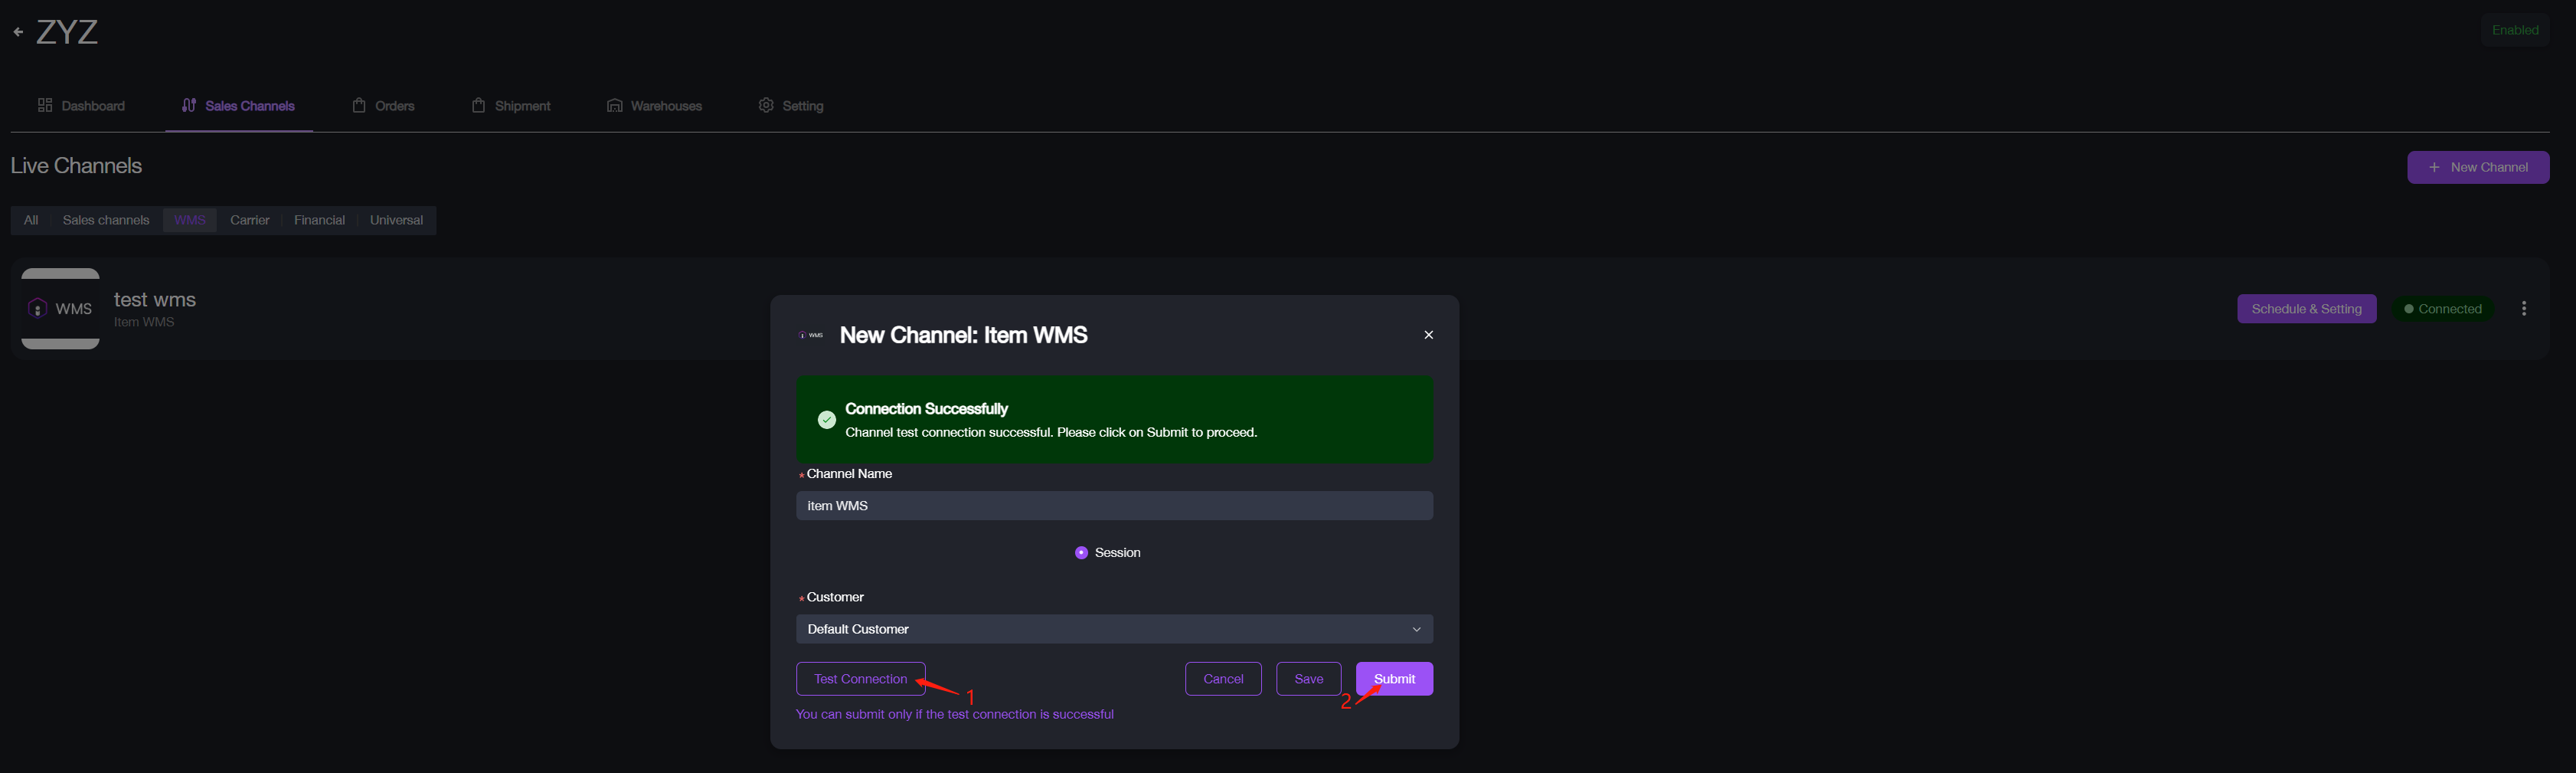
- Click Test Connection. If the "Connection Successful" message appears, click Submit.
Note: A Default Customer is set up for the admin account, you can also create customers at Settings > Organizations (opens in a new tab).
After connecting, item DI will pull the warehouse data that corresponding to this customer from item WMS and display it in the Warehouses (opens in a new tab) section.
UNIS Wise Integration
To integrate with UNIS Wise:
- From the left panel, switch back to item DI.
- Navigate to Merchants > select the desired merchant > Sales Channels.
- Select WMS under the Live Channels section.
- Click the + New Channel button. The channel list window will appear.
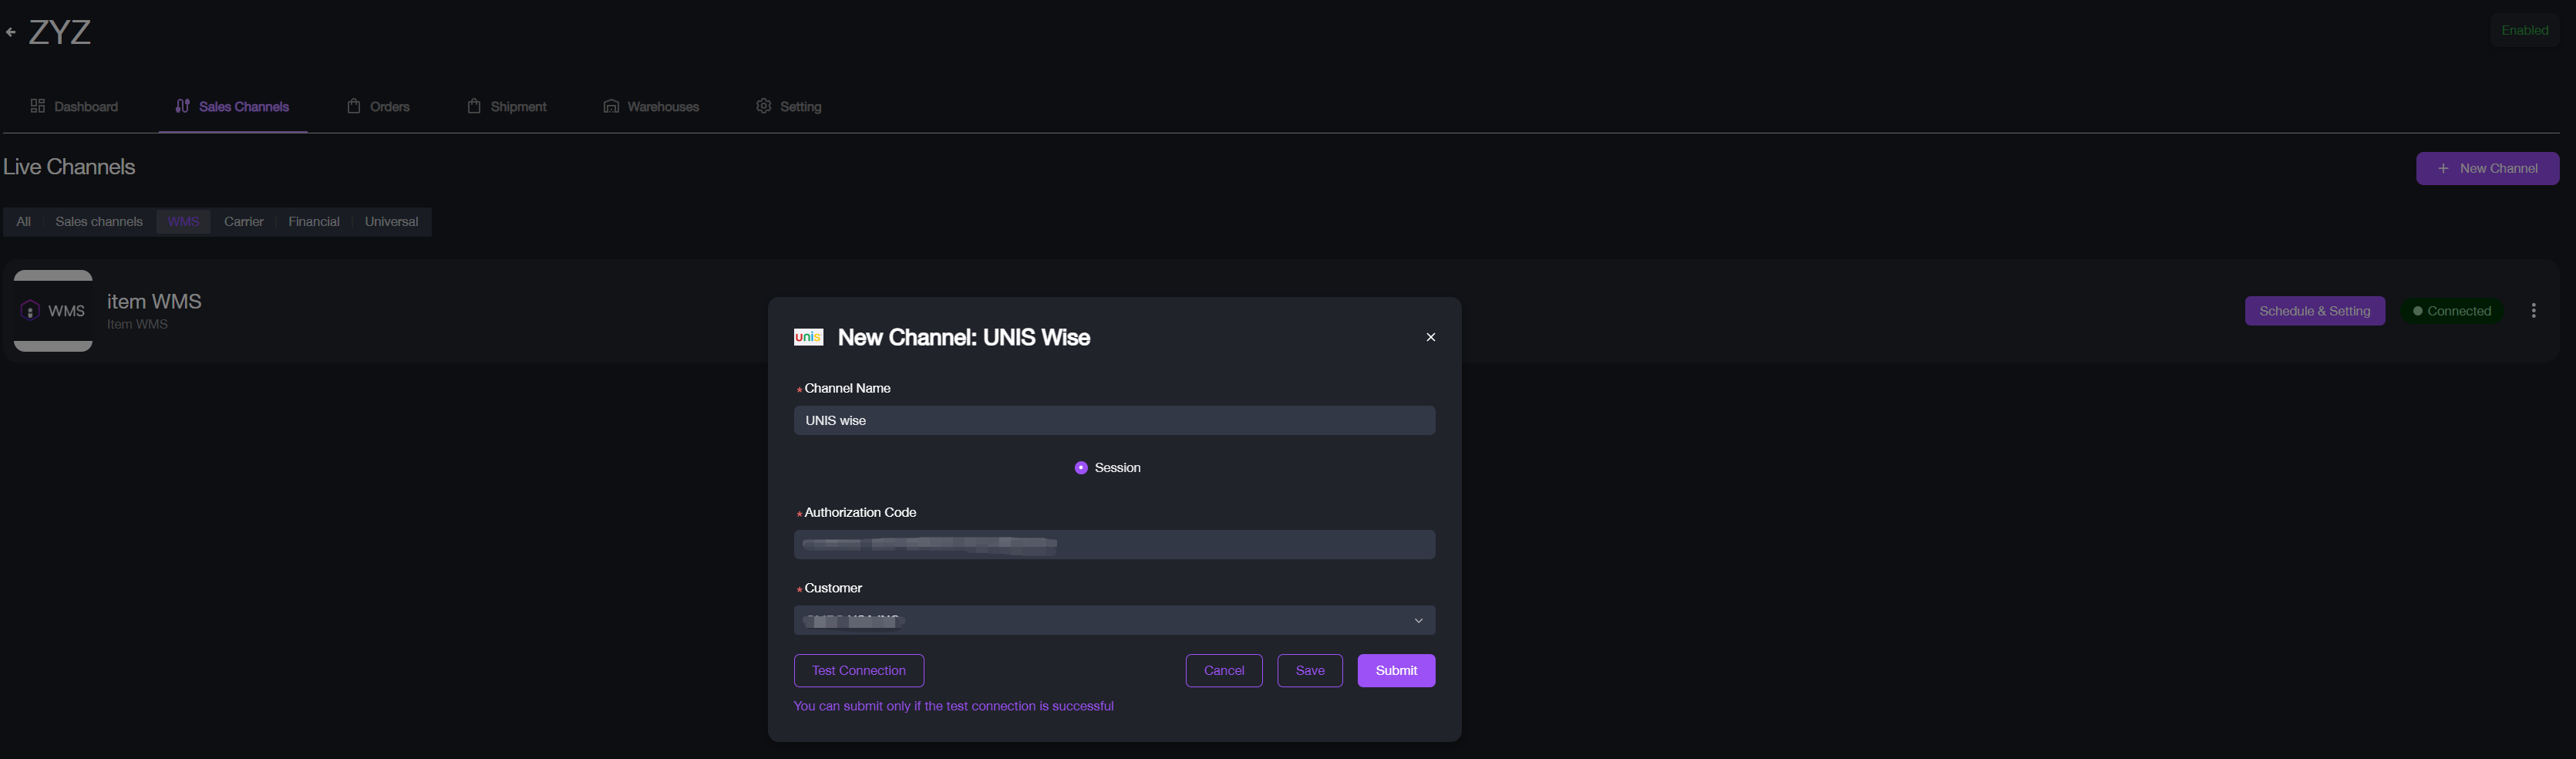
- Choose the WMS category and select UNIS Wise from the channel list. The new channel pop-up window appears.
- Enter the Channel Name, Authorization code and choose the customer.
* If the Authorization code is correct, the customer in Unis WISE will appear in the drop-down list. - Click Test Connection. If the "Connection Successful" message appears, click Submit.
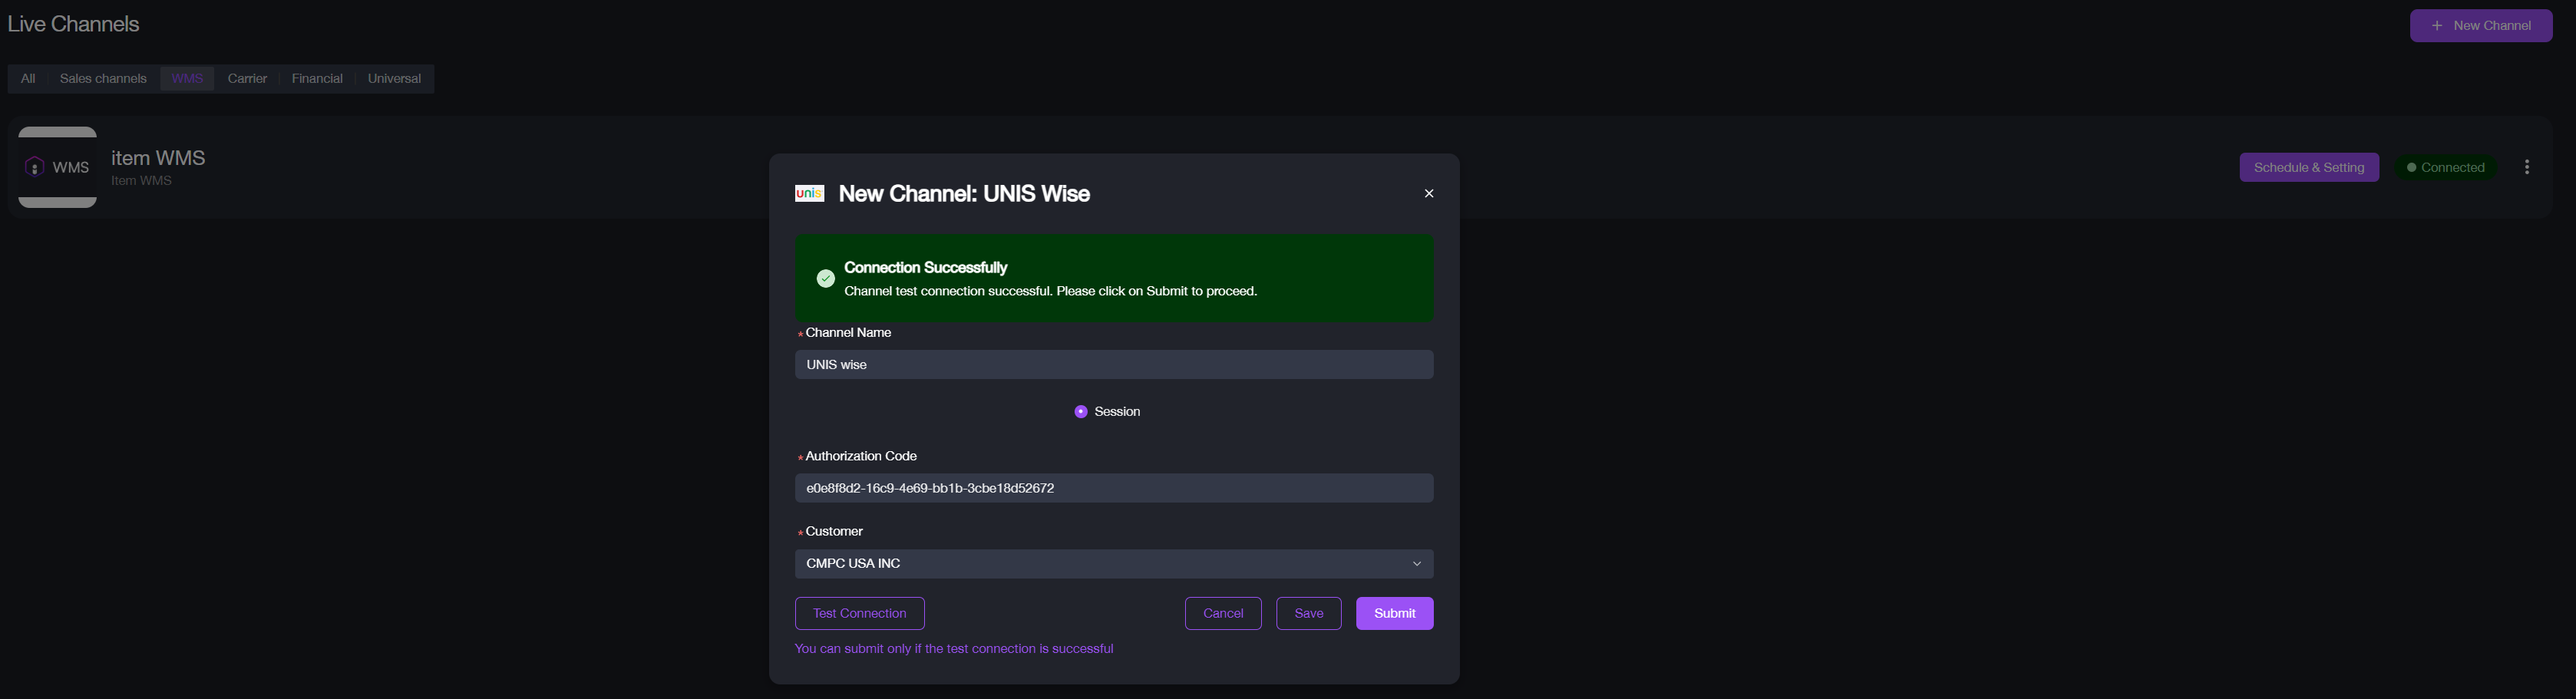
After connecting, item DI will pull the warehouse data that corresponding to this customer from UNIS Wise and display it in the Warehouses section.