Integration
The Integrations module allows you to connect to external platforms such as Shopify, Amazon, and other sales channels directly in OMS. Once connected, you can automate the flow of orders, inventory, and fulfillment data between your store and the system.
Connect an Integration
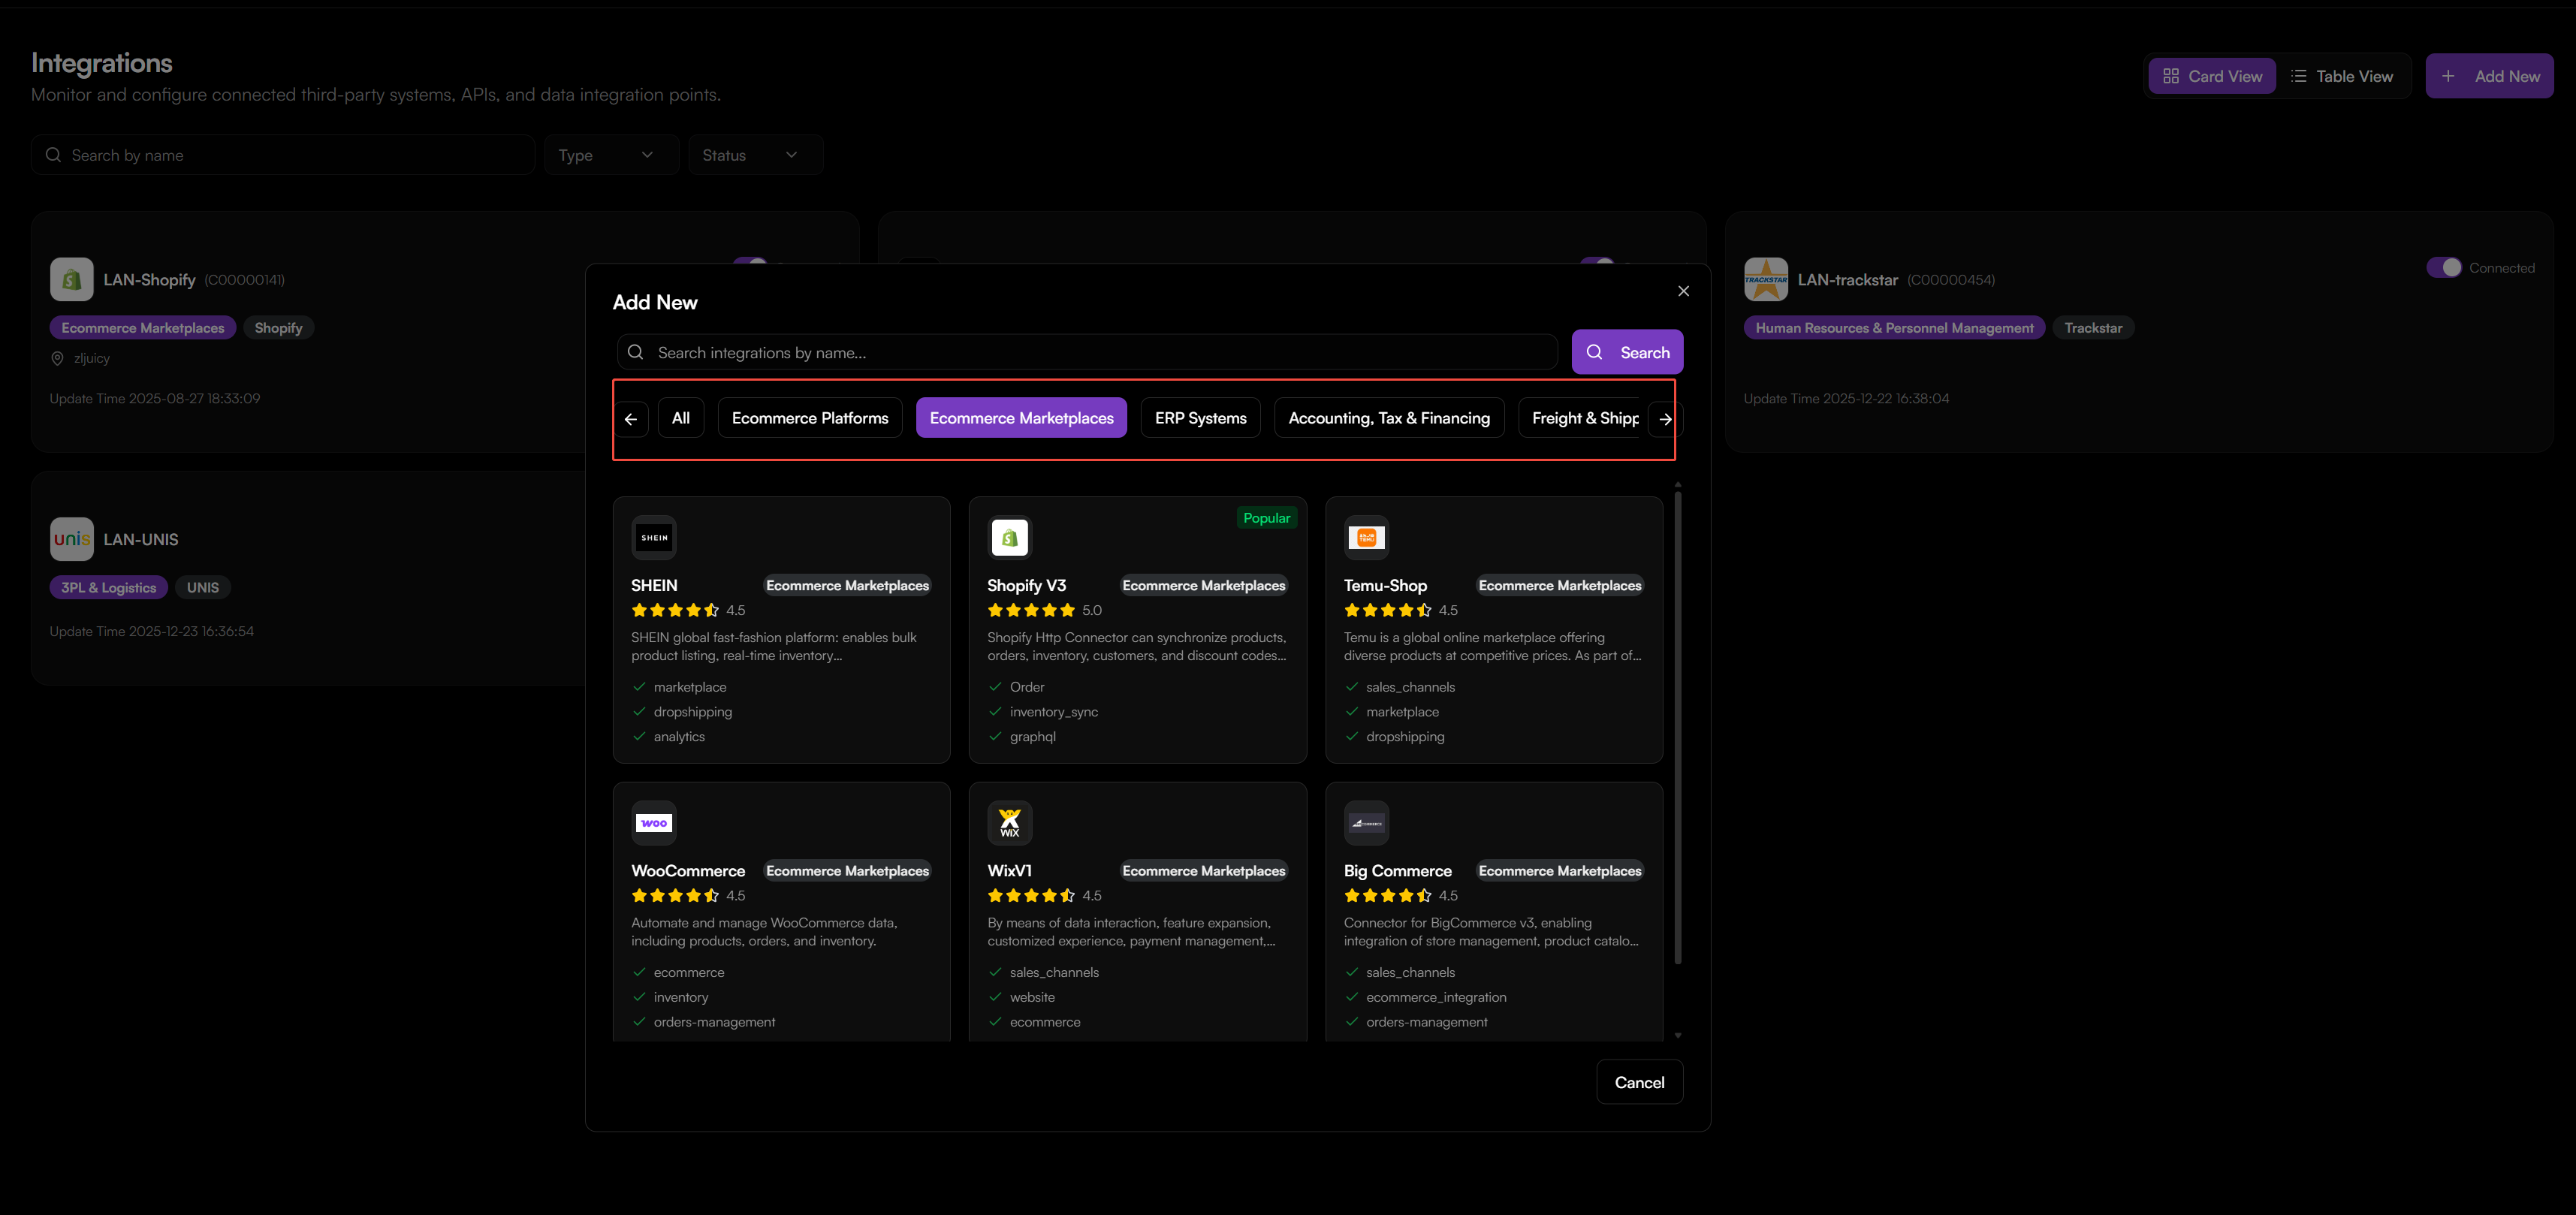
Step 1: Add a New Connection
- Go to Integrations.
- Click Add New.
- Search for or select the platform you wish to connect (e.g., Shopify V3).
Step 2: Configure Connection Settings
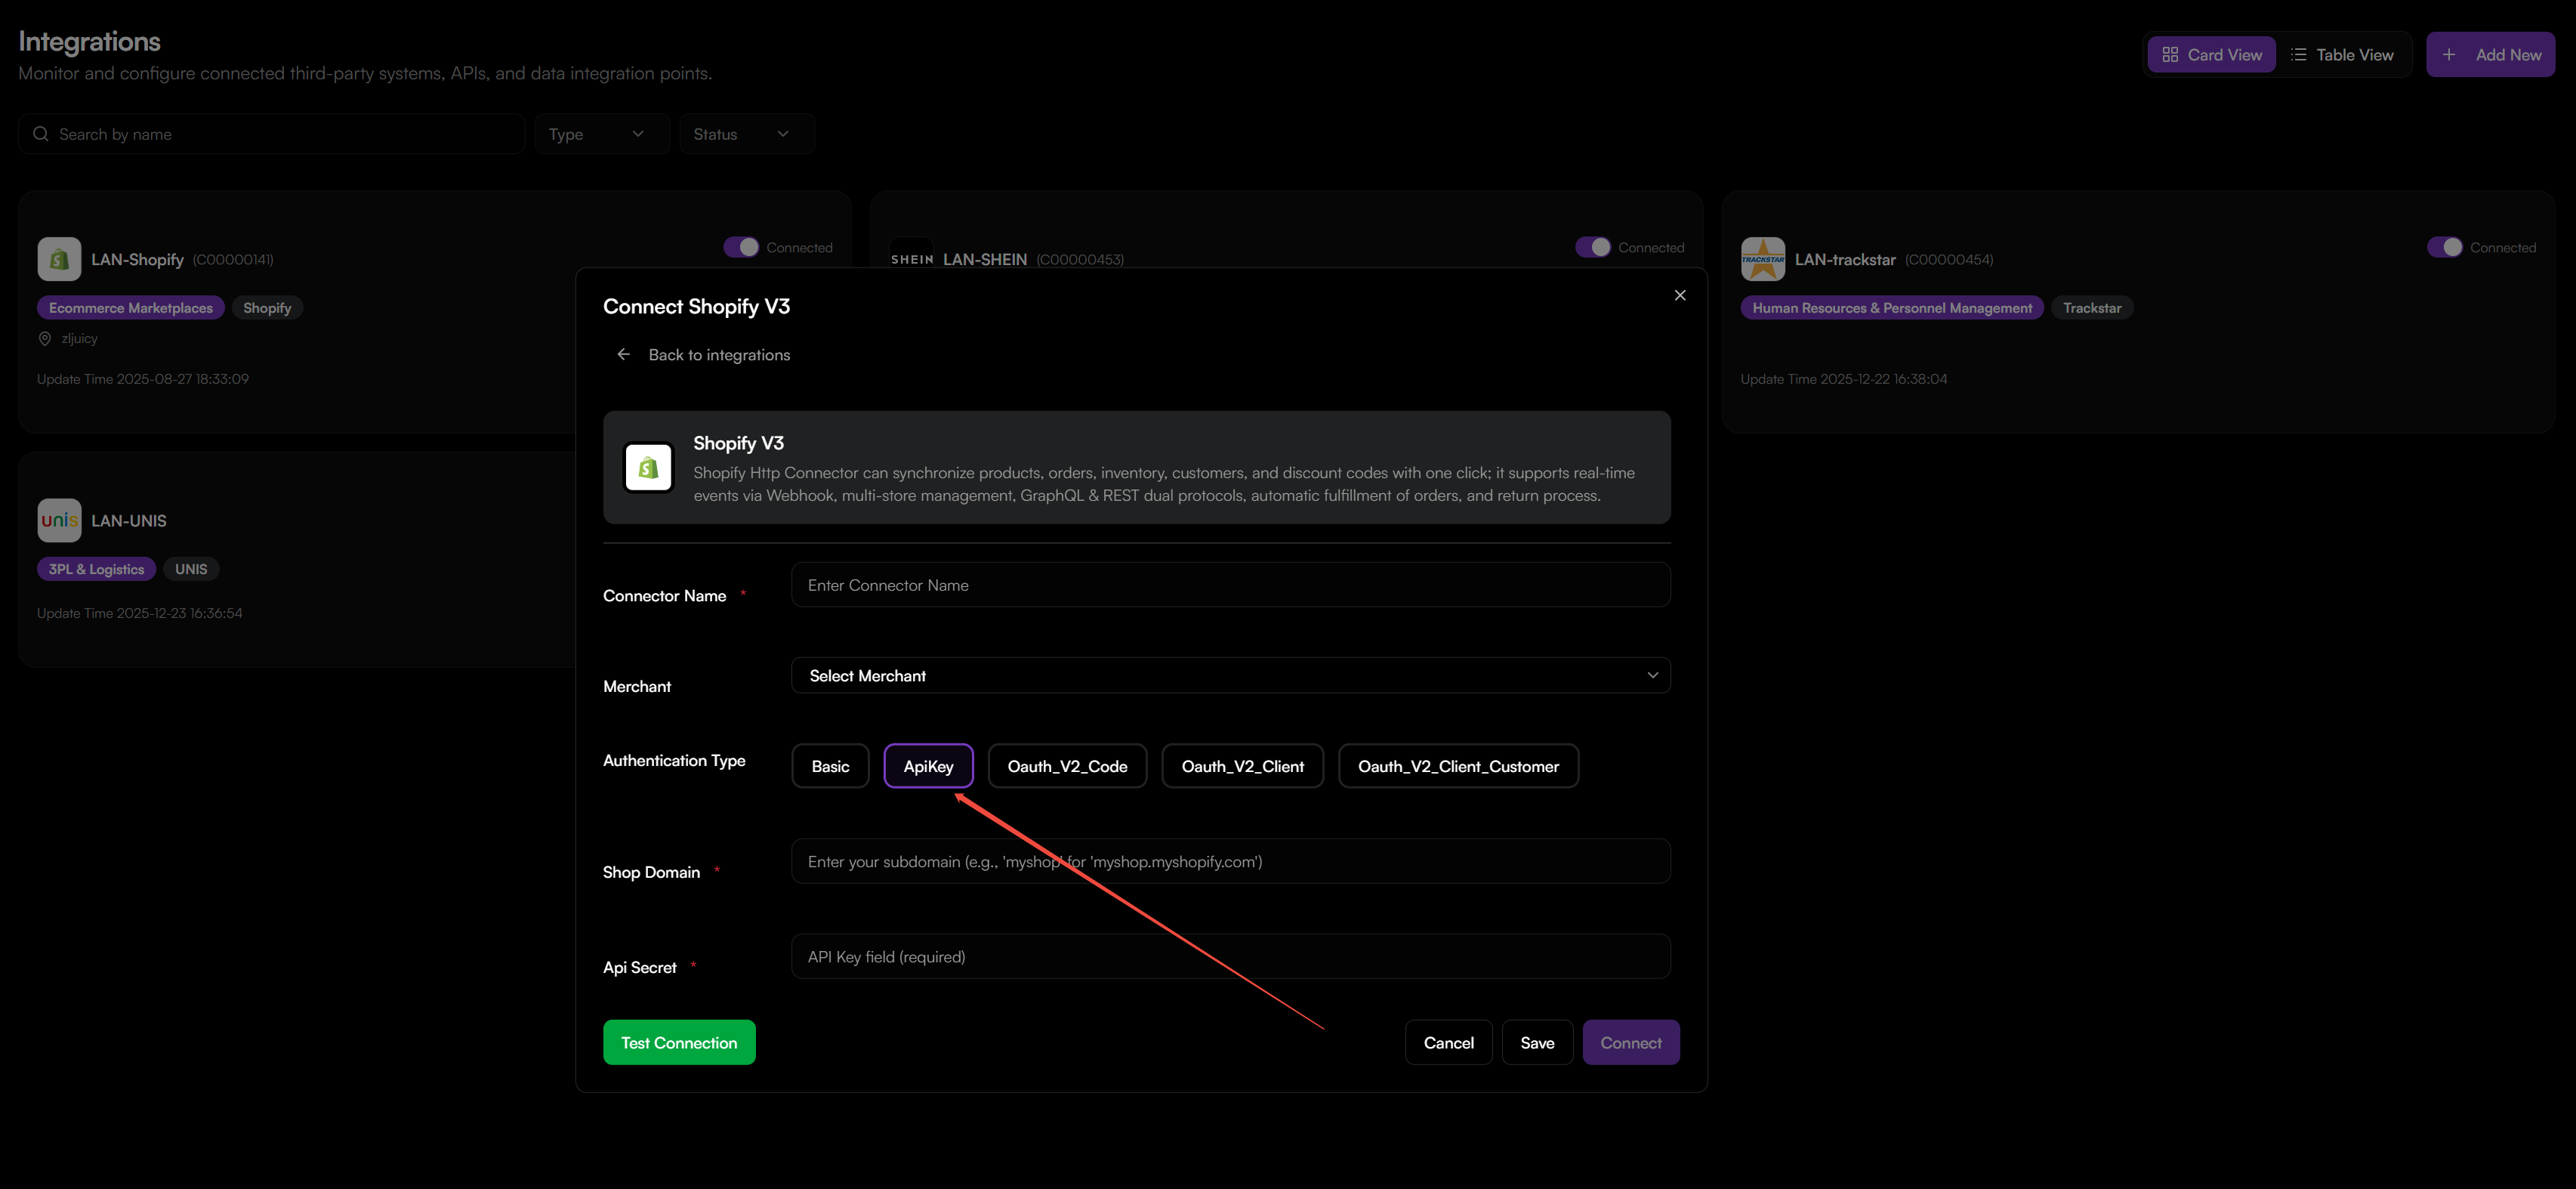
For most ecommerce platforms (using Shopify as an example):
- Connector Name: Enter a descriptive name for this connection.
- Merchant: Select the merchant profile associated with this store.
- Authentication Type: Select the method (e.g.,
Oauth_V2_Clientfor Shopify). - Shop Domain*: Enter your store's subdomain (e.g.,
mystoreformystore.myshopify.com). - API Secret*: Enter the API key or secret from your external platform.
- Click Test Connection to verify credentials.
- Click Save or Connect to complete the setup.
Where to Get API Credentials\nLog into your external platform's admin panel, navigate to the developer or API settings section, and generate an API key or OAuth token. Copy the key/secret into the OMS.
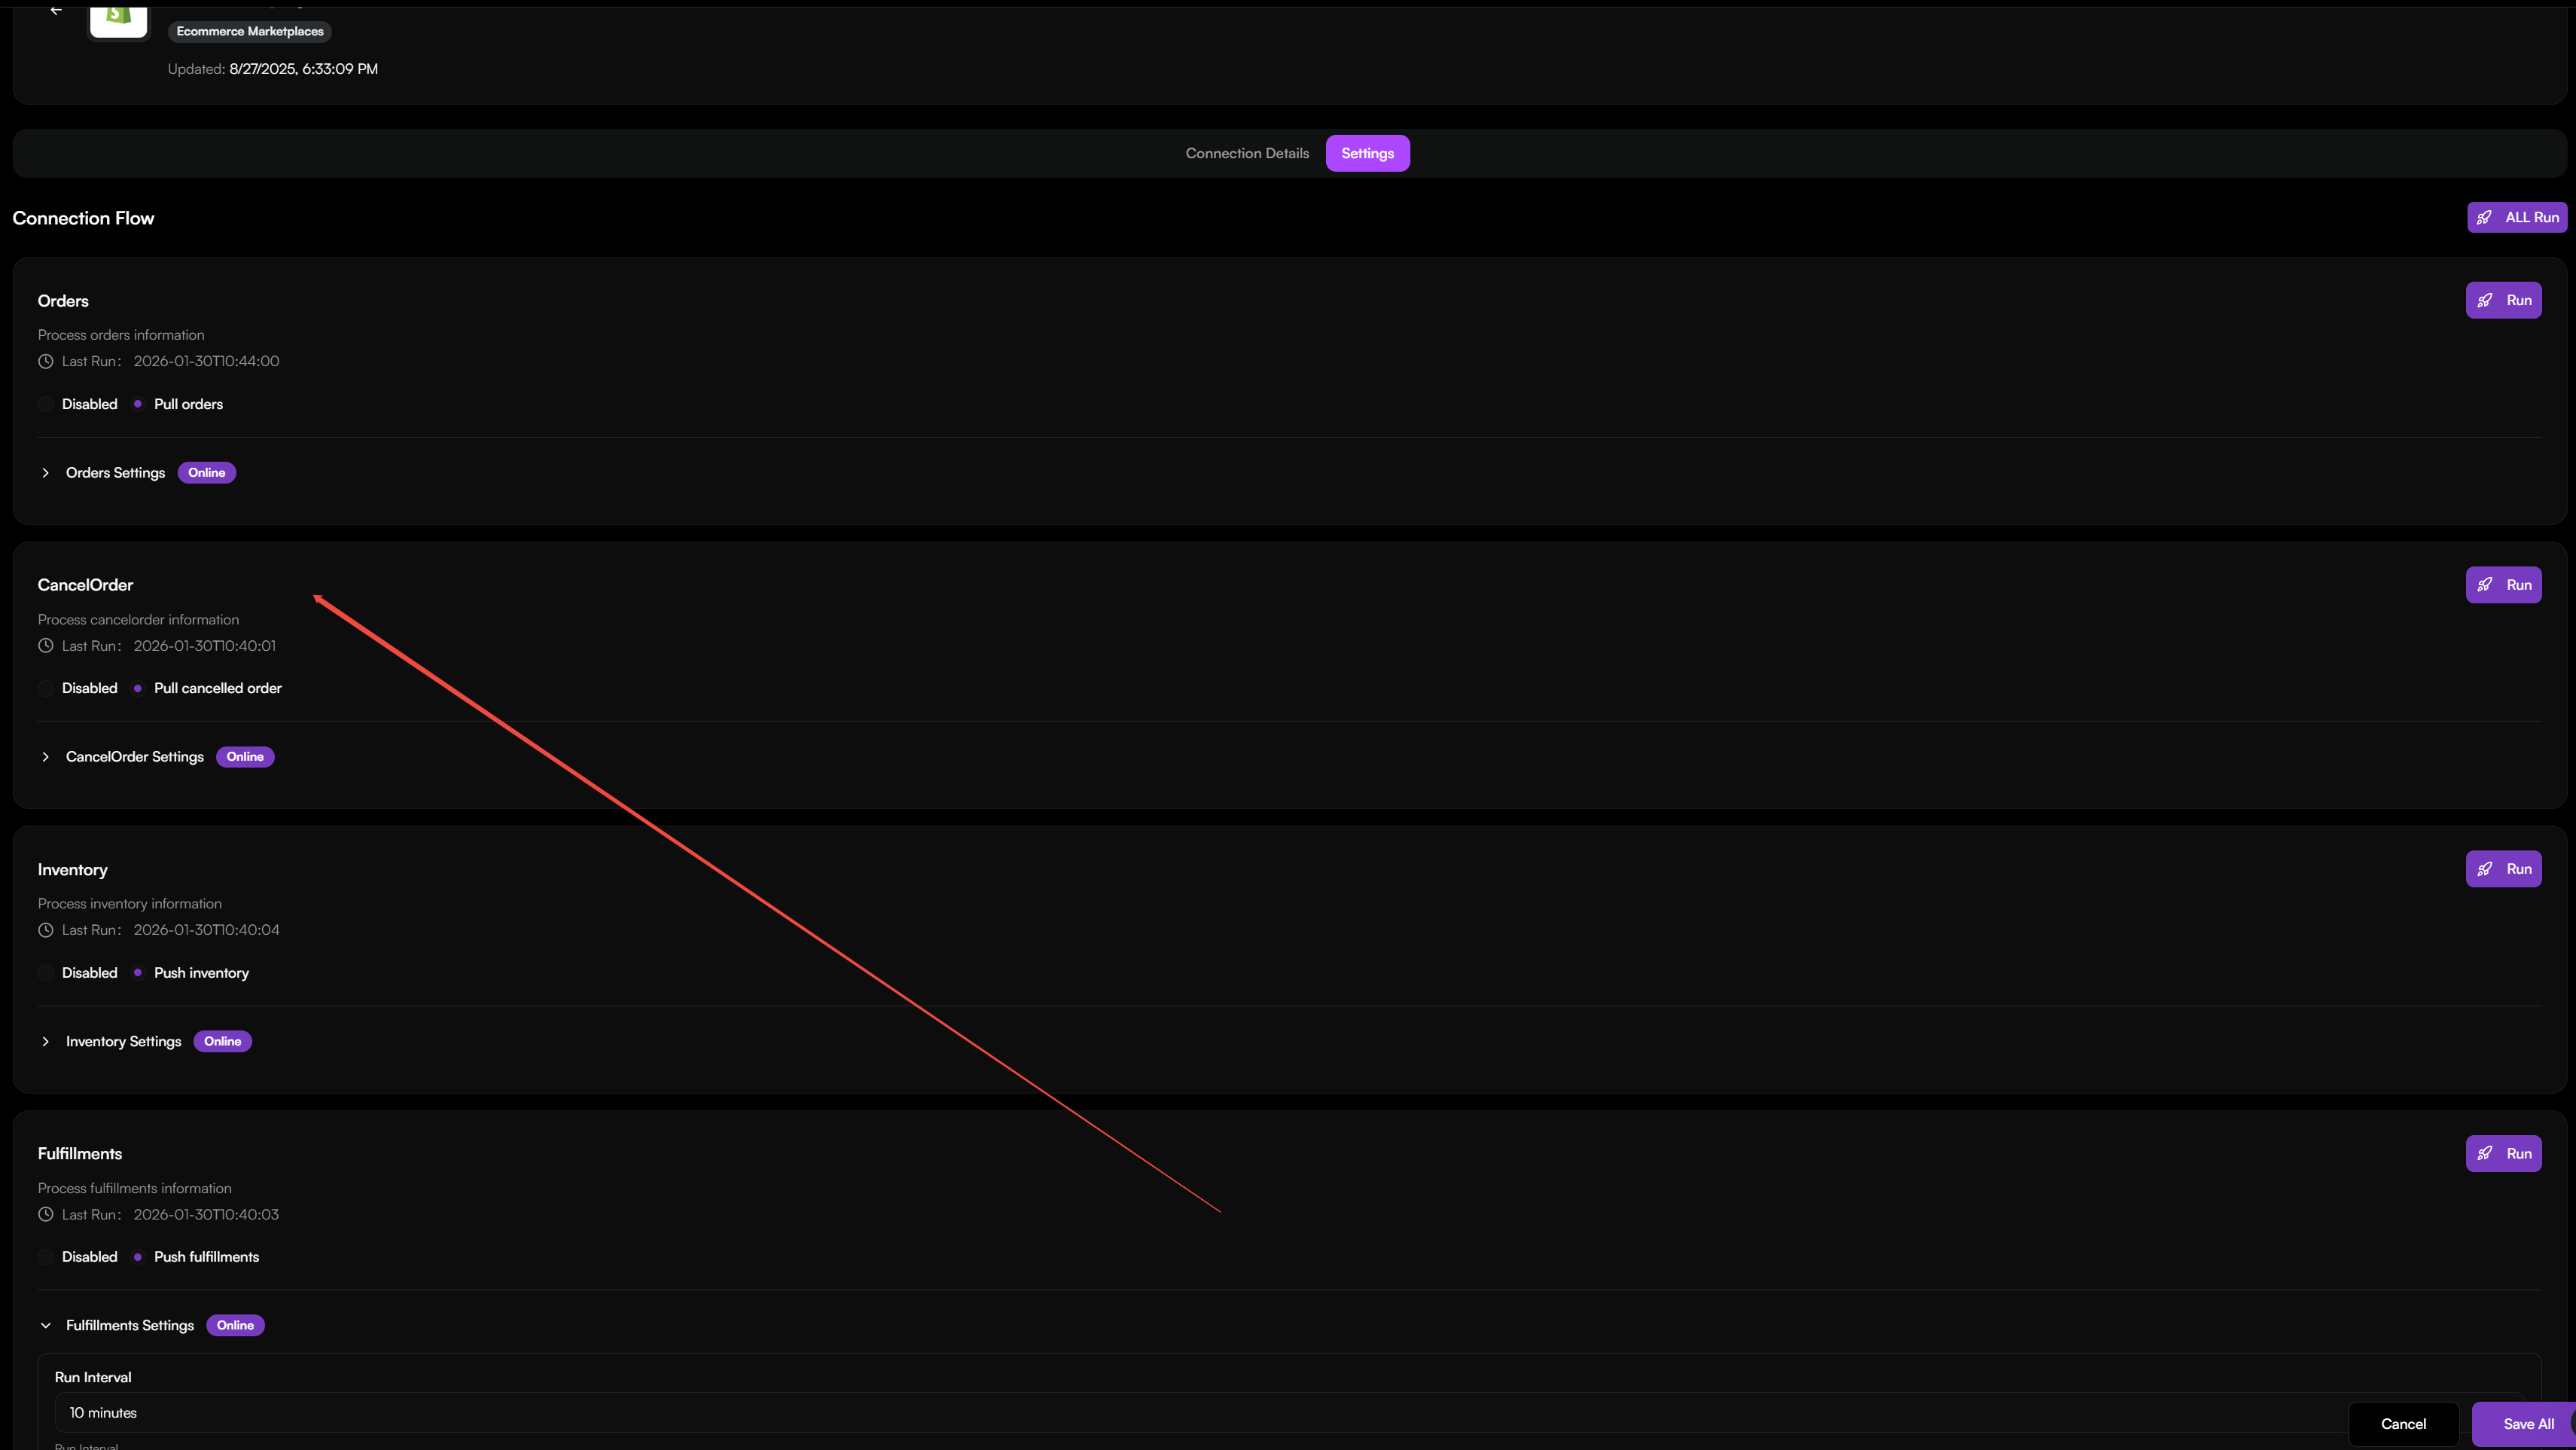
Setting Up Connection Flows
After the integration is connected, you must configure Flows to define what data is synchronized and when.
Step 1: Go to Settings
- In the integration's details page, switch to Settings tab.
- You can see the available flows for this connector.
Step 2: Configure Flow Settings
Each flow has specific settings. Common configurations include:
For Order Sync
- Run Interval: How often to check for new orders (e.g., every 15 minutes).
- Order Date From: Start date for pulling orders.
- Financial Status: Filter by payment status (e.g.,
paidonly). - Fulfillment Service: Filter by service type.
- Filter Country/Currency: Limit orders by destination or currency.
- Delay Time: Delay order pull to allow for cancellations (e.g., 24 hours).
For Cancelled Order
- Run Interval: Frequency for checking cancelled orders (e.g., every 10 minutes).
- Order Date From: Start date for pulling cancelled orders based on their creation date.
For Fulfillments
- Run Interval: Frequency for sending fulfillment updates (e.g., every 10 minutes).
For Inventory Sync
- Run Interval: Synchronization frequency.
- Location: The specific Shopify location to sync.
- Marketplace Ids: For Amazon FBM sync.
Step 3: Manage Flows
Once a flow is created, you can:
- Edit: Modify its settings.
- Enable/Disable: Turn the automated sync on or off.
- Run Now: Trigger an immediate synchronization.
- Delete: Remove the flow entirely.