Pick and Run + Drop & Hook
In the drayage industry, Pick and Run + Drop & Hook refers to the driver picking up a container or trailer and delivering it directly to the destination, where they drop off the loaded trailer and hook up an empty or preloaded trailer, reducing waiting time and increasing operational efficiency.
Pick and Run + Drop & Hook routing template includes two Moves, Pickup Container, Delivery Container and Drop Container are involved in Move 1, Hook Container and Return Container are involved in Move 2.
This article provides the guidance on how to complete the load process with this routing template.
Operation on Move 1
Assign Move 1 to Driver on Web
This section provides the structure on how to edit the load information and arrange driver assignment.
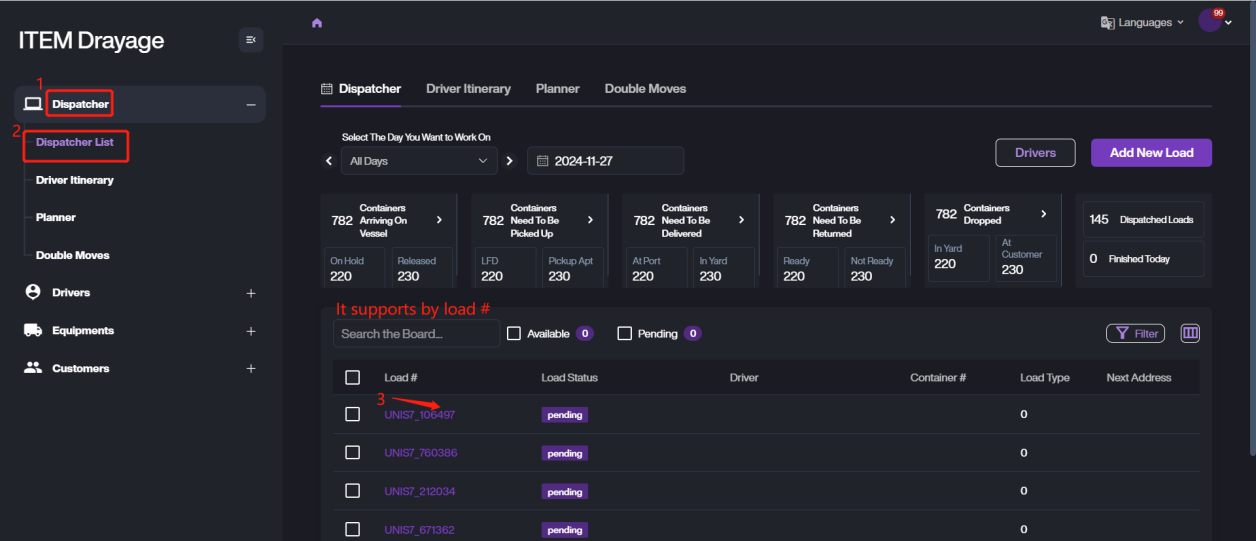
- Navigate to Dispatcher > Dispatcher List, confirm the target load and click Load # into details page. It supports quick searching via Load #.
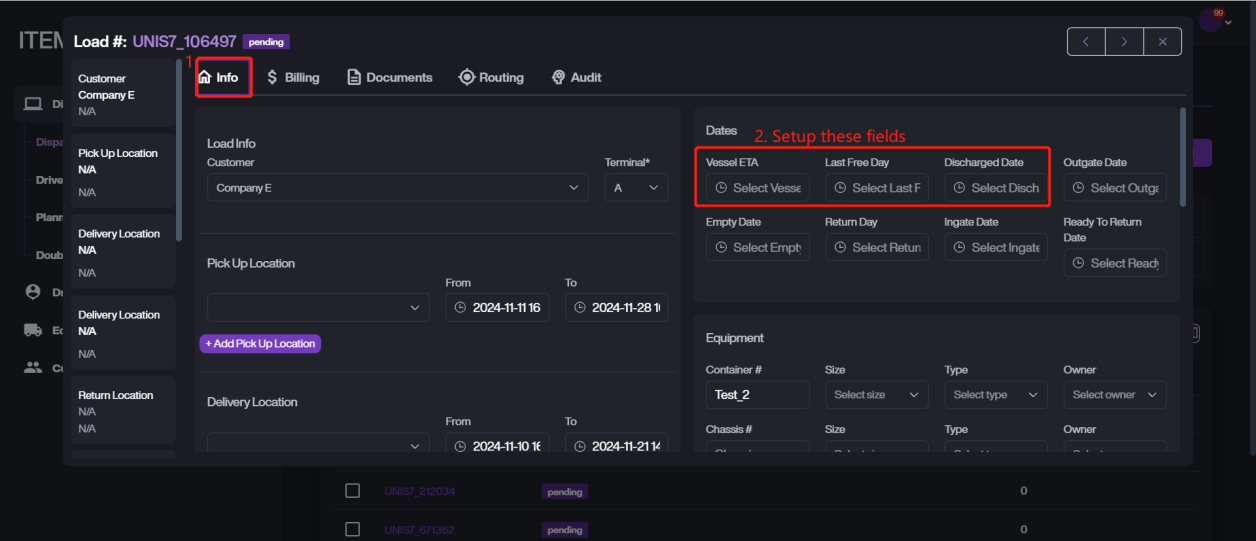
- Keep on Info Tab, update the Vessel ETA, Last Free Day and Discharged Date. More field details, please refer to this article (opens in a new tab).
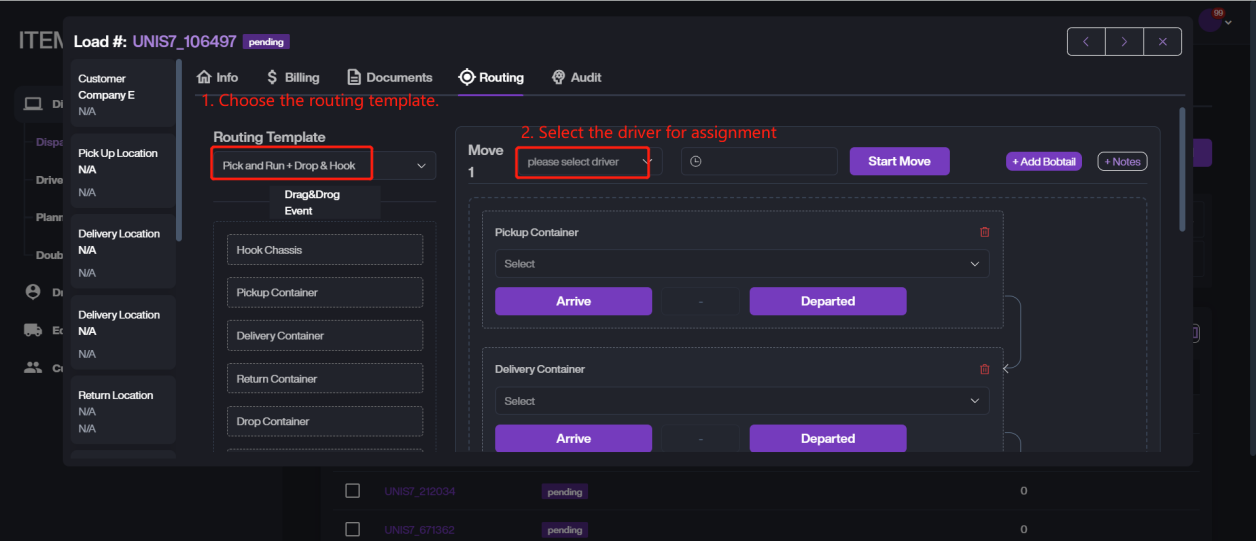
- Click Routing tab, confirm the Routing Template then to select a driver to execute Move 1.
Accept and Execute the Task on App
This section introduces the driver operations on app.
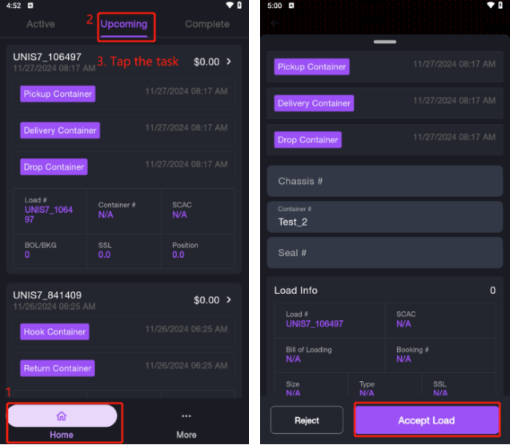
- Go to Home > Upcoming, it displays all assigned loads in this interface.
- Select the target task, tap the task, tap Accept Load button to accept it. Otherwise, tap Reject button.
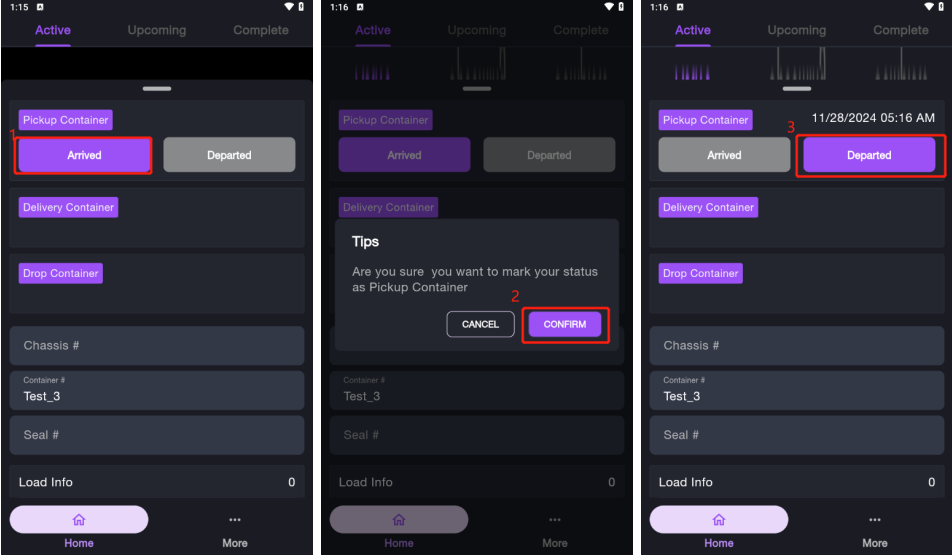
- Go to Active tab, it displays all accepted loads in this page.
- Start the first event: Pickup Container. When you arrived the pickup location, please tap the Arrived Button to update the status. Tap CONFIRM to process.
- Tap Departed when you drive to next location.
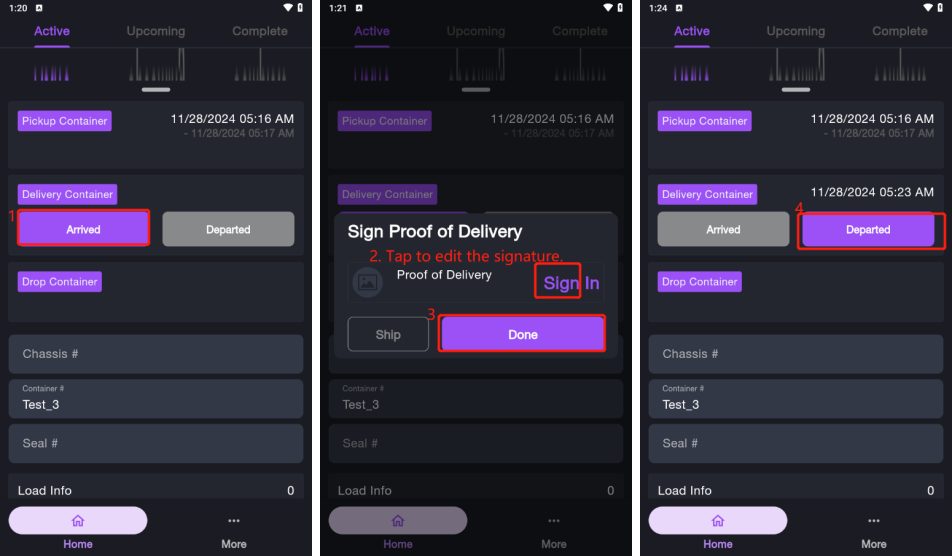
- Continue second event: Delivery Container. Tap Arrived to update the status if you arrived in delivery destination.
- Tap Sign to complete the Electronic Signature and record the date and time. Tap Apply button to save and apply the data, then tap Done button to process.
- Tap Departed when you leave this location and drive to the next location.
- Execute the final event: Drop Container, please tap Arrived button to update the status when you arrive the location.
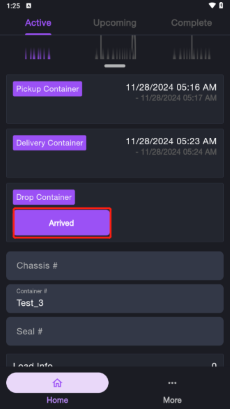
When you complete the entire task, the load will been displayed under Completed tab.
Operation on Move 2
Assign Move 2 to Driver on Web
This section explains the dispatcher’s operations after the driver completes Move 1.
- Go to Dispatcher > Dispatcher List, click Load # of the target load.
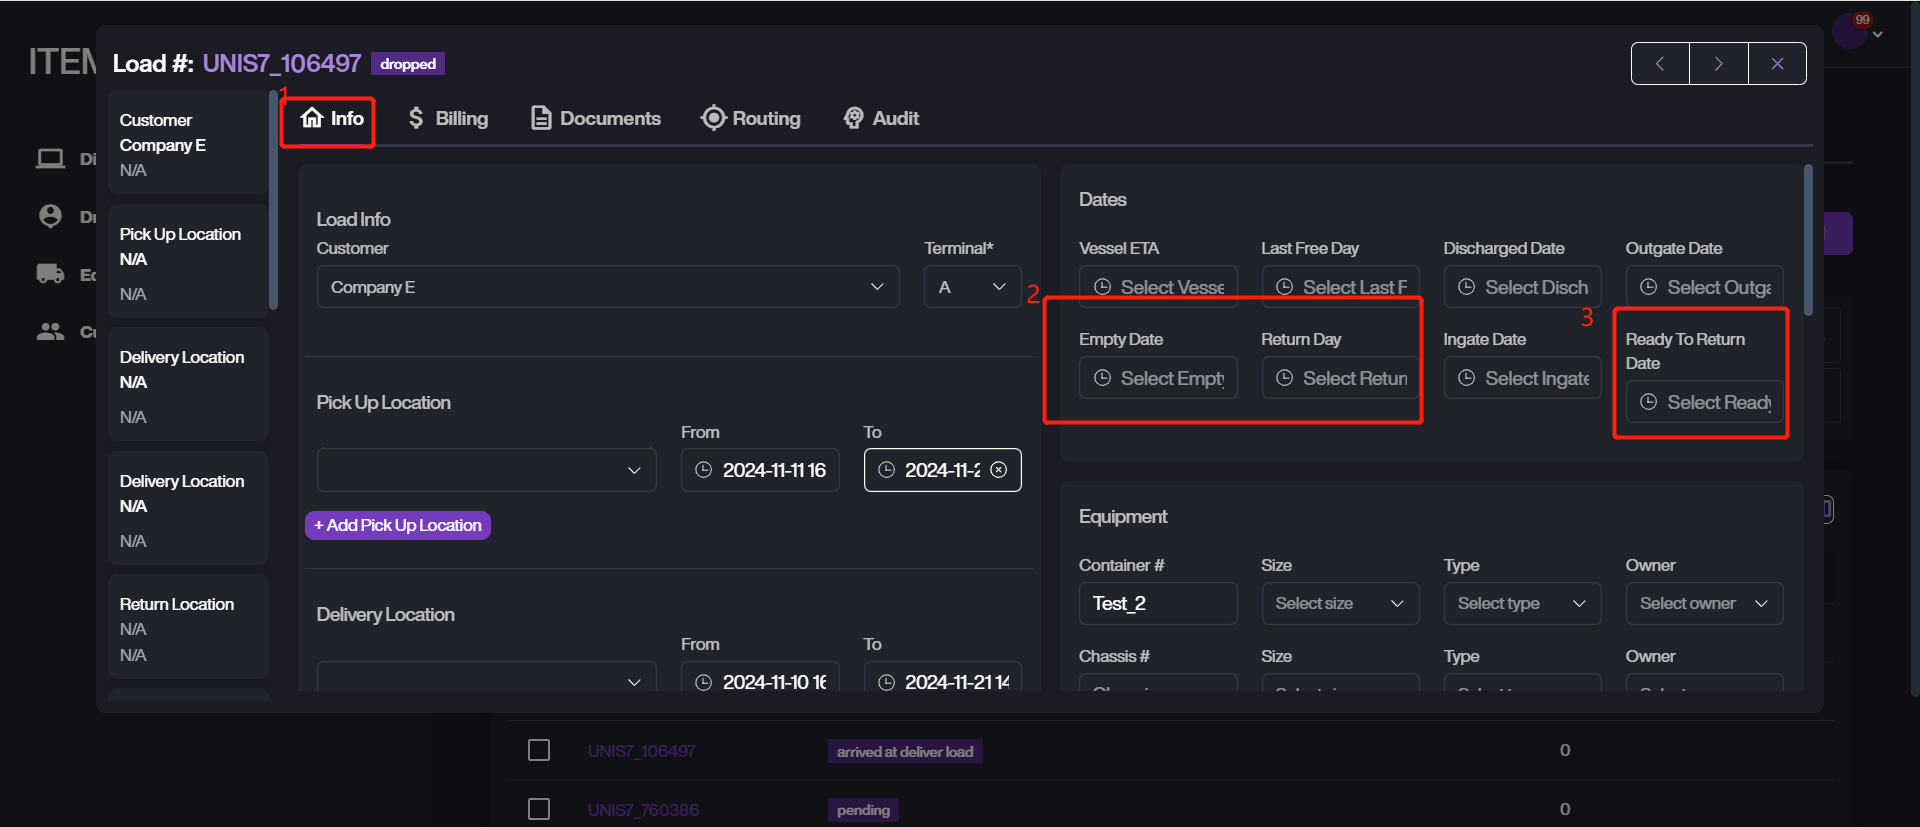
- Go to Info tab, update these date fields: Empty Date, Return Day and Ready To Return Date. If you have assigned driver for return load in advanced, he will get the notification to start the task after updating Return Day and Ready Date.
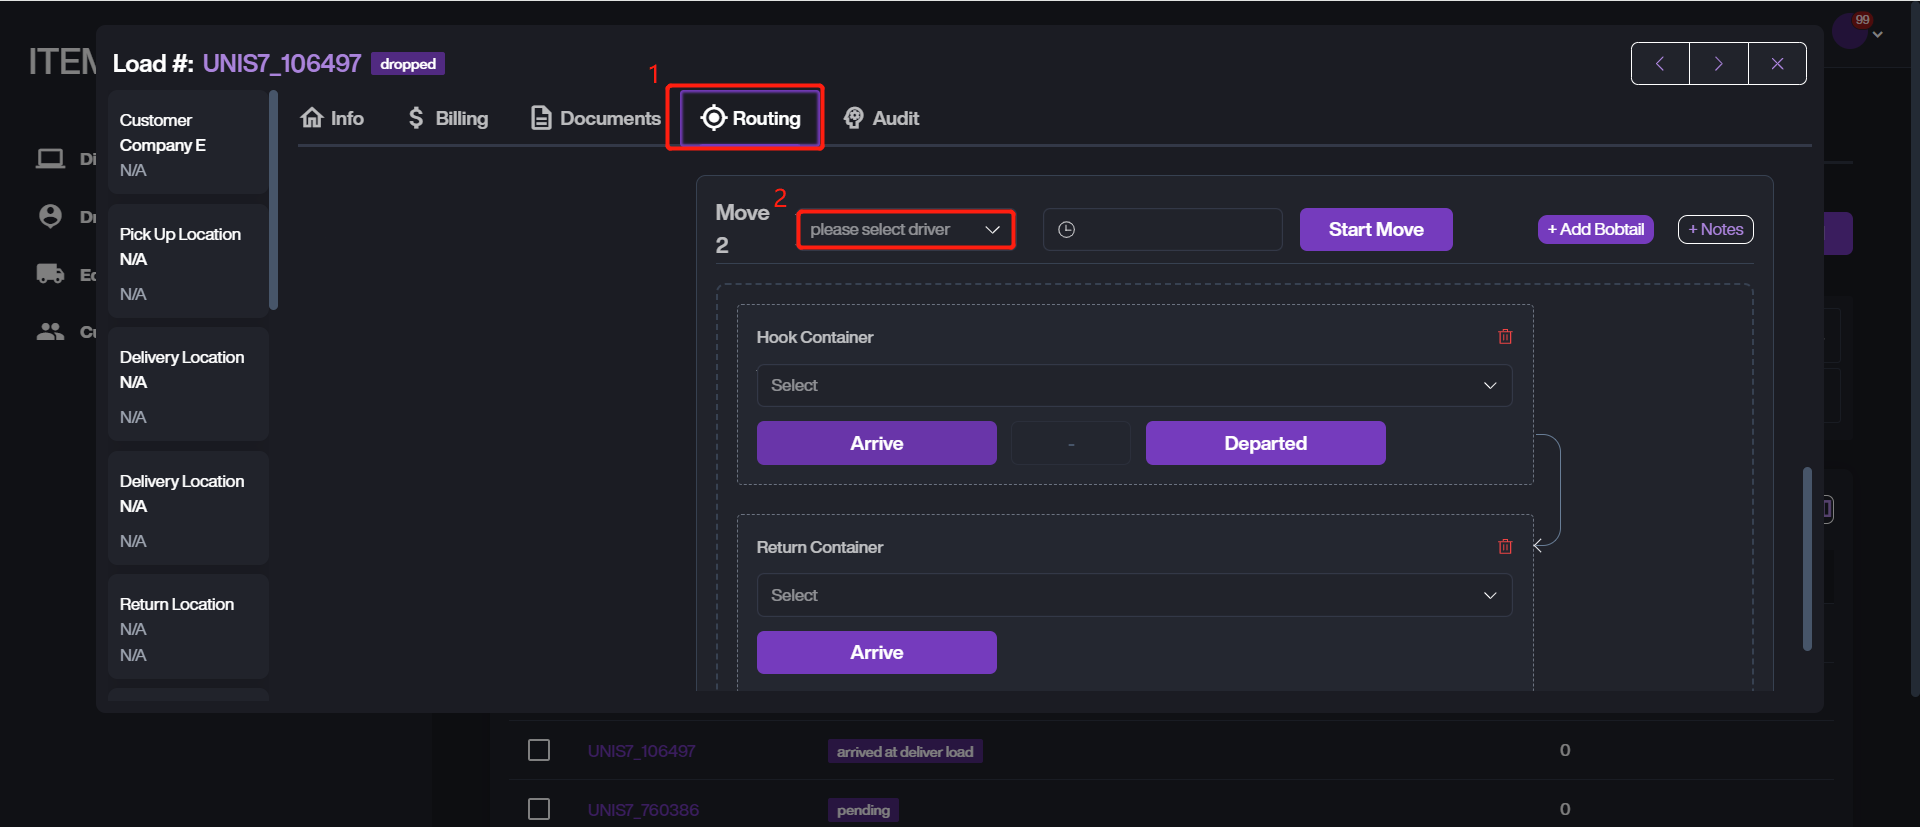
- Go to Routing tab, assign Move 2 to specific driver.
Accept and Execute Move 2 on App
This section explains on how to execute Move 2 on app.
-
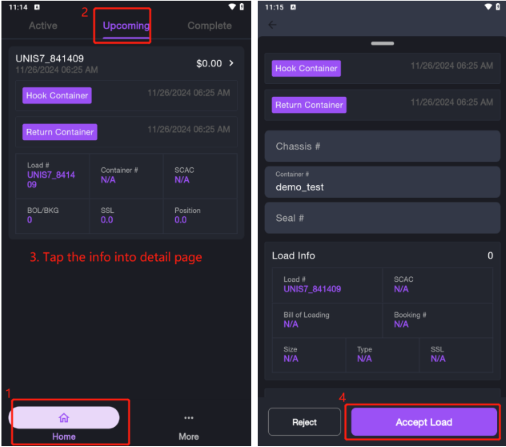
Go to Home > Upcoming, you will see the assigned load. Please tap the load info into details page, then tap Accept Load to accept it.
-
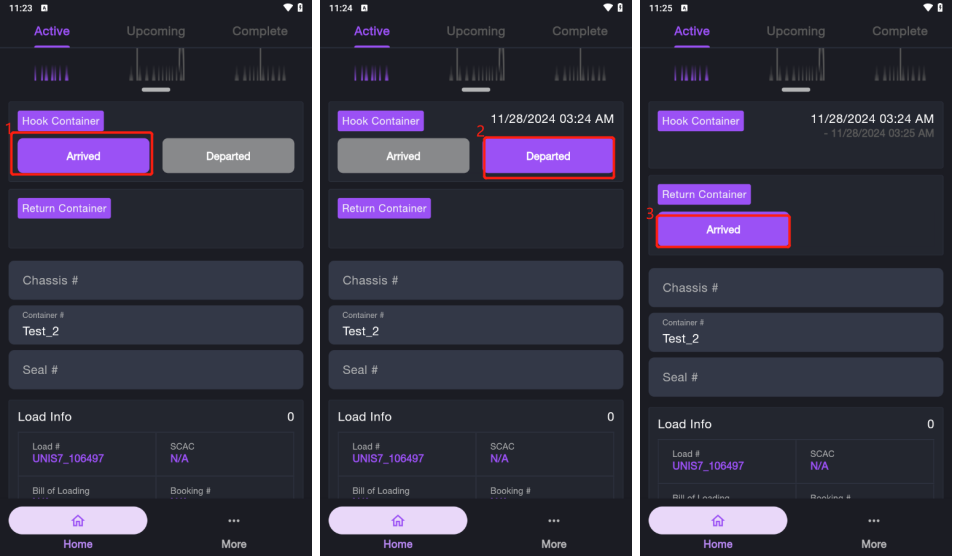
Go to Active tab to execute the target load.
-
Start the first event: Hook Container. Please tap Arrived if you have arrived the location to hook container, then tap Departed to update the status if you are driving to next location.
-
Continue the second event: Return Container. Tap Arrived if you arrived the location to return the container.
Complete Load on Web
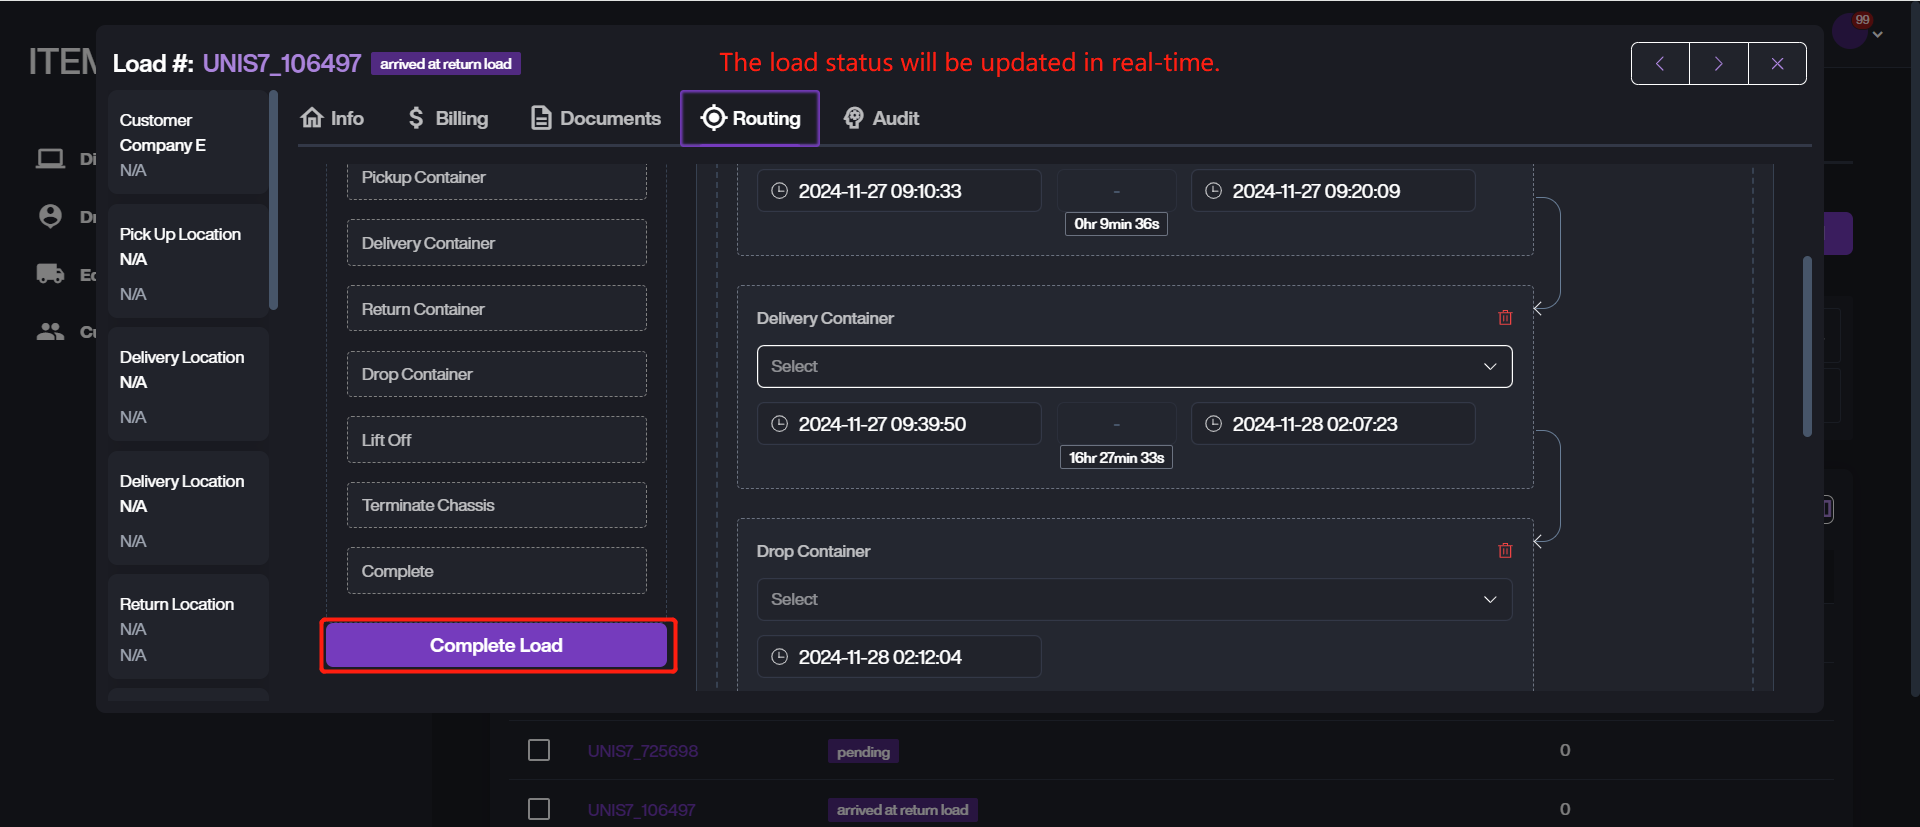
After all Moves have finished, the dispatcher should confirm the progress and complete the load on web.
- Go to Dispatcher > Dispatcher List, enter into details page of the target load.
- Go to Routing tab, click Complete Load button if the process doesn’t exist any issue. The load status will automatically updated in real time during the process.
