Vendor Management
This function is designed to manage the information of the vendors that you need to select when generating the purchase plan. You can add new vendors or edit existing vendors within this module.
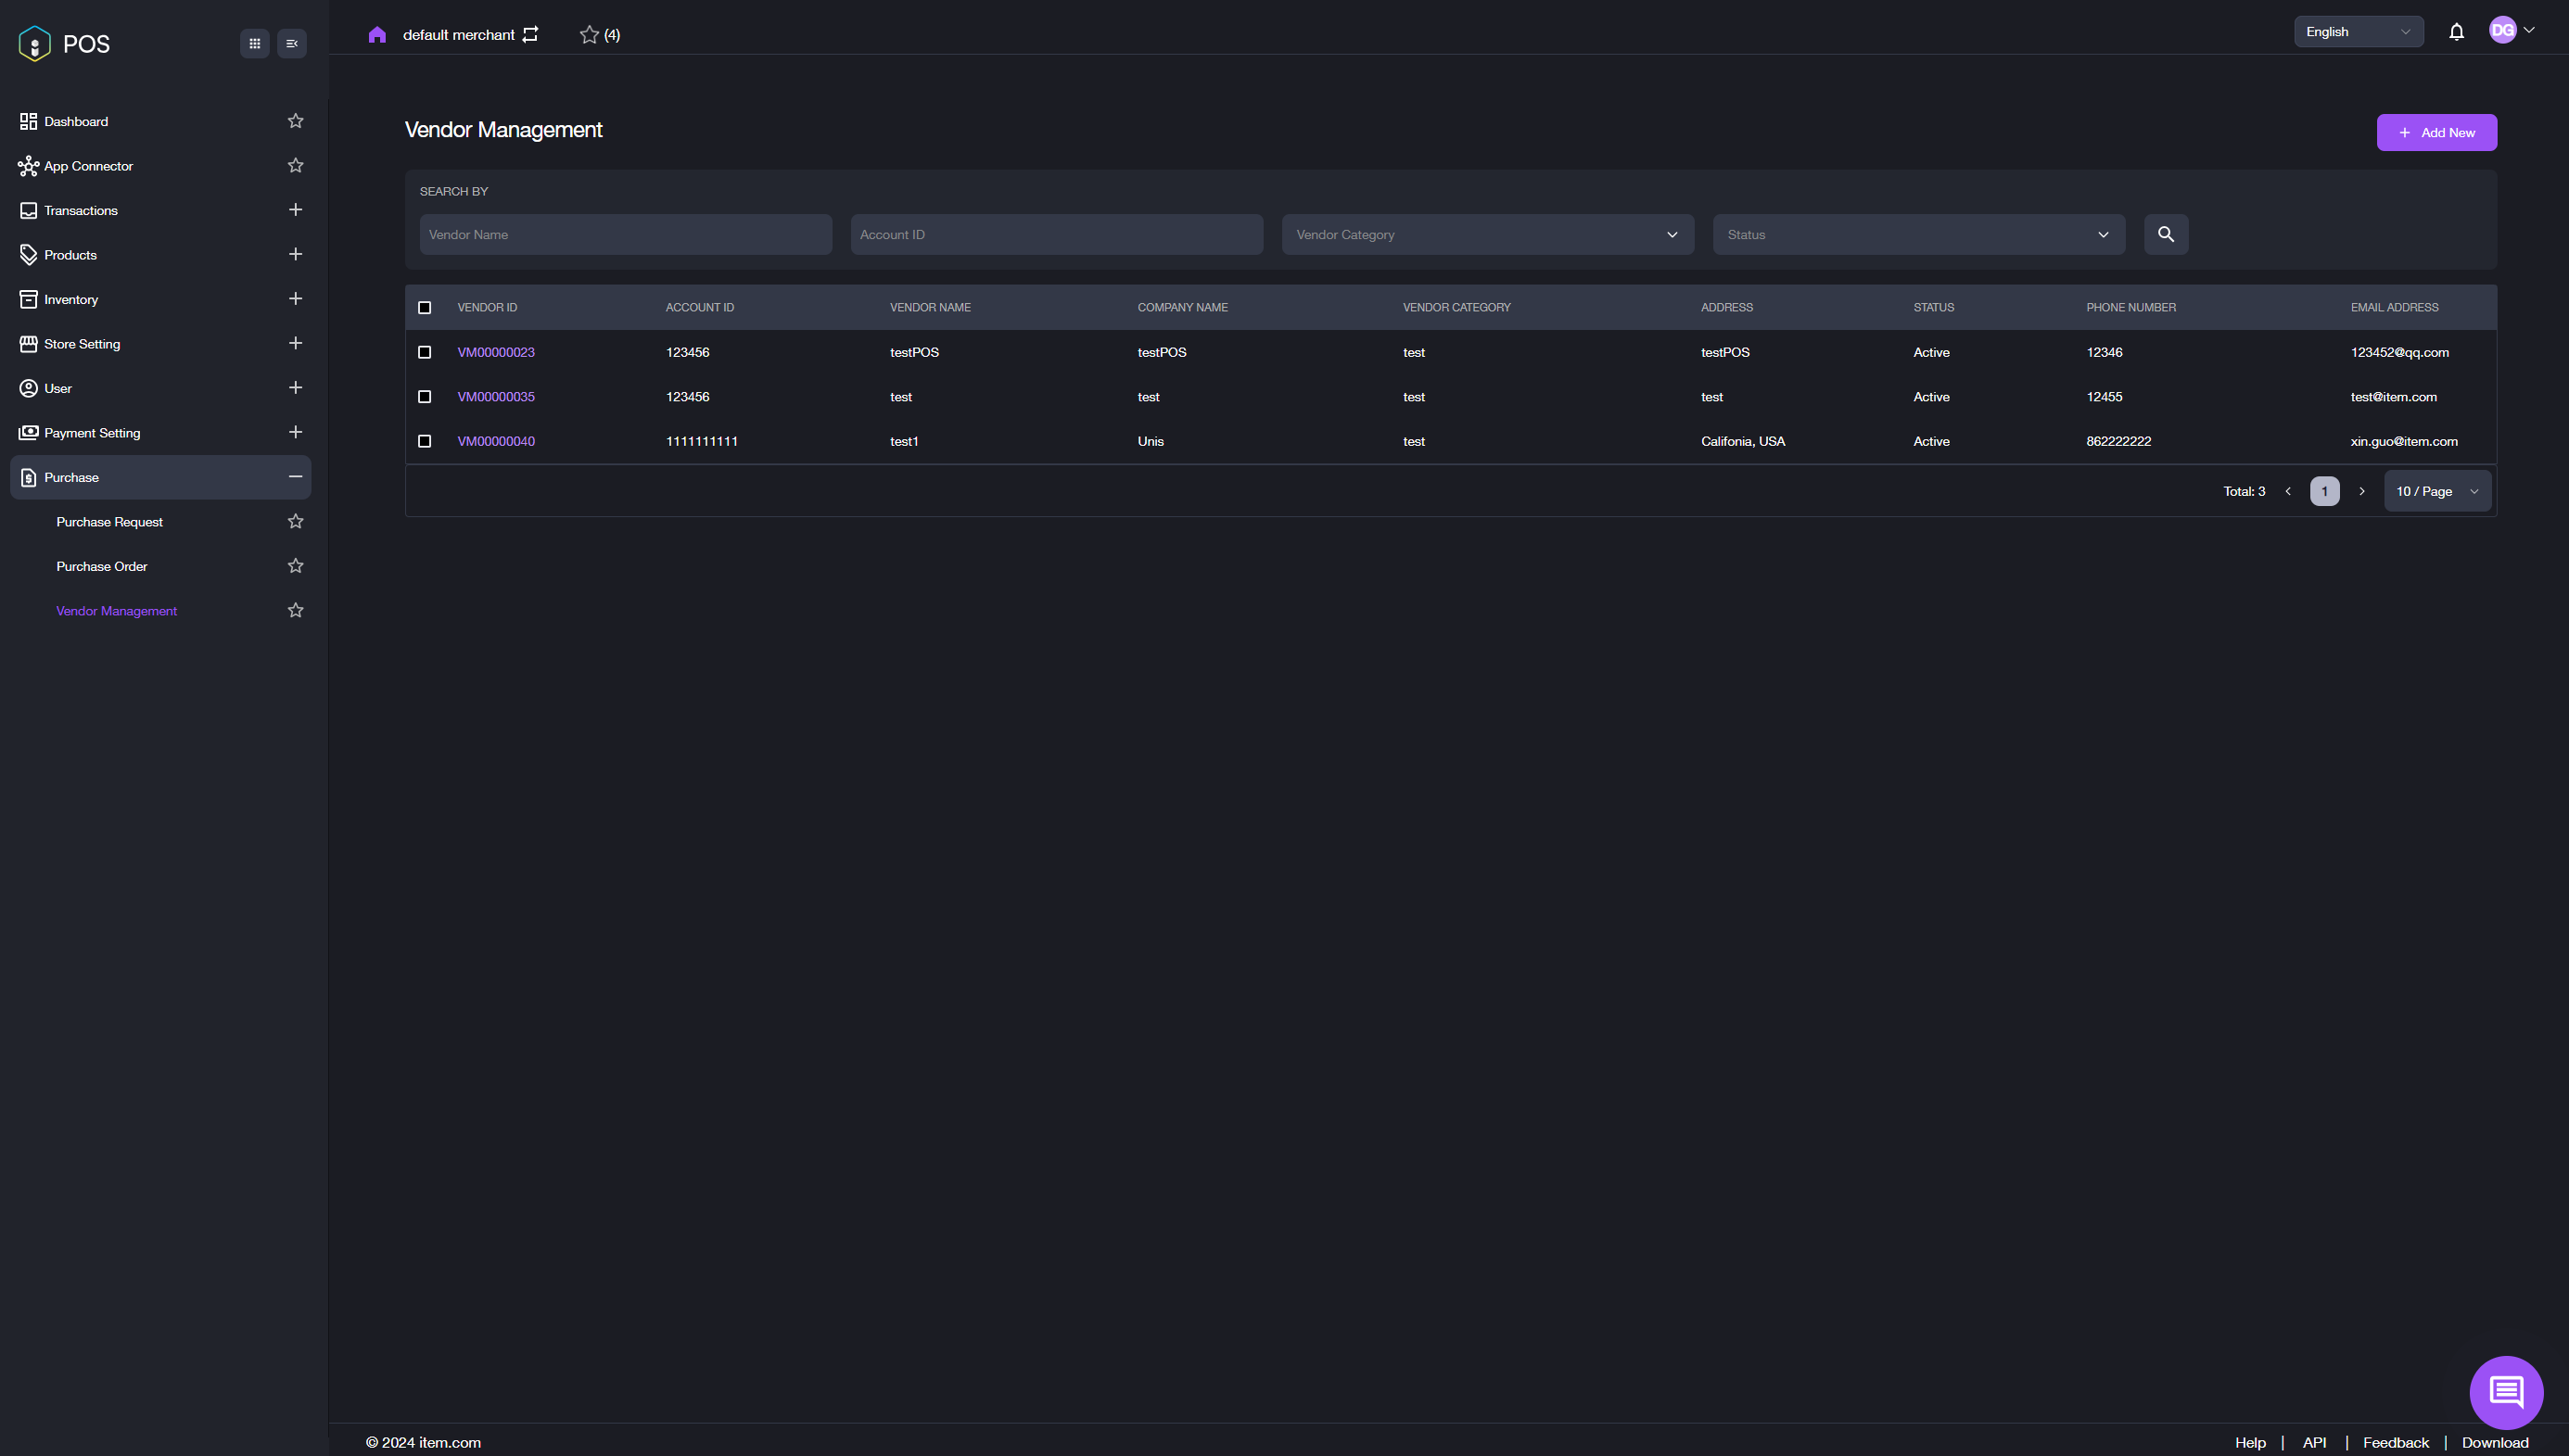
- Click Purchase, then select the sub-menu Vendor Management from the navigation panel on the left side of the main interface. The Vendor Management page shown in the image below will be displayed.
-
All vendors are listed in the table, where you can review their basic information, including: Vendor ID, Account ID, Vendor Name, Company Name, Vendor Category, Address, Status, Phone Number, and Email Address.
- VENDOR ID: The unique identifier for the vendor.
- ACCOUNT ID: The unique identifier for the merchant account.
- VENDOR NAME: The name of the vendor.
- COMPANY NAME: The name of the vendor company.
- VENDOR CATEGORY: The classification or type of the vendor.
- ADDRESS: The vendor's address.
- STATUS: Indicates whether the vendor is active or inactive.
- PHONE NUMBER: The vendor's phone number.
- EMAIL ADDRESS: The vendor's email address.
You can also filter the specific vendor by inputting the value for the following one or multiple parameters: Vendor Name, Account ID, Priority, Vendor Category, Status, and clicking the search icon, in the SEARCH BY section.
-
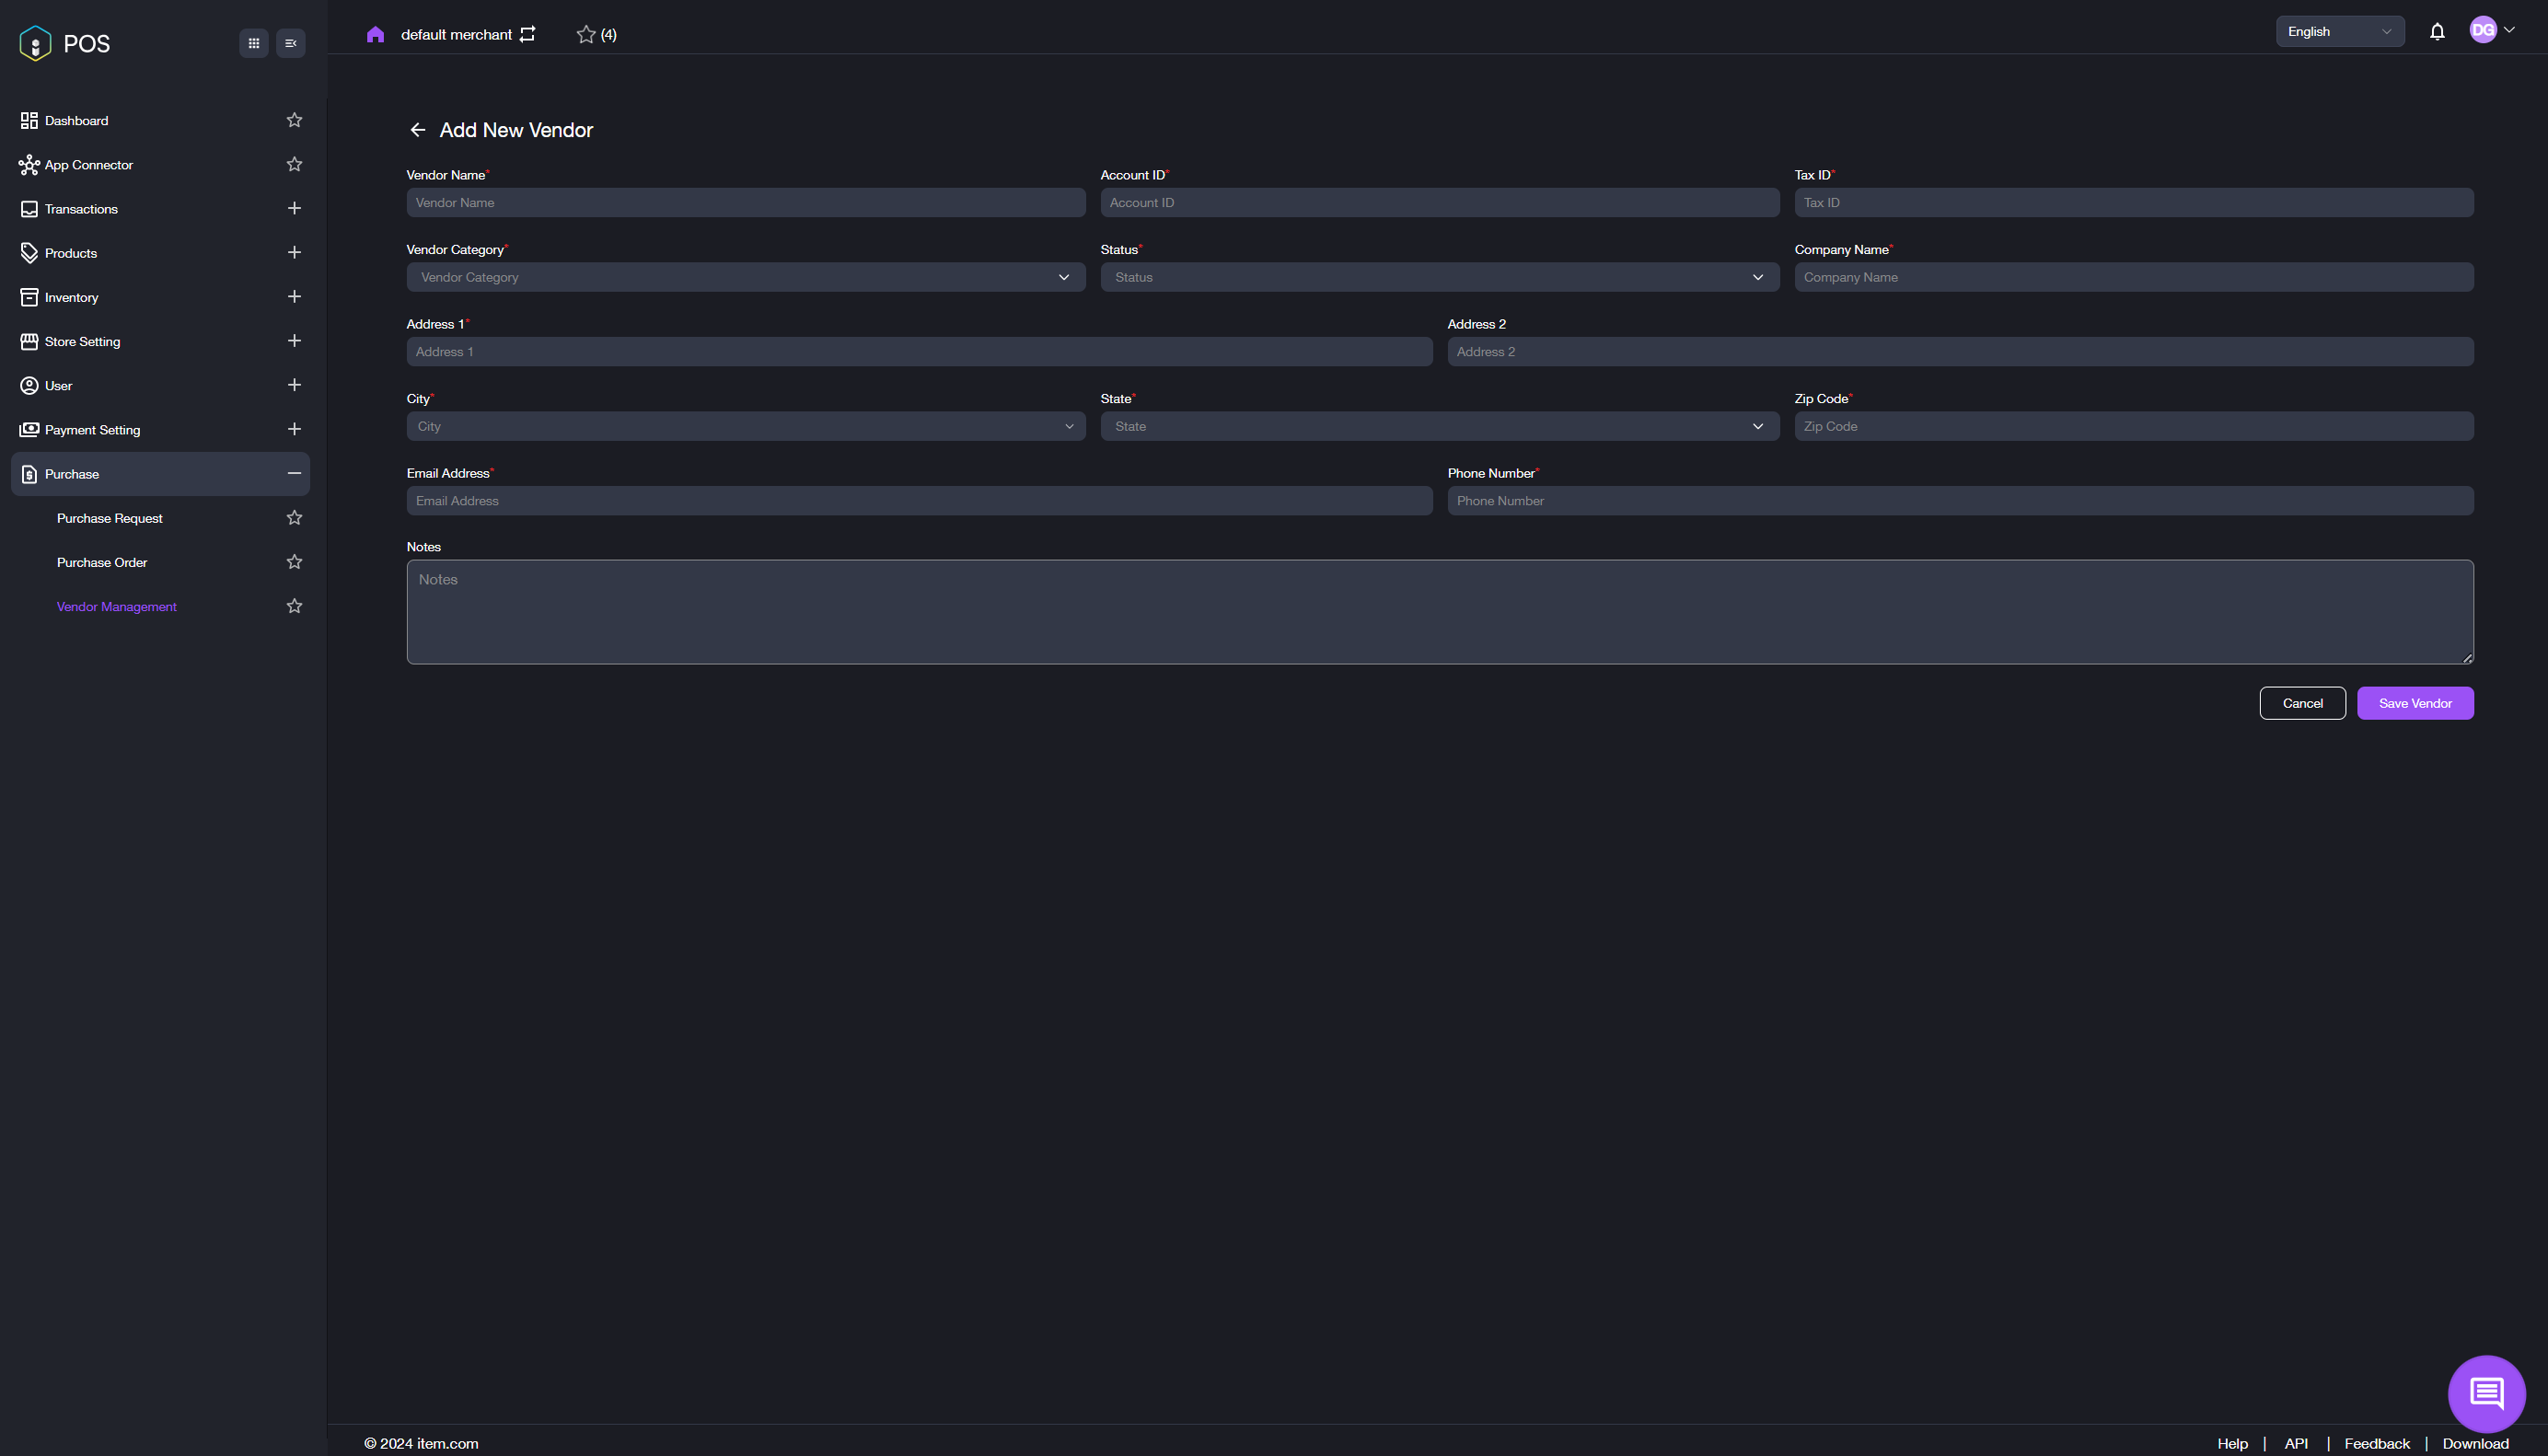
Add new vendor: Click the + Add New button in the top right corner of the Vendor Management page. The interface shown in the image below will appear. Fill in the required information and click the Save Vendor button.
A notification will pop up indicating whether the vendor was added successfully or if the process failed.
If the addition fails, follow the prompts to re-enter the vendor information.
If successful, you will be returned to the Vendor Management page, where the newly added vendor will be listed in the table. You can view the vendor's basic information and edit the vendor by clicking on the Vendor ID.
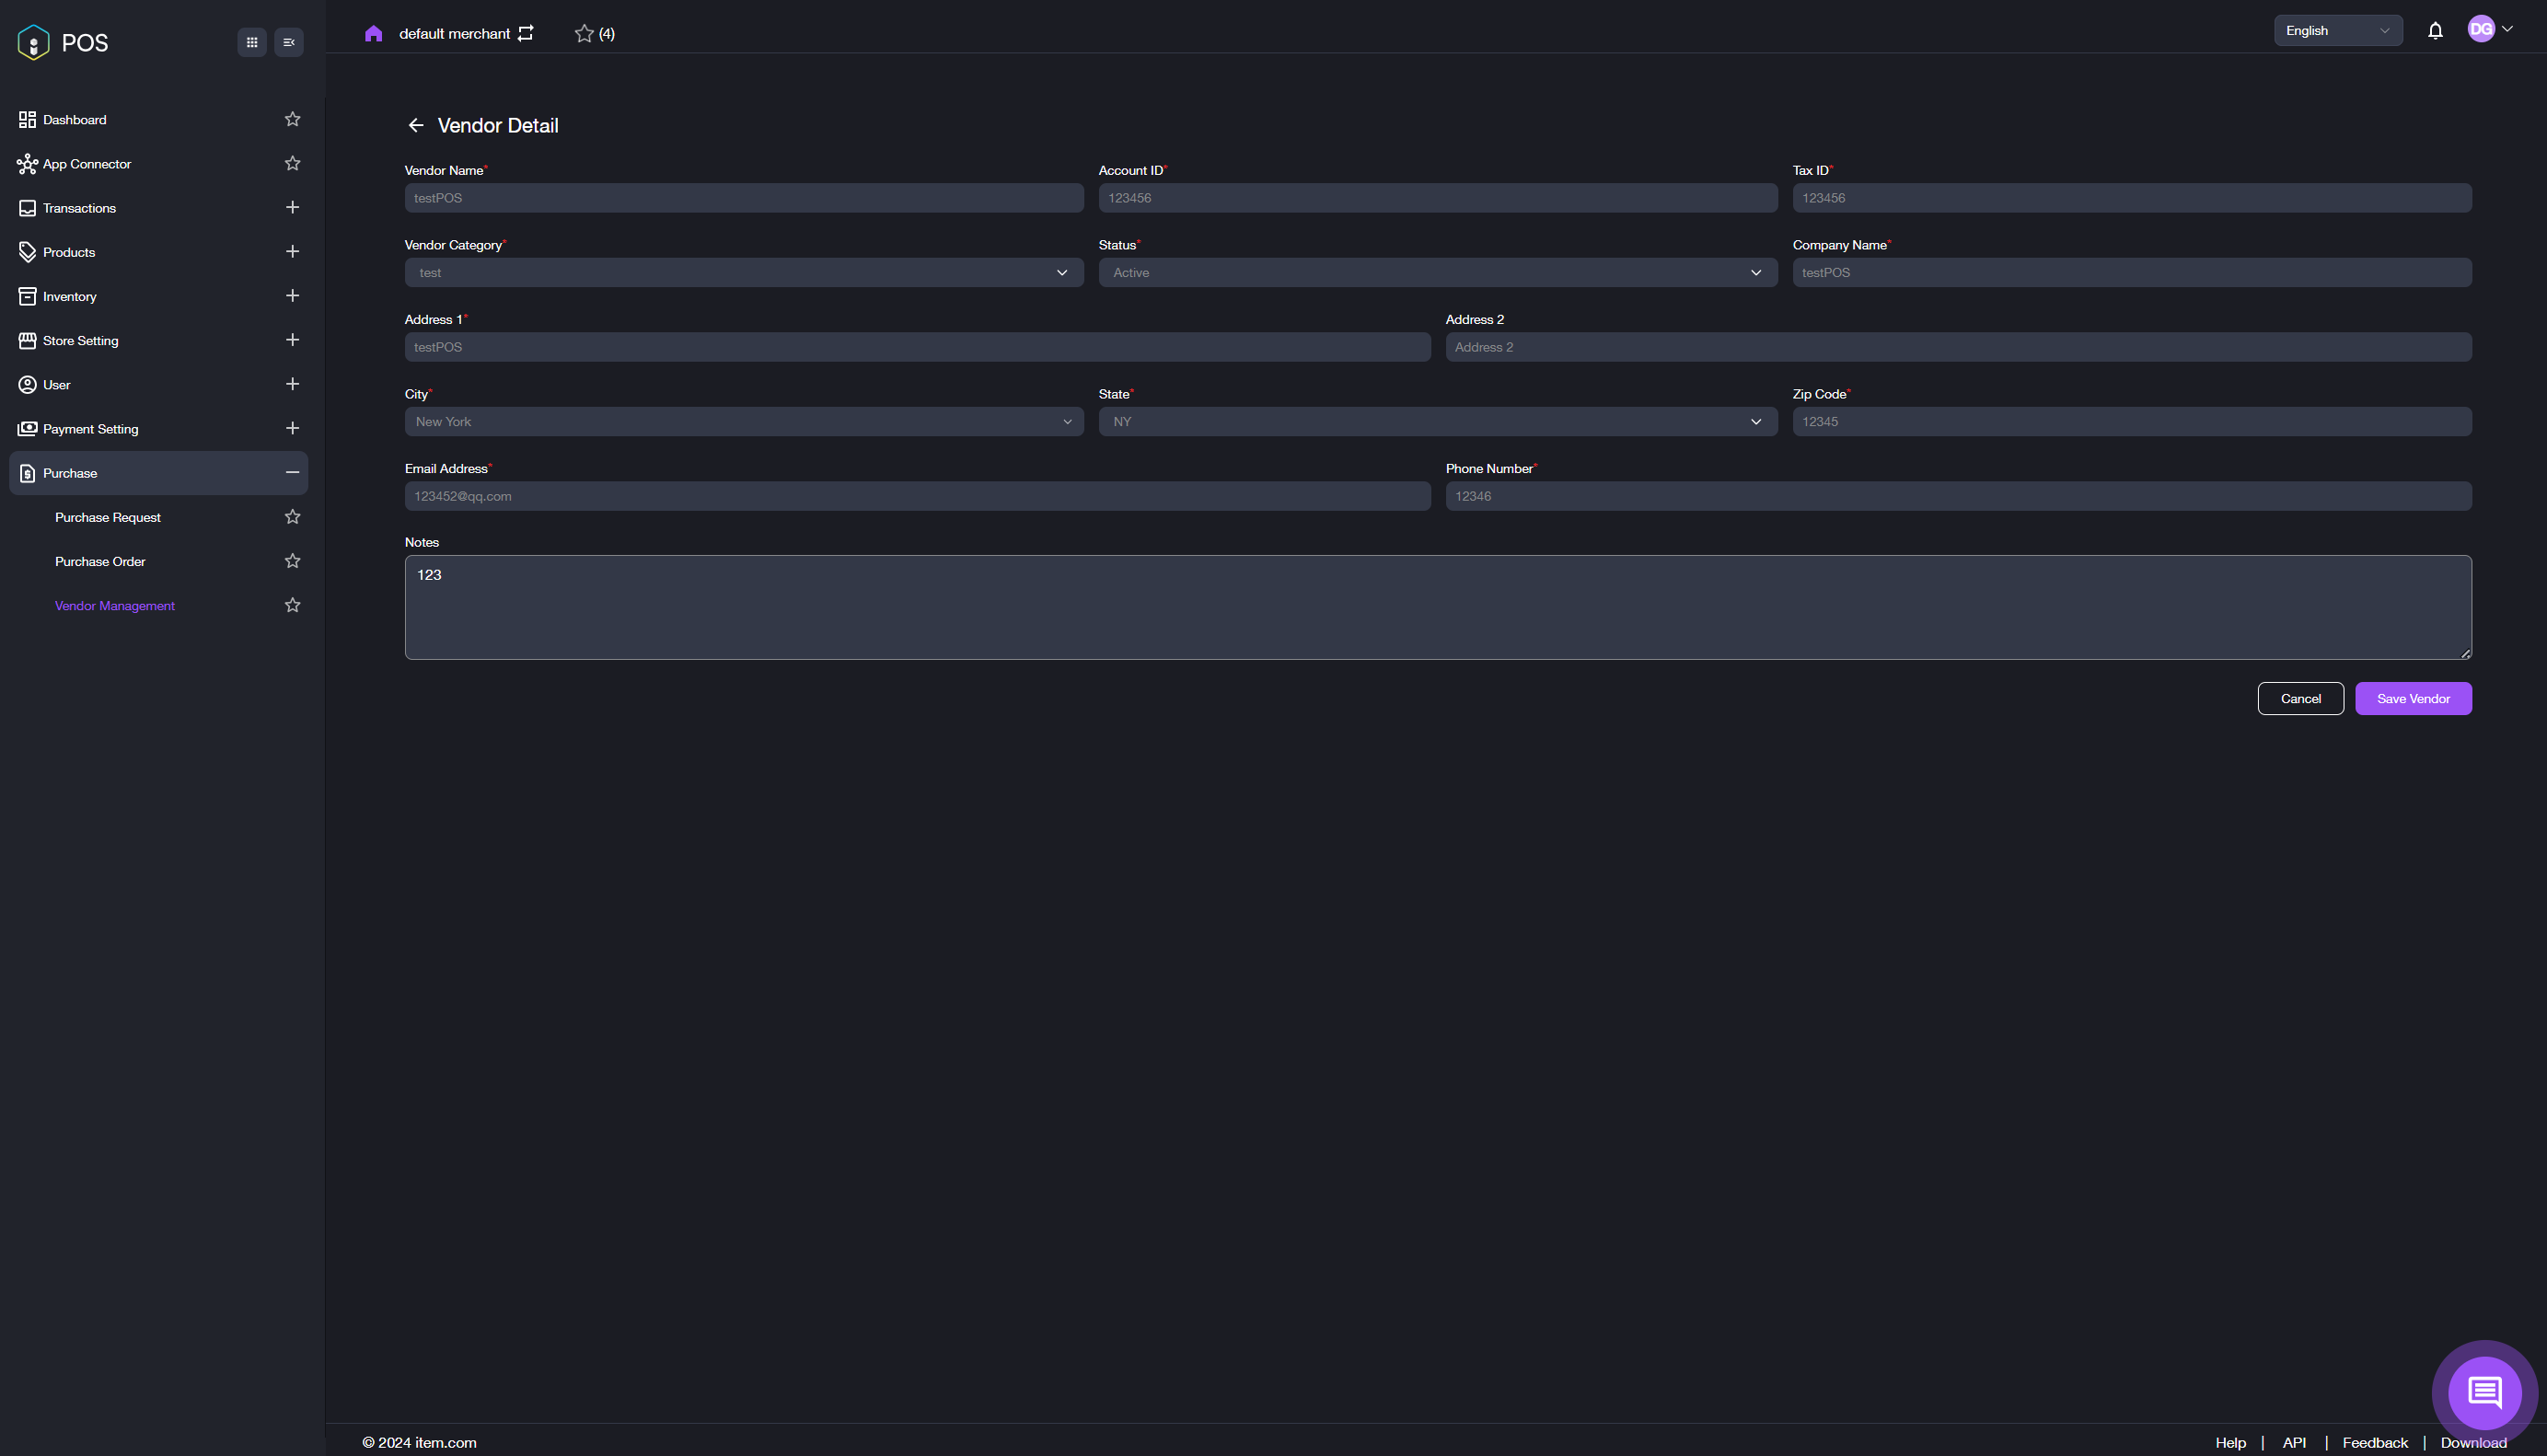
- Edit Vendor: Click the Vendor ID in the table. The Vendor Detail page shown in the image below will appear.
Revise the vendor information as needed and click the Save Vendor button.
A notification will pop up indicating whether the vendor was edited successfully or if the process failed.
If the revision fails, follow the prompts to re-enter the vendor information.
If successful, you will be returned to the Vendor Management page, where you can view the updated information in the table.