Appointment
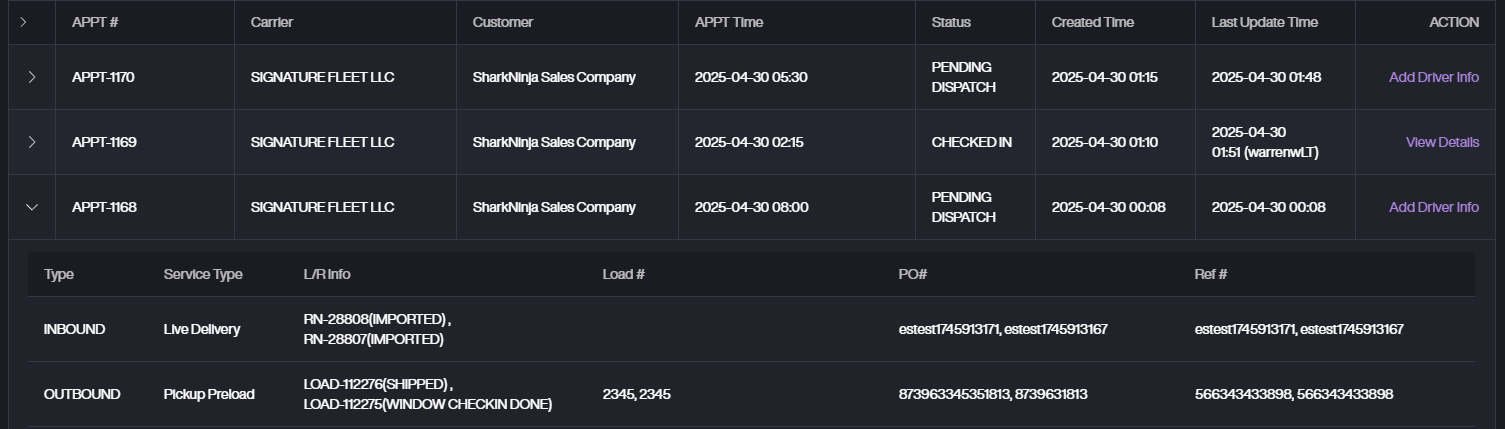
Appointment List
-
APPT Time: Scheduled time.
-
Status: Appointment status (e.g. NOT CONFIRMED, CHECKED IN).
-
Created Time & Last Update Time
-
Tap Expand to see the appointment's Receipts and Loads.
-
Action
-
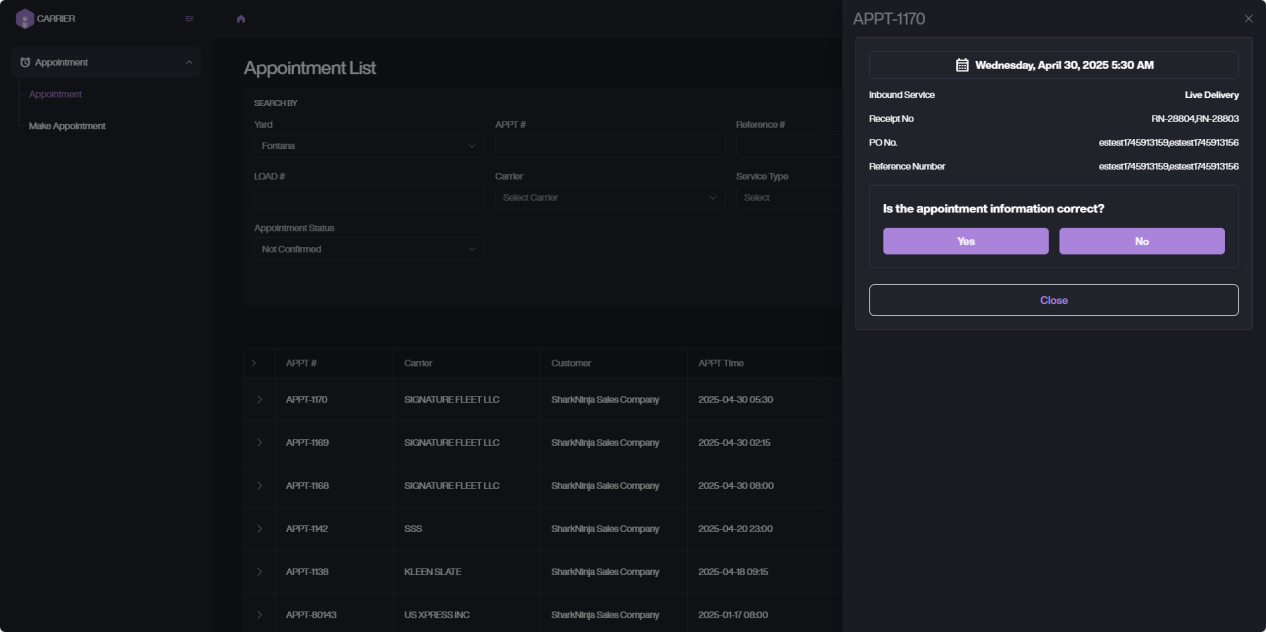
If the appointment status is NOT CONFIRMED, You will see the Confirm button. Tap the Confirm button,You will see a preview of the appointment details.
A. Tap Yes to proceed to the driver information page, where you can enter the driver's details. At this point, the appointment status changes to PENDING DISPATCH.
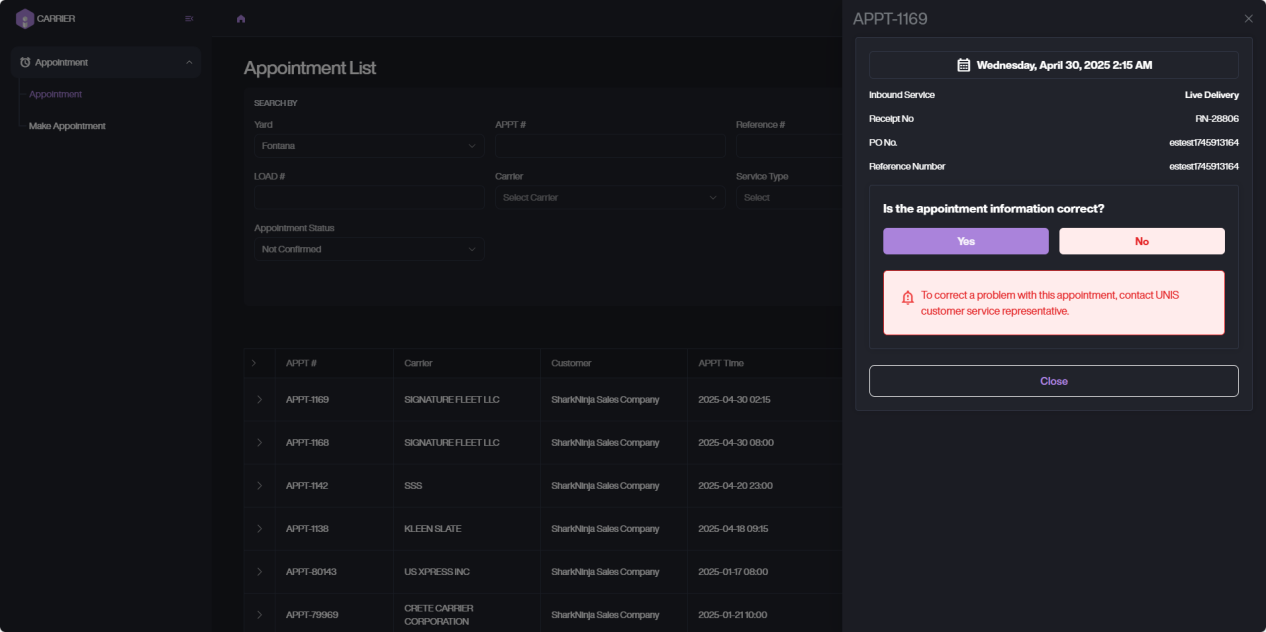
B. If the appointment information is incorrect, tap No - a message will prompt you to contact the YMS administrator to make changes.
-
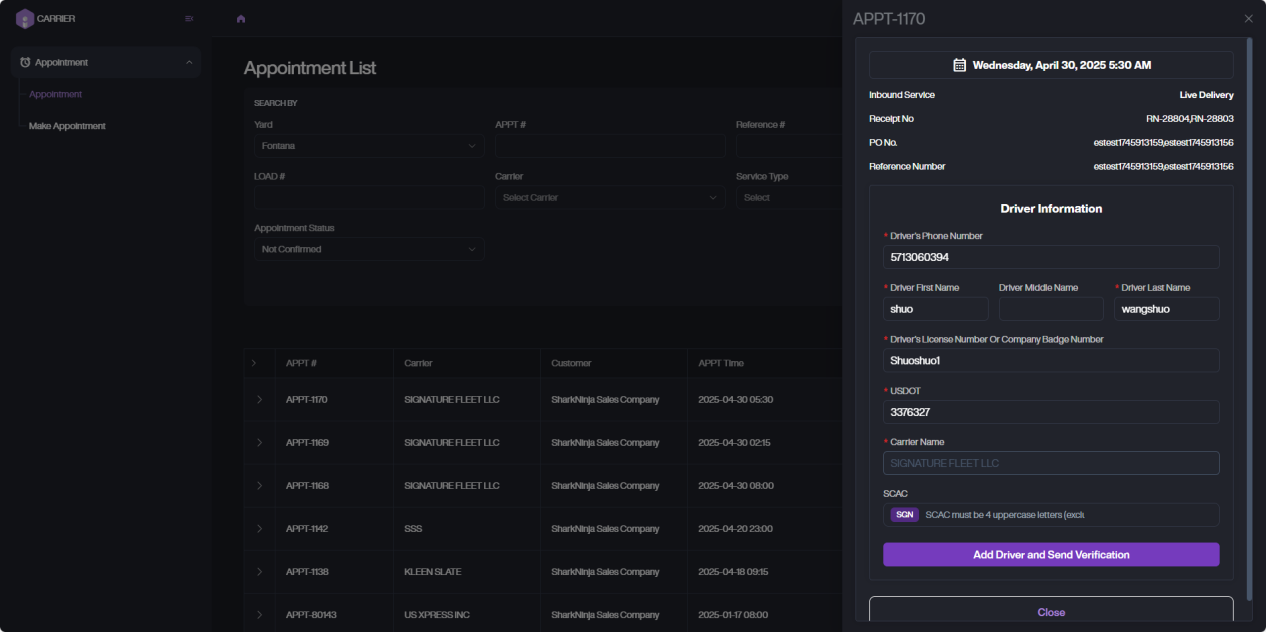
When the appointment is in PENDING DISPATCH status, the Add Driver Info button will be visible. Tap it to proceed to the driver information entry page.
A. When entering driver information, if the driver already exists in the system, the saved details will auto-fill.
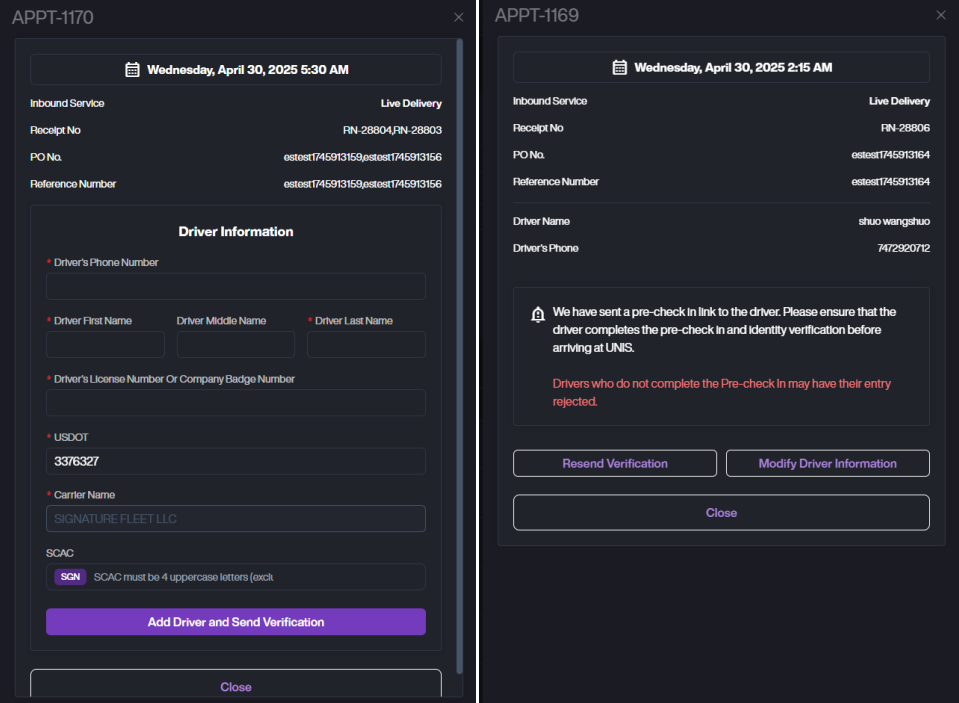
B. Click Add Driver and Send Verification to send an appointment notification SMS to the driver's phone number.
C. At this point, the appointment status changes to WAITING FOR DRIVER.
-
When the appointment status is WAITING FOR DRIVER, the Modify Driver button will be visible. Tap it to update driver information or resend the verification message.


- When the driver completes the Pre-Check-In on the Driver Portal, the appointment status will change to PRE CHECK IN COMPLETE. You can also modify the driver information.

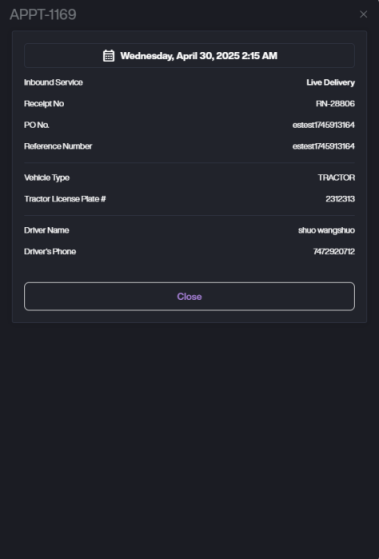
- When the driver arrives at the yard and the appointment has completed gate check-in, the appointment status will change to CHECKED IN. Tap View Details to view the complete appointment details.

-
Make Appointment
-
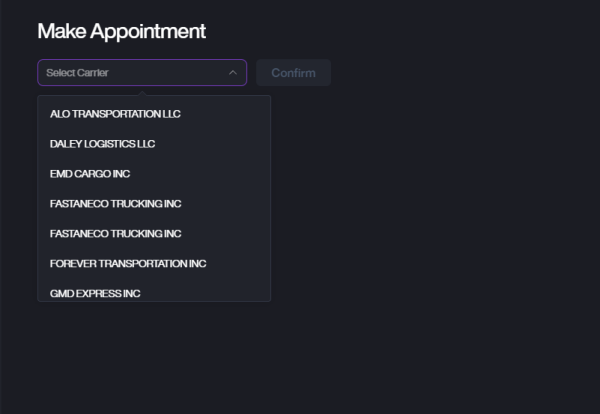
In the left-side menu, click Make Appointment to open the appointment creation page. You can also open the Make Appointment page by clicking Add New at the top right of the Appointment List.
-
Choose the Carrier for this appointment. Click Confirm to proceed.
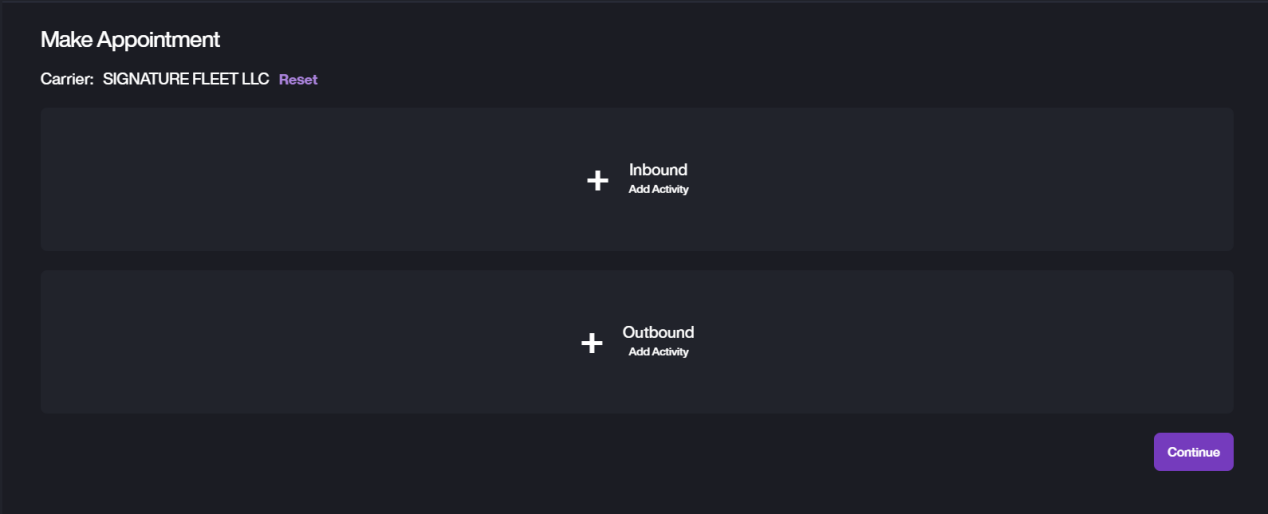
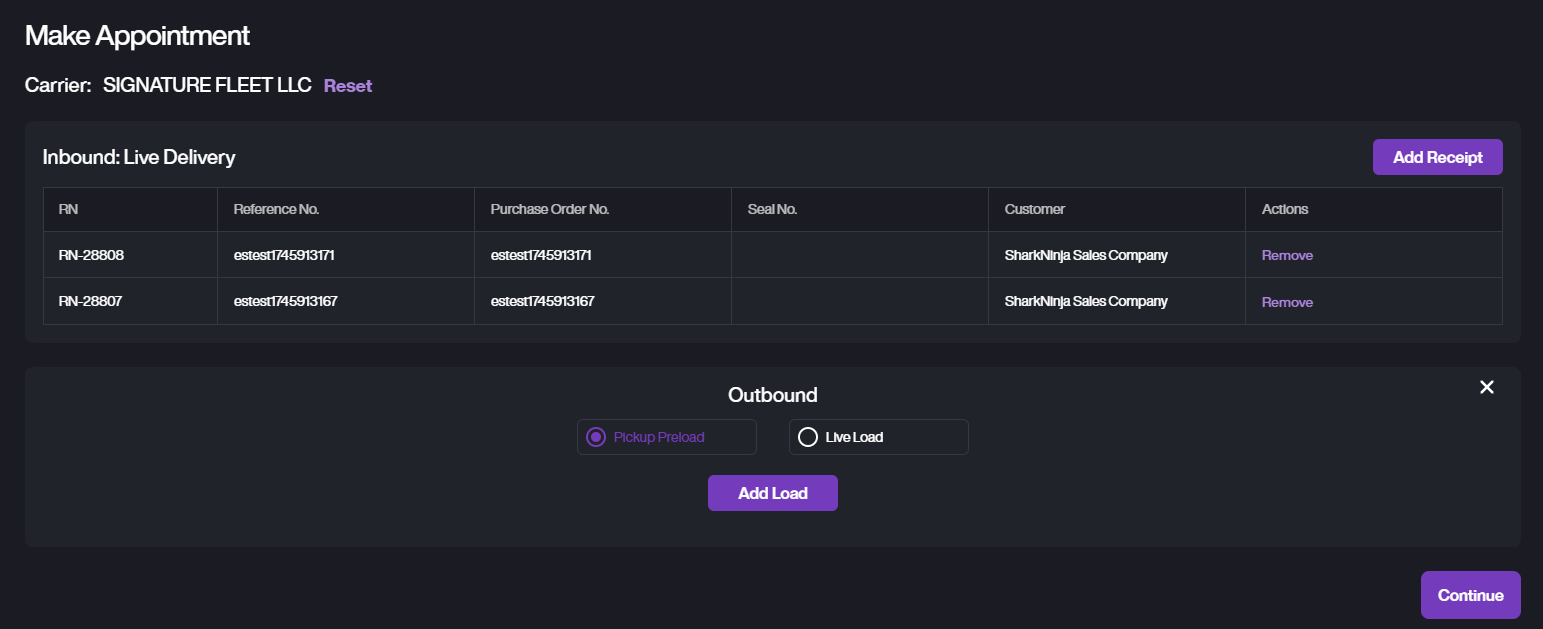
- Select the Inbound Action and Outbound Action for this appointment. Click the + button to add actions:
-
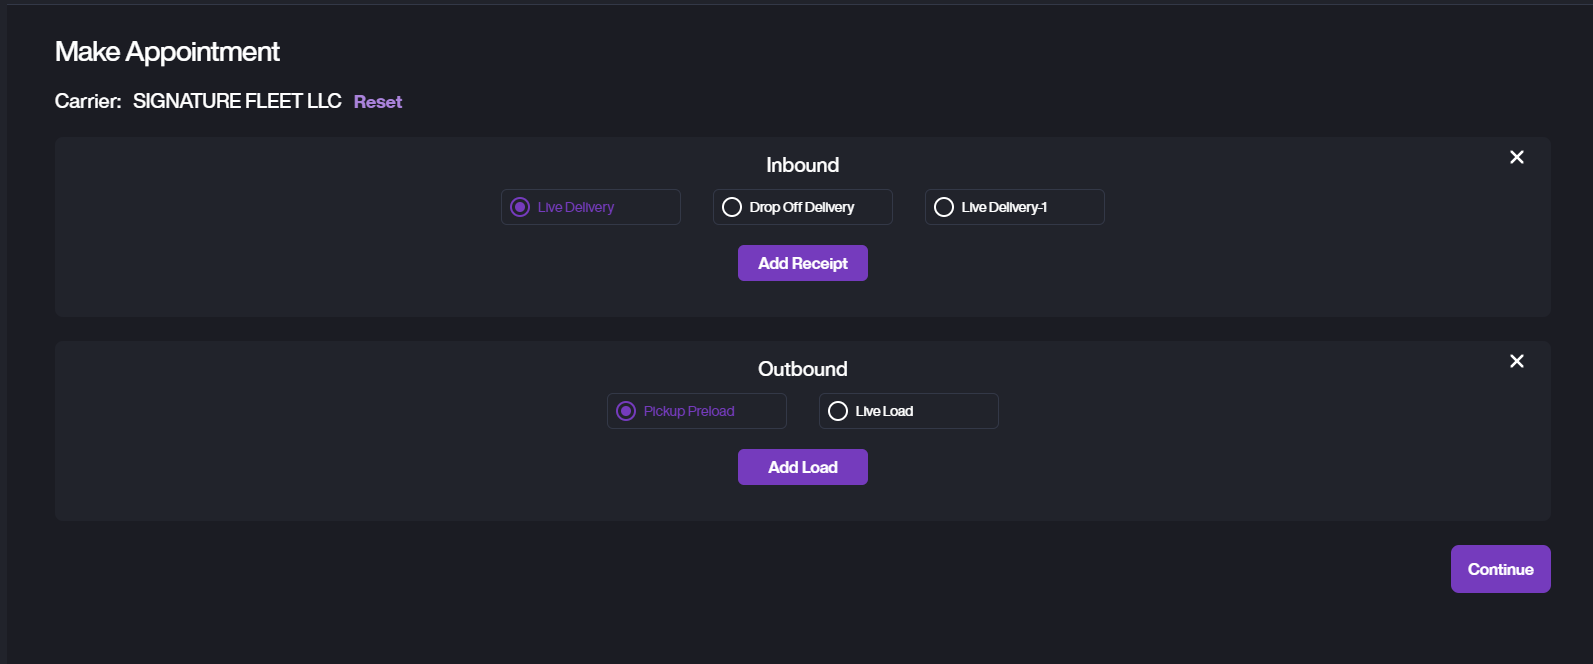
For Inbound
A. For on-site unloading, select Live Delivery.
B. If the driver unloads and leaves immediately, select Drop Off Delivery.
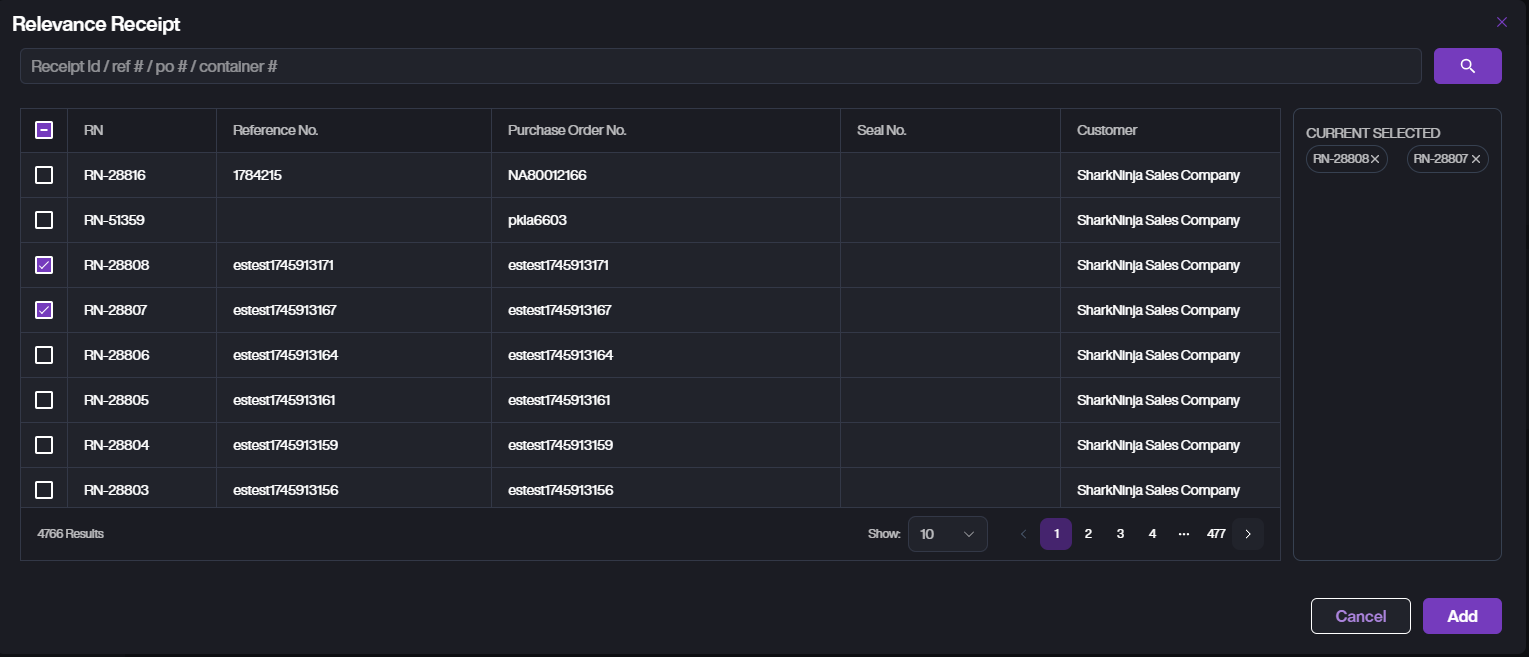
C. Tap Add Receipt to select Receipt.You can add multiple Receipts if needed. If the Receipt for your customer is not listed, please contact the administrator to have it added.

-
For Outbound, select Load
A. For on-site loading, select Live Load.
B. If the driver picks up a preloaded full container, select Pickup Preload.
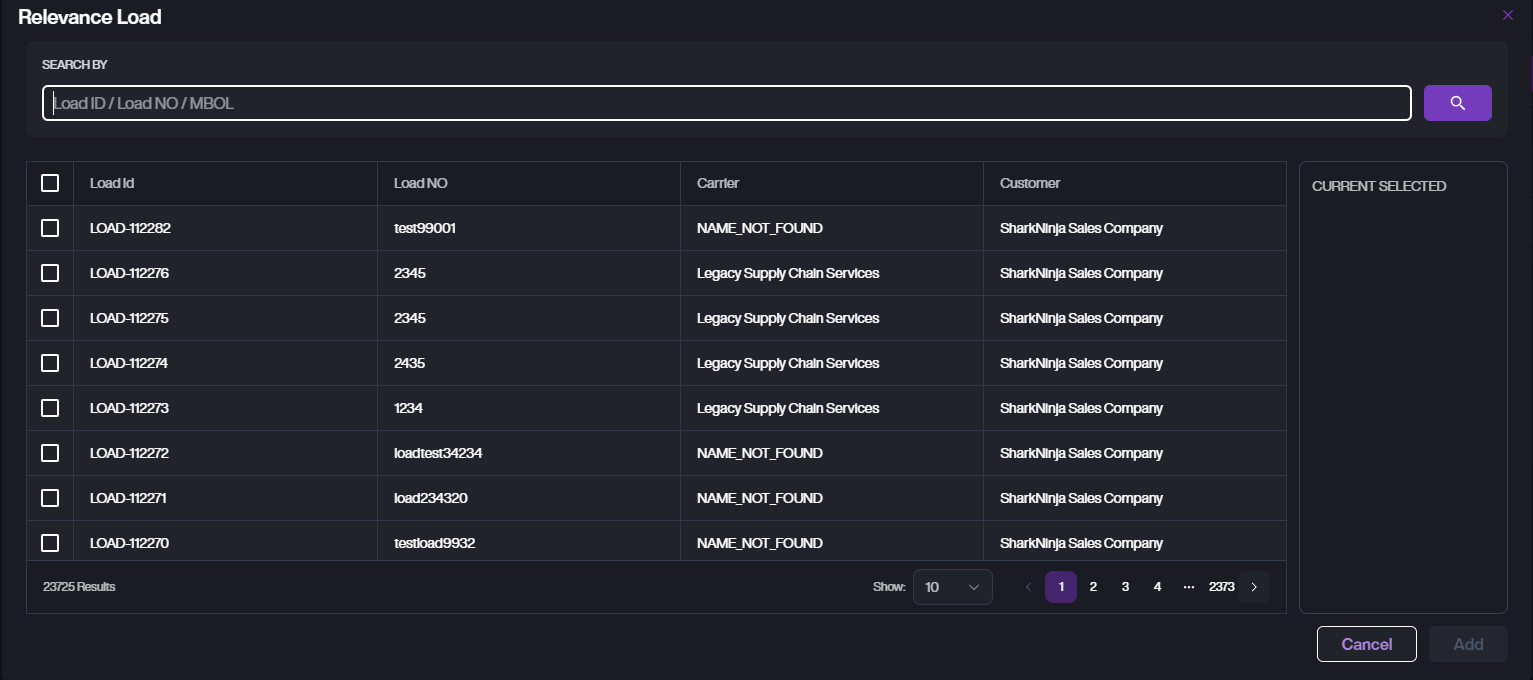
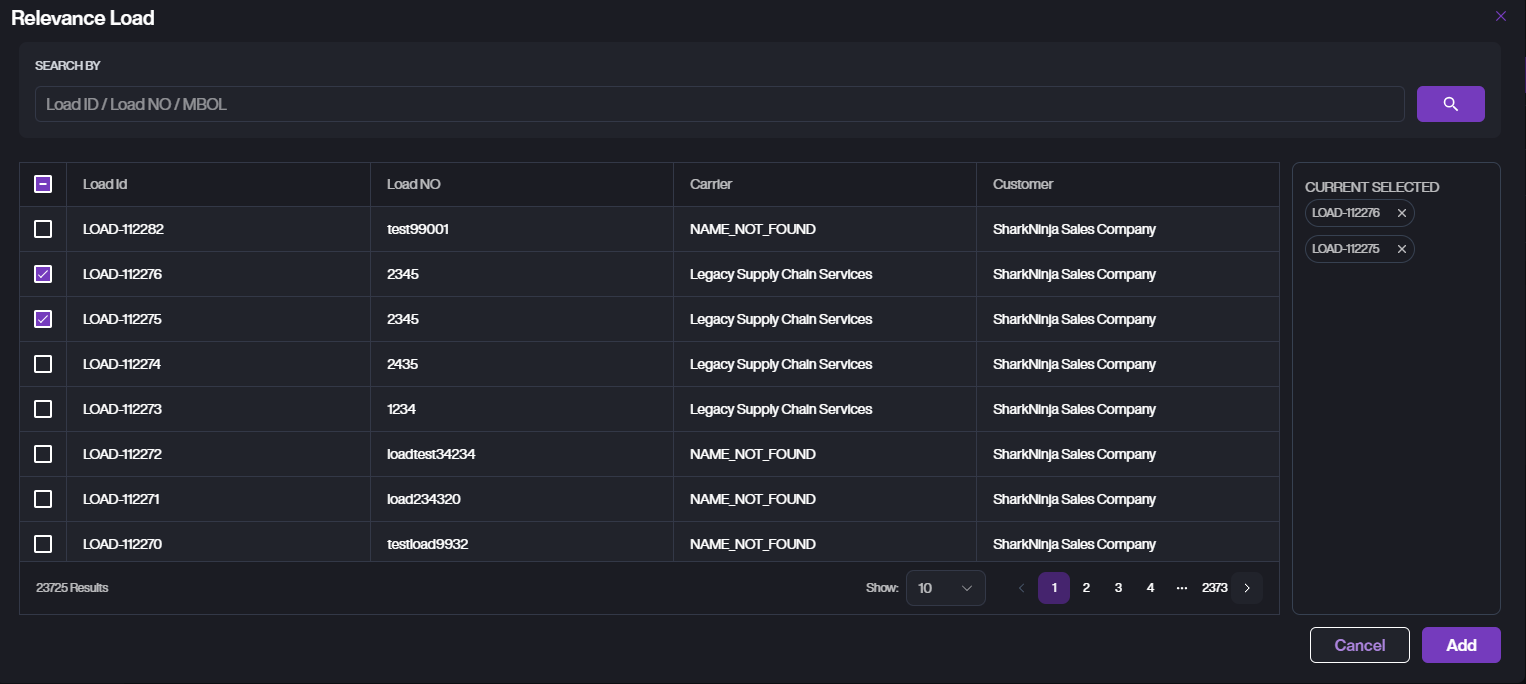
C. Tap Add Load to select Load. You can add multiple Loads if needed. If the Loads for your customer is not listed, please contact the administrator to have it added.
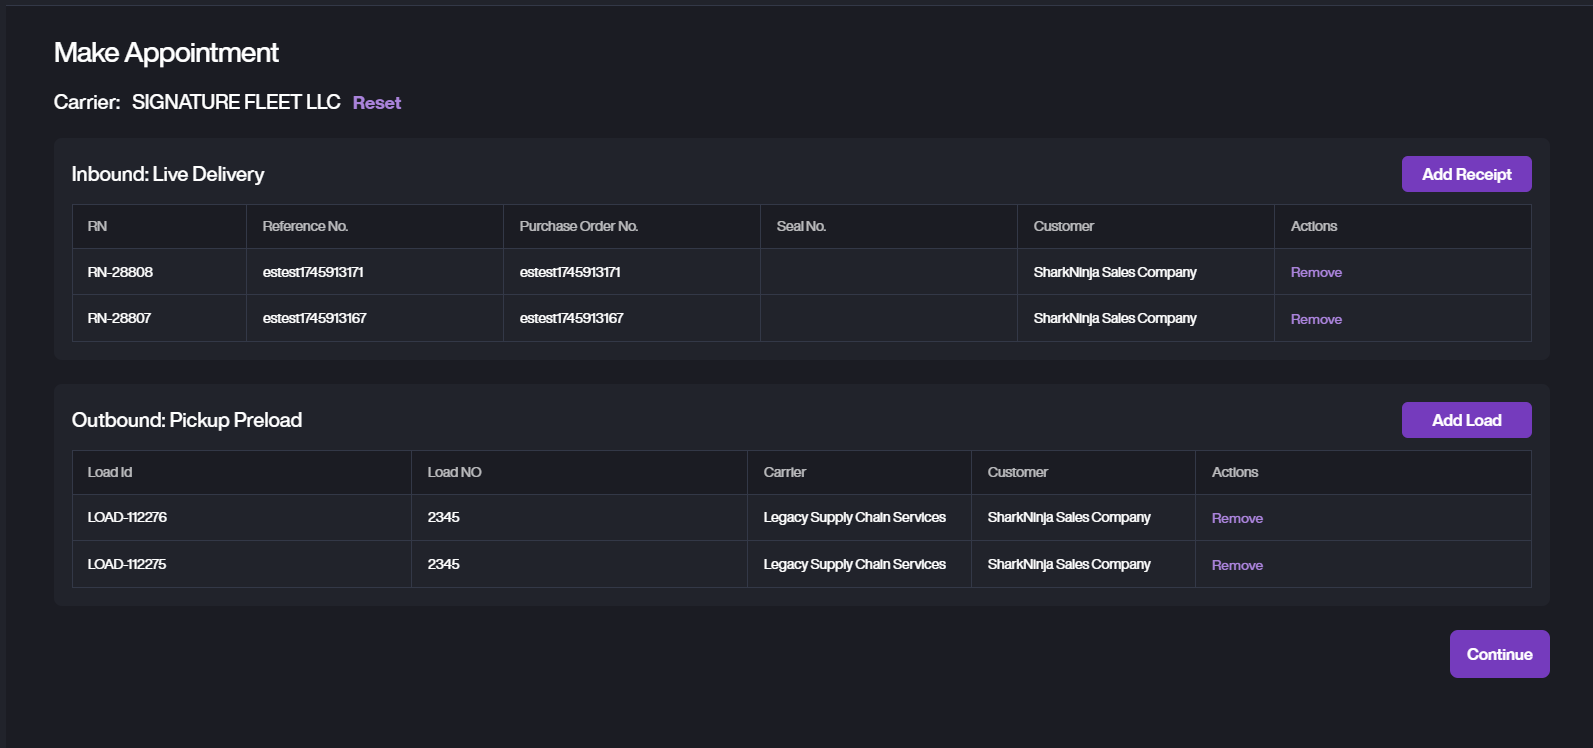
Notes: You can also choose only Inbound or only Outbound if needed.
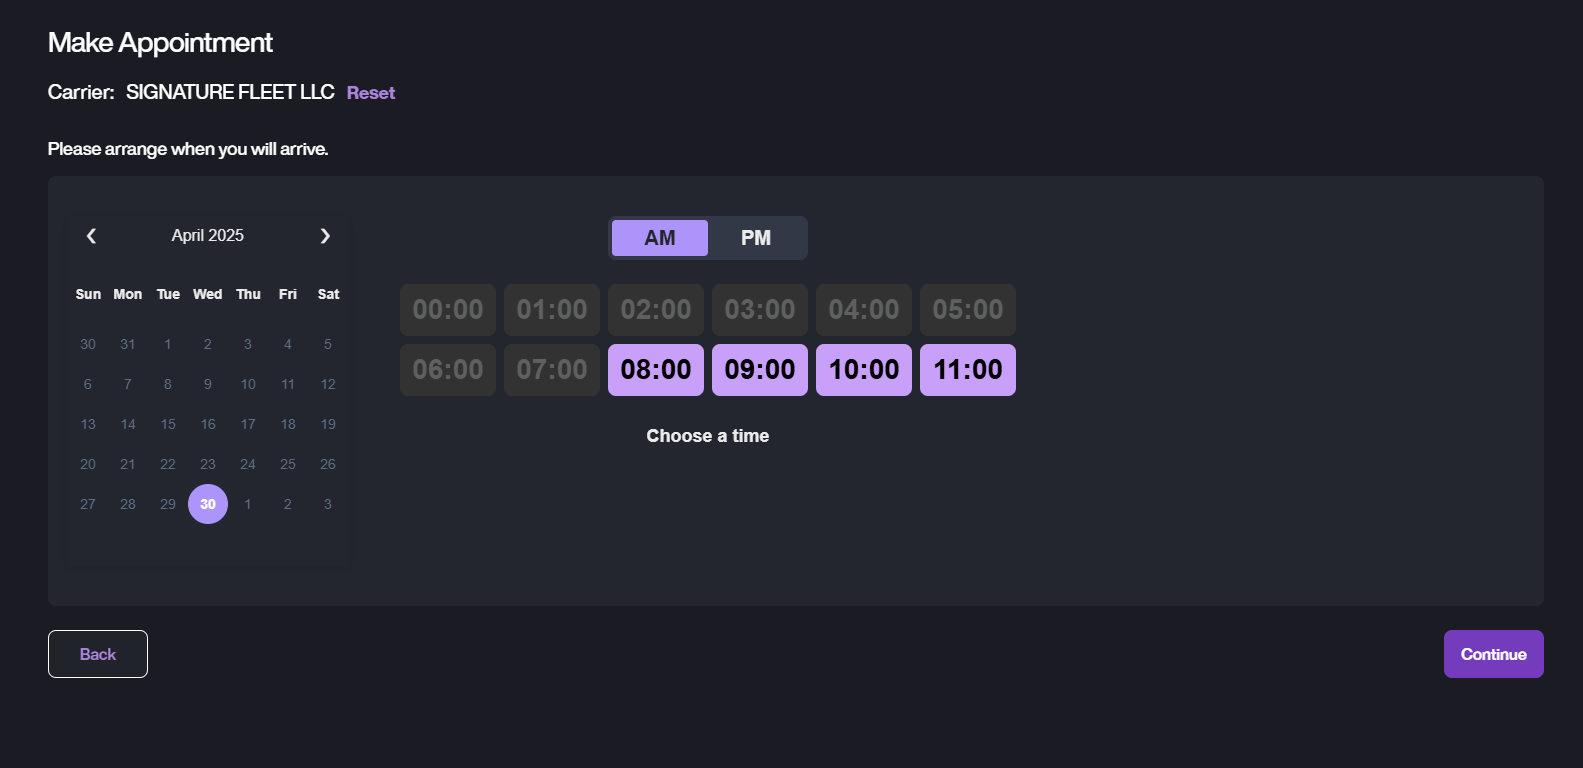
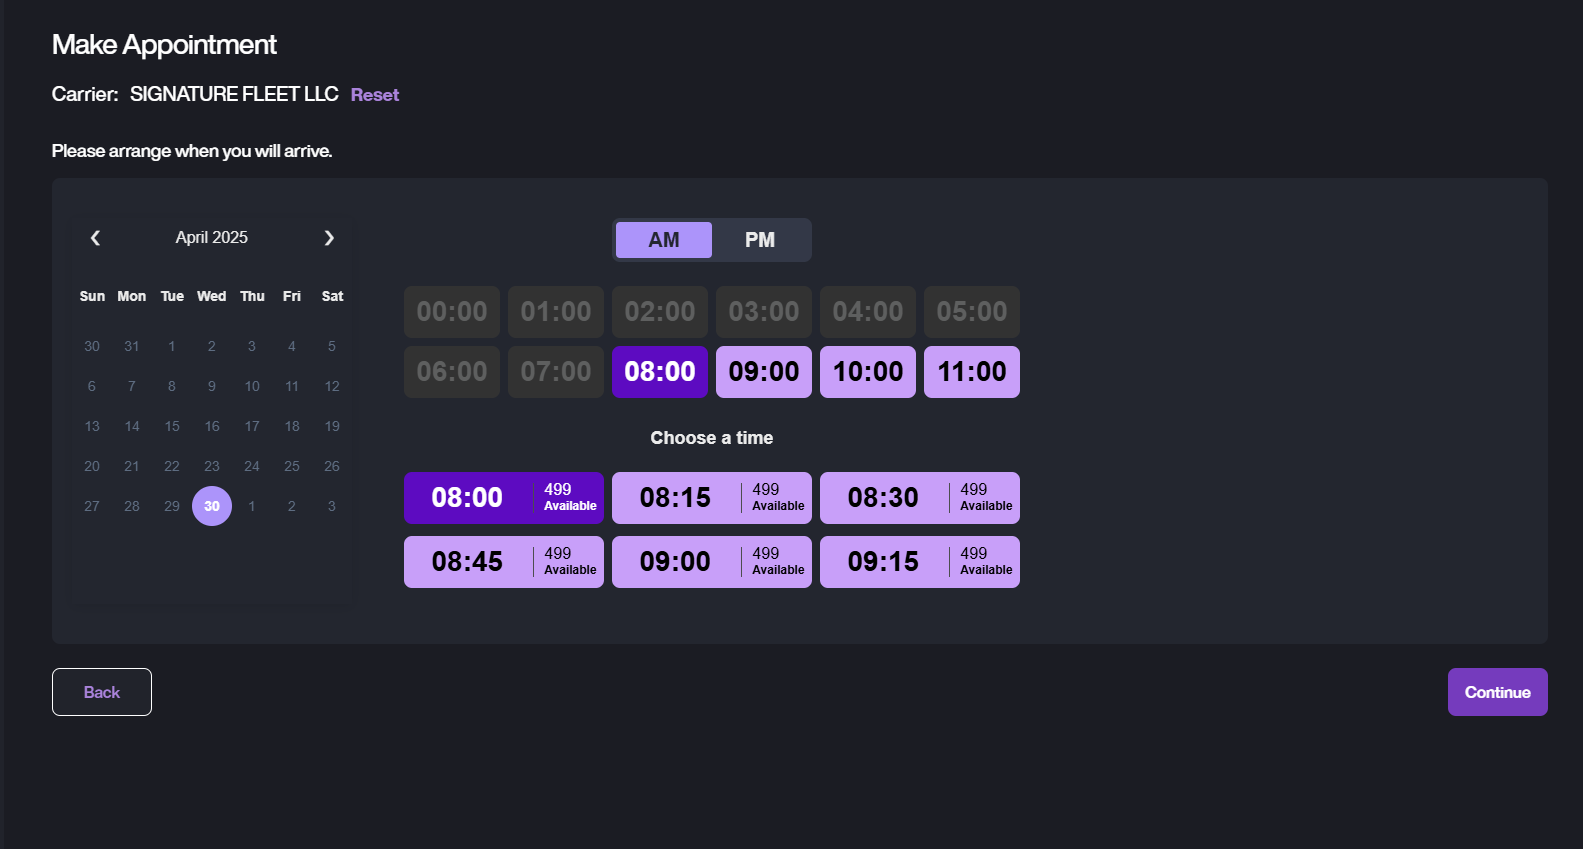
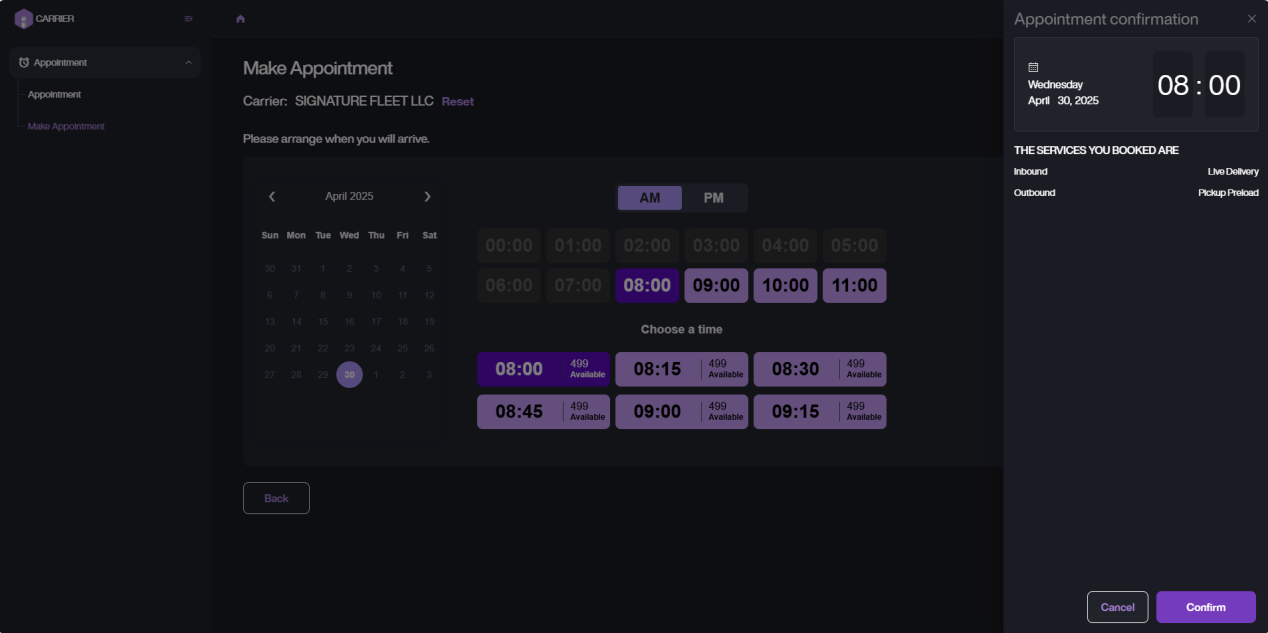
- Tap Continue to choose the exact time for your appointment. After selecting the time, tap Continue to review your appointment details, then tap Confirm to complete the appointment.