Merchants
The Merchants function allows you to quickly configure your e-commerce business, covering the entire workflow and providing full control over your sales channels.
Dashboard Overview
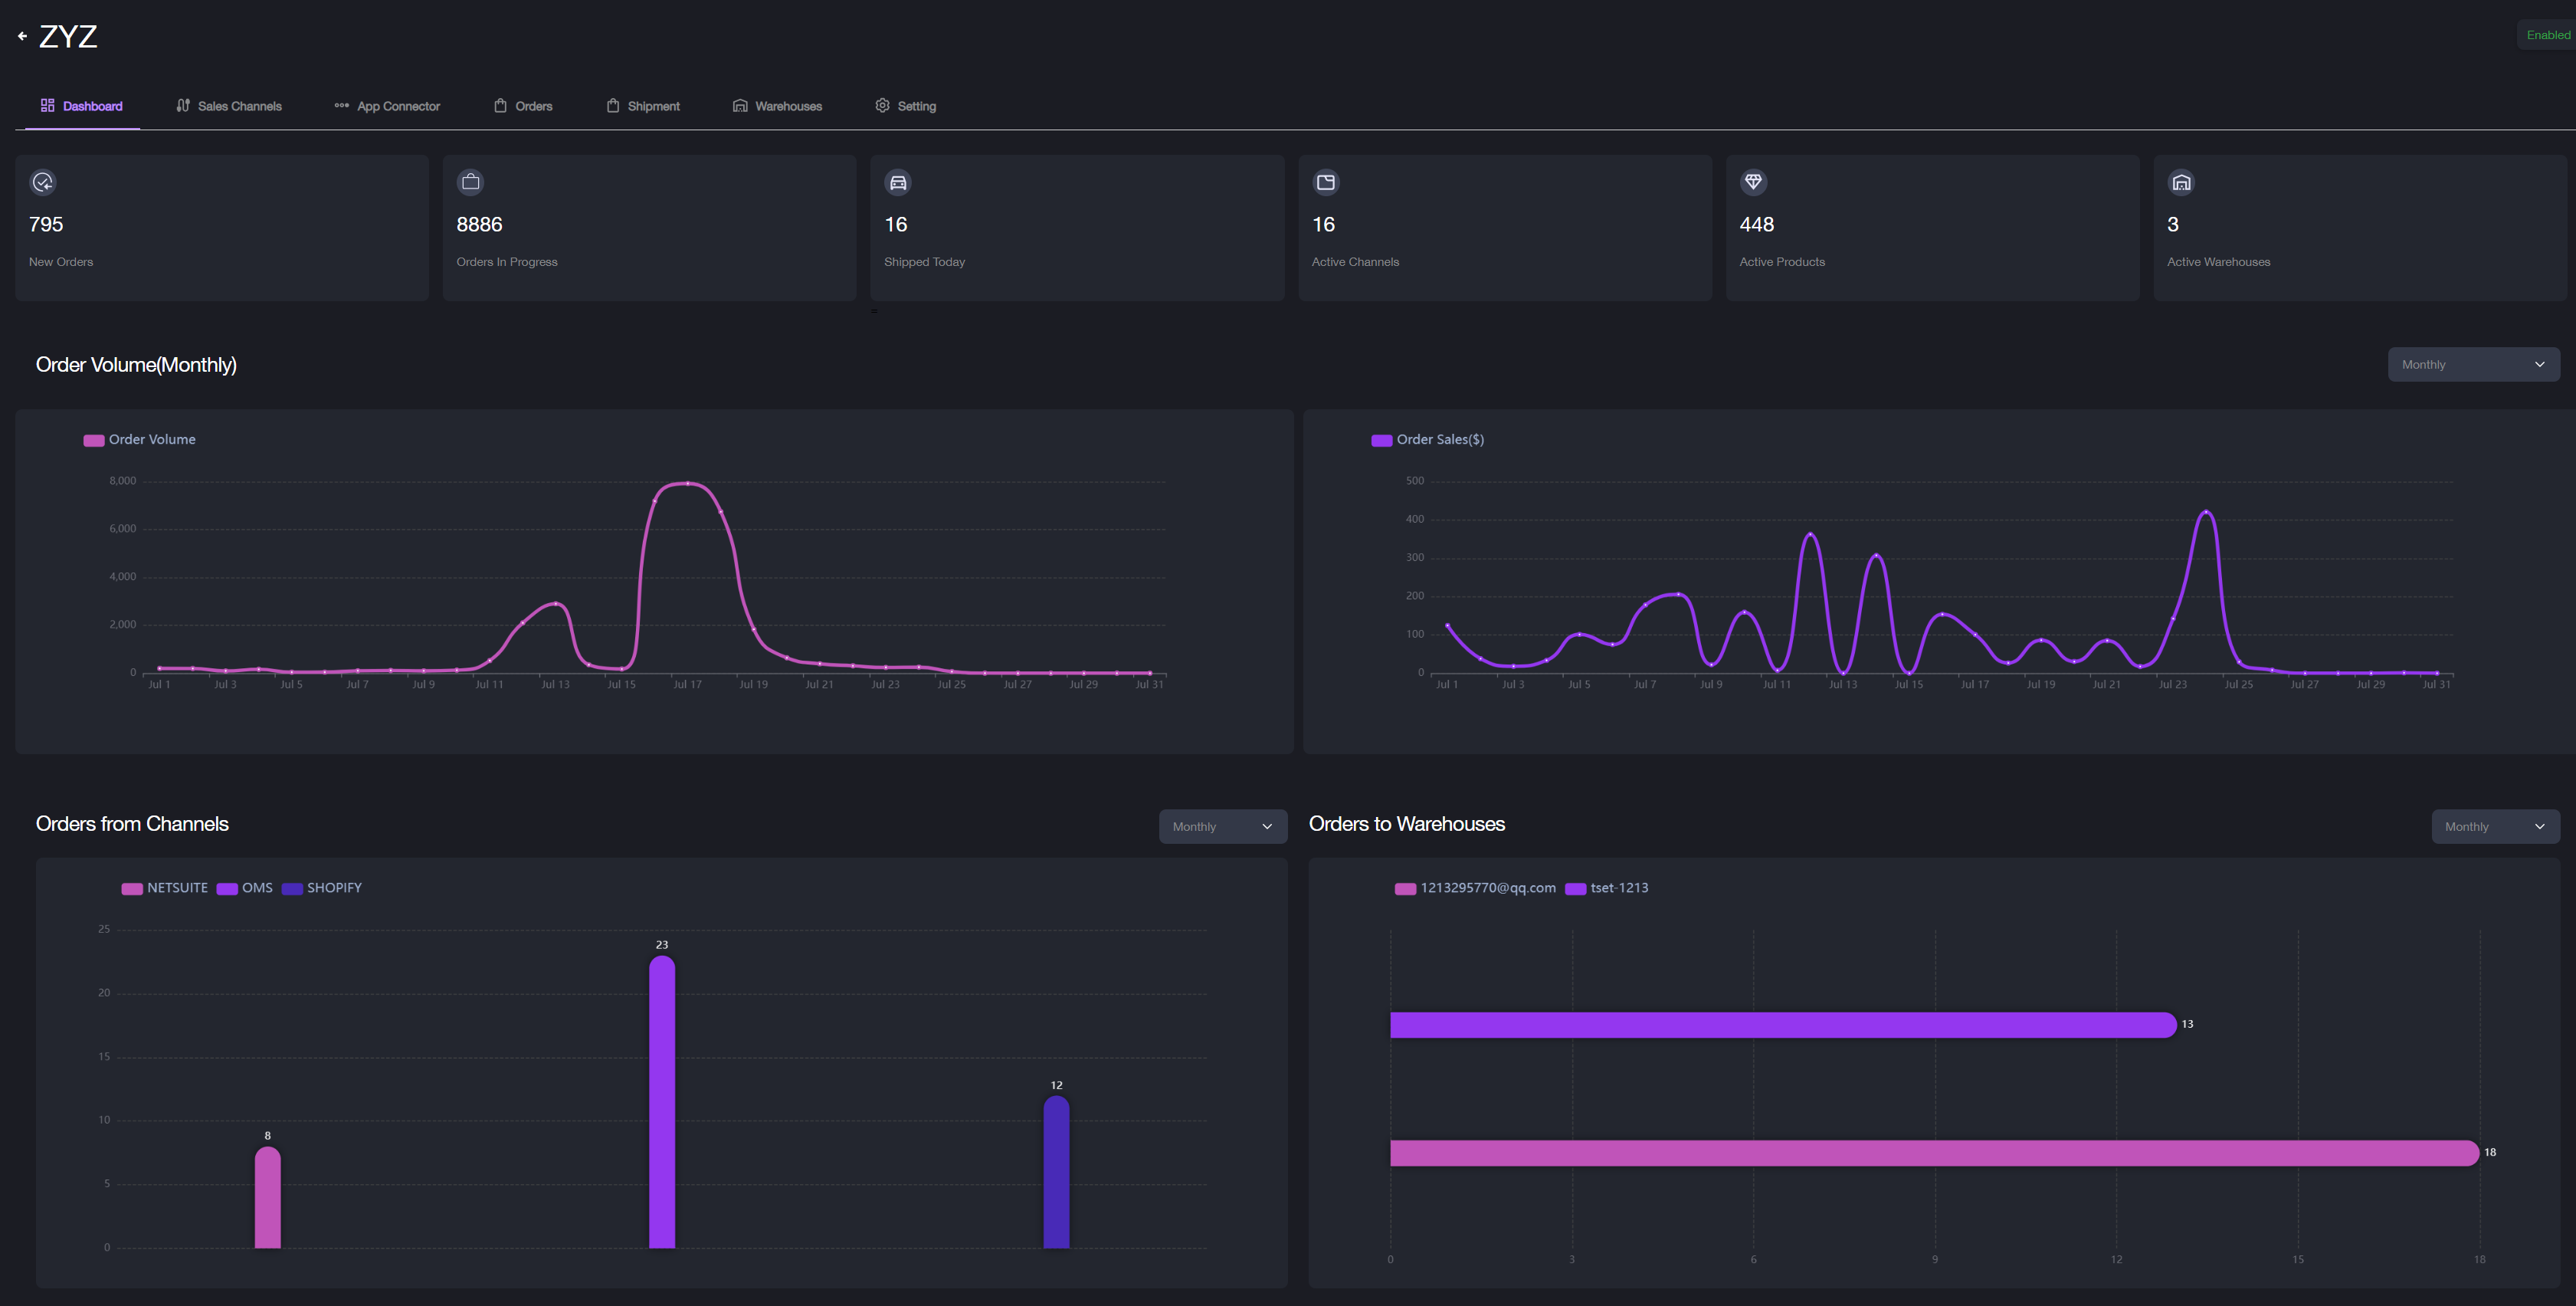
When you select a merchant from either the Merchants menu or the Active Merchants list on the homepage, you will be directed to that specific merchant's dashboard.
This dashboard provides an overview of data related to sales channels, orders, shipments, products, and warehouses. Each merchant has its own dashboard view, displaying the following information:

-
New Orders: Recent orders from all sales channels.
-
Orders in Progress: Orders sent to the warehouse for processing.
-
Shipped Today: Orders shipped as of today.
-
Active Channels: Enabled sales channels for this merchant.
-
Active Products: Products currently available for sale and in stock.
-
Active Warehouses: Currently available warehouses.
-
Order Volume: Live charts showing the order volume on a daily, monthly, quarterly, or yearly basis.
-
Orders from Channels: Bar charts displaying orders from all sales channels on a daily, monthly, or yearly basis.
-
Orders to Warehouses: Bar charts displaying orders sent to the warehouse on a daily, monthly, or yearly basis.
Note: Hovering over a data point on the live charts or bar charts will display more details.
Creating a New Merchant
A default merchant is set up when you log in, but you can also create new merchants based on sales channels, product categories, or business distributions.

To create a new merchant:
- Go to the Merchants section.
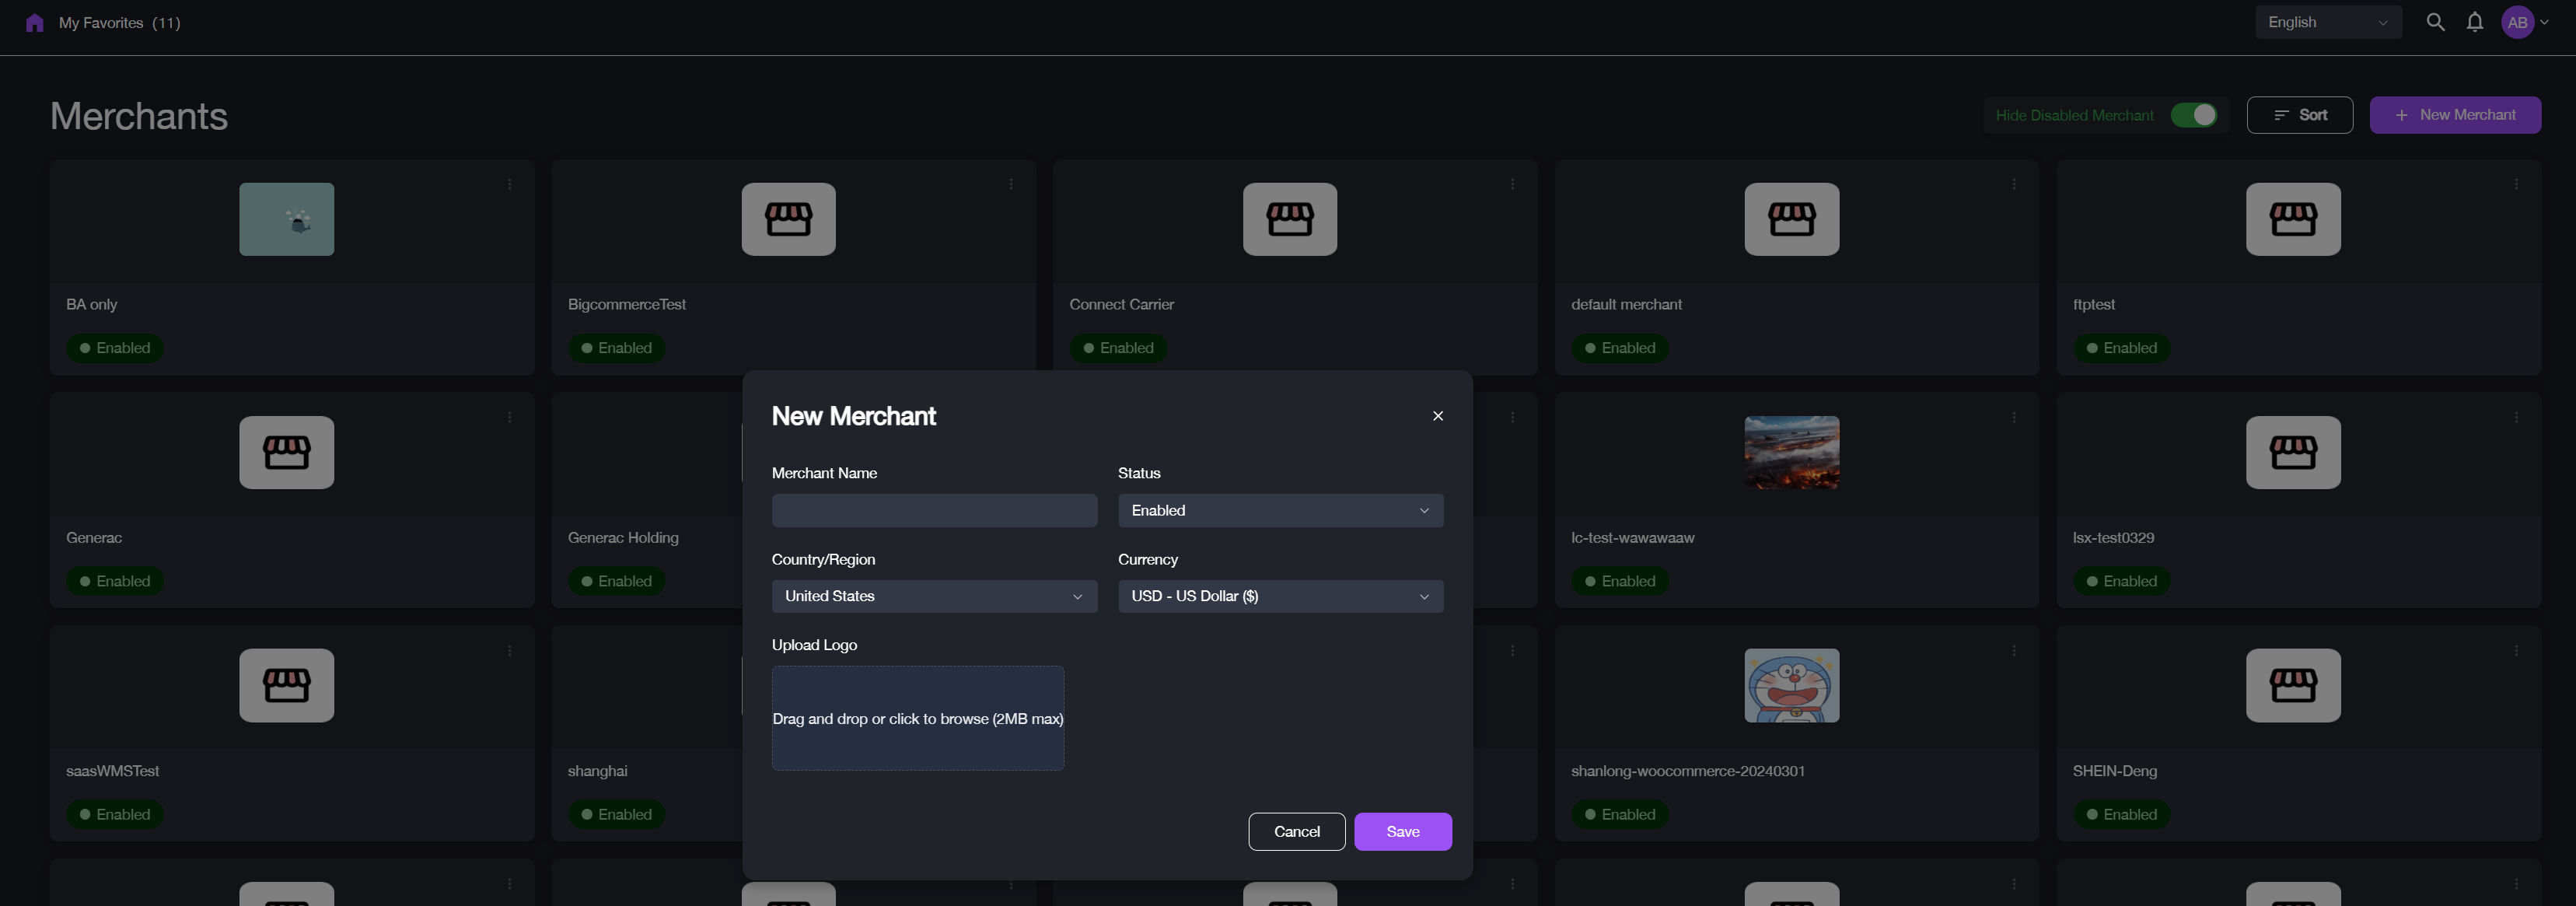
- Click the + New Merchant button. The new merchant window will appear.
- Enter the Merchant Name.
- Set the merchant status to Enabled.
- Set the Country/Region and the Currency.
- Upload a logo for the merchant.
- Click Add. The merchants you create will be listed under the Merchants menu and sorted alphabetically by name.
Notifications
The merchant you created in item DI will be synced with other item applications. Please ensure that you configure the correct country/region and currency settings when creating a new merchant, as these settings cannot be changed afterward. These configurations will impact the following features:
- Filtering of available connected channels.
- Currency unit used for orders.
- Order retrieval based on currency and country filters.
- Currency unit applied to product pricing.
Switching between Merchants

After creating merchants, you can switch between the merchants using the following methods:
If signed in to item DI:
- Navigate to the left panel.
- Under the Merchants section, select the desired merchant from the merchant list.
- Alternatively, click on the current merchant's name. You will be taken to the merchant page, where you can select the desired merchant to switch.
If signed in to other item applications:
- Click on the current merchant's name next to the house icon on the header.
- A pop-up window will appear with a list of merchants. Select the desired merchant to switch.
Editing Merchant Info

To edit merchant info:
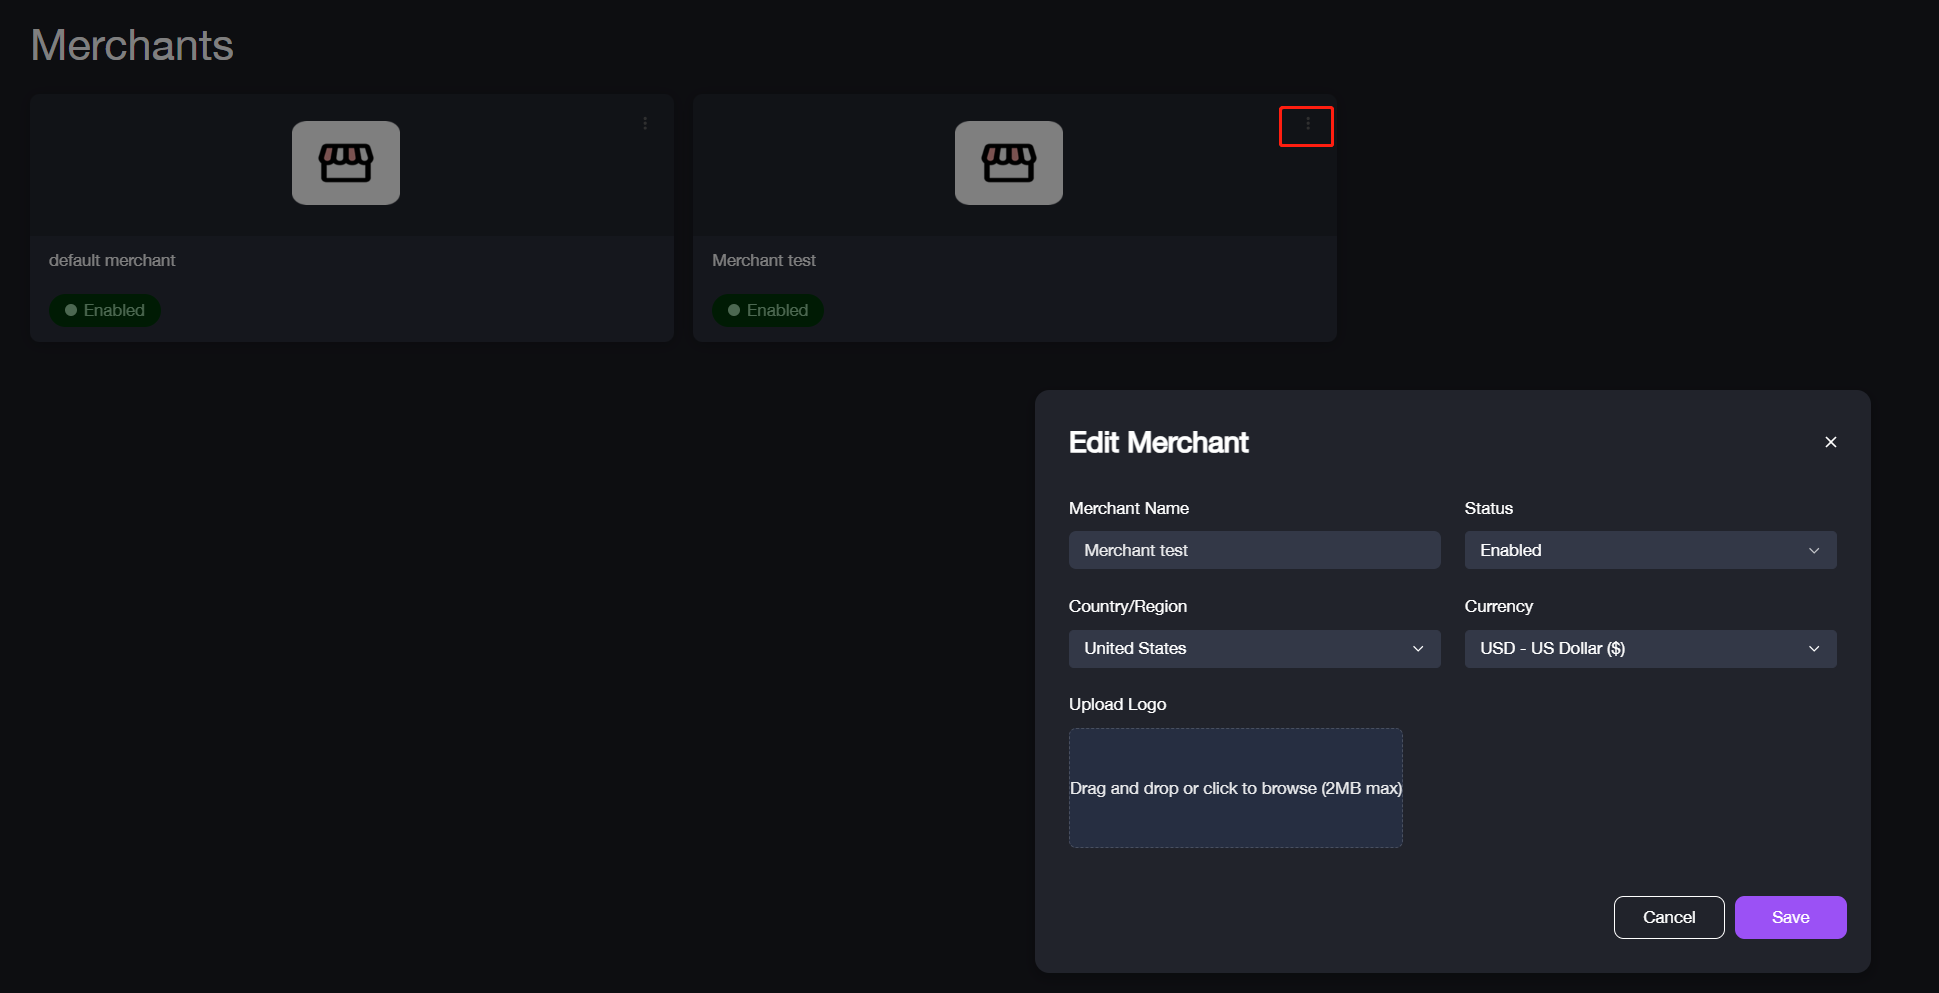
- Click the three-dot icon in the upper-right corner of the merchant card.
- Select Edit.
* Country/Region and Currency settings cannot be edited once the merchant is created.
Enable/Disable Merchants
To change a merchant's status:
- Click the three-dot icon in the upper-right corner of the merchant card.
- Select Disable or Enable as needed.
* Before disabling a merchant, ensure there are no sales channels connected to that merchant.
Hide/Show Disabled Merchants
For easier access to currently enabled merchants, you can temporarily hide disabled merchants.
To hide or show disabled merchants, click the toggle button to switch between showing or hiding disabled merchants.