Open Scanning for Carton
This topic introduces the transload workflow for an organization/customer whose "Transload Receive Mode" has been set as Open Scanning for Carton. In this mode, the products are received in cartons at the warehouses, and their data is manually logged. No destination is provided initially. The cartons are scanned during loading and then shipped.
Add/Import Receipt
The inbound receipt can be created by manually adding, or importing from edited templates or EDI.
- Add Receipt
Log into Item Transload, navigate to Inbound > Receipt, and click Add Receipt. Be noted that Receipt Type should be set as Transload.
- Import Receipt
Log into Item Transload, navigate to Inbound > Receipt, and click Import Receipt.
Inbound Receiving
Upon the arrival of the products at the warehouse, finish window check-in and then transload receiving task.
- Log into Item Transload. In Window Check In > Entry List, create an entry and finish window check-in. A transload receive task is created and a specific assignee is appointed for this task.

- The assignee then finds and finishes the transload receive task in the Transload app on the work phone. Refer to the following instructions.
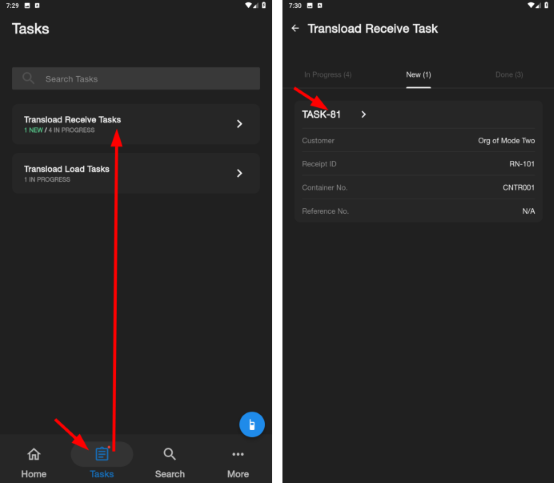
a. Log into the Transload app on the work phone.
b. Go to Tasks > Transload Receive Tasks, find the desired task in the New tab, and tap the task ID.
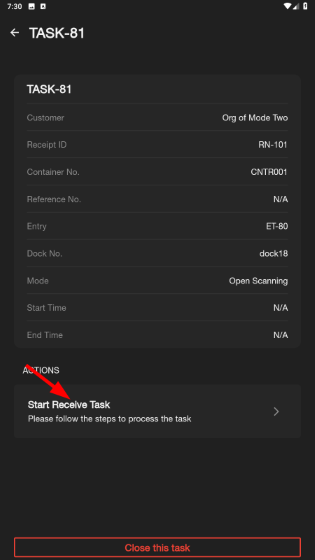
c. Tap Start Receive Task.
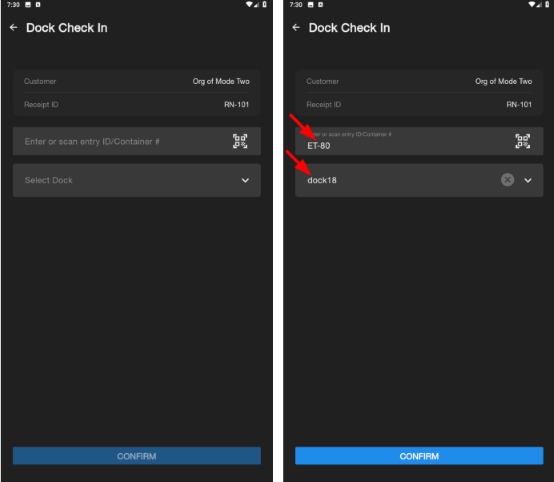
d. Enter or scan the Entry ID or Container No., select the dock No., and tap "CONFIRM".
e. In the Work tab, scan or enter the location, and then scan or enter the cartons.
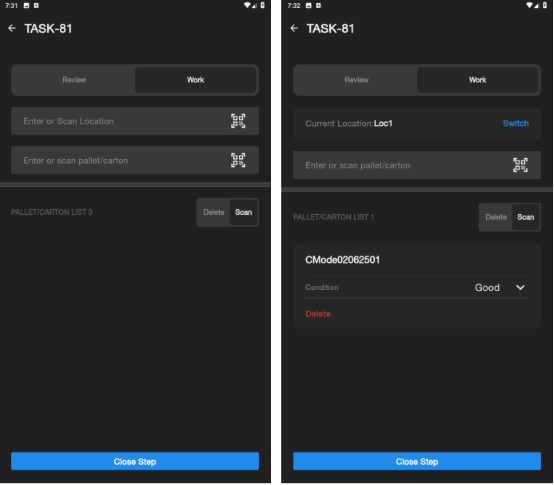
f. (Optional) If there is any damaged cartons or products found, tap the dropdown button in Condition and change it from "Good" to "Damage". To delete any scanned cartons, tap Delete, select the cartons and delete them.
g. Tap Close Step when all the cartons are scanned.
h. Tap Close this task.
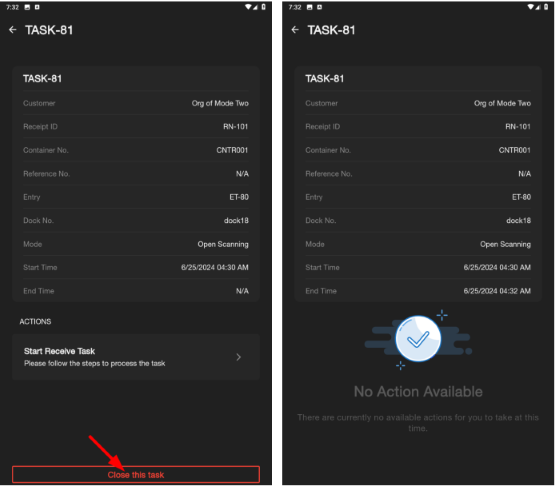
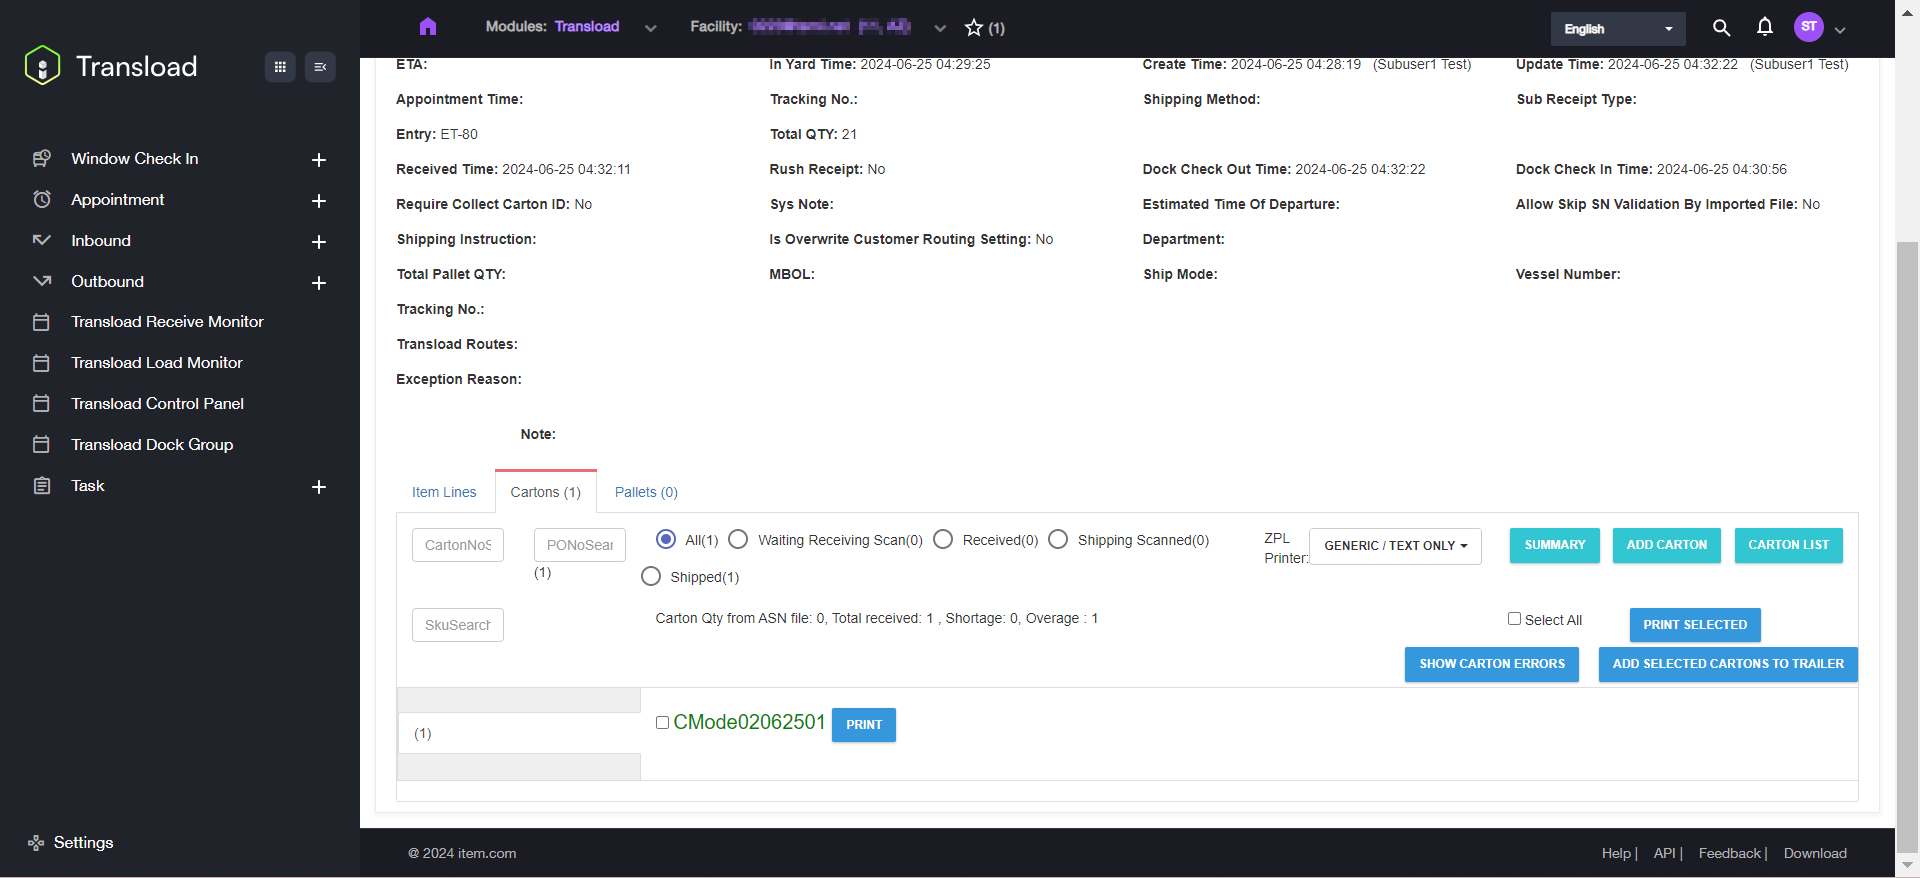
The transload receive task is finished. In term of inventory, except for the unknown item, the inventory of other products remains unchanged. The receipt is also updated, including the cartons' information.
Outbound Loading
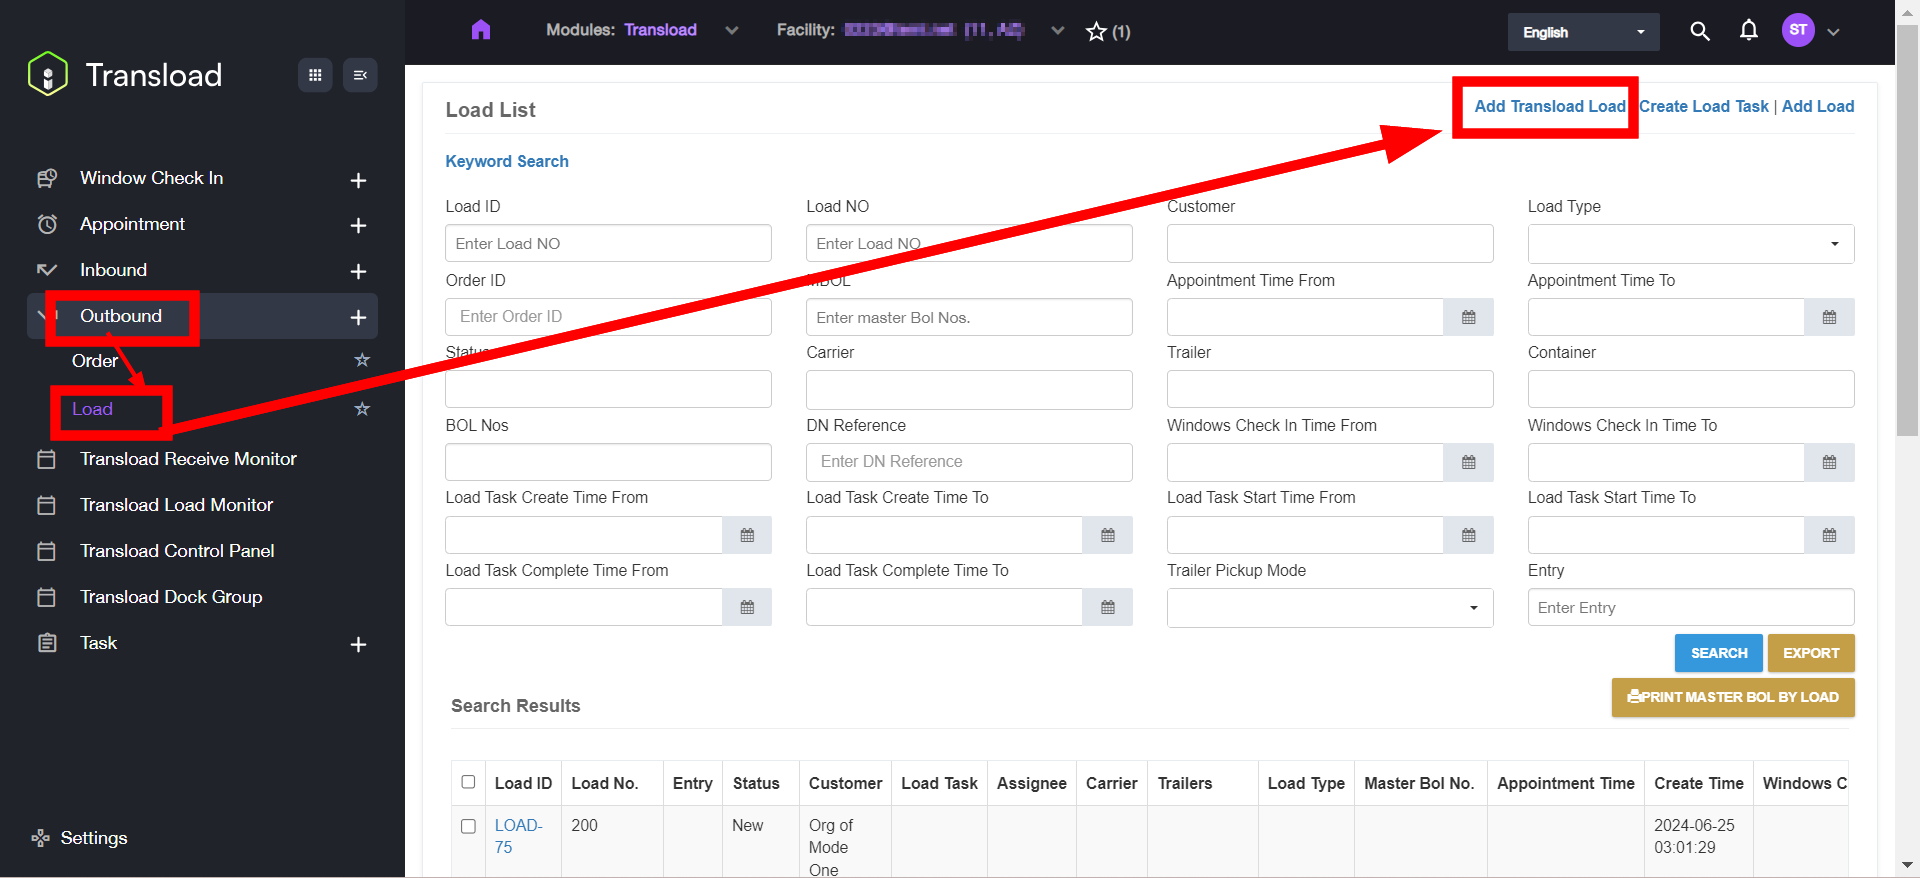
- In Item Transload, navigate to Outbound > Load and click Add Transload Load in the upper right corner.
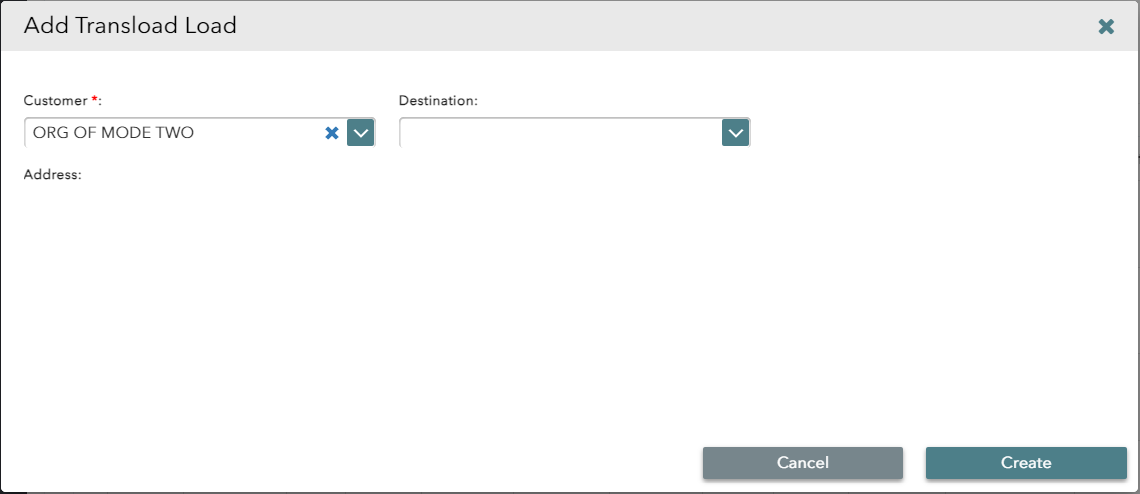
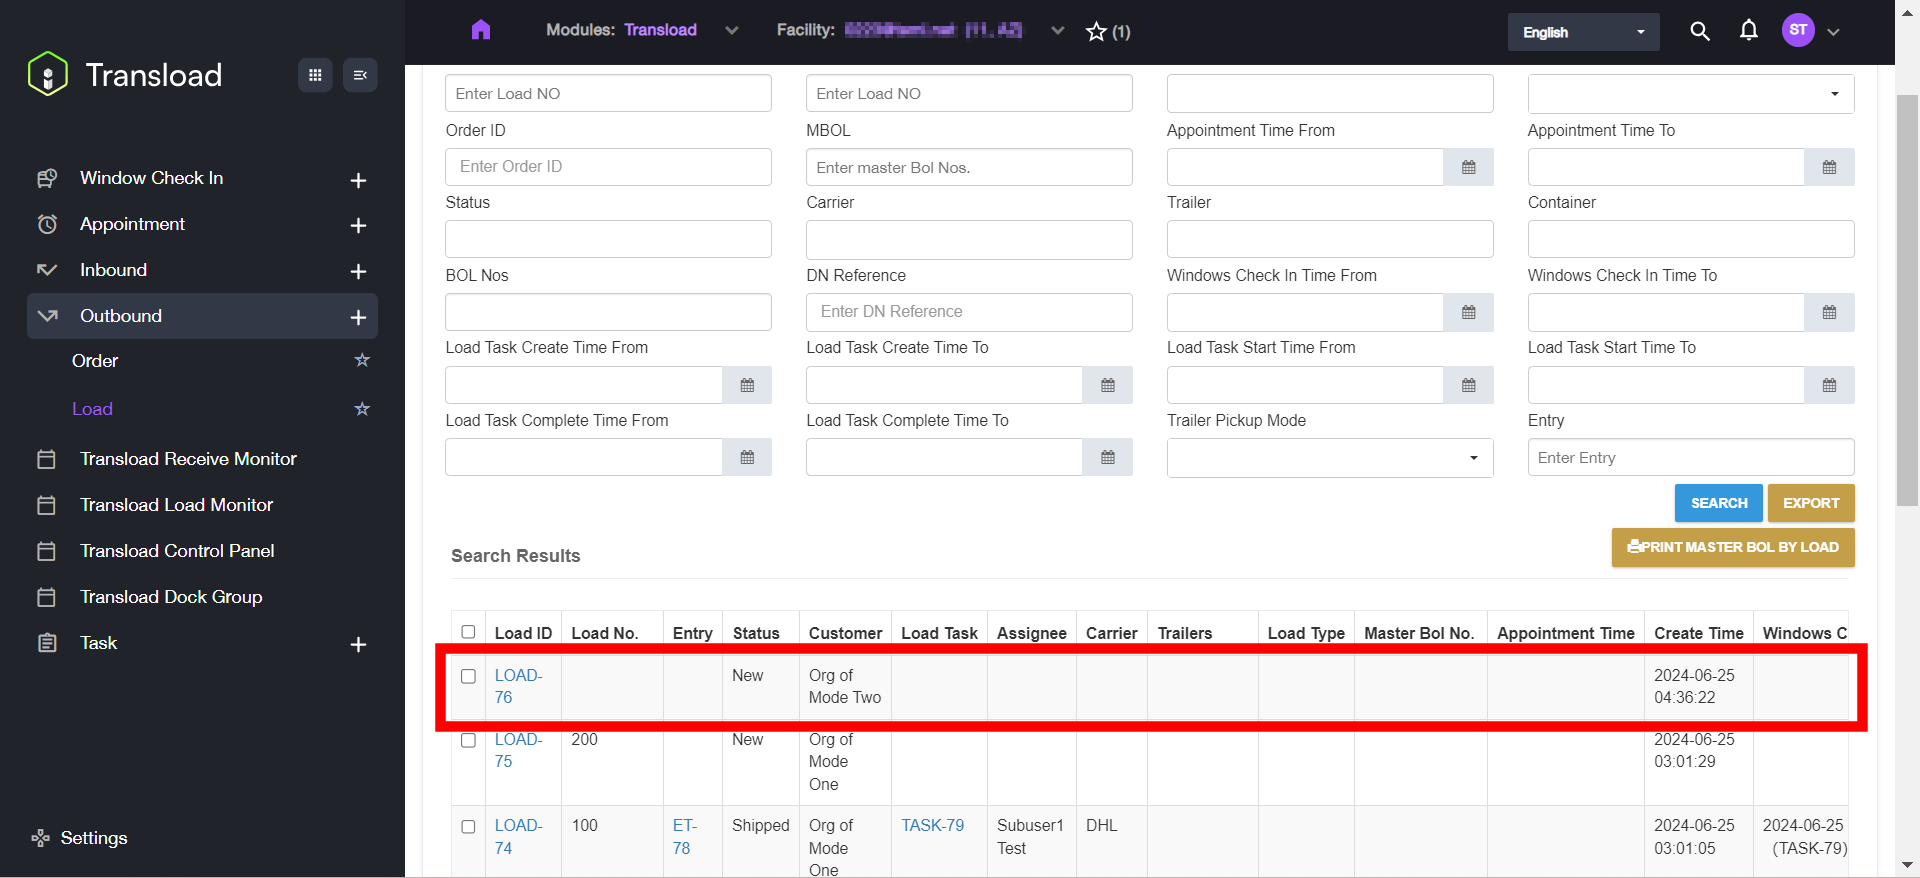
- In the popup dialog box, select the customer, i.e., the organization of this transload. "Destination" is optional for organizations of this Mode ("Open Scanning for Carton"). Then, click Create. The transload Load is created, and a corresponding outbound Order is also automatically created, which can be viewed in Outbound > Order.
-
Go to Window Check In > Entry List, create an entry, and finish window check-in with the Load ID from last step. A transload load task is created and a specific assignee is appointed for this task.
-
The assignee then finds and finishes the transload load task in the Transload app on the work phone. Refer to the following instructions.
a. Log into the Transload app on the work phone.
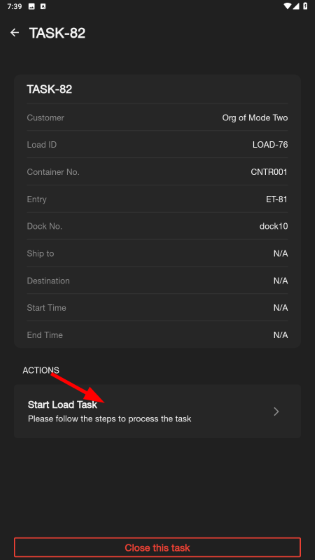
b. Go to Tasks > Transload Load Tasks, find the desired task, and tap the task ID.
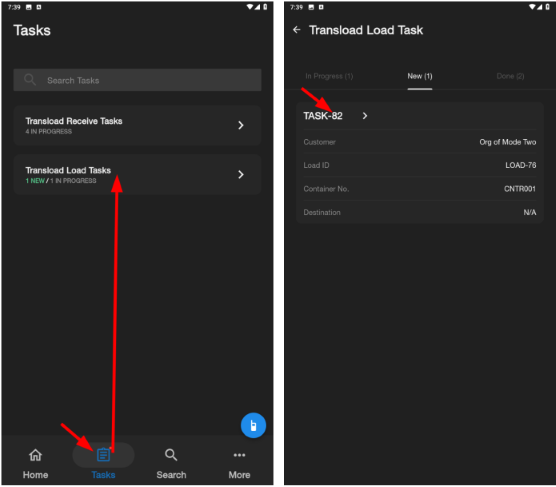
c. Tap Start Load Task.
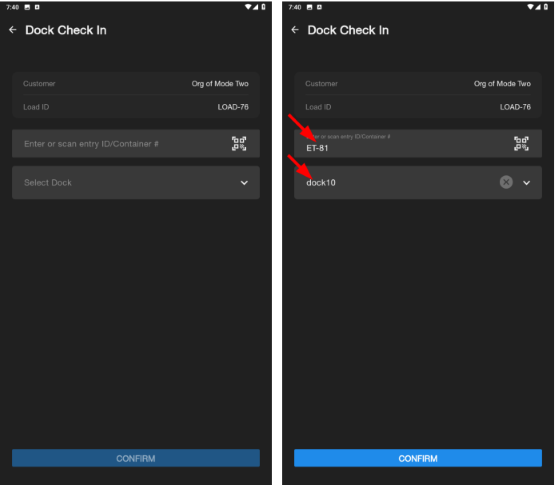
d. Enter or scan the Entry ID or Container No., select the dock No., and tap CONFIRM.
e. Tap the Load ID.
f. In the Work tab, scan or enter the location, and then scan or enter the cartons. The Load Qty is updated.
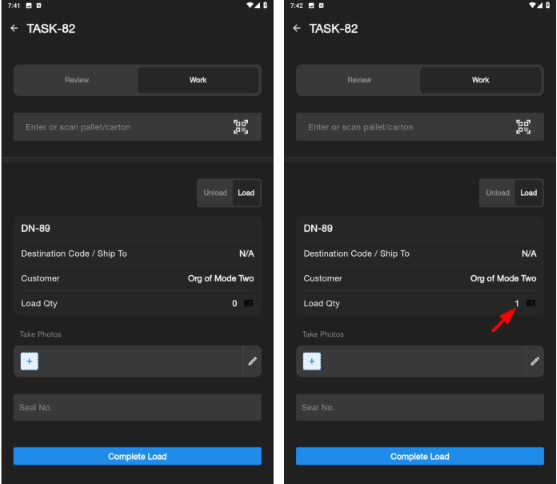
g. (Optional) If there is any damaged cartons or products found, tap the + icon to take photos of them. To unload any loaded cartons, tap Unload, select the cartons, and unload them.
h. Tap Complete Load when all the cartons are scanned.
i. Return to the previous page and tap Close this task.
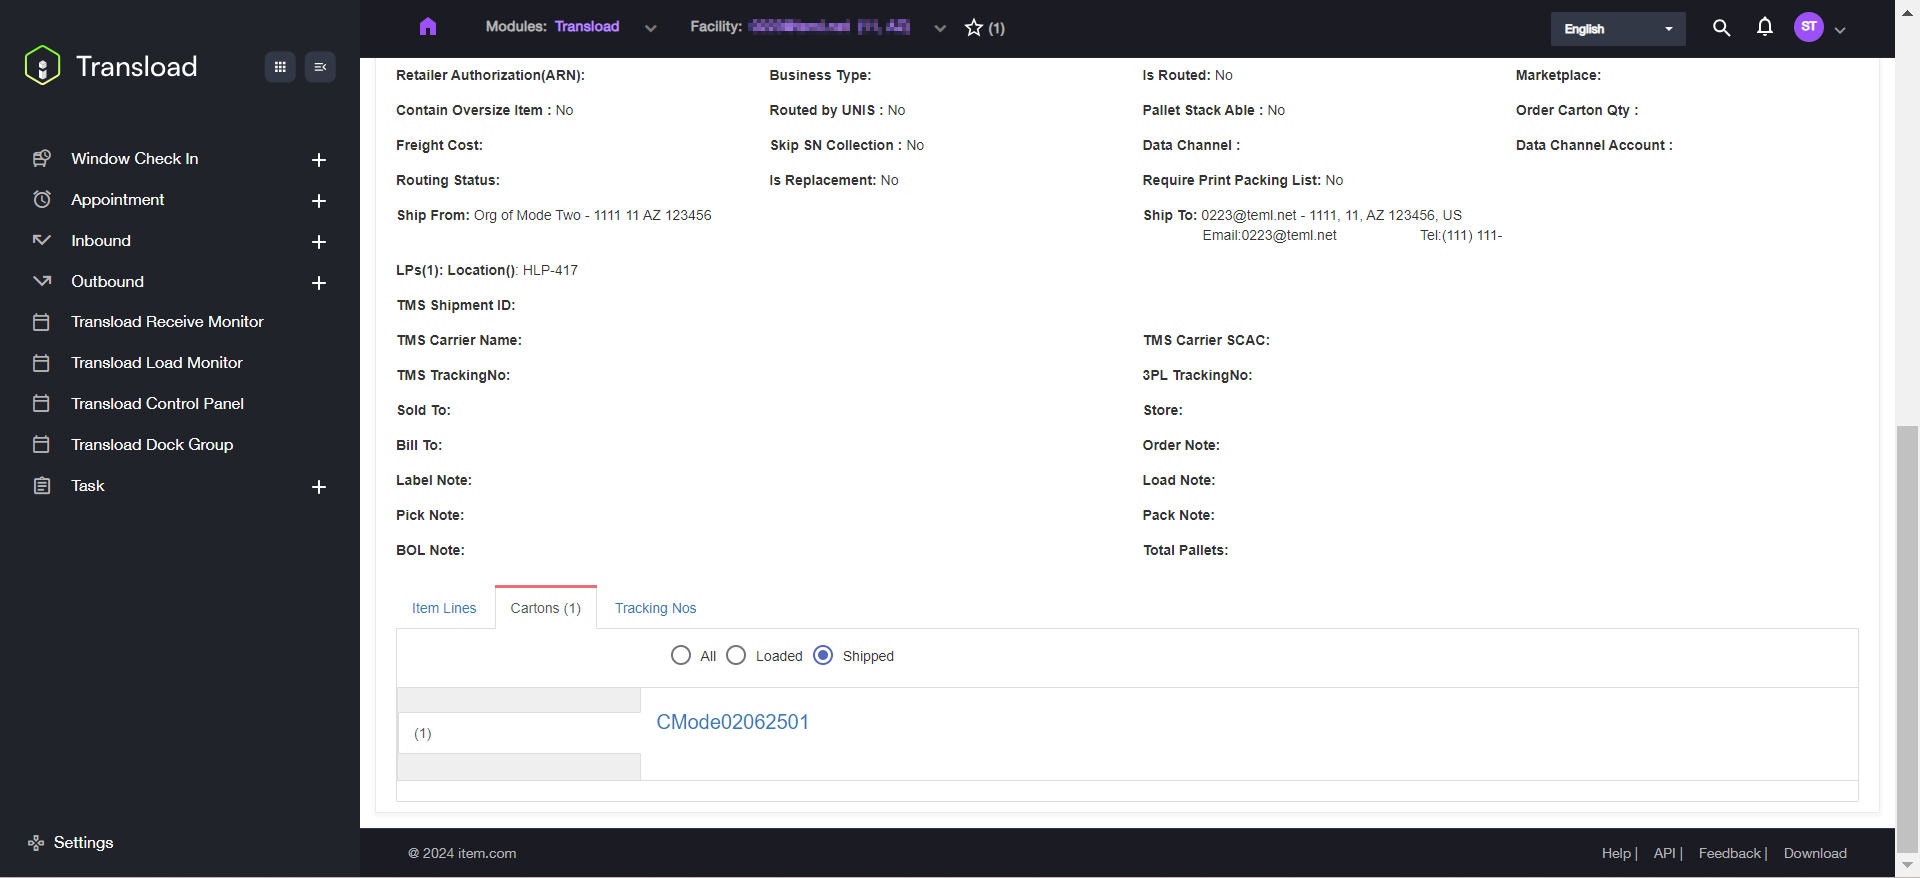
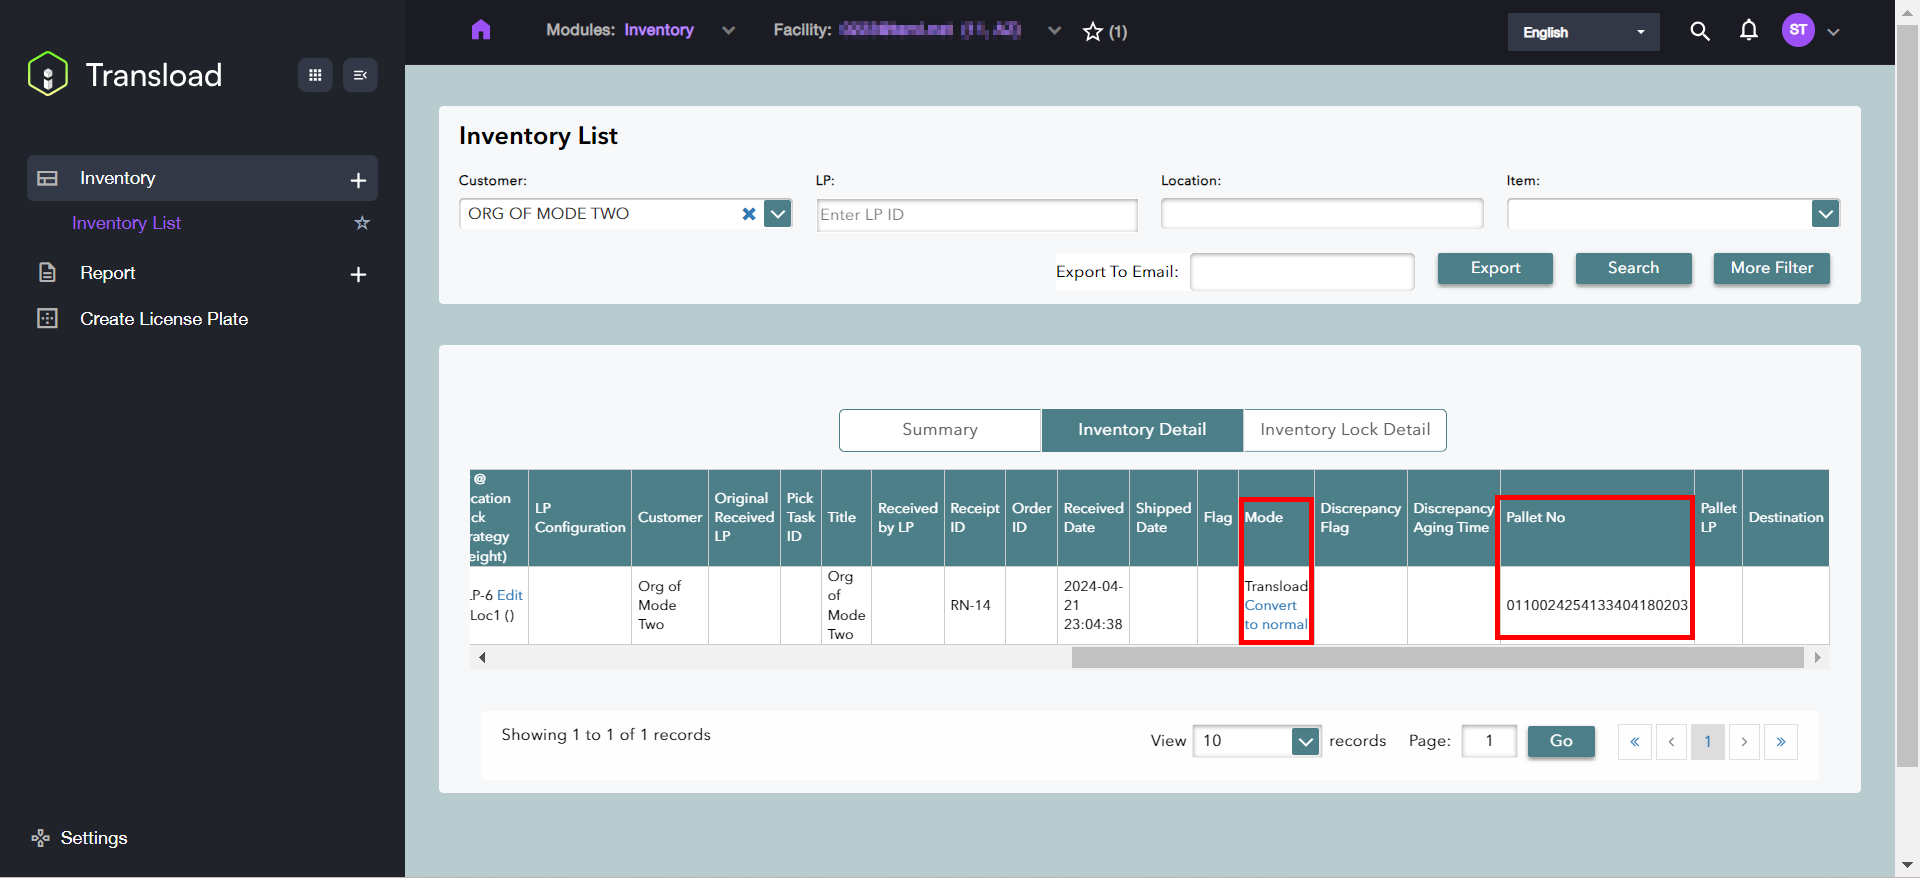
The transload load task is finished and the status of both the Load and the Order will be marked as Shipped. The inventories of the products are updated accordingly, such as the quantity, the pallet number, etc.