Prepull + Live Unload
In the drayage industry, Prepull + Live Unload Routing is a strategy used to optimize transplantation efficiency. It helps reduce port congestion, minimize demurrage fees and maintain precise delivery schedules, especially for time-sensitive shipments.
It involves prepulling a container from a port or terminal before its scheduled delivery and temporarily storing it at a yard or staging area. Then the container is transported to the destination, where it is unloaded immediately while the truck waits.
Prepull + Live Unload routing template contains two Moves, Pickup Container and Drop Container are involved in Move 1, Pickup Container, Delivery Container and Return Container are involved in Move 2.
This article provides the guidance on how to complete the load process with this routing template.
Operation on Move 1
Dispatch Load on Web
This section provides the structure on how to edit the load information and arrange driver assignment.
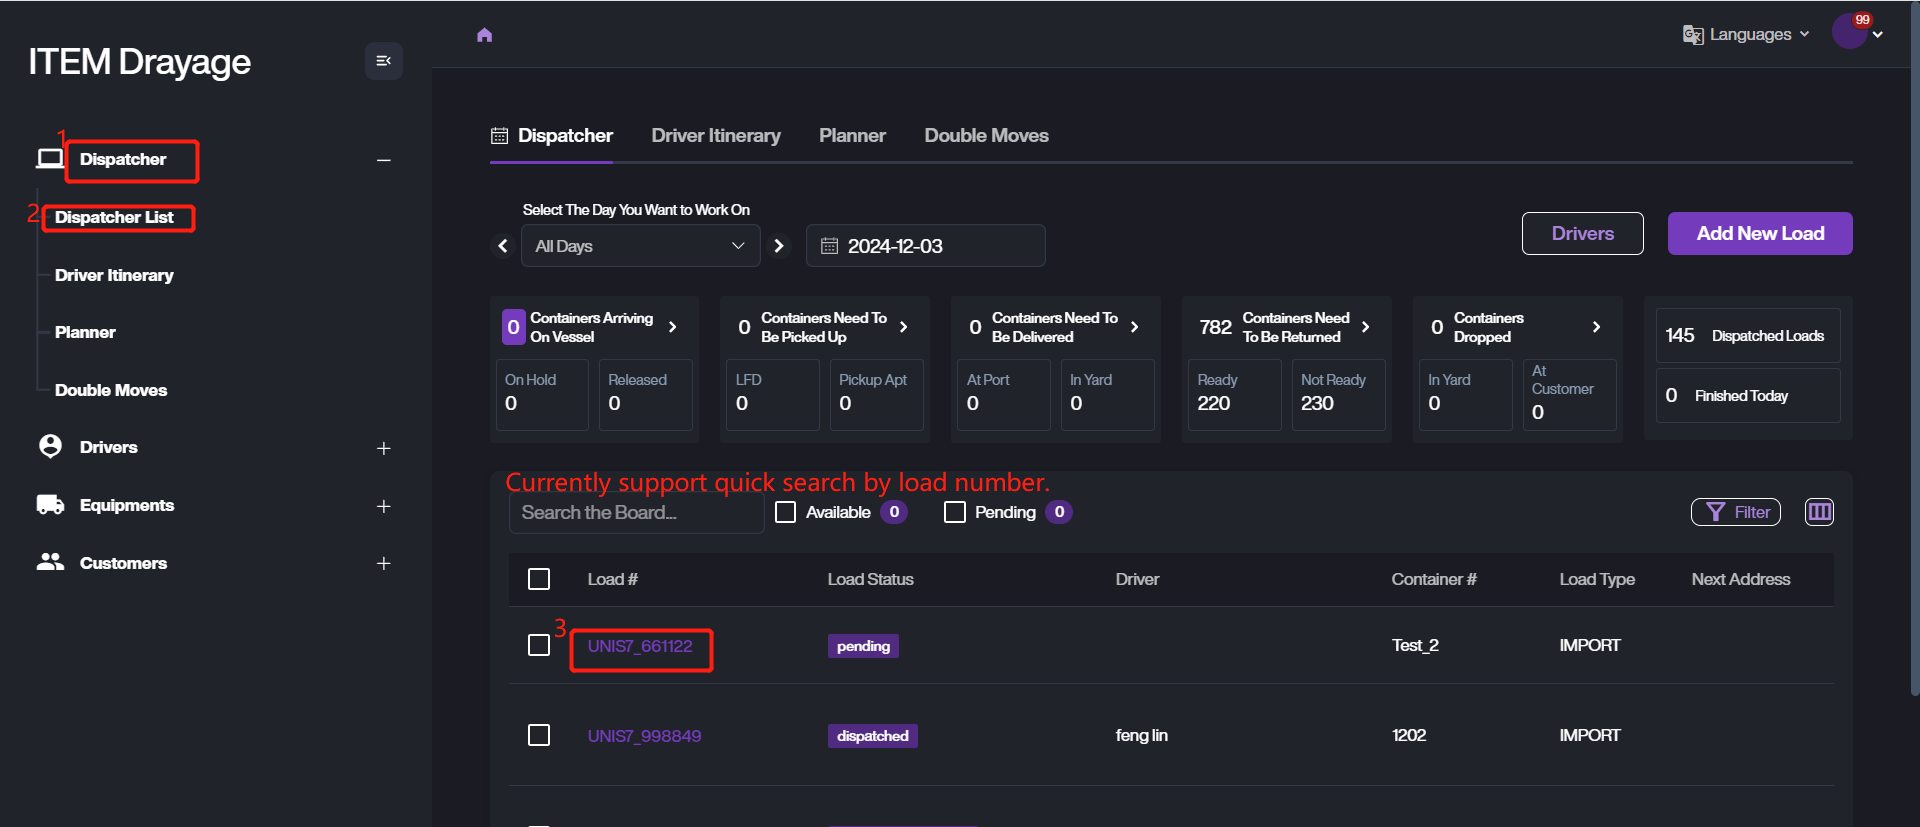
- Navigate to Dispatcher > Dispatcher List, confirm the target load and click Load # into details page. It supports quick searching via Load #.
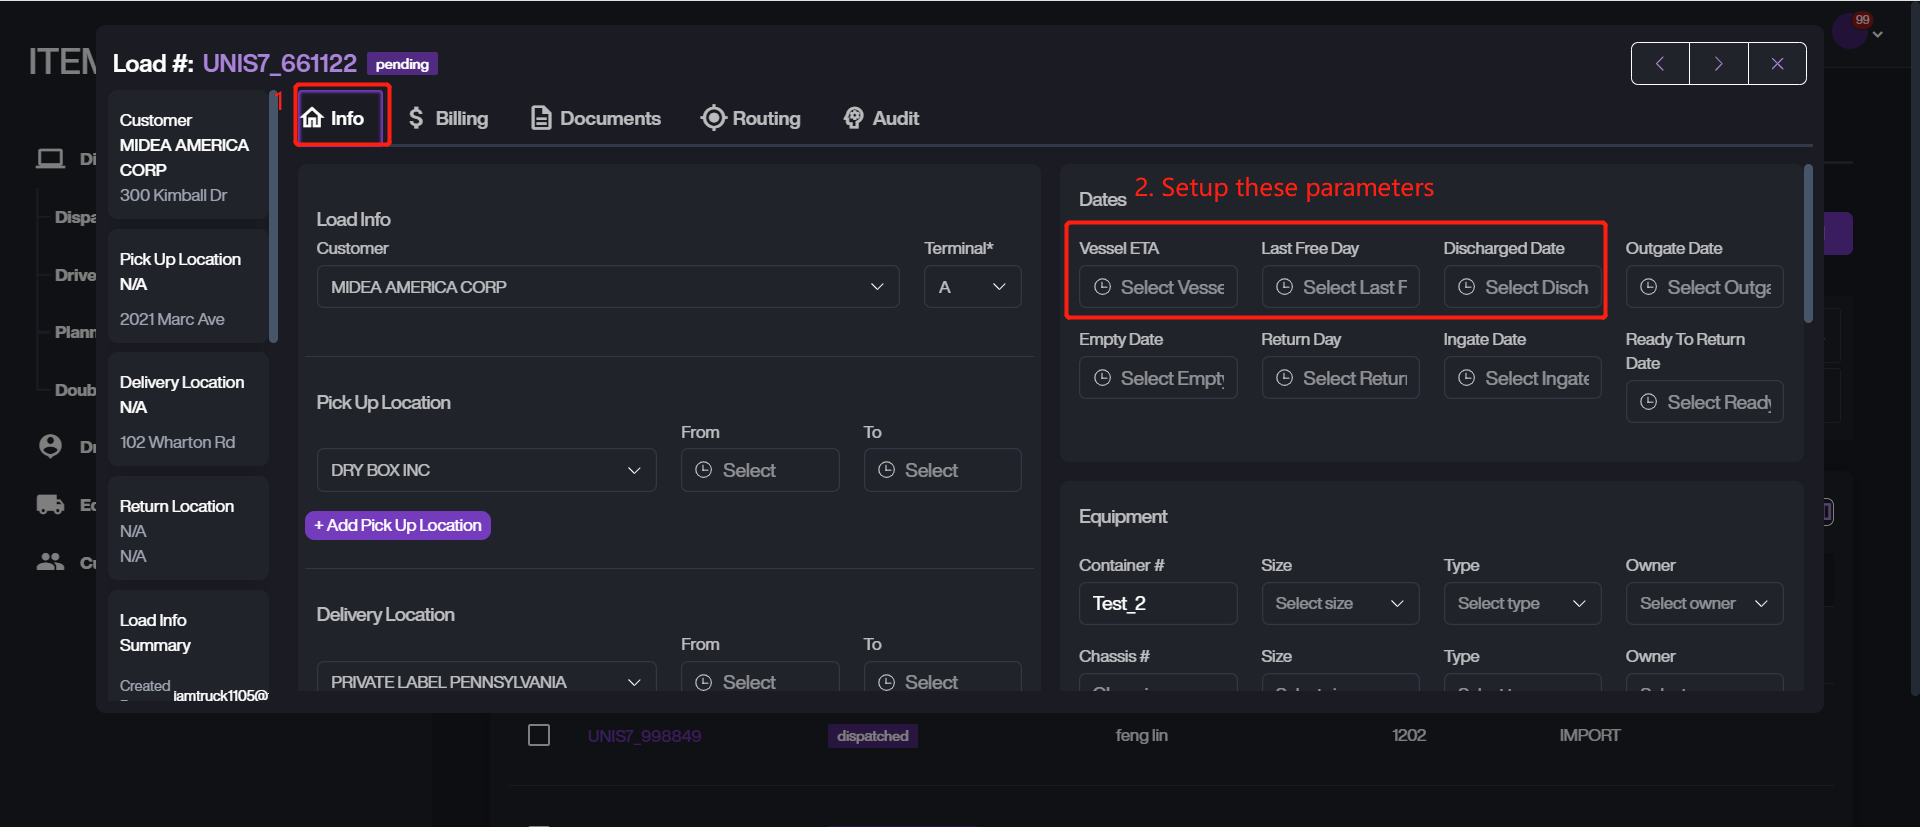
- Keep on Info Tab, update the Vessel ETA, Last Free Day and Discharged Date. More field details, please refer to this article (opens in a new tab).
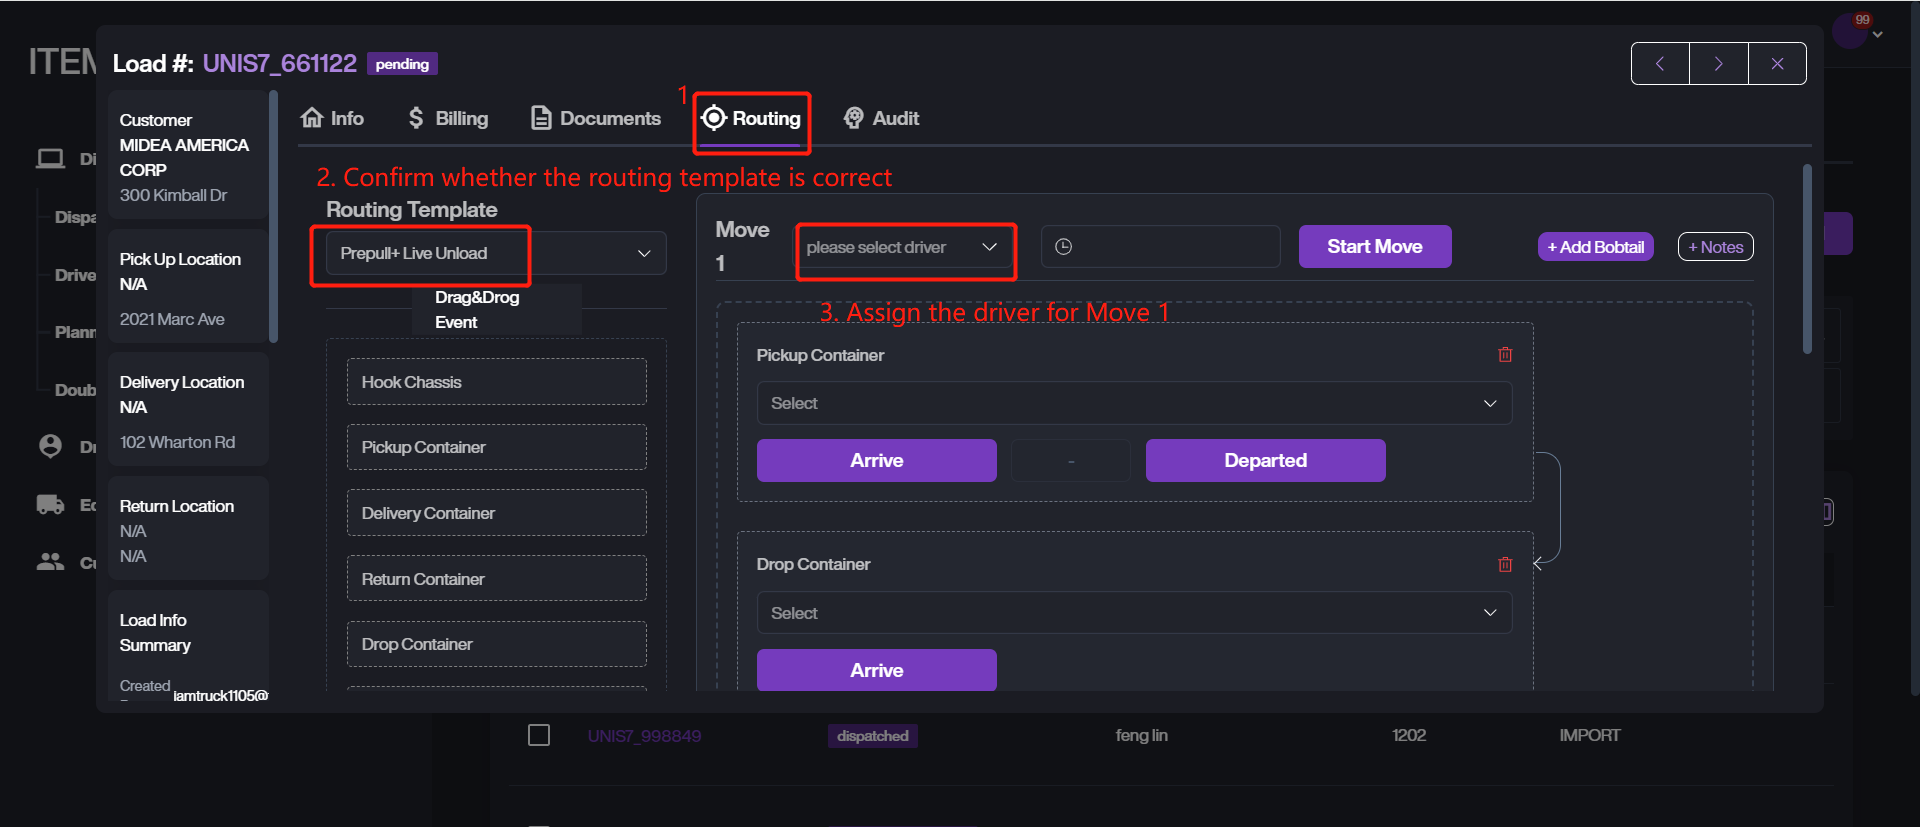
- Click Routing tab, confirm the Routing Template then to select a driver to execute Move 1.
Accept and Execute Move 1 on App
This section explains how the driver confirms the acceptance and executes the task on mobile app.
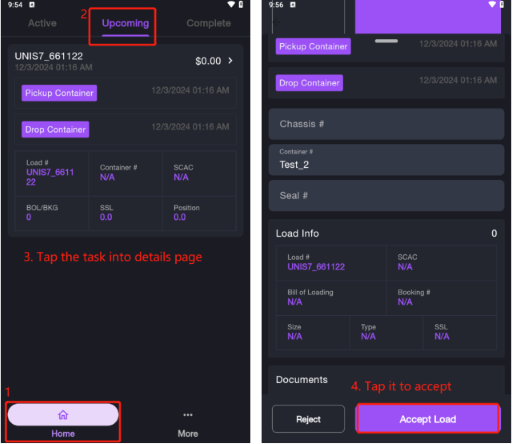
- Go to Home > Upcoming to view all assigned tasks .
- Confirm the target task, tap the task into details page to confirm the acceptance.
- Tap Accept Load button to accept it. Otherwise, tap Reject button. Tap YES to continue.
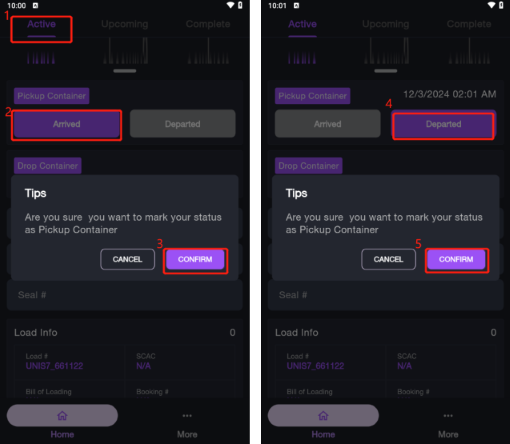
- Go to Active tab, it displays all accepted loads in this page.
- Start the first event: Pickup Container. When you arrived the pickup location, please tap Arrived button to update the status. Tap CONFIRM to process.
- Tap Departed when you drive to next location.
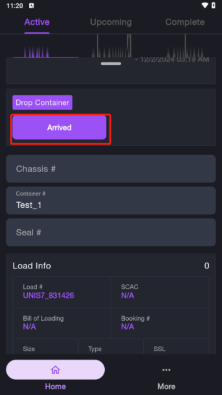
- Continue second event: Drop Container. Tap Arrived to update the status if you arrived in delivery destination.
When you complete the entire task, the load will been displayed under Complete tab.
Operation on Move 2
Complete Drive Assignment for Move 2 on Web
When prepull task is completed by driver, the dispatcher should continue arranging driver for Move 2 on web platform.
- Go to Dispatcher > Dispatcher List, click Load # to access details page of the target load. You can find the load status has changed to dropped.
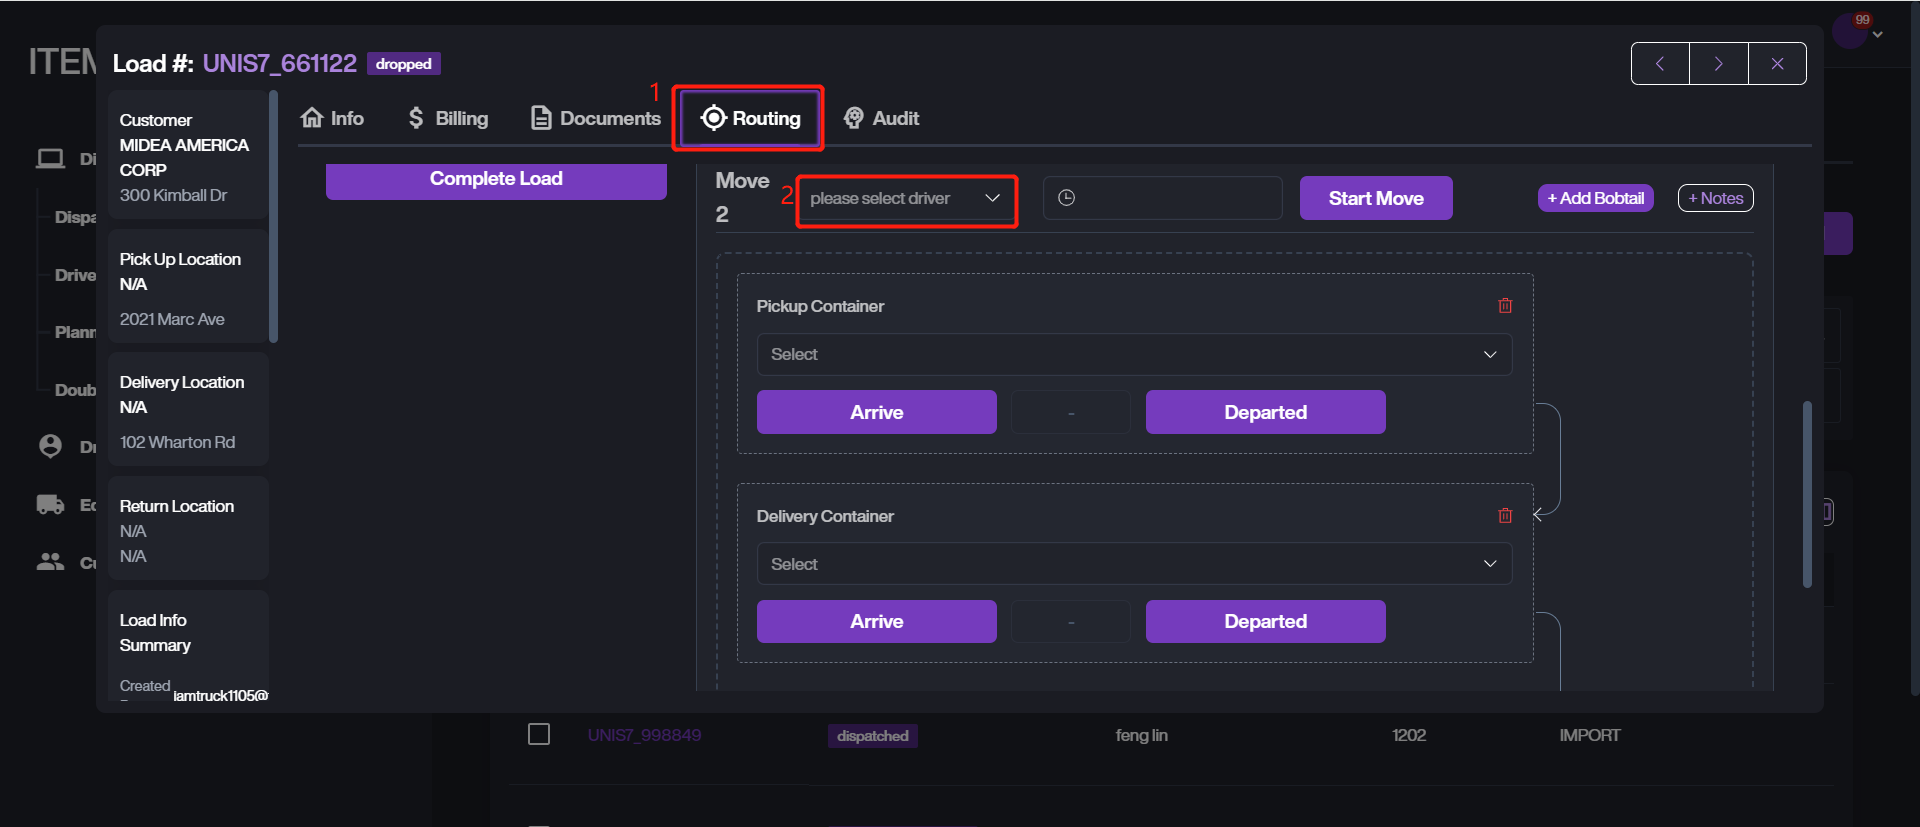
- Go to Routing tab, select one driver to execute Move 2.
Execute Move 2 on App
This section explains the work flow to execute Move 2 on driver app.
- Navigate to Home > Upcoming, confirm the target task, then tap it into details page.
- Confirm the acceptance, please tap Accept Load button if you accept the task and agree to execute the task.
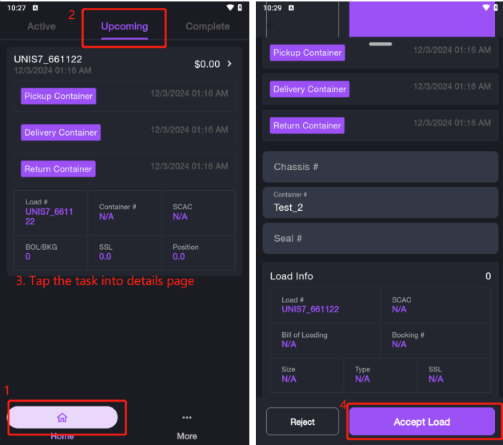
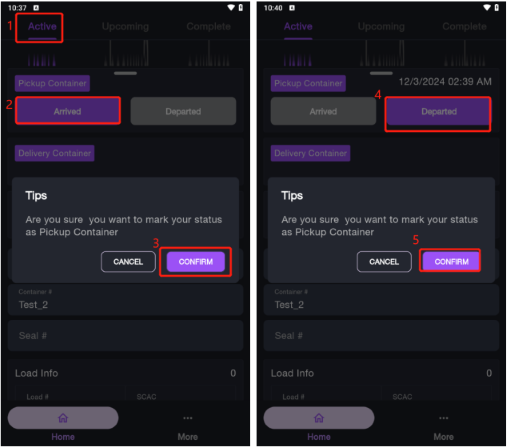
- Switch to Active tab, view progress and update task status here .
- Start the first event: Pickup Container. Tap Arrived button when you arrived in the location to pickup container.
- Update the status via tapping Departed when you are driving to next destination.
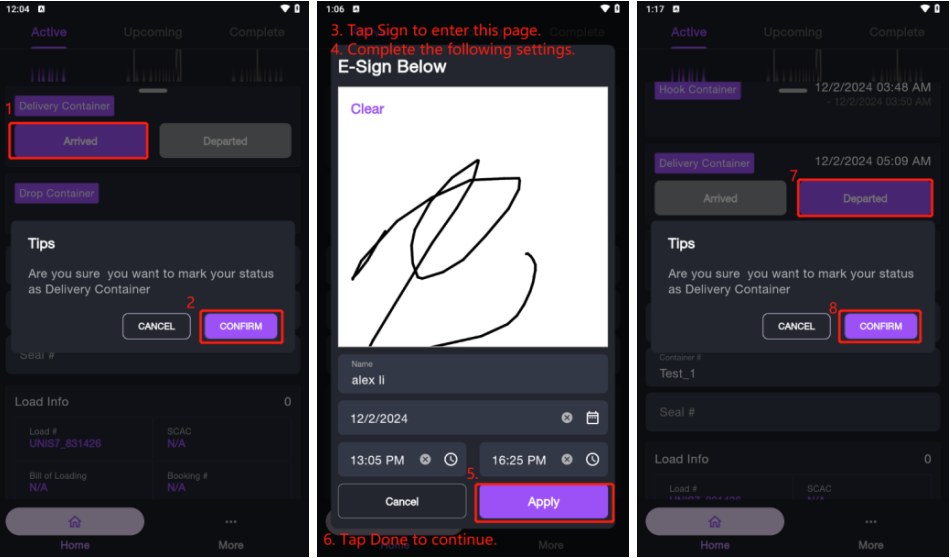
- Start the second event: Delivery Container. Mark the status as Arrived via tapping Arrived button, when arriving at the location.
- Tap Sign button to complete signing proof of delivery, configure the involved parameters then tap Apply to save and apply these data.
- Tap Done to continue the task.
- Update the status to Delivery Container if you left the delivery location via tapping Departed button.
- Start the third event: Return Container. When arriving the location to return the container, please tap the Arrived button to update status.
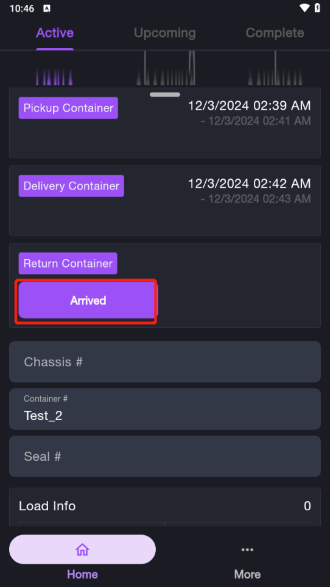
All tasks have been completed, the load status will be updated to arrived at return load automatically.
Complete Load on Web
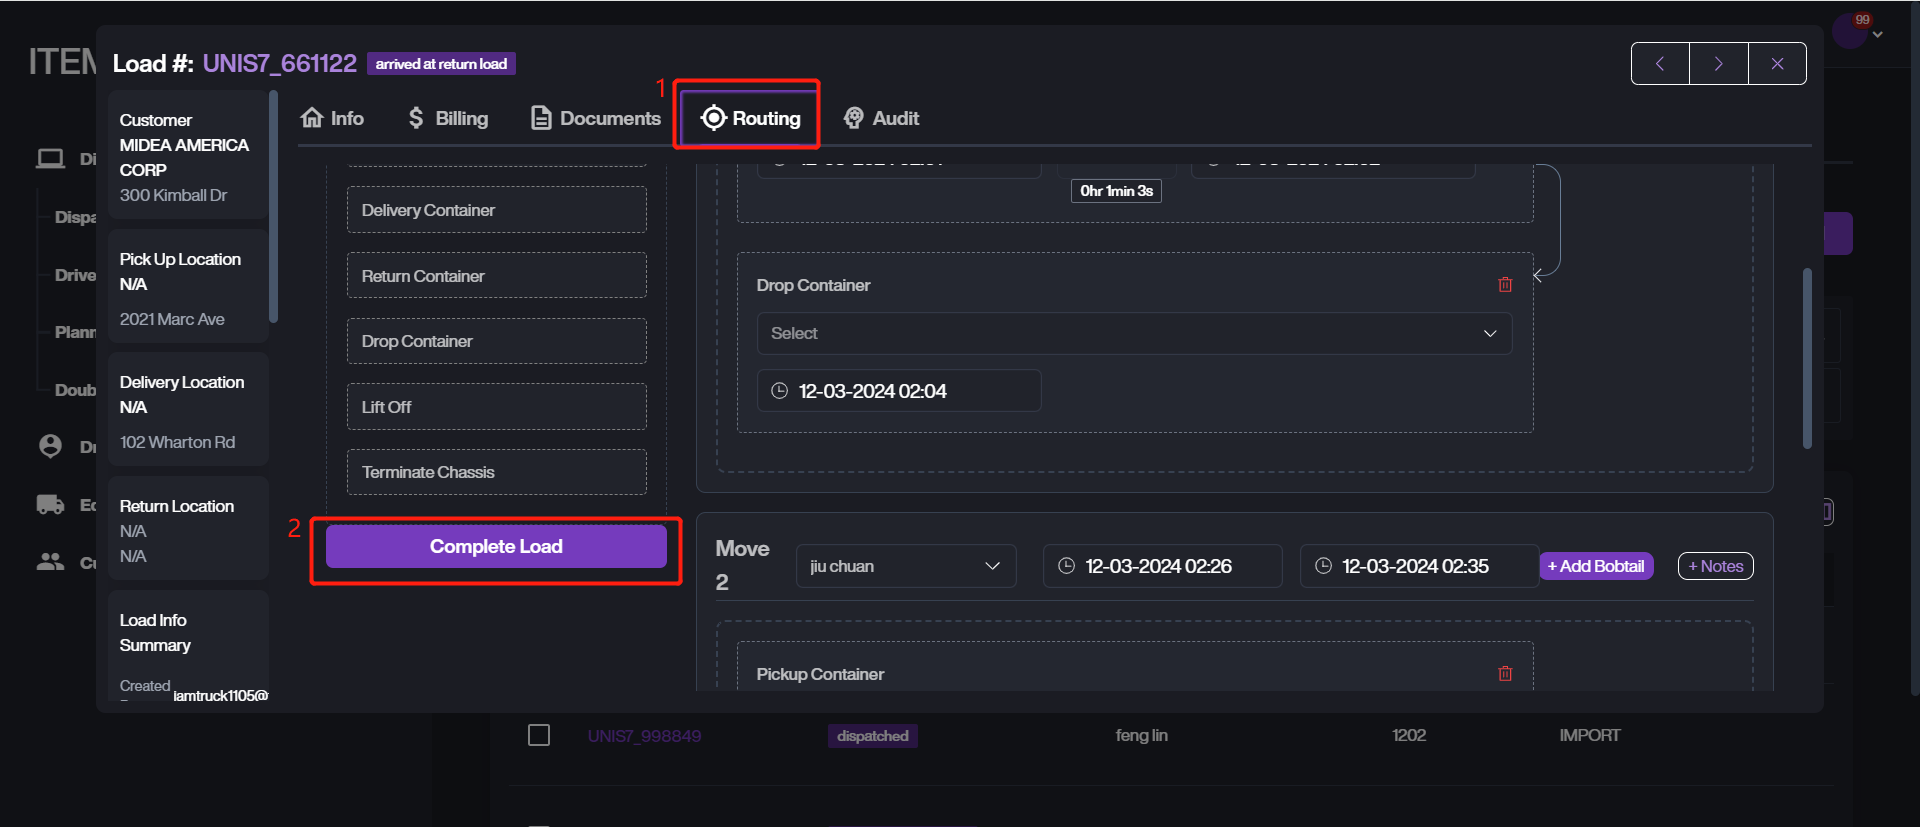
After all moves completing, the dispatcher should check the process and confirm to complete the load on web. Here are the corresponding steps.
- Access the details page of the target load.
- Switch to Routing tab, check the process to confirm whether existing any issues.
- Click Complete Load if everything is correct.
