How to Build a Badge
This article introduces badge feature and how to build a badge on Pass.
Badge Introduction
Badge is similar to an unique employee’s digital ID card, which can be used for logging Item applications. Badge serves as a secure and convenient way for users to authenticate their identity and gain access various applications.
Users can simply login via scanning the badge on their mobile device, which streamline the login process and enhance security.
For iOS users, it supports to add the badge into their Apple Wallet for login.
How to Generate a Badge
Note: only admin user can generate the badge for the employees.
Preconditions: installed and run Print Hub Client already. This artcile is for the reference: Printing Settings (opens in a new tab).
-
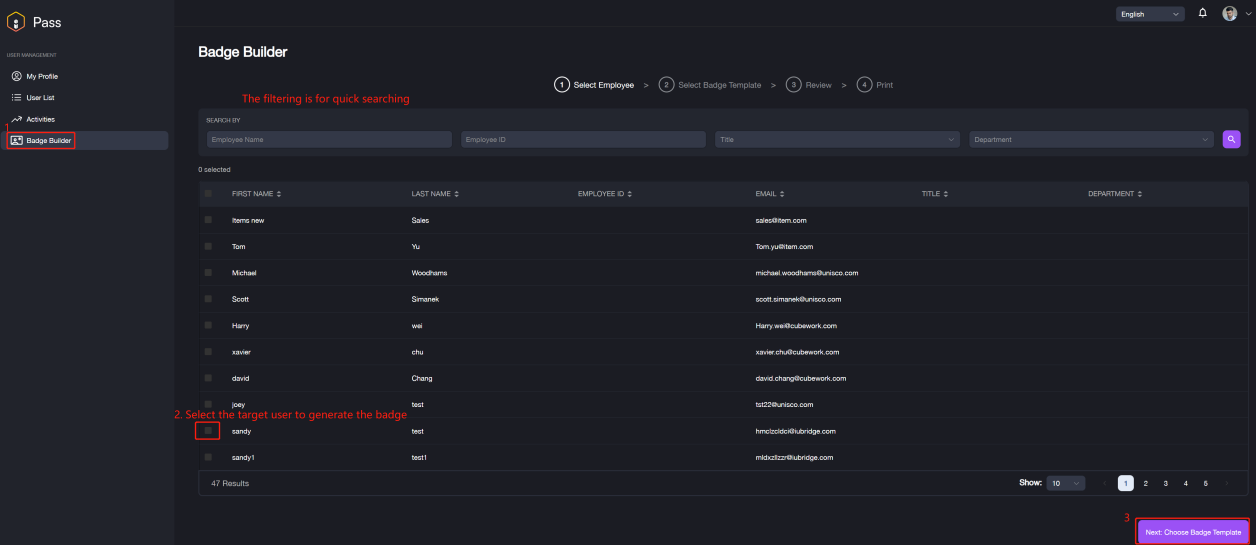
Navigate to Badge Builder, here displays the user list. It supports to simply search by filter some fields such as Employee Name, Employee ID, Title or Department.
-
Select the target user to generate the badge, then click Next:Choose Badge Template button for next step.
-
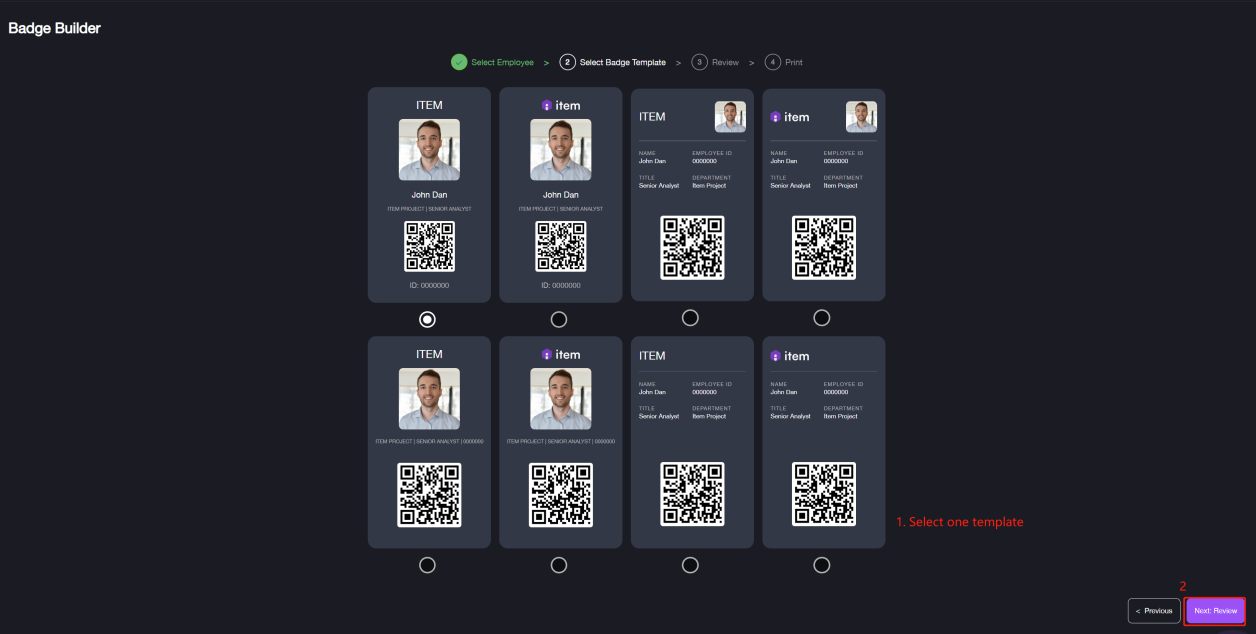
Select one badge template from the template lists, then click Next: Review button to continue.
-
Review the badge and click Next: Print after complete reviewing.
-
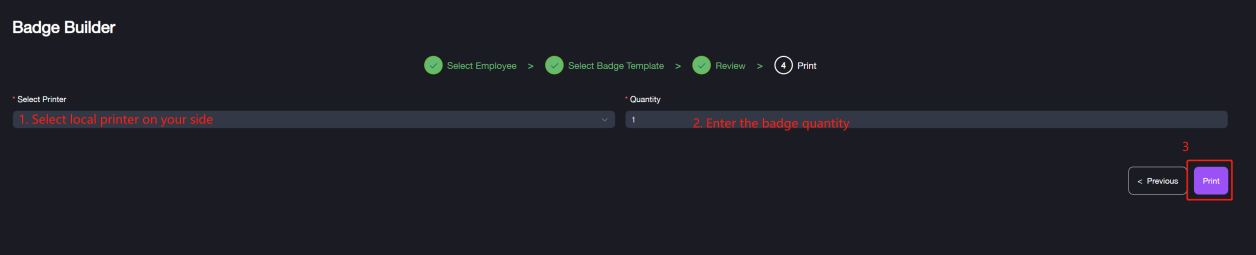
Select the printer, setup badge quantity. Then click Print button to complete the printing.
It supports to disable badge via clicking on Disable Badge on the User List. Please note the badge will be invalid if disabled and can not be used for login. If you want use the feature again, please contact the admin user to generate a new one.