Sales Order Routing
Sales Order Routing acts as the decision engine for your fulfillment. It determines which warehouse will ship an order and how that order is packed (single vs. split shipments).
Prerequisites
- WMS Connection: Requires an active connection to a Warehouse Management System (e.g., Item WMS, UNIS Wise) to view real-time inventory and facility data.
- Facility Setup: Ensure your warehouses are correctly configured in WMS and with Zip Codes and Country codes if using geographic routing.
Once the warehouse is identified, these General Rules control how the order is released and packaged. Follow the steps below to configure order routing rules.
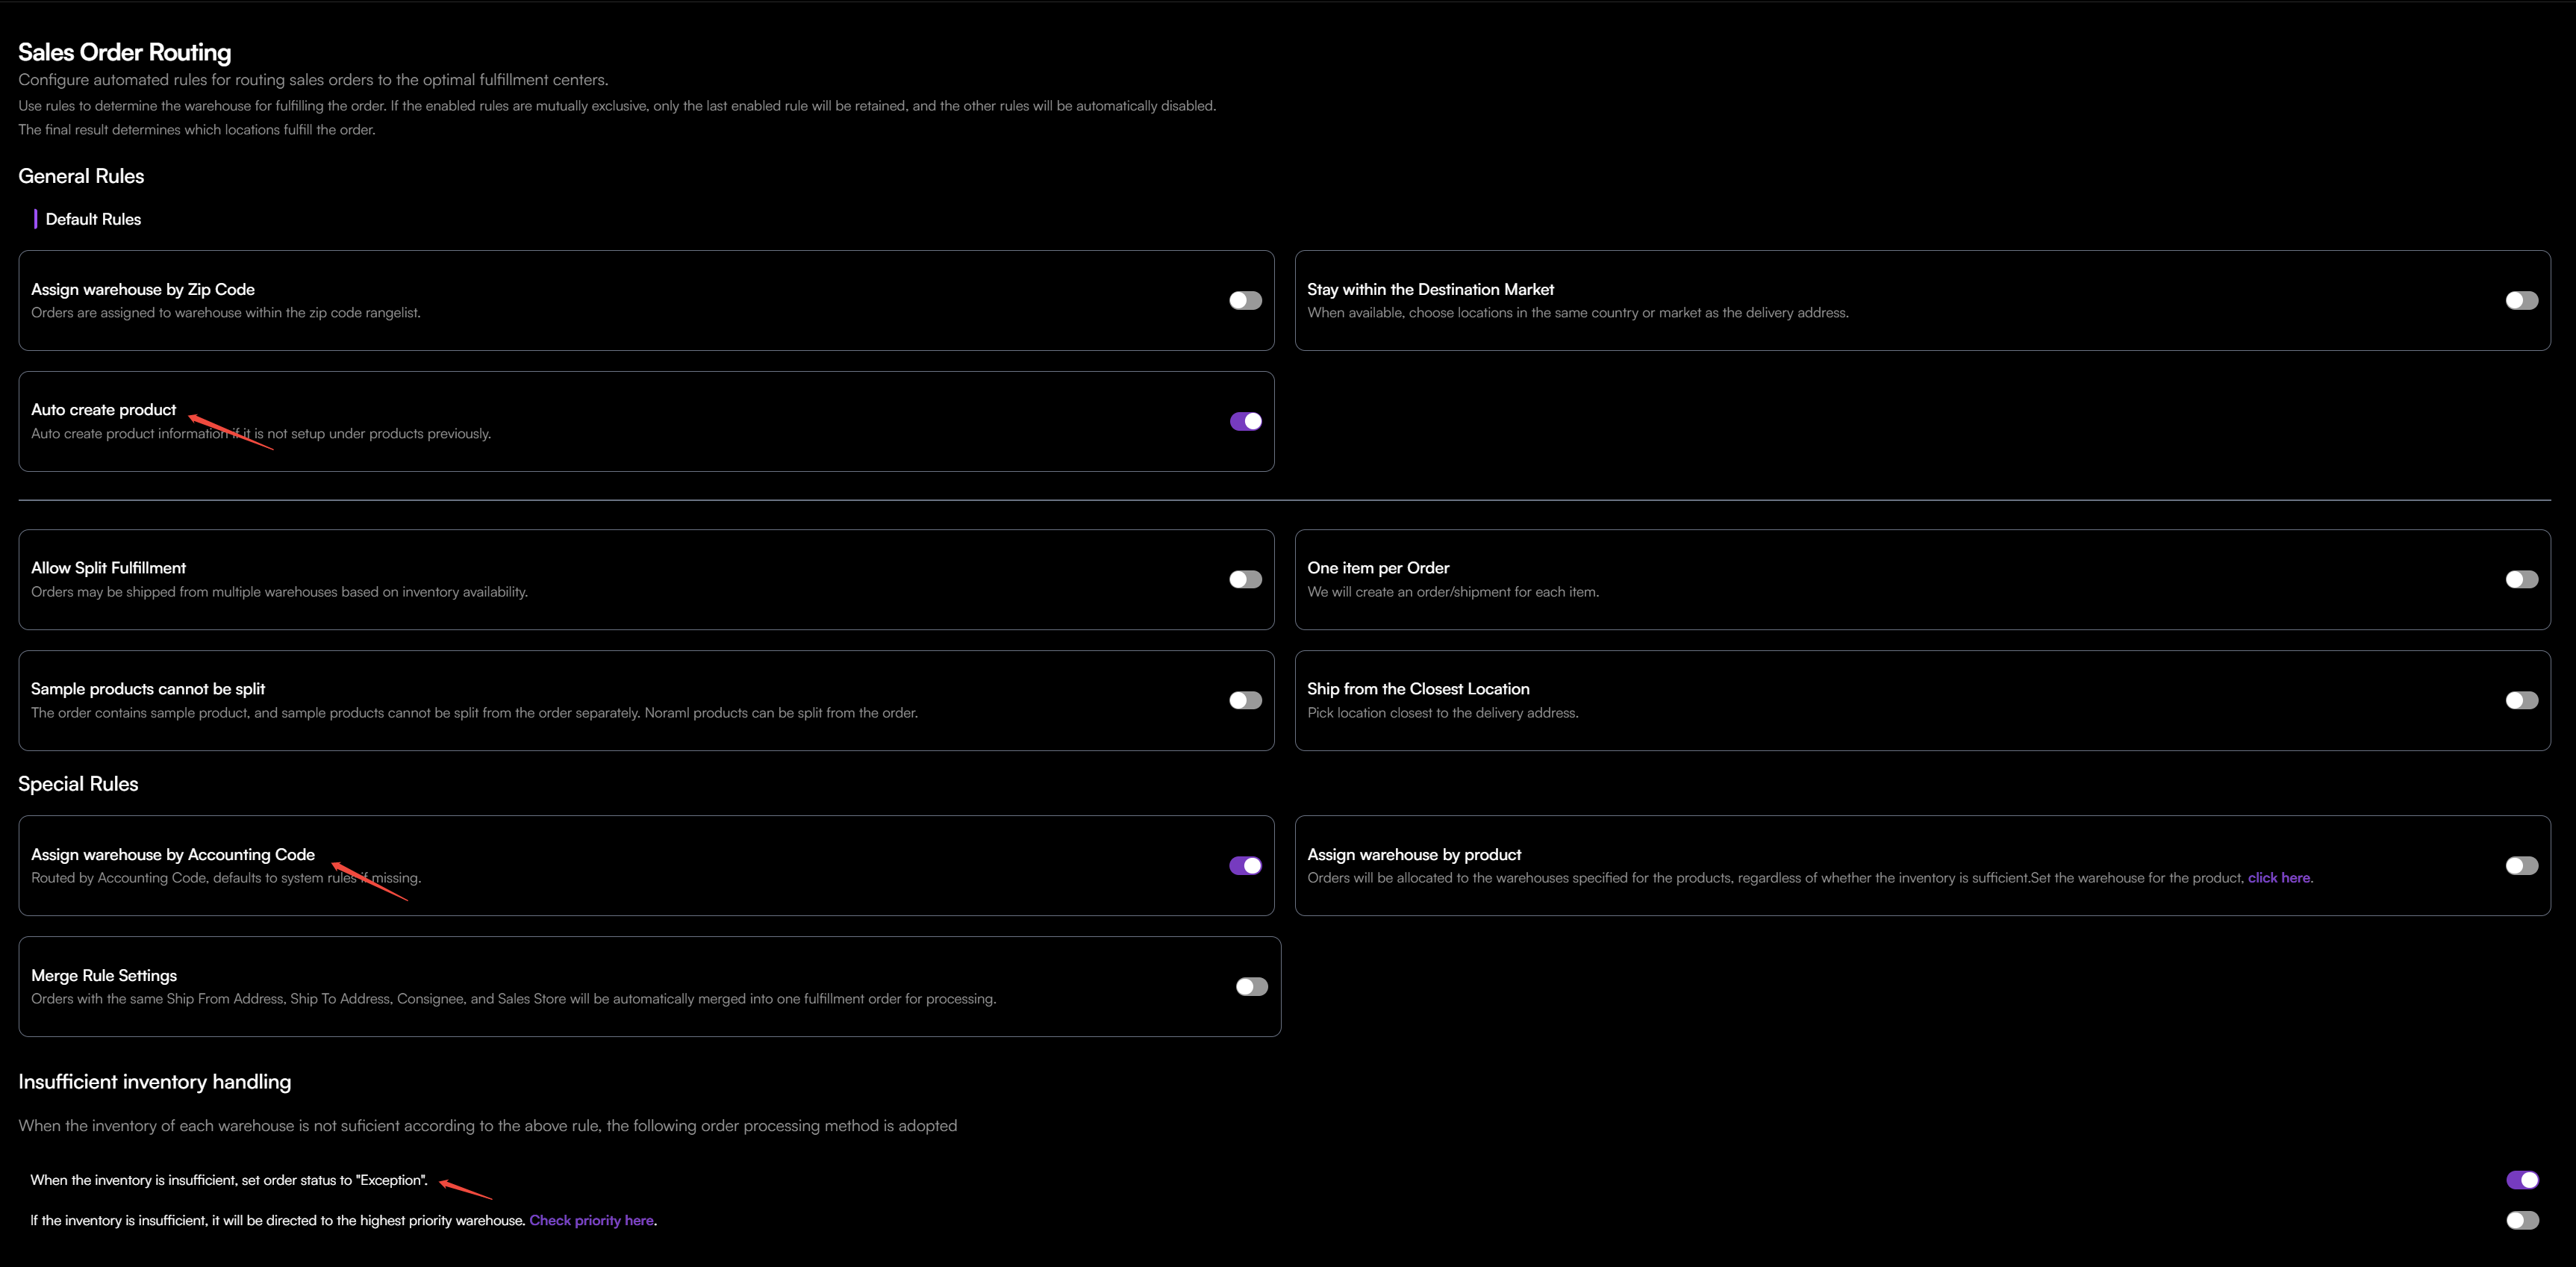
Step 1: Set High-Priority Overrides (Direct Assignment)
The system always checks these Special Rules first. If an order matches a rule here, it is immediately routed to the specific warehouse, ignoring all distance or geographic settings.
| Rule | Function |
|---|---|
| Assign warehouse by Product | Forces specific items (e.g., Hazmat, Oversized) to always ship from their designated facility, regardless of the customer's location. |
| Assign warehouse by Accounting Code | Maps a specific sales channel or business unit to a specific WMS facility code. Note: Defaults to system rules if the accounting code is missing. |
Step 2: Define General Rules
| Rule | Function |
|---|---|
| Merge Rule Settings | Automatically combines multiple orders into a single fulfillment order if they share the same Ship From Address, Ship To Address, Consignee, and Sales Store. |
| Assign Warehouse by ZIP Code | Routes orders to warehouses within a defined ZIP code range. Ideal for strict regional territories. |
| Stay within the Destination Market | Ensures orders are fulfilled from warehouses located in the same country or market as the delivery address (e.g., US orders stay in US warehouses). |
| Ship from the closest location | If no Zip Code or Market rule is met, the system calculates the physical distance from the shipping address to all available warehouses and selects the nearest one. |
Step 3: Define Packing & Splitting Strategy
| Rule | Strategy / Impact |
|---|---|
| Auto Create Product | Leave Enabled. Automatically creates product information if the item does not yet exist under Products, preventing unnecessary "Missing Product" exceptions. |
| Allow Split Fulfillment | ON: If the selected warehouse cannot fill the entire order, the system is allowed to ship available items from Warehouse A and the rest from Warehouse B. OFF: The system will only route the order if a single warehouse has 100% of the items. |
| Sample Products Cannot Be Split | Ensures that orders containing sample products remain as one shipment. |
| One Item per Order | Forces each item in a sales order to be fulfilled as a separate shipment. Note: This cannot be enabled if Sample Products Cannot Be Split is on. |
Step 4: Configure Exception Handling
Define the safety net for orders that cannot be fulfilled (e.g., Stock is 0 in all valid warehouses).
- Go to Insufficient inventory handling.
- Enable one of the following options:
- Set order status to Exception (Default is On): The order pauses in the Exception tab. This allows your team to investigate manually rather than shipping a partial order or backordering blindly.
- Route to highest priority warehouse: Enable this only if you want to force a backorder in your primary warehouse, regardless of stock levels.
Step 5: Trace Routing Results
The system provides two distinct ways to audit results: a detailed Execution Report for successful allocations and an Exception Notification for failed orders.
Scenario A: Analyzing a Successful Allocation
If an order is successfully routed, the system generates a detailed execution log. This log traces how the system filtered multiple warehouses down to the final choice.
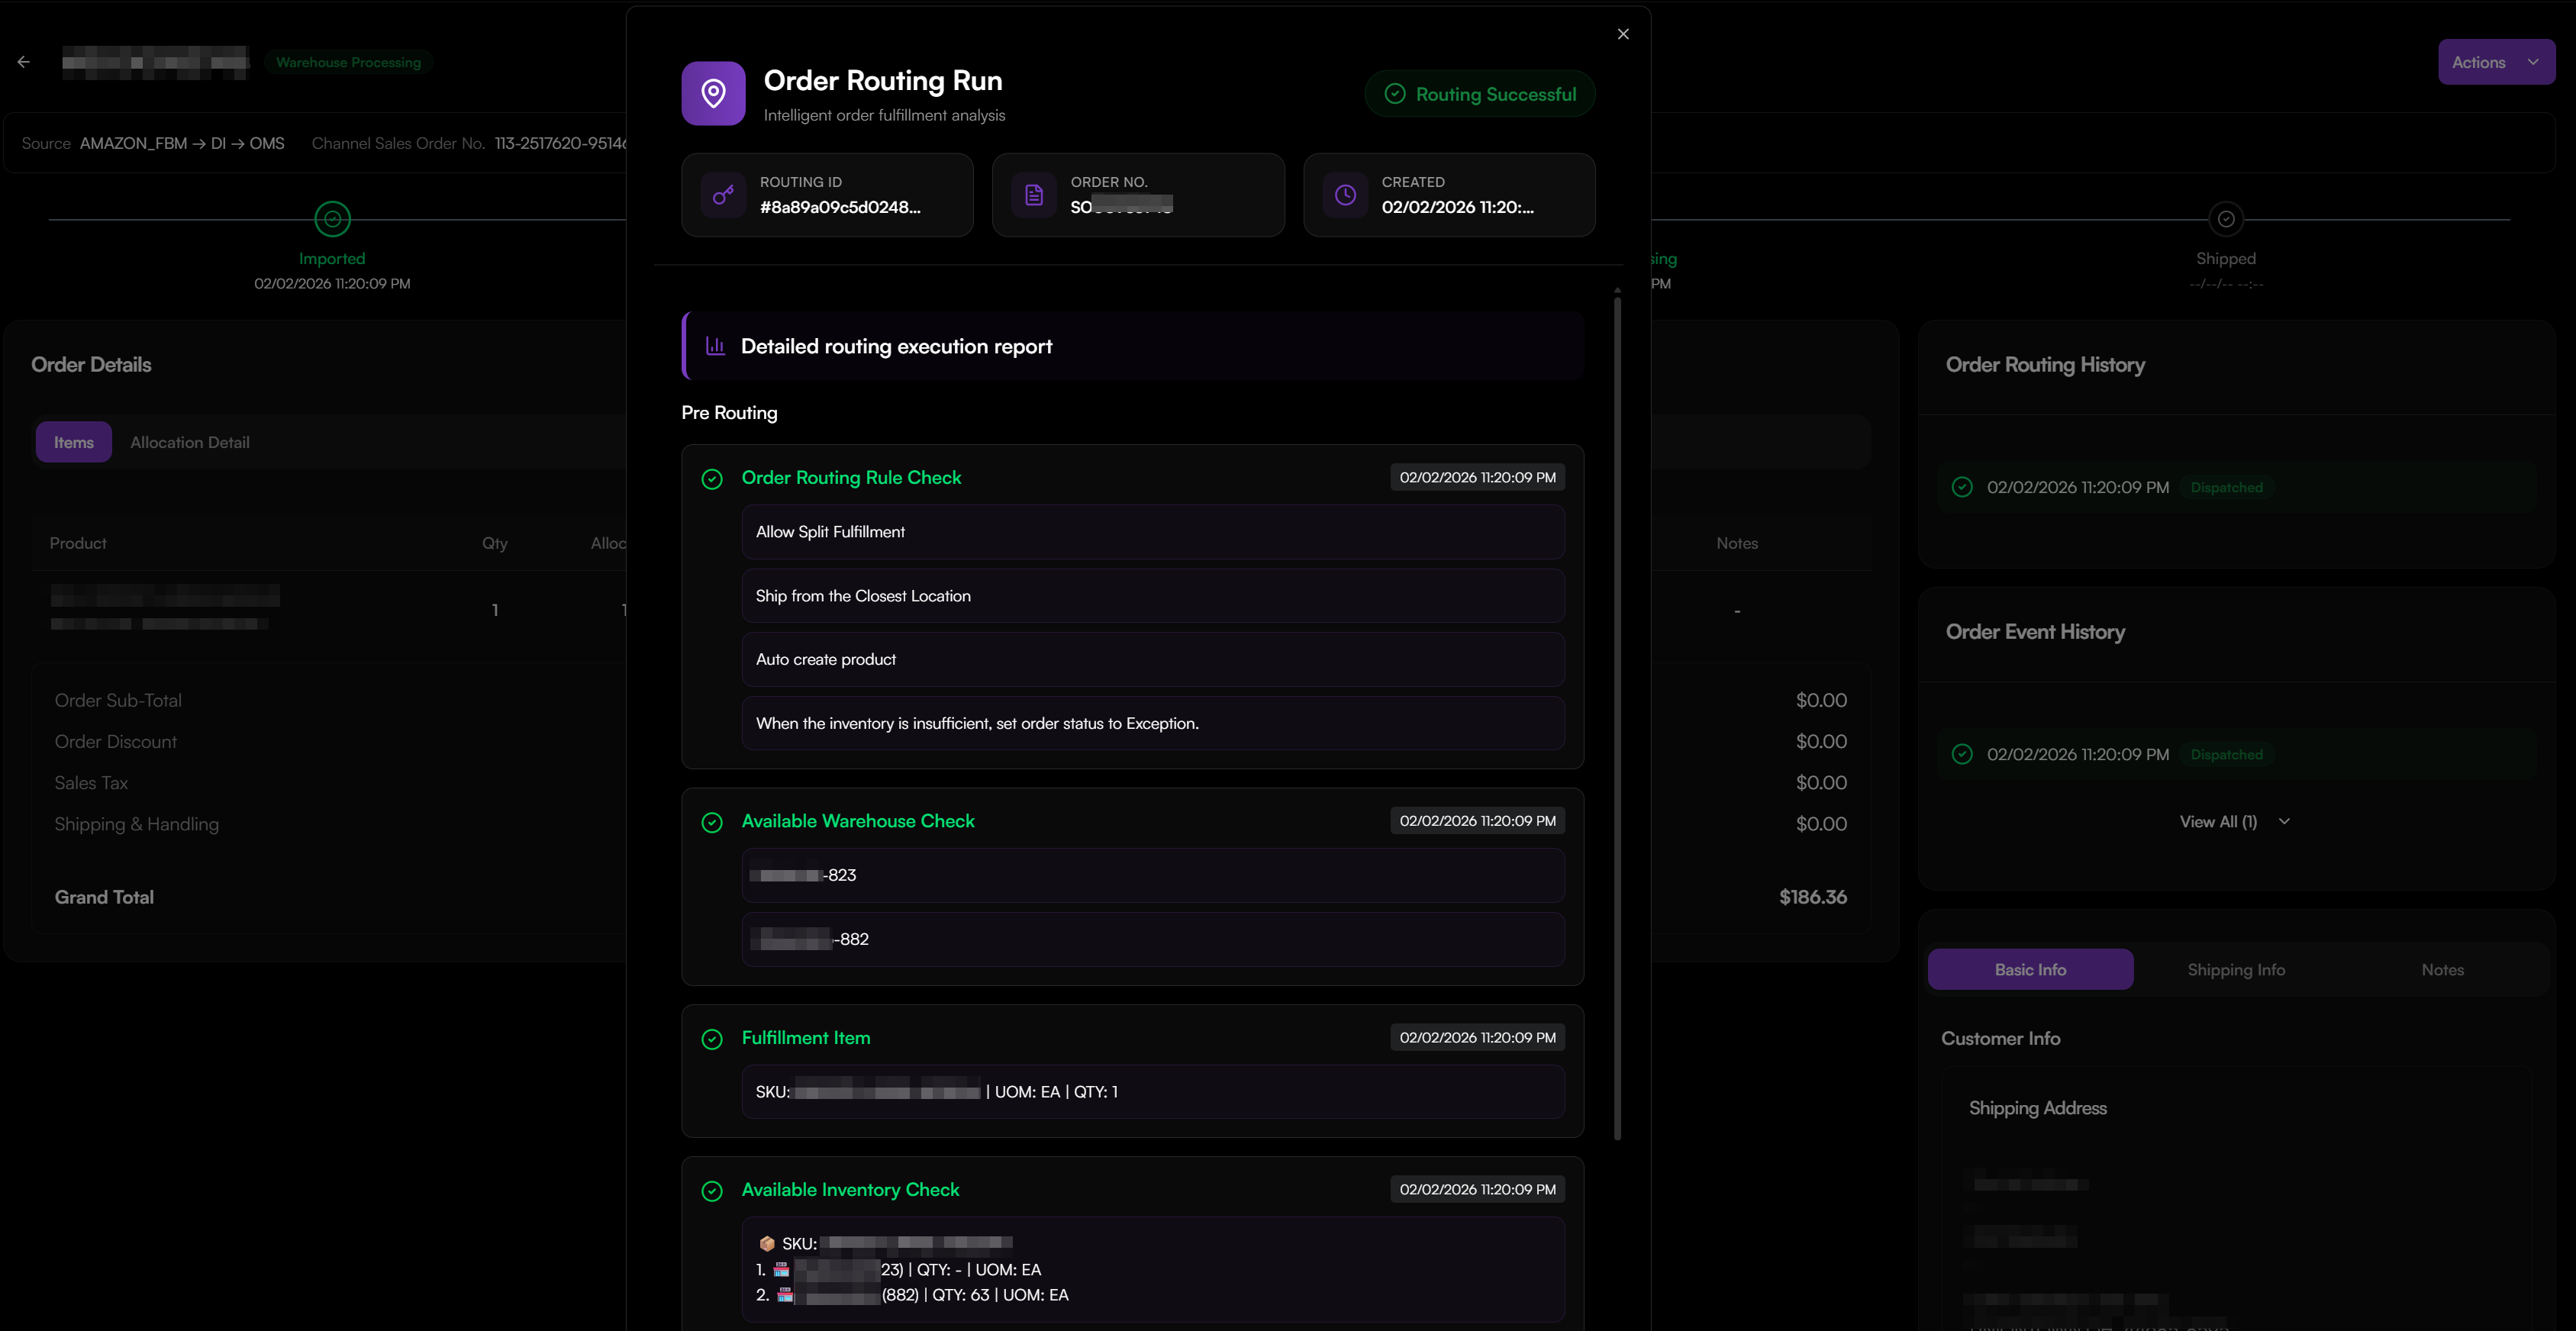
To access the report:
- Open the Sales Order.
- In the Order Routing History card, click the green timestamp.
- Check the following routing log:
| Section | What to Check |
|---|---|
| Order Routing Rule Check | Configuration Verification: Lists the rules enabled at the exact moment of processing. Use this to confirm that settings like Allow Split Fulfillment were active. |
| Available Warehouse Check | Warehouse Filter: Lists all facilities allowed to participate based on your Zip Code or Market rules. If a warehouse is missing, it was excluded before stock was even checked. |
| Fulfillment Item | Order Confirmation: Displays the specific SKUs and quantities the system is currently attempting to route. |
| Available Inventory Check | WMS Stock Validation: Displays the real-time stock count returned by the WMS for every eligible warehouse. If a warehouse shows QTY: - or 0, it is disqualified from the calculation. |
| Routing | Process History: Traces the selection steps. It shows all warehouses that had enough stock to be considered for fulfillment. |
| Final Summary | Final Assignment: The definitive list showing which warehouse is fulfilling the order. |
Scenario B: Troubleshooting a Routing Failure
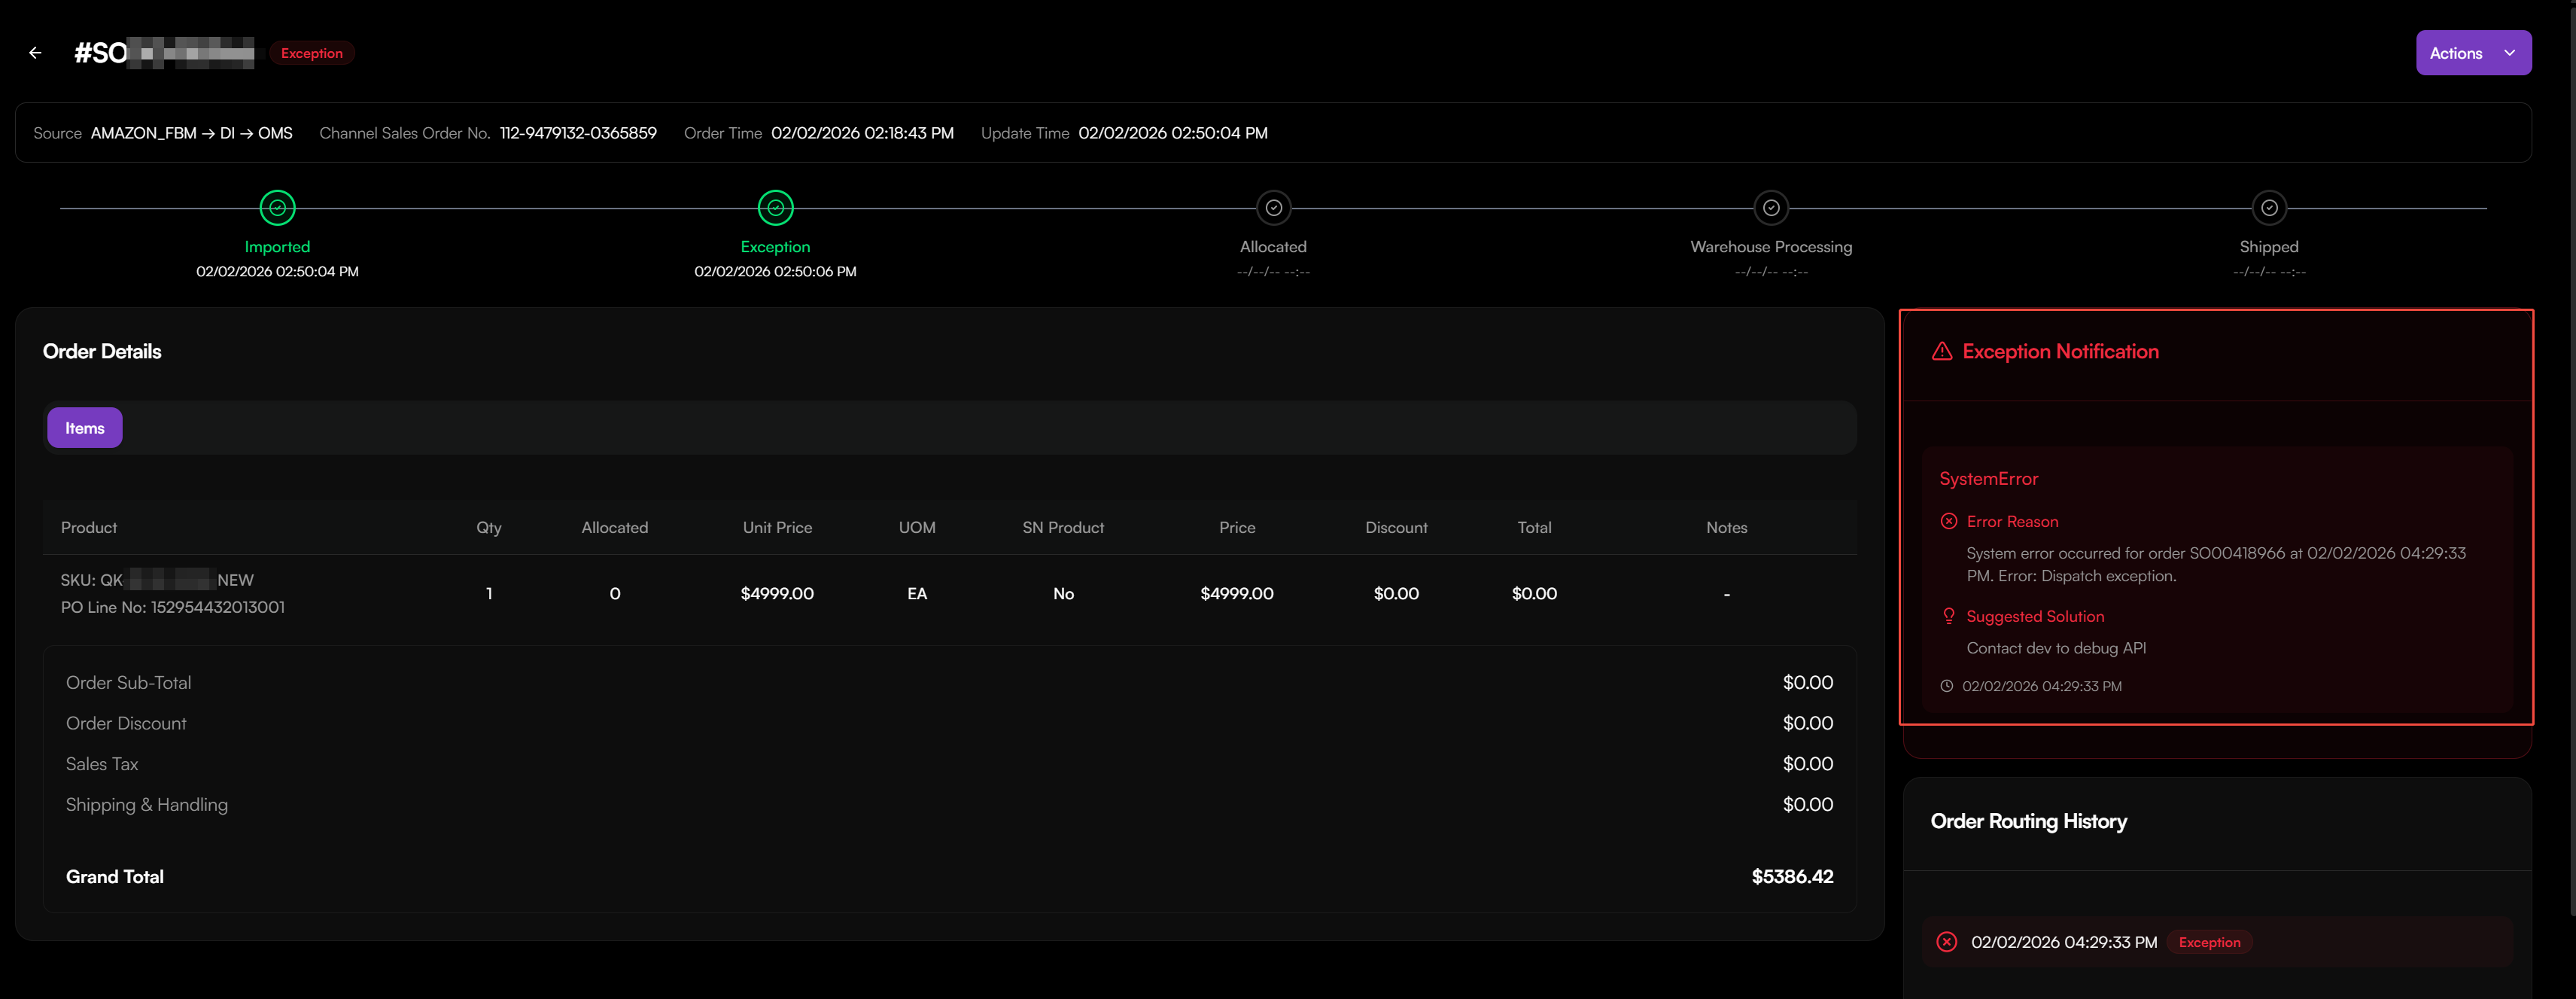
If the system cannot find a valid fulfillment path, no routing report is generated. Instead, the order is flagged as an Exception.
An Exception Notification card appears at the top of the order detail page and displays:
- Error Reason: The technical cause, such as a Dispatch exception or an insufficient.
- Suggested Solution: Actionable advice, such as Contact dev to debug API.