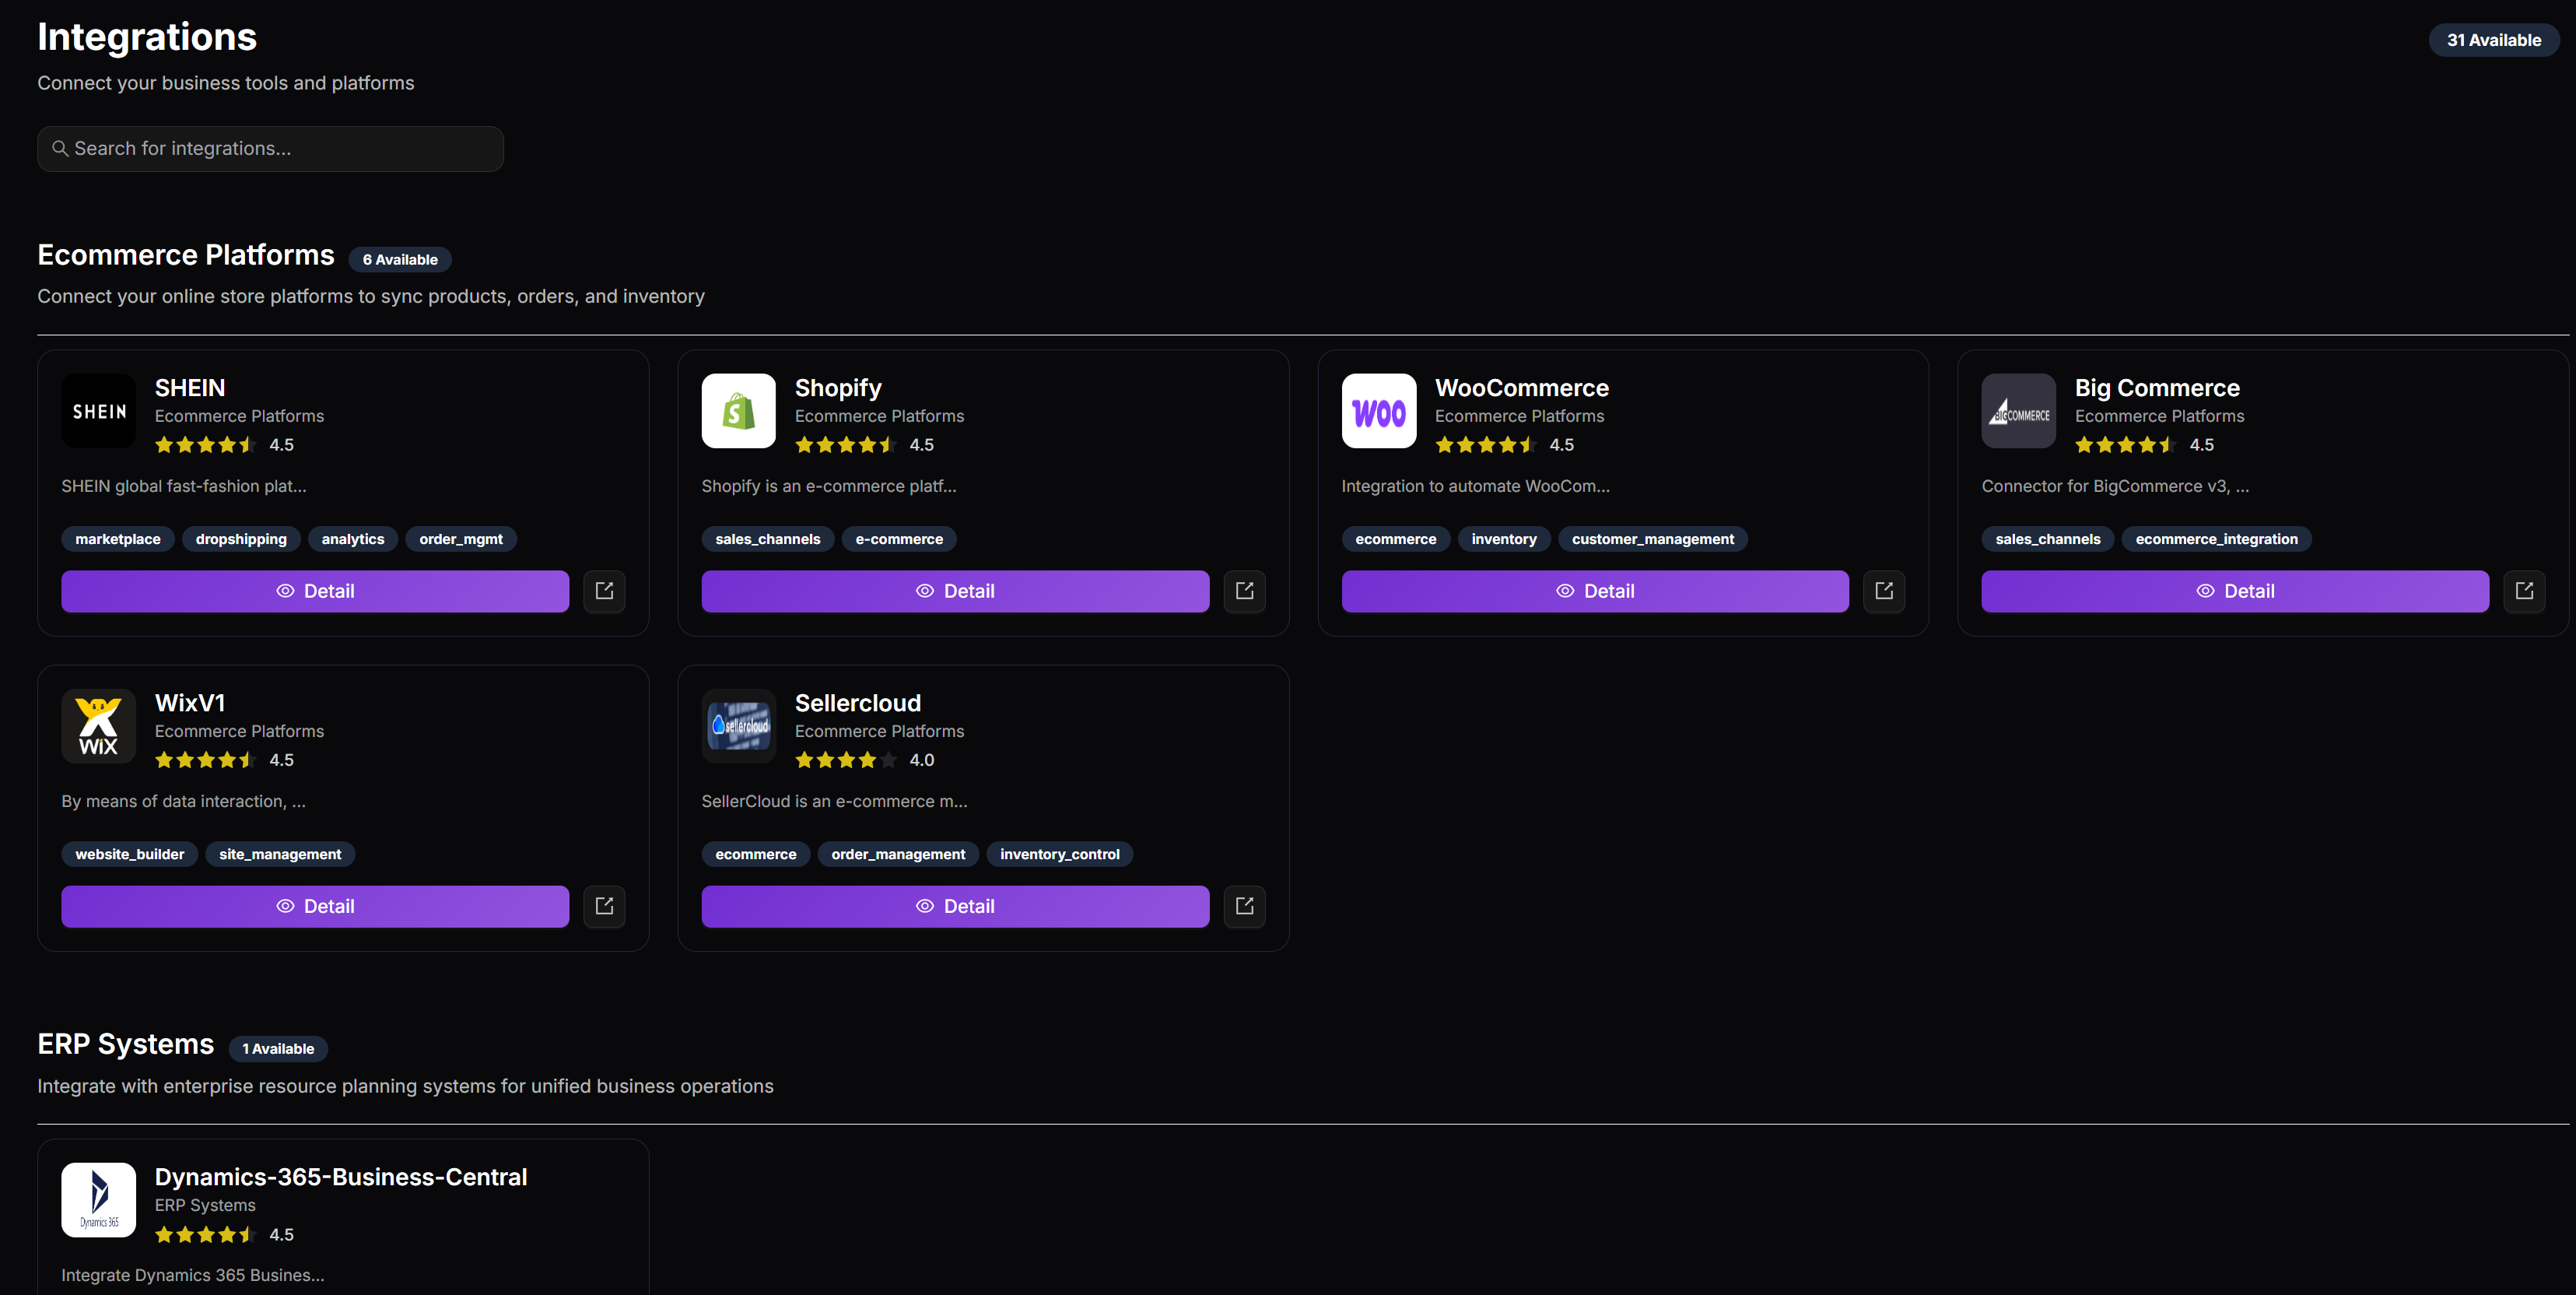
Integrations
The Integrations module lists all available internal and external platforms supported by Item DI. You can:
- Browse all available platforms.
- Review the integration details before connecting, such as key features, supported operations, or authentication types.
- Follow the step-by-step setup guide provided directly on the platform’s detail page.
Connecting to Internal or External systems
Each integration follows a similar setup process regardless of whether it’s an internal or external system. Follow the connection steps displayed on the Integration detail page.
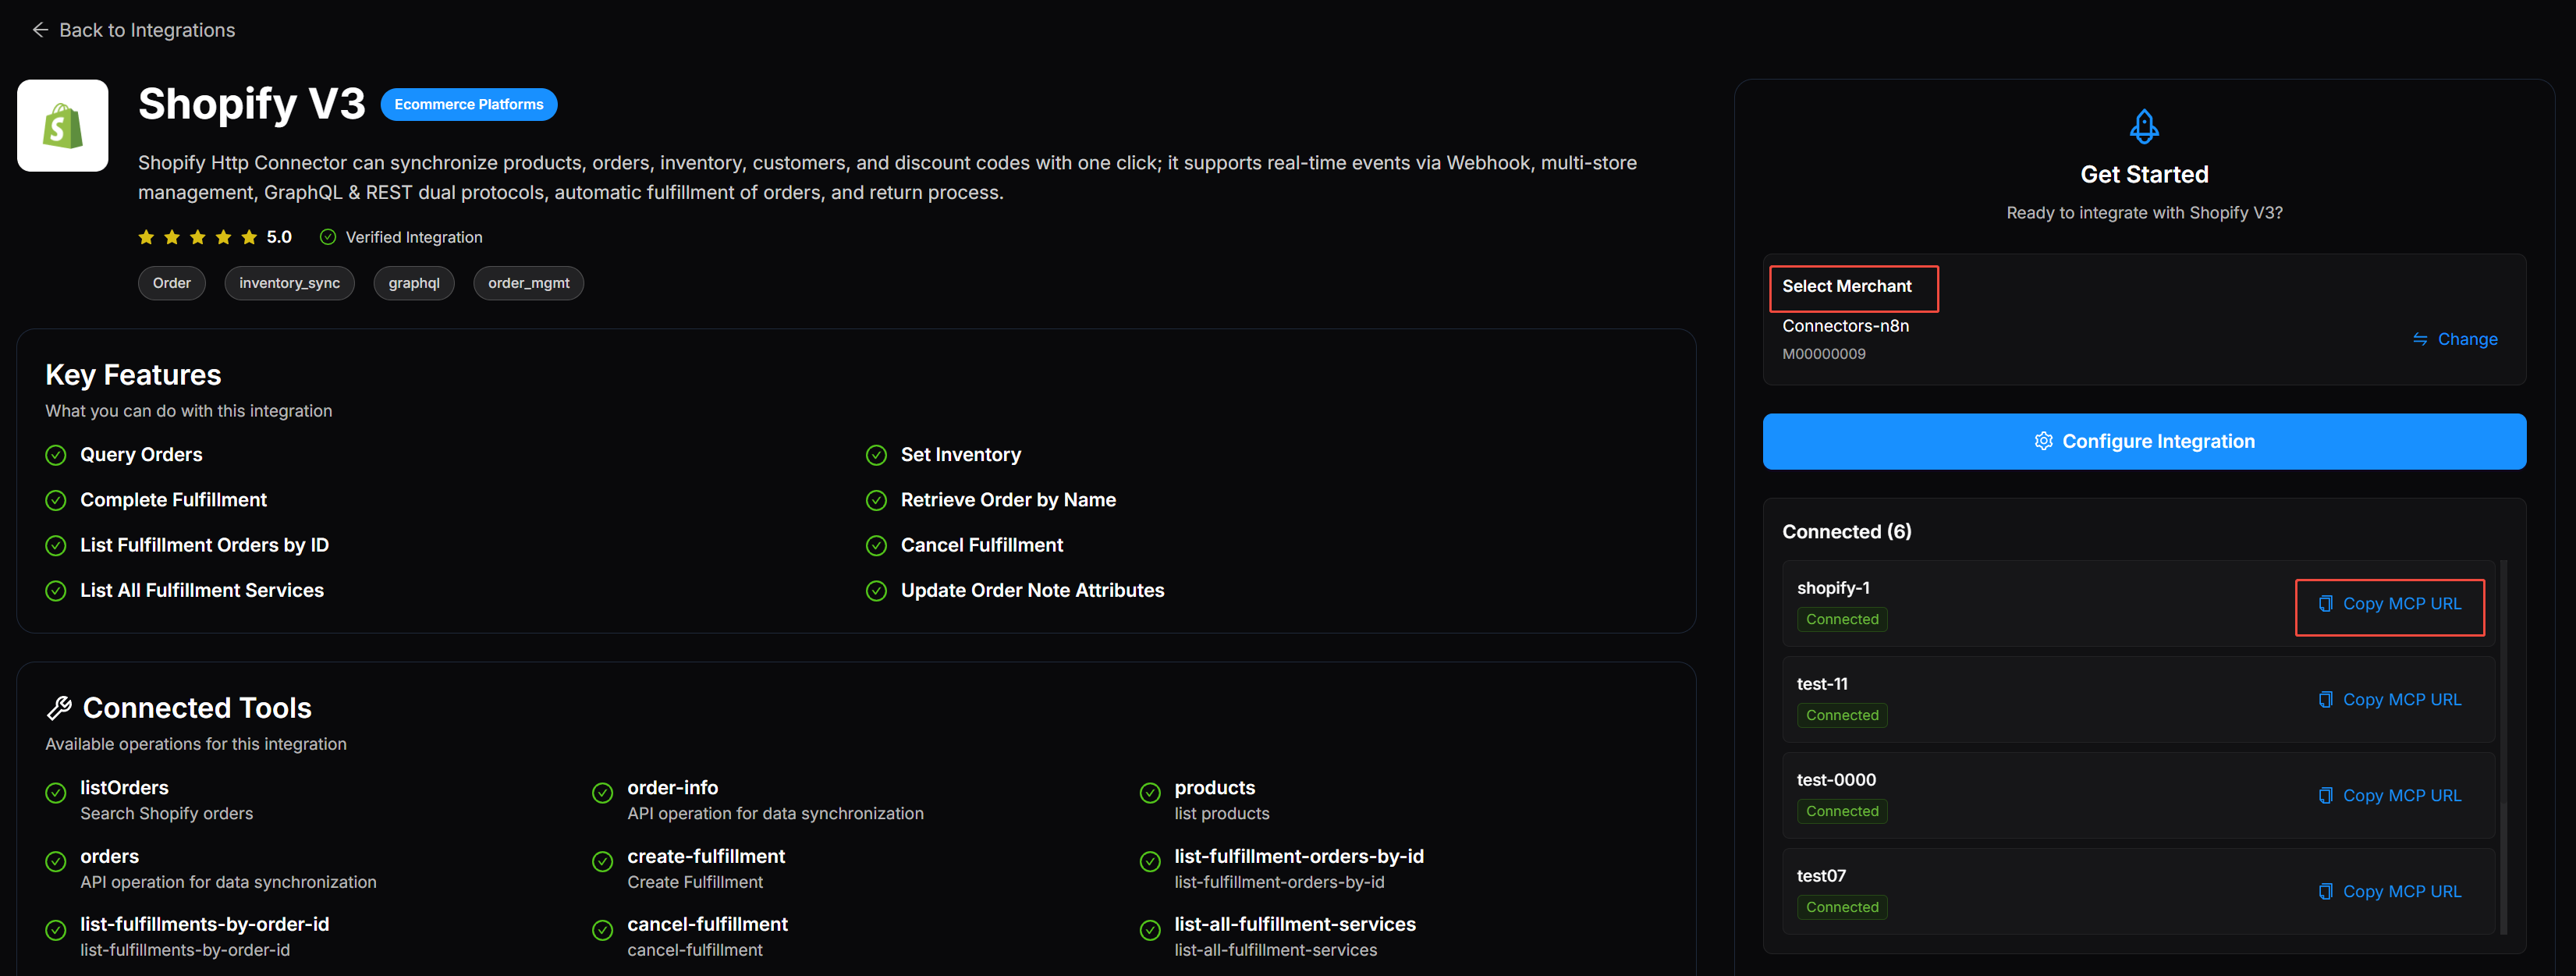
- Navigate to Integrations from the top navigation bar.
- Browse or search for the target platform.
- Click Detail on the integration card.
- Click Configure Integration on the detail page.
- if multiple merchants exist in your workspace, select the Merchant first.
- Enter the required authentication credentials or initiate the authorization process (depending on the platform type).
- Click Test Connection.
- If the test succeeds, click Submit to complete the configuration.
- Once configured, the connected platform will appear as a Connector under the corresponding Merchant in the Workspace module.
- The connector is now ready for use in Settings (for flow templates) or Workflow (as nodes in automation).
Adding MCP Server to Cursor
Cursor reads MCP servers from the user configuration file. Add an entry for each connected integration.
- Copy your MCP URL from the Integrations page.
- Open Cursor settings for MCP or edit your MCP JSON config directly.
- Add a top-level key for the service (e.g., "SHOPIFY") and set its url field to your MCP link.
- Minimal JSON example (single server):
{
  "SHOPIFY": {
    "url": "https://di-v3-staging.item.com/streamable-http/ShopifyV3/mcp/1954850432972193793"
  }
}- Save the file and restart Cursor (or reload MCP). Your tools will appear in the tool list and can be called from chat or the command palette.
Use the Tools
- In Cursor, call tools by name and pass parameters per the connector’s tool schema.
- Start with read-only actions like
listOrdersto validate permissions, then proceed to write actions likecreate-fulfillmentorset-inventory.