Order Management
Orders are identified by the Delivery Notification (DN) numbers. An order and its DN notifies the warehouse of an outbound order. An order can be created by an EDI, an API or using the Item interfaces. When an order with a Delivery Notification is created, the system generates a Pick Task in the app. This article introduces the related order operations.
How to Search the Orders
Item WMS supports two methods for quick searching: Keyword Search and Advanced Search.
Keyword Search
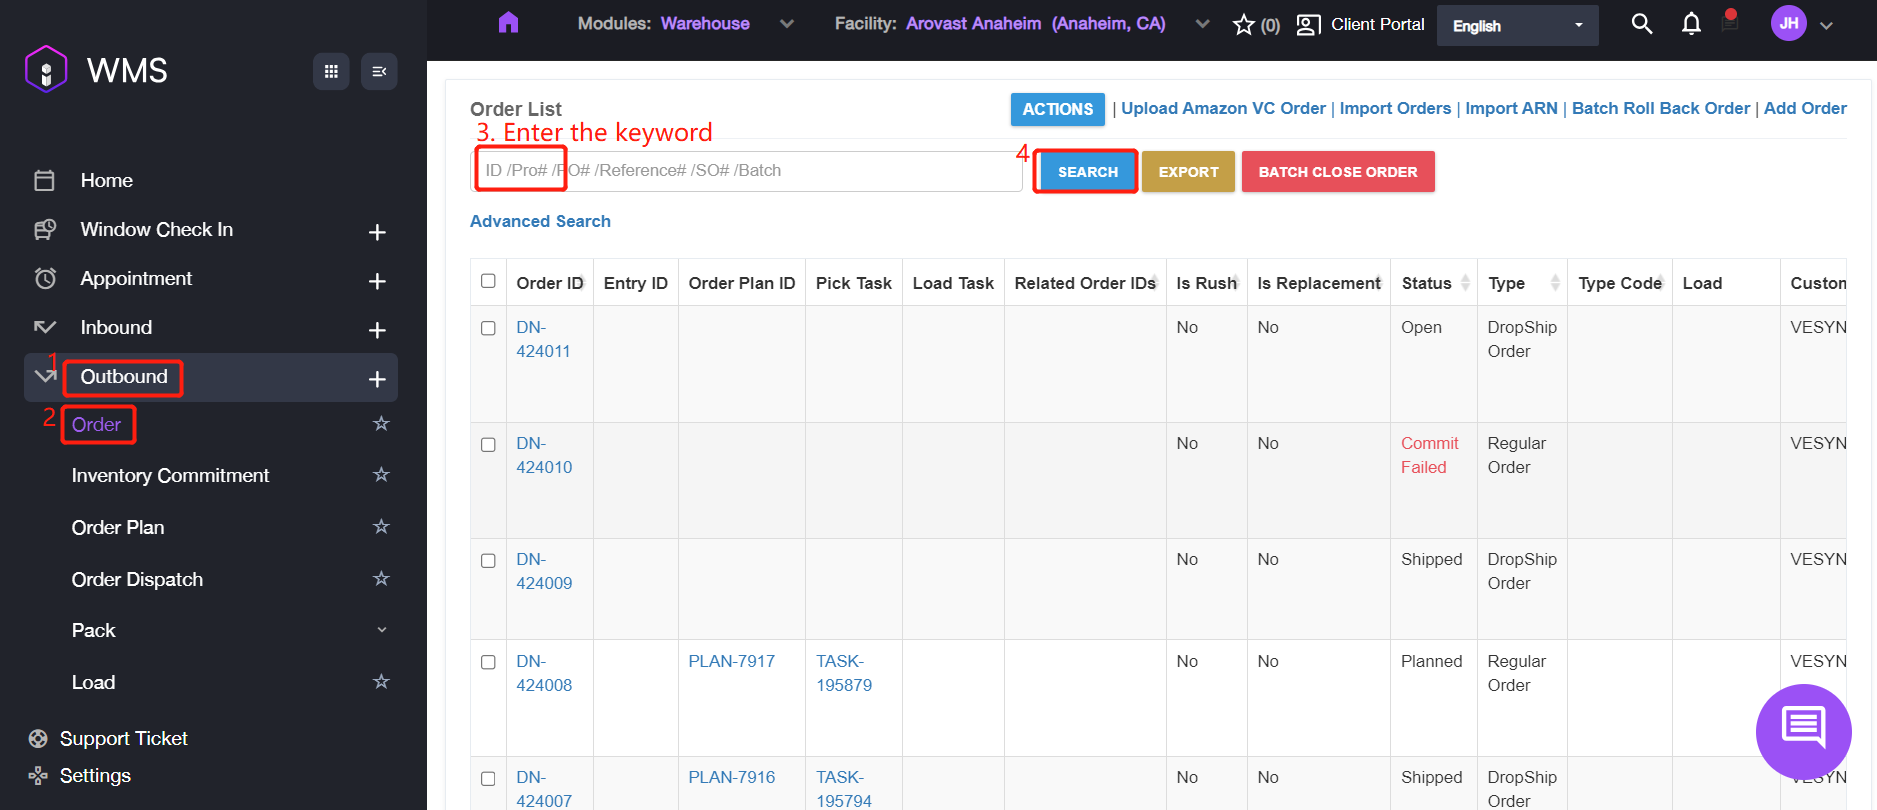
- Navigate to Outbound > Order, it will display the Order List.
- If you remember any keywords of the order such as Order ID/Batch ID or Order Reference, please enter the keyword into the input box then click SEARCH to search the corresponding orders.
Advanced Search
-
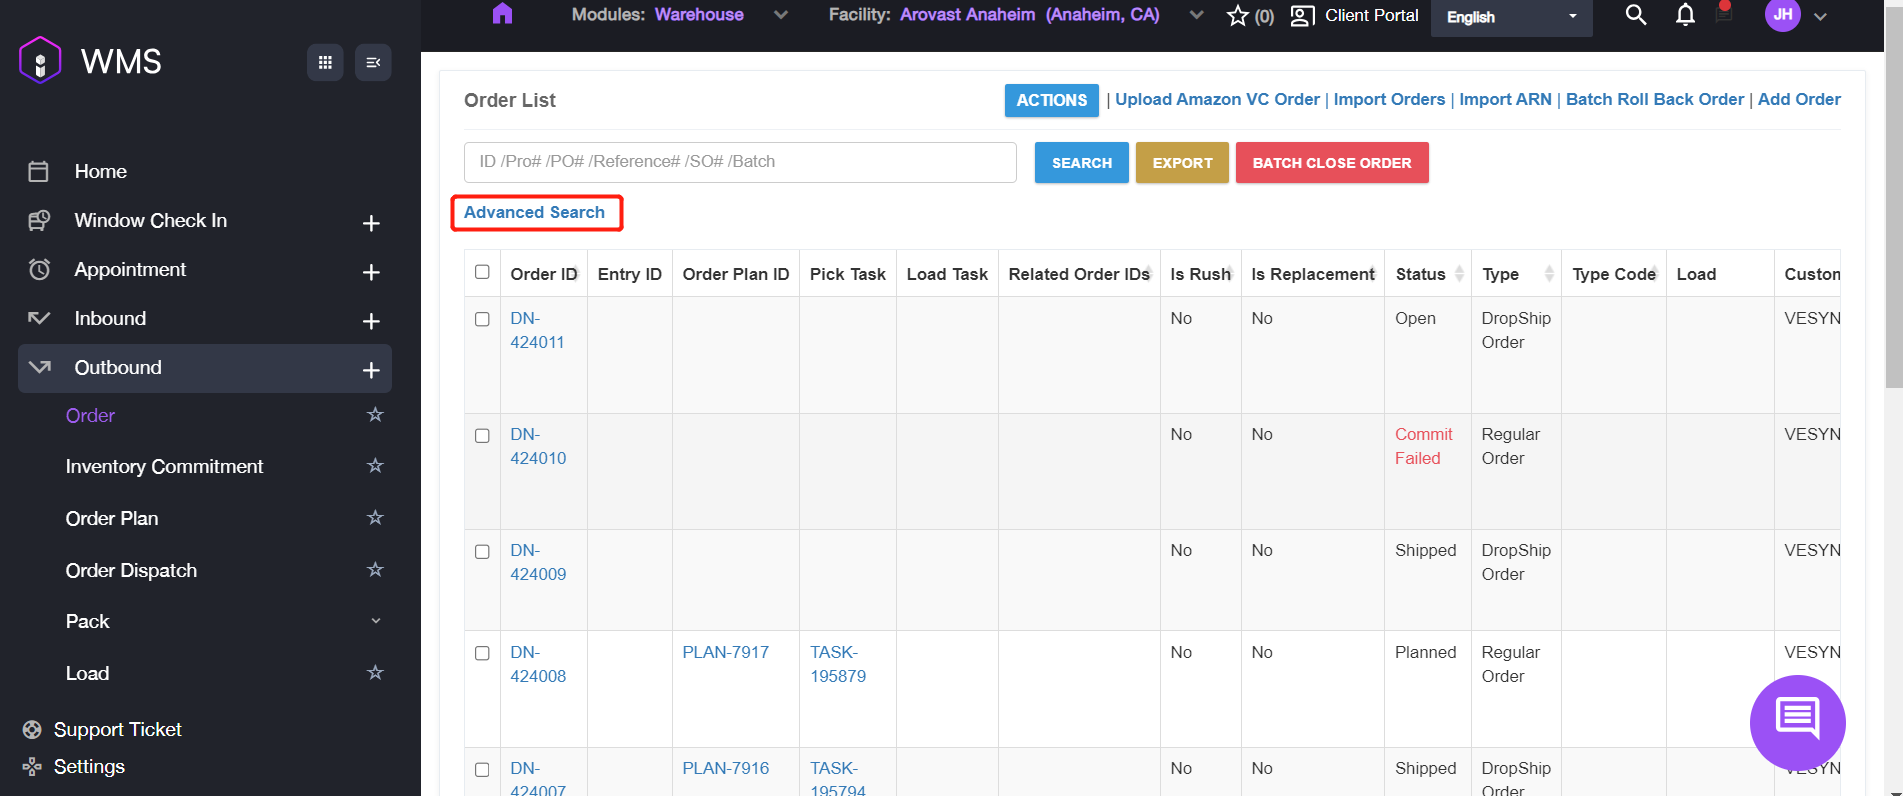
If there are still too many results after filtering keyword or if you want to search some specific fields such as Status, Order Type or Entry ID. Please click Advanced Search to switch the searching method.
-
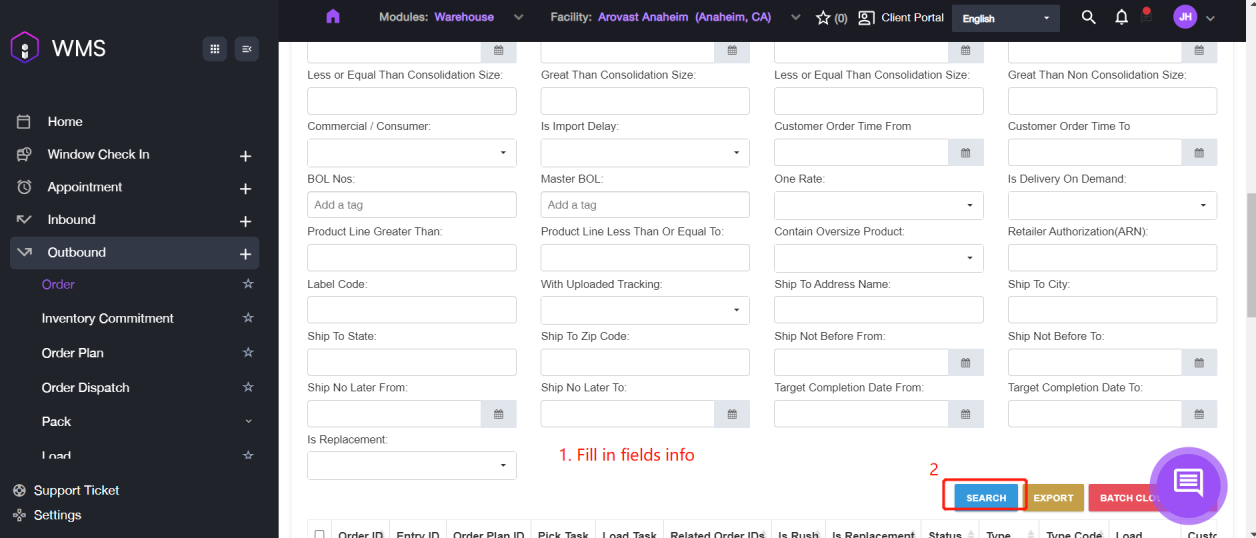
Fill in the fields information then scroll down to click SEARCH button for searching.
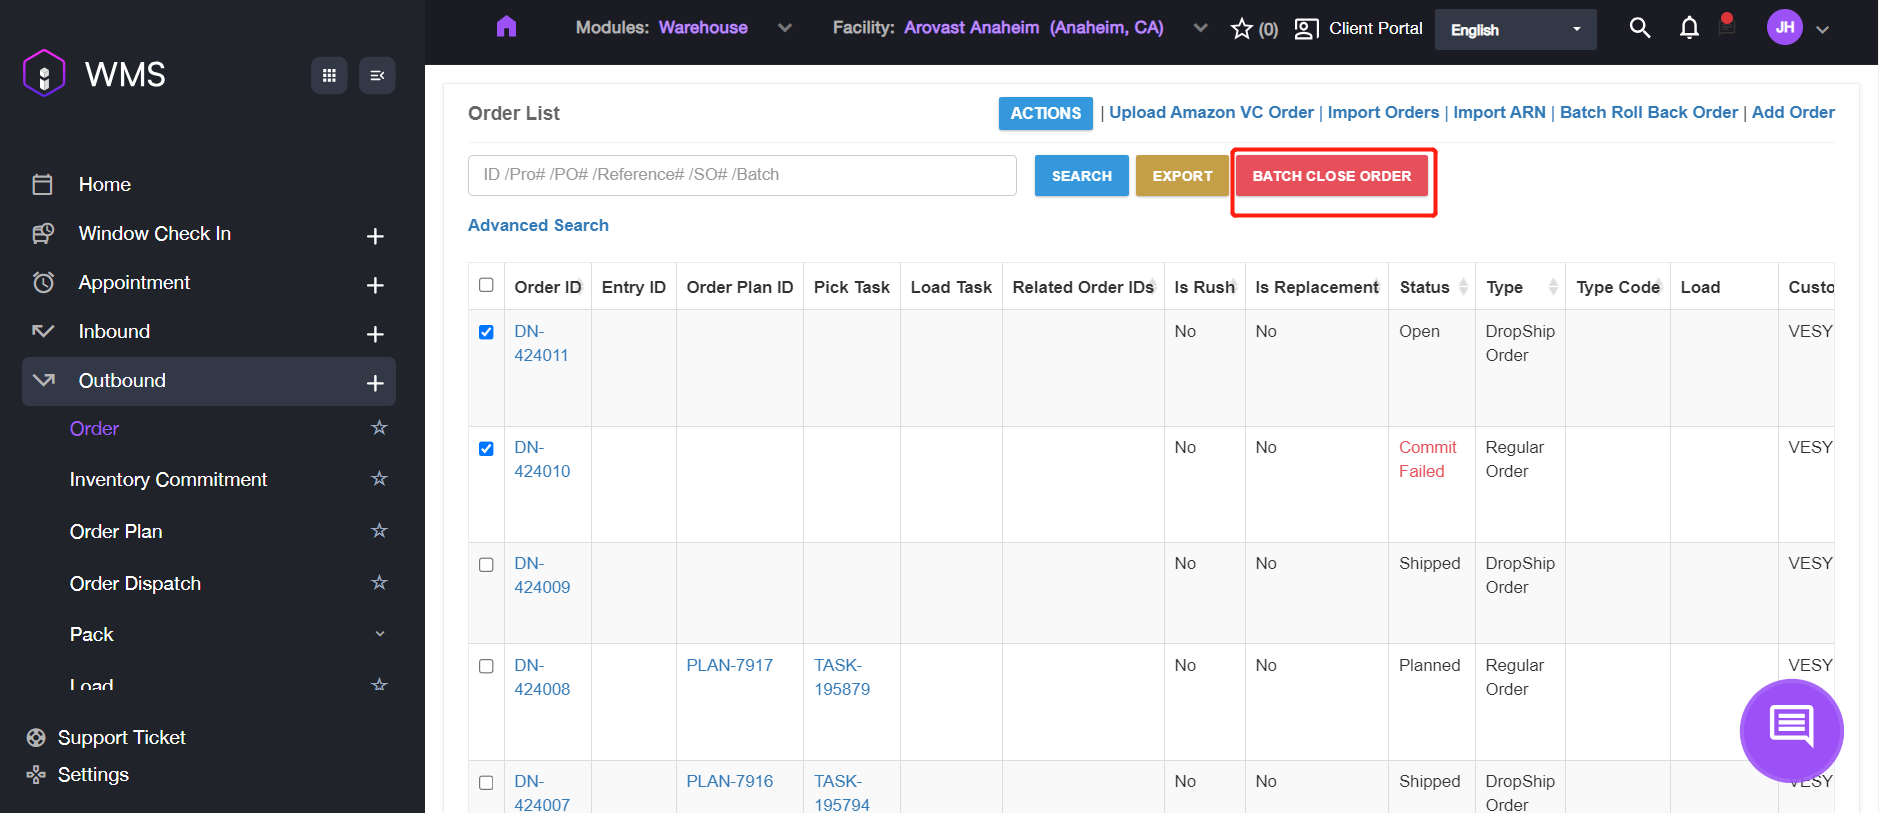
The system supports to export orders records according to different levels. Please click EXPORT button to select a level to export orders.
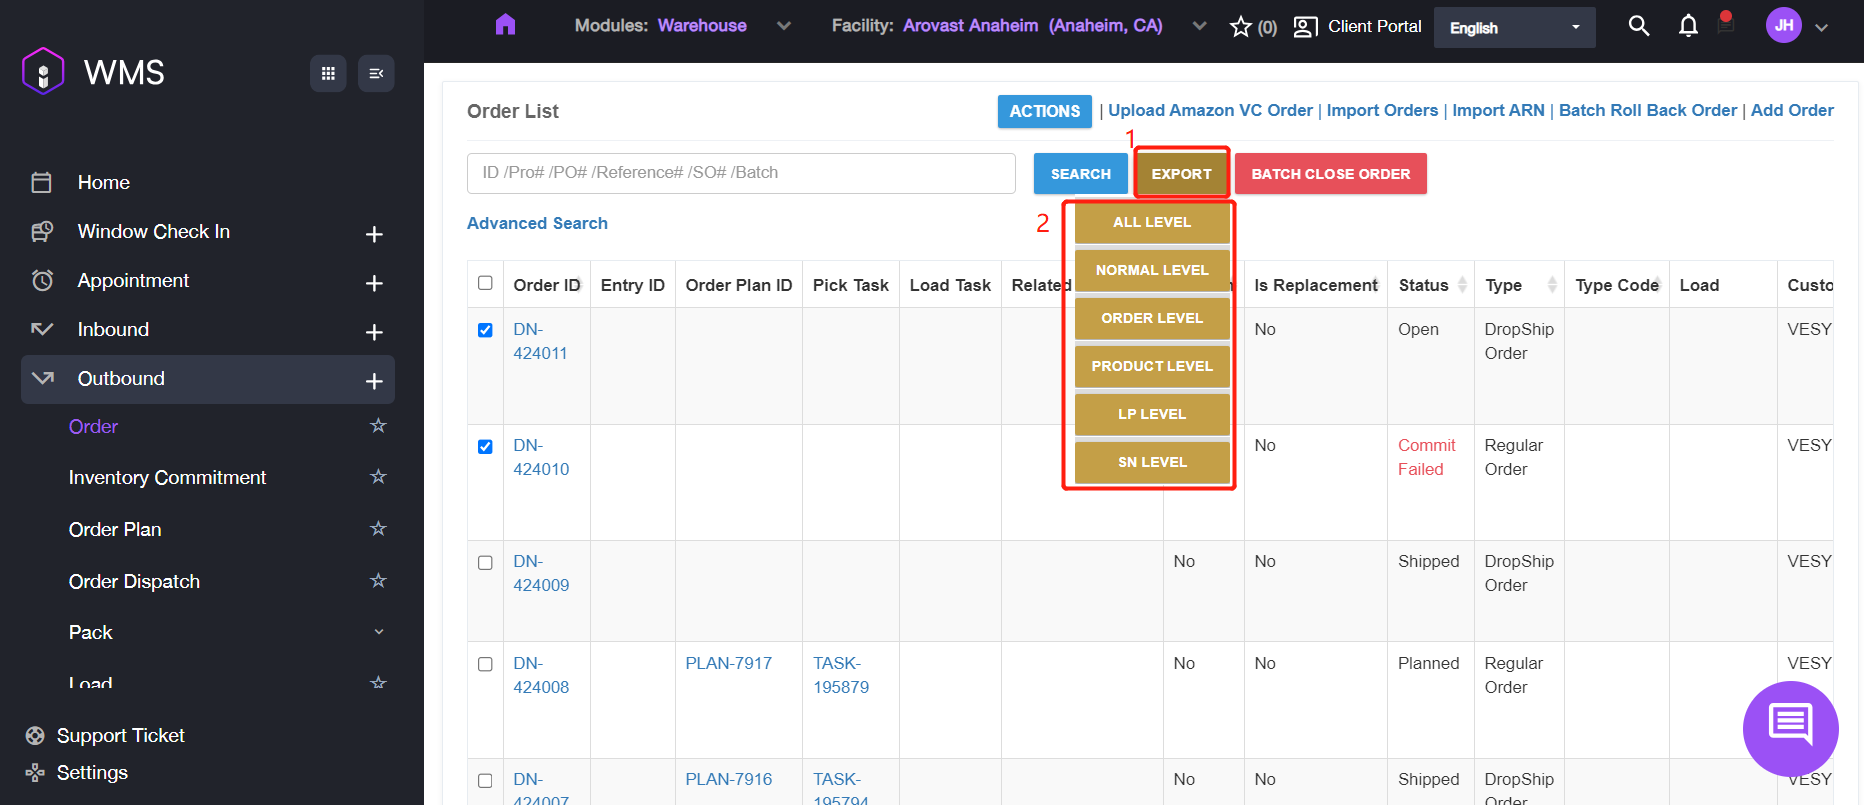
If there are any orders which have completed, you can click BATCH CLOSE ORDER button to close the orders in bulk instead of closing the order one by one.
How to Create a New Order
There are two ways supported to add new orders: manual and import orders in bulk.
Manual Adding
-
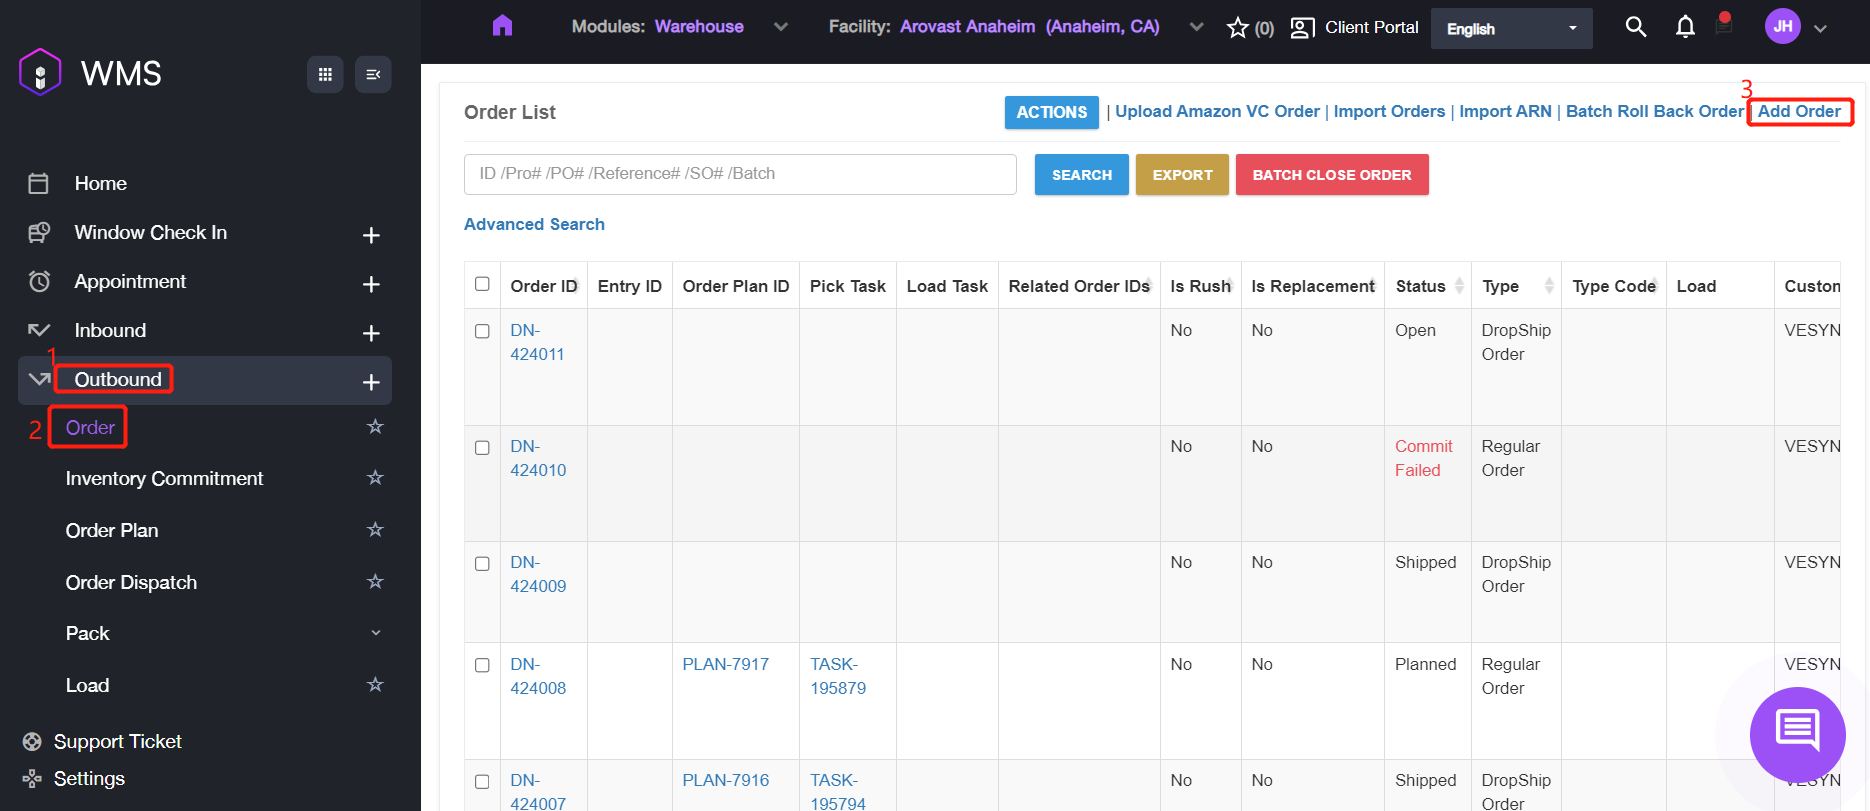
Navigate to Outbound > Order, click Add Order button at the upper right corner.
-
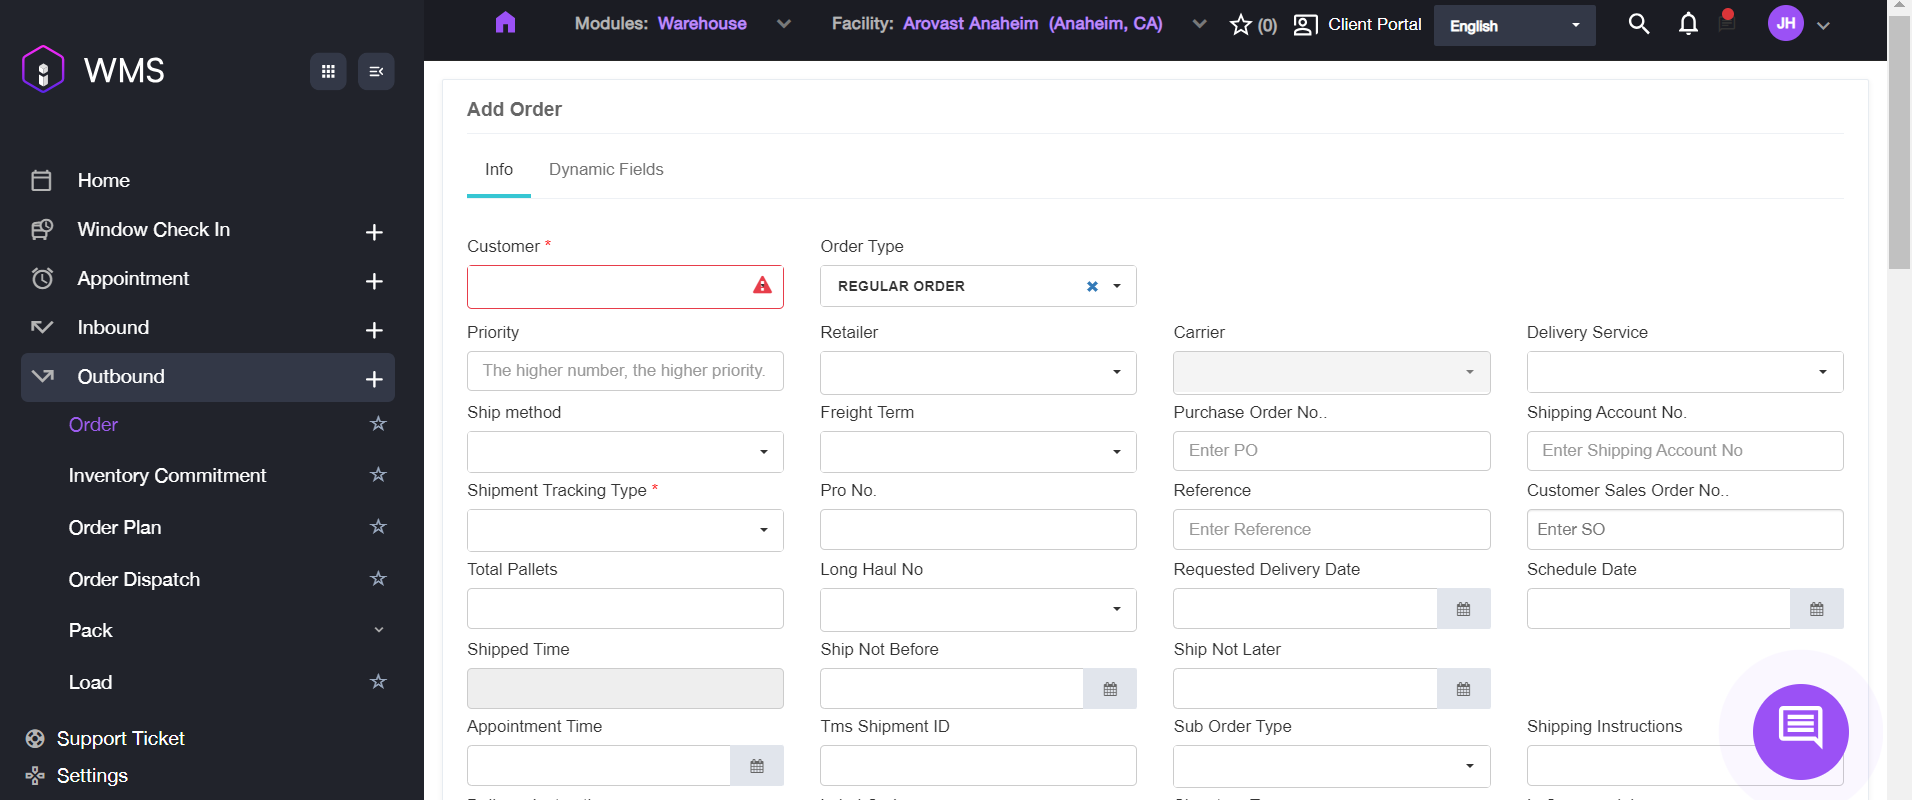
Select the value for some specific fields such as Customer and Shipping Tracking Type, then fill in other additional information.
-
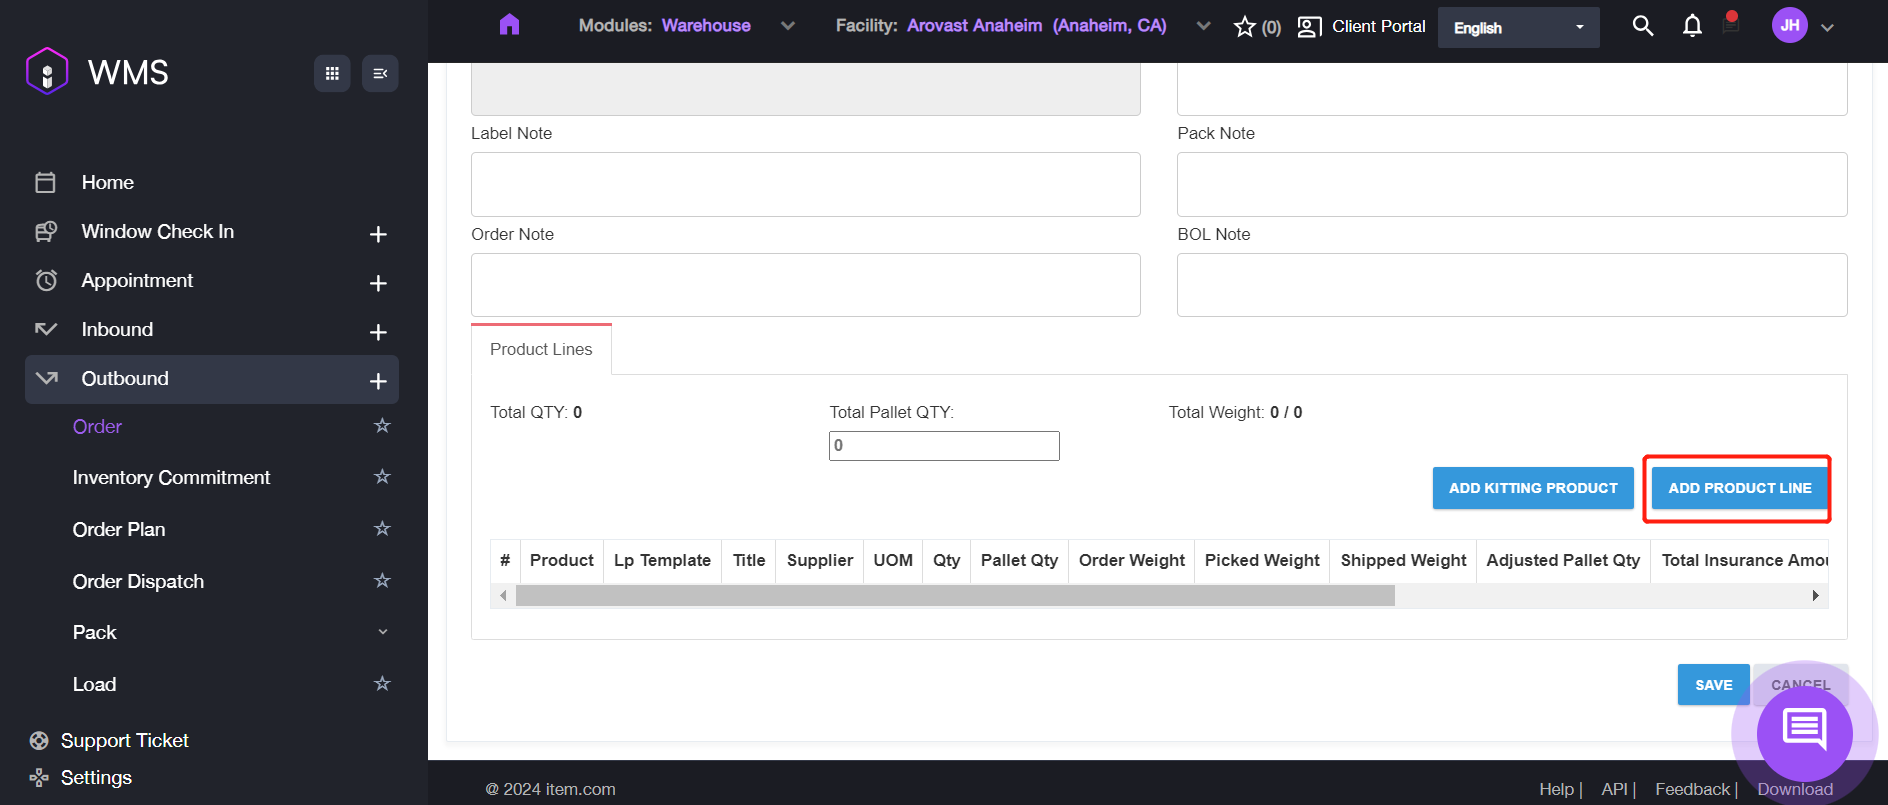
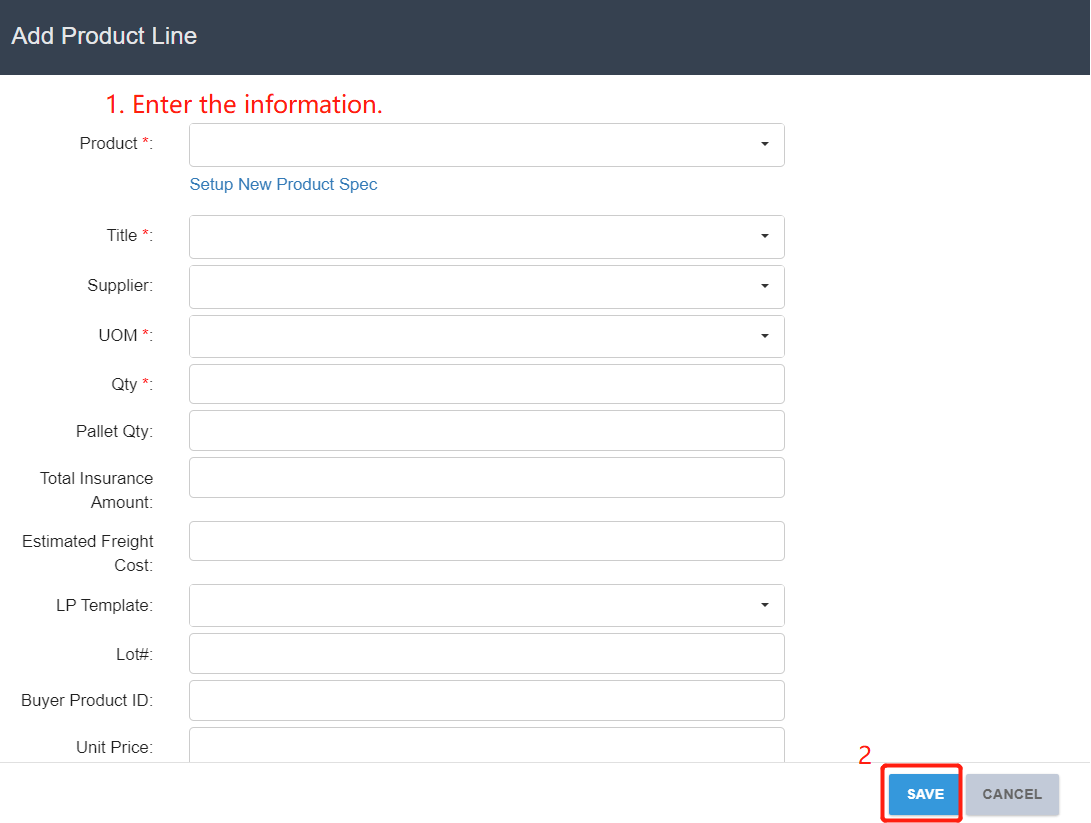
Scroll down and click ADD PRODUCT LINE to add the first line to the order.
-
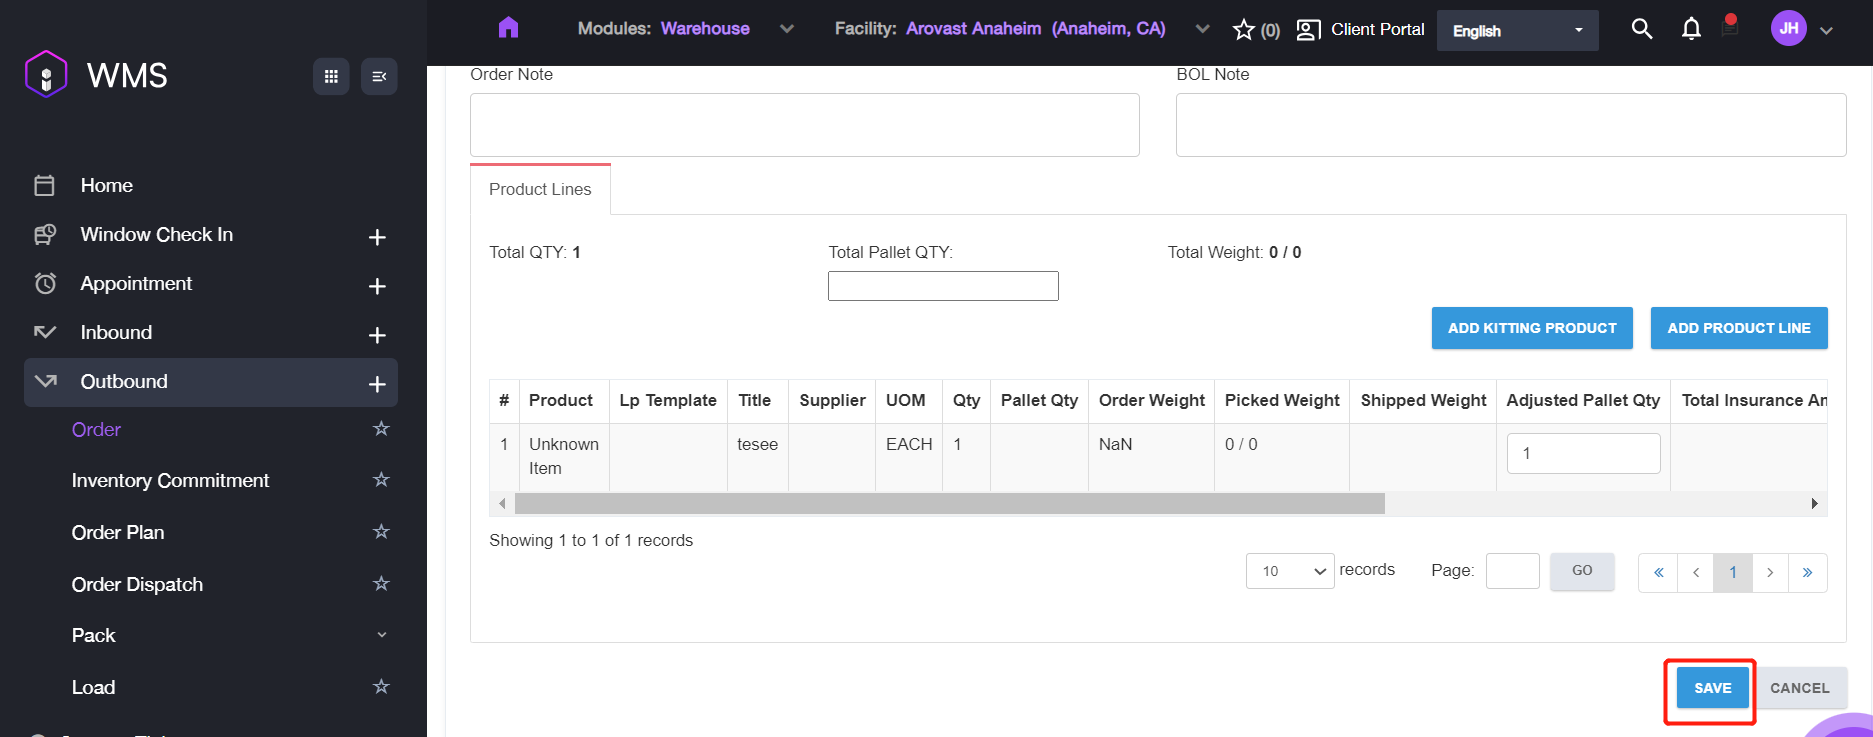
Setup the parameters for the product line, then click Save to save the information.
-
Click Save button to complete the progress.
Adding in Bulk
-
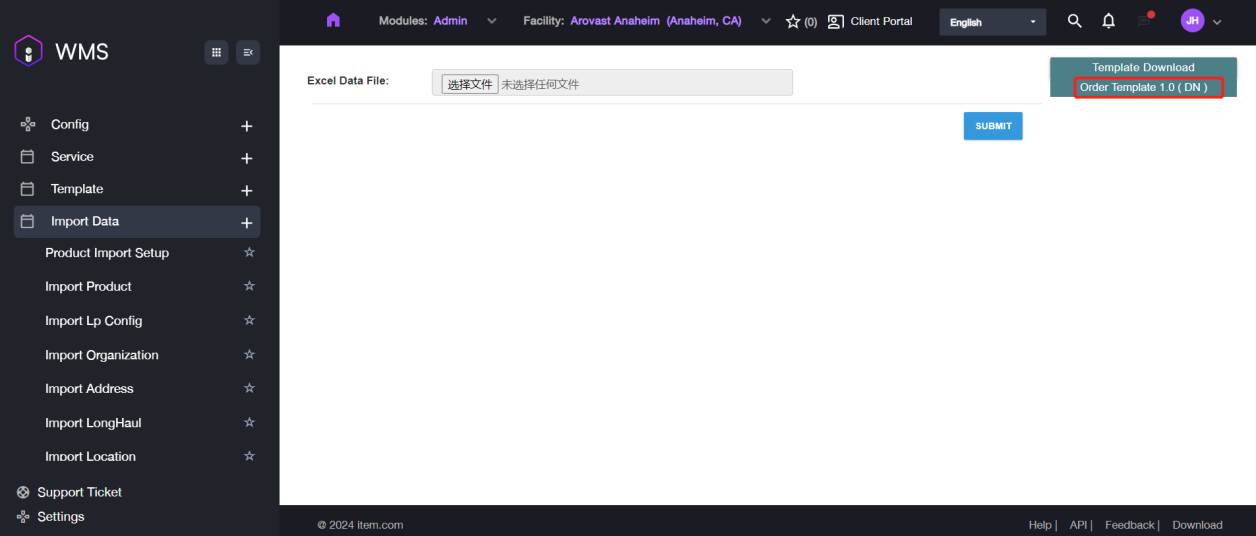
Navigate to Outbound > Order > Import Orders.
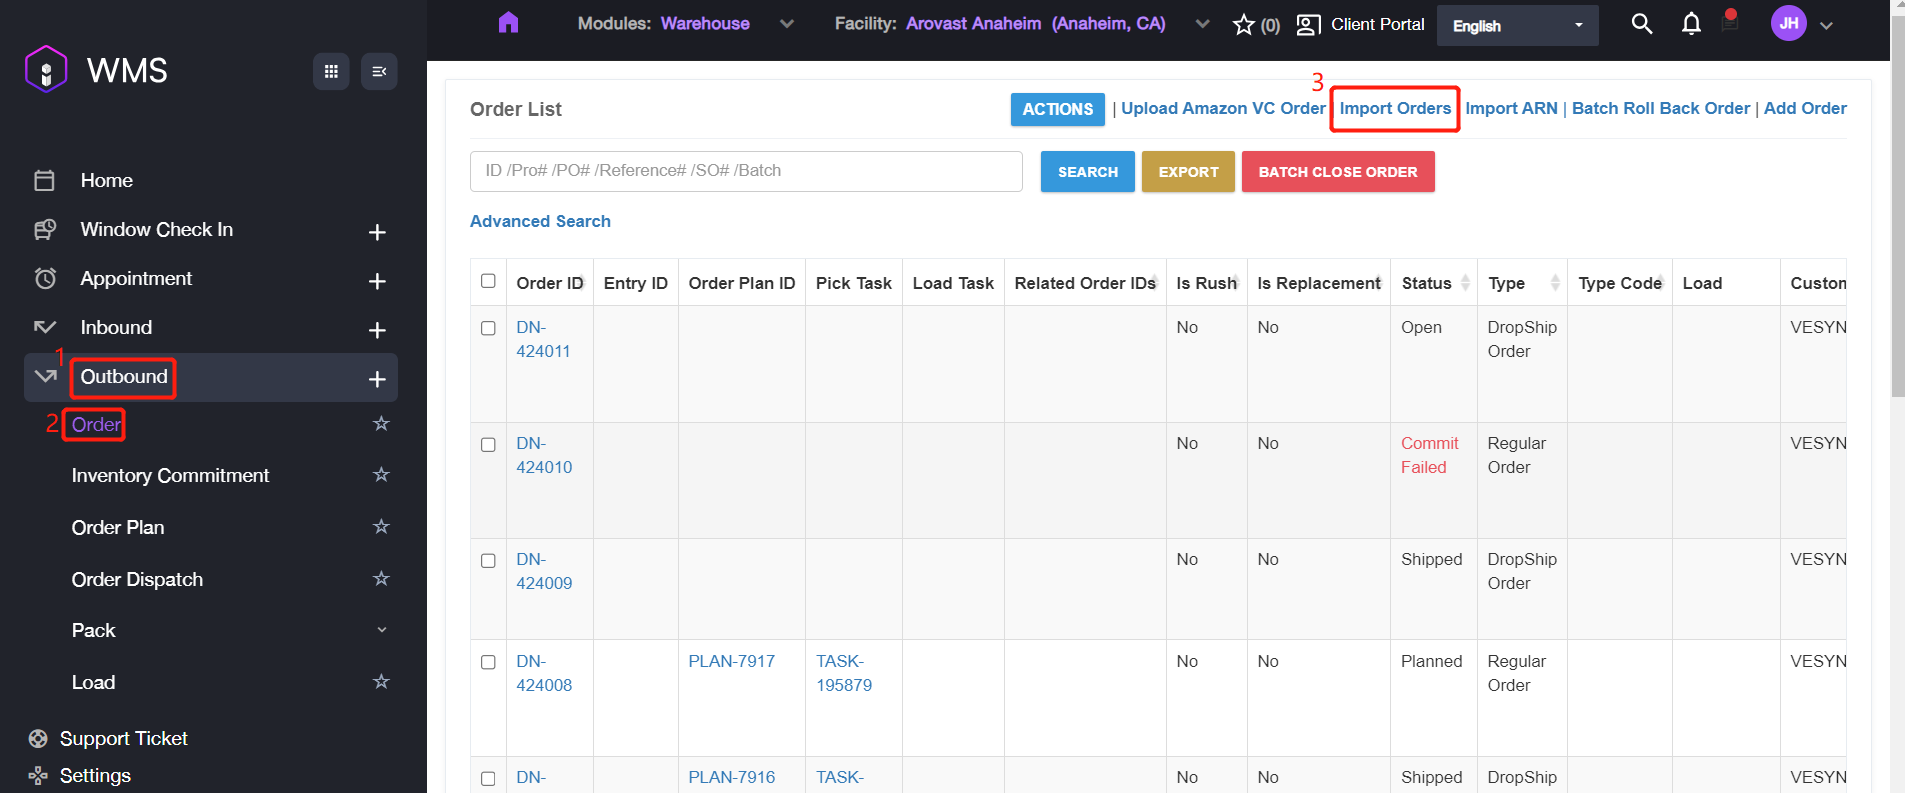
-
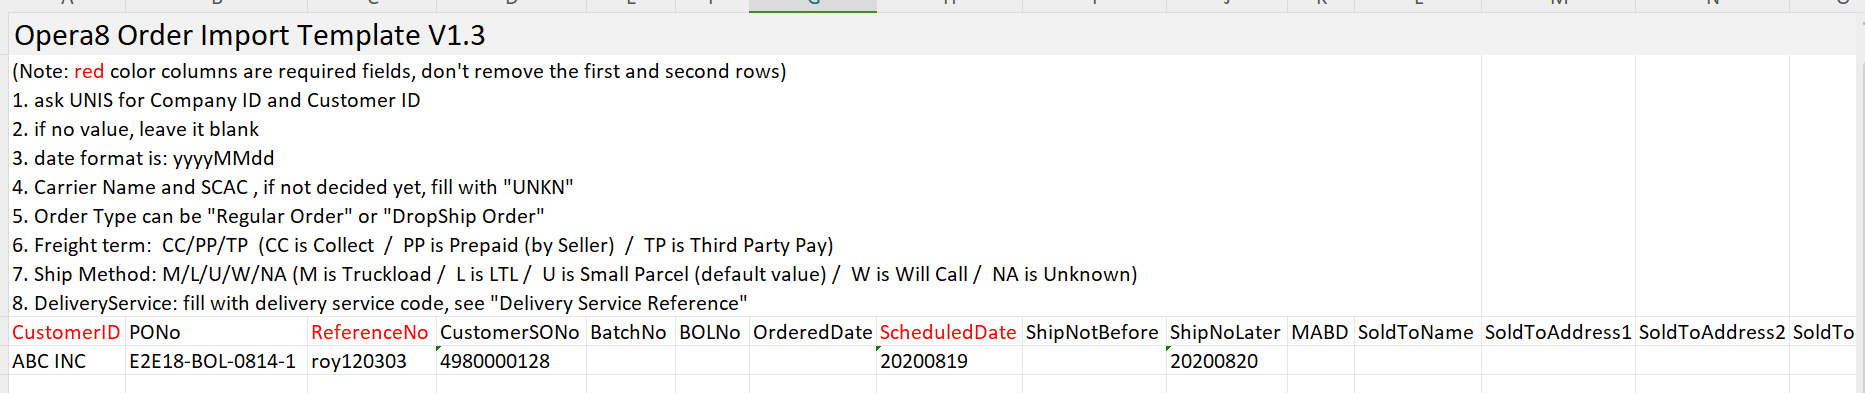
Please download the template by clicking Template Download > Order Template 1.0 (DN), if you don’t have the template file.
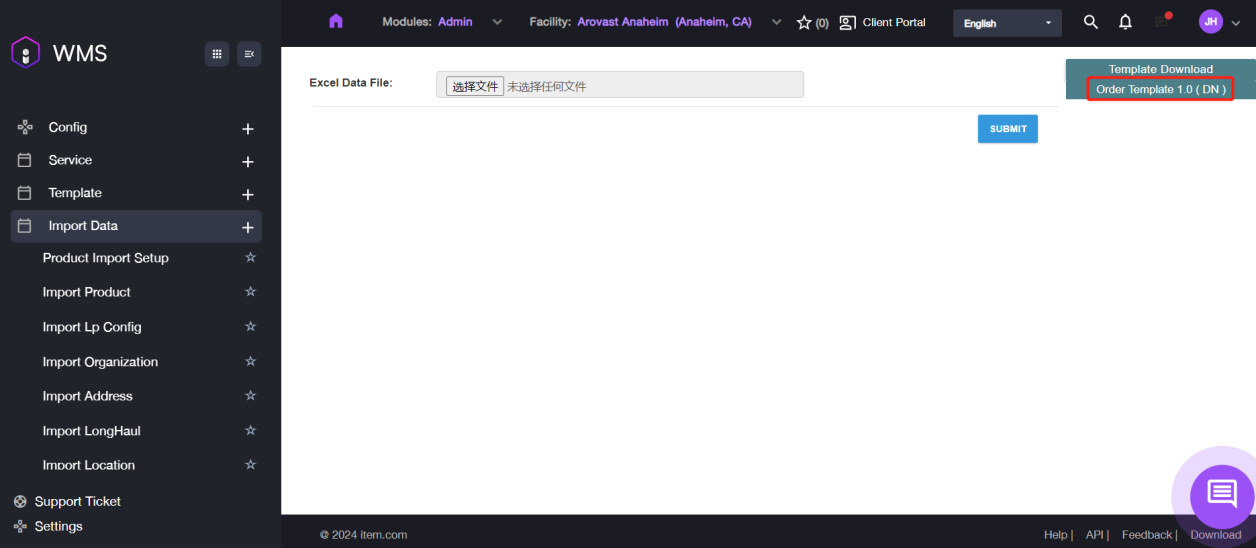
-
Fill in the Order details such as Customer ID, Reference No and Schedule Date as shown.
-
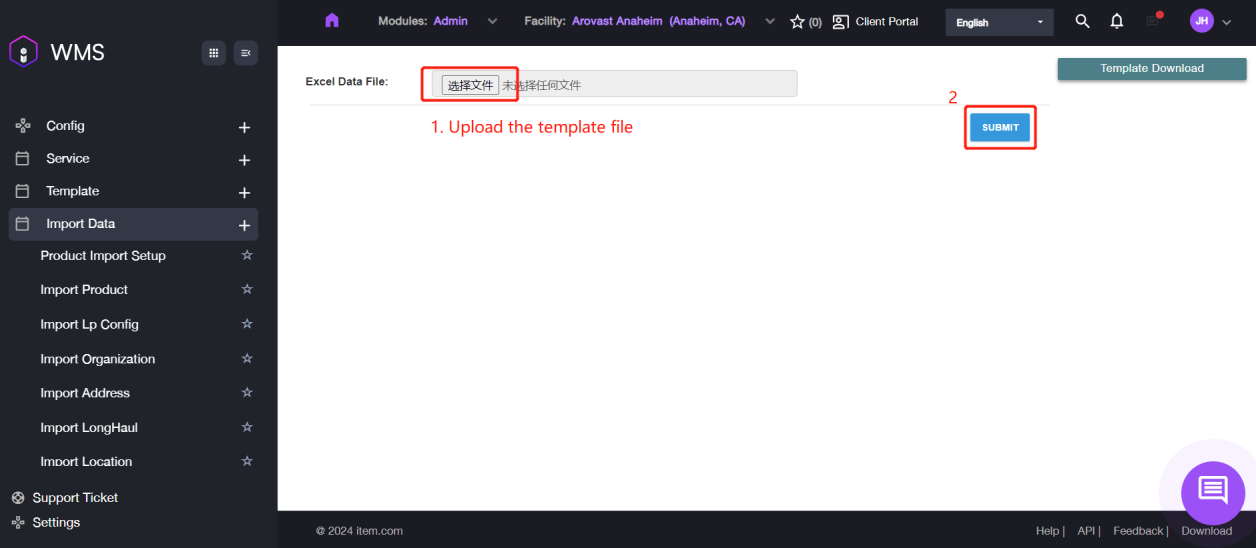
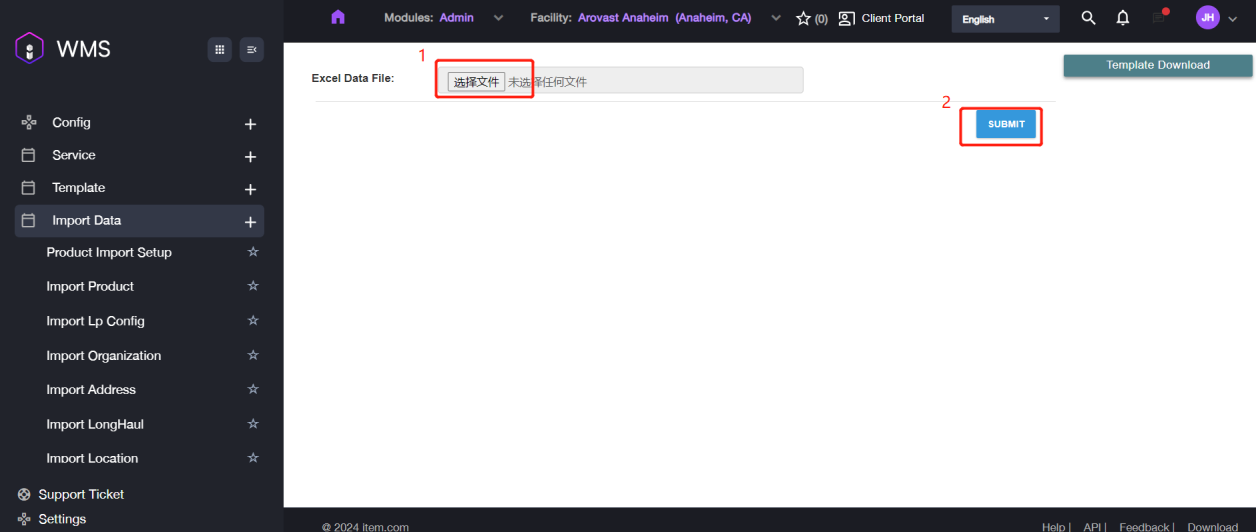
After saving the excel data, please click Choose File to upload the template file then click Submit to complete the progress.
How to Manage the Orders
In this user interface, it also supports some other operations below.
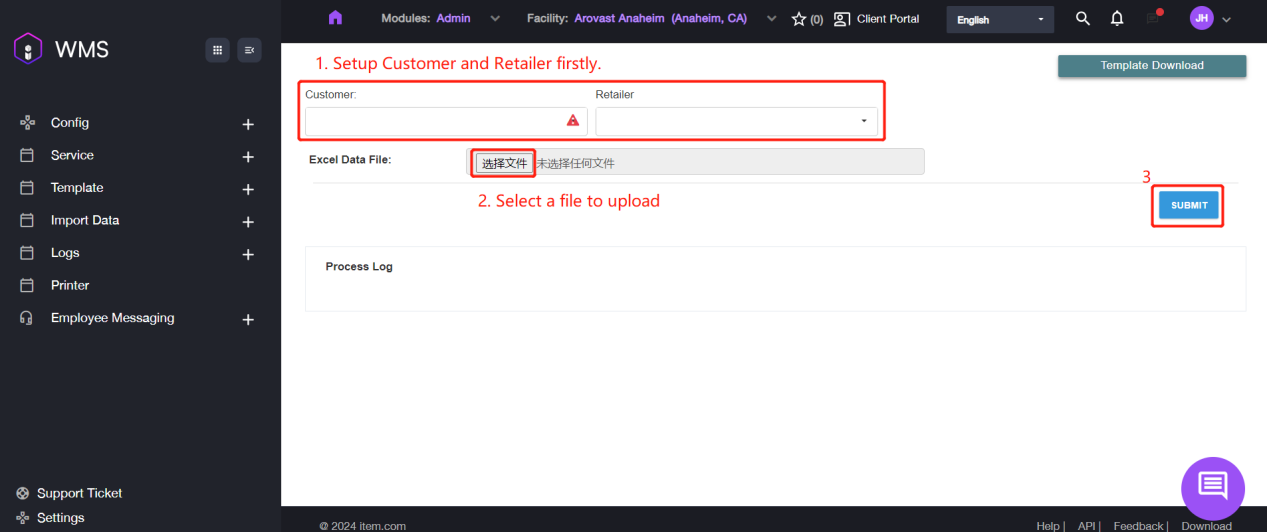
Upload Amazon VC Orders
-
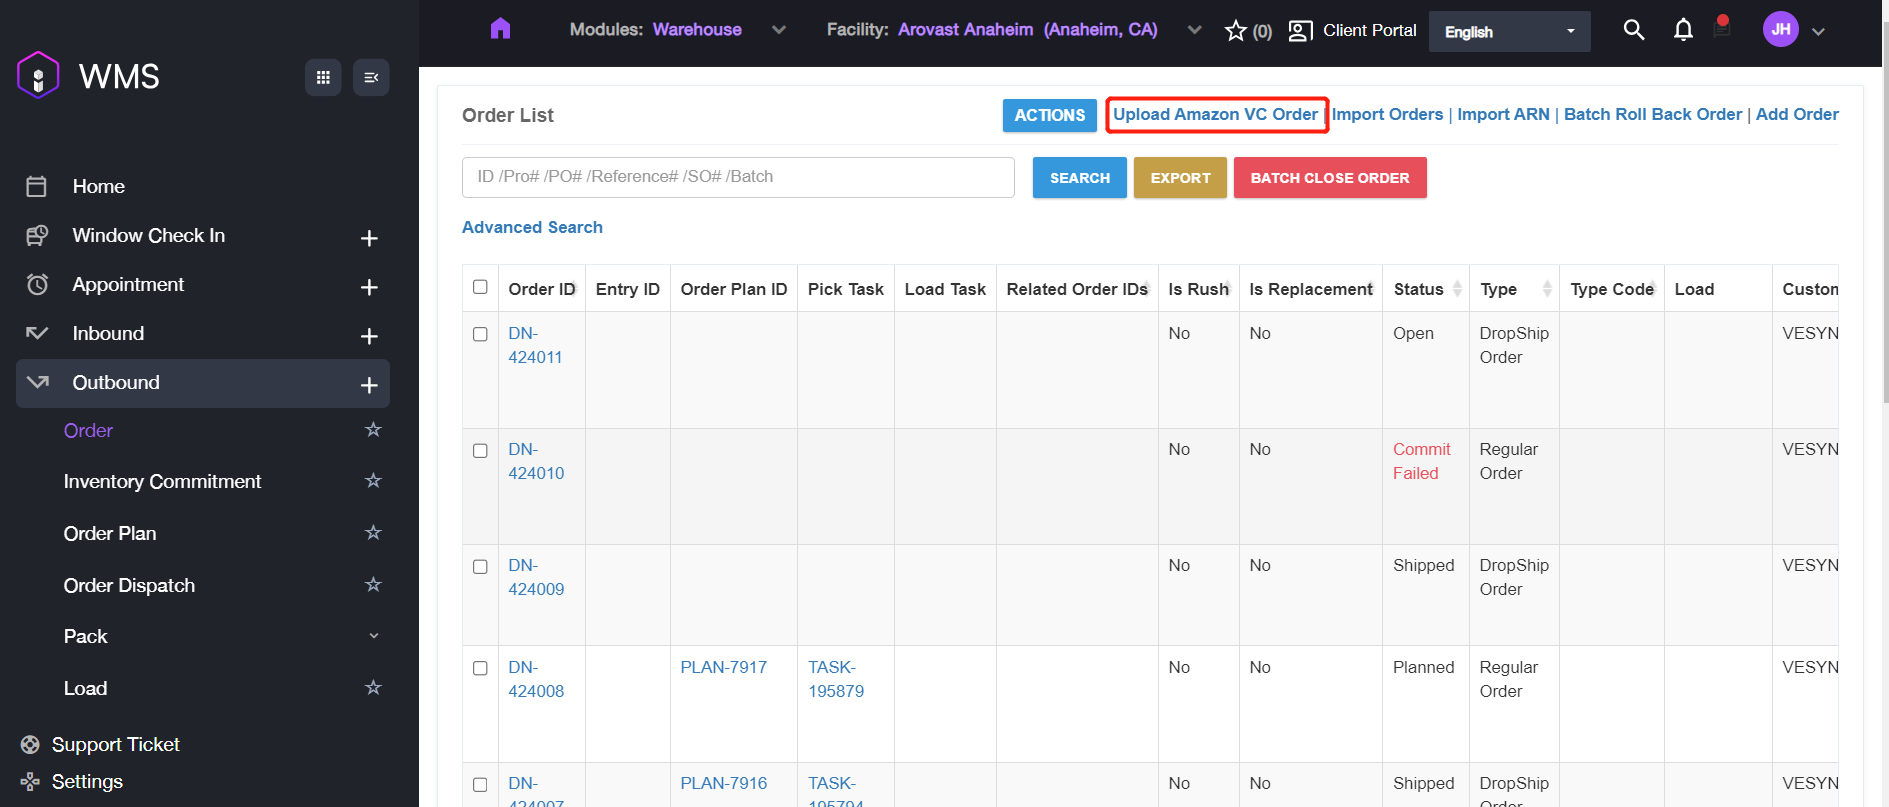
Navigate to Outbound > Order > Upload Amazon VC Orders.
-
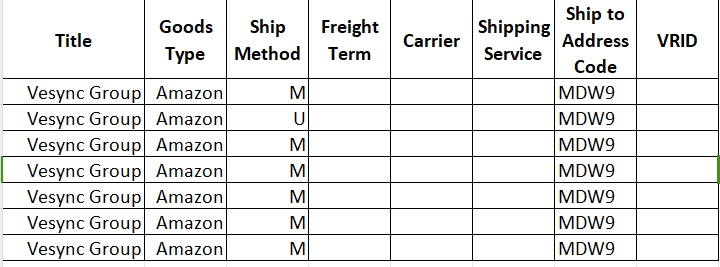
Tap Template Download > Upload Amazon VC Order Template 1.0 (Amazon 1PPO order smpale) to download order template file.

-
Fill out the template file.
-
Setup Customer and Retailer, click Choose File to upload the template file. Then click Submit to complete the progress.
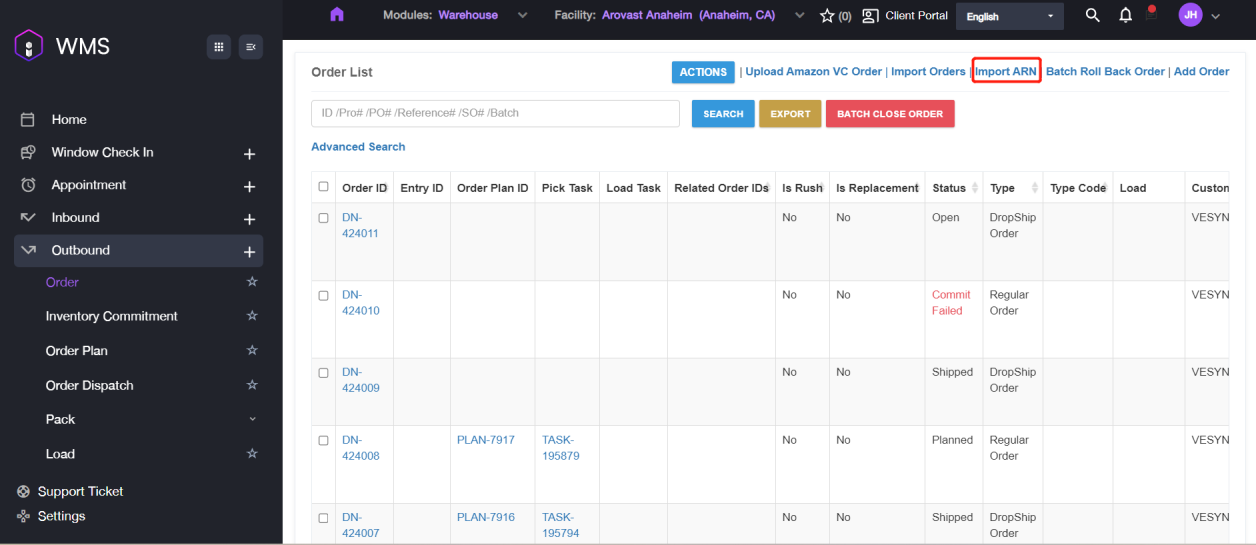
Import ARN
-
Navigate to Outbound > Order > Import ARN.
-
Click Template Download > Order Template 1.0 (RN) to download the template file.
-
Fill out the table.
-
Click Choose File to upload a file, then click SUBMIT to complete the progress.
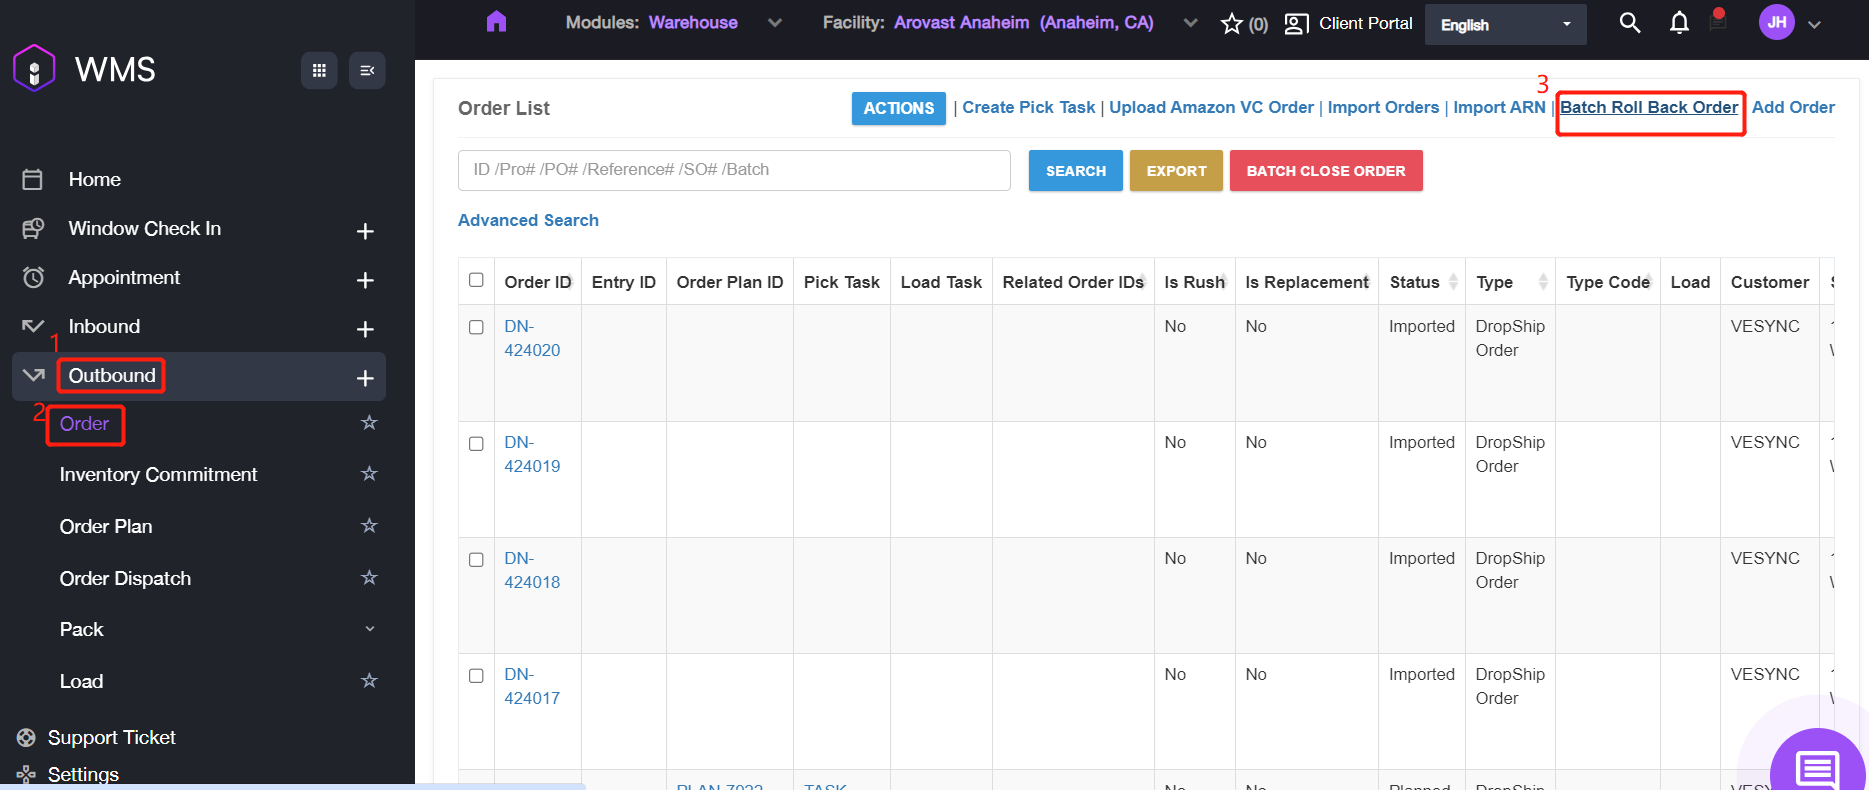
Batch Roll Back Order
If you want to roll back some orders status to adjust the carrier or modify any information/task for the order, please follow the steps below to operate.
-
Navigate to Outbound > Order > Batch Roll Back Order.
-
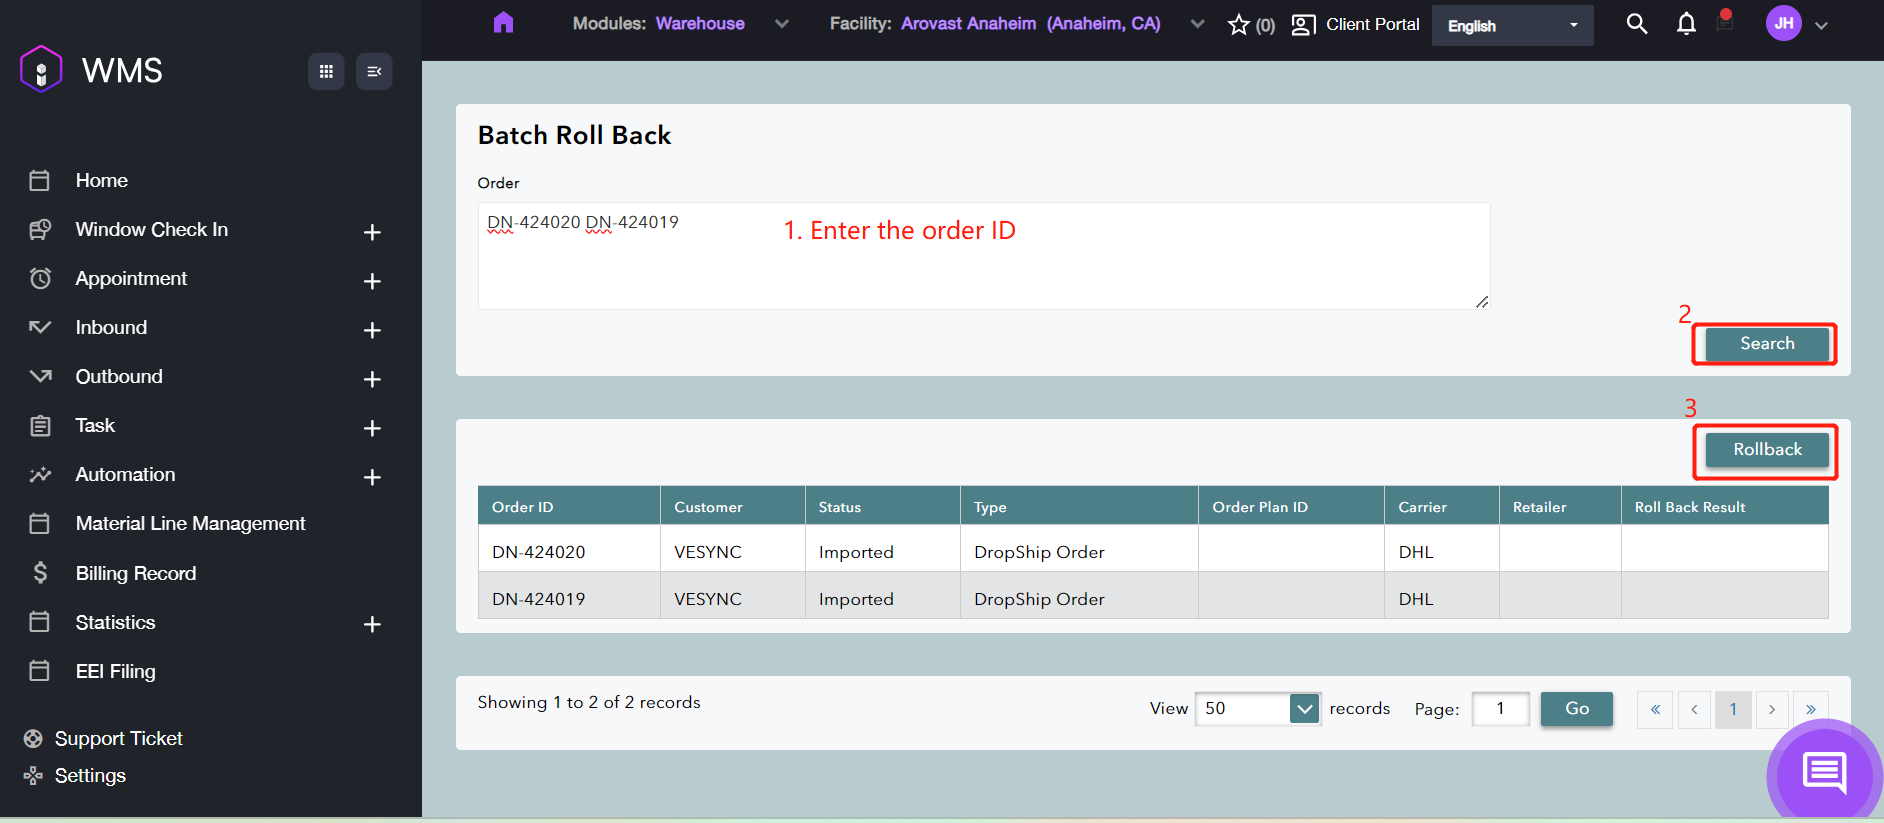
Enter the Order ID into the input box. If you want to batch roll back orders, please enter the all orders’ IDs.
-
Click Search to searching for the corresponding orders, please check the order details to confirm whether the orders are target orders.
-
Click Rollback button for roll back orders in batch.
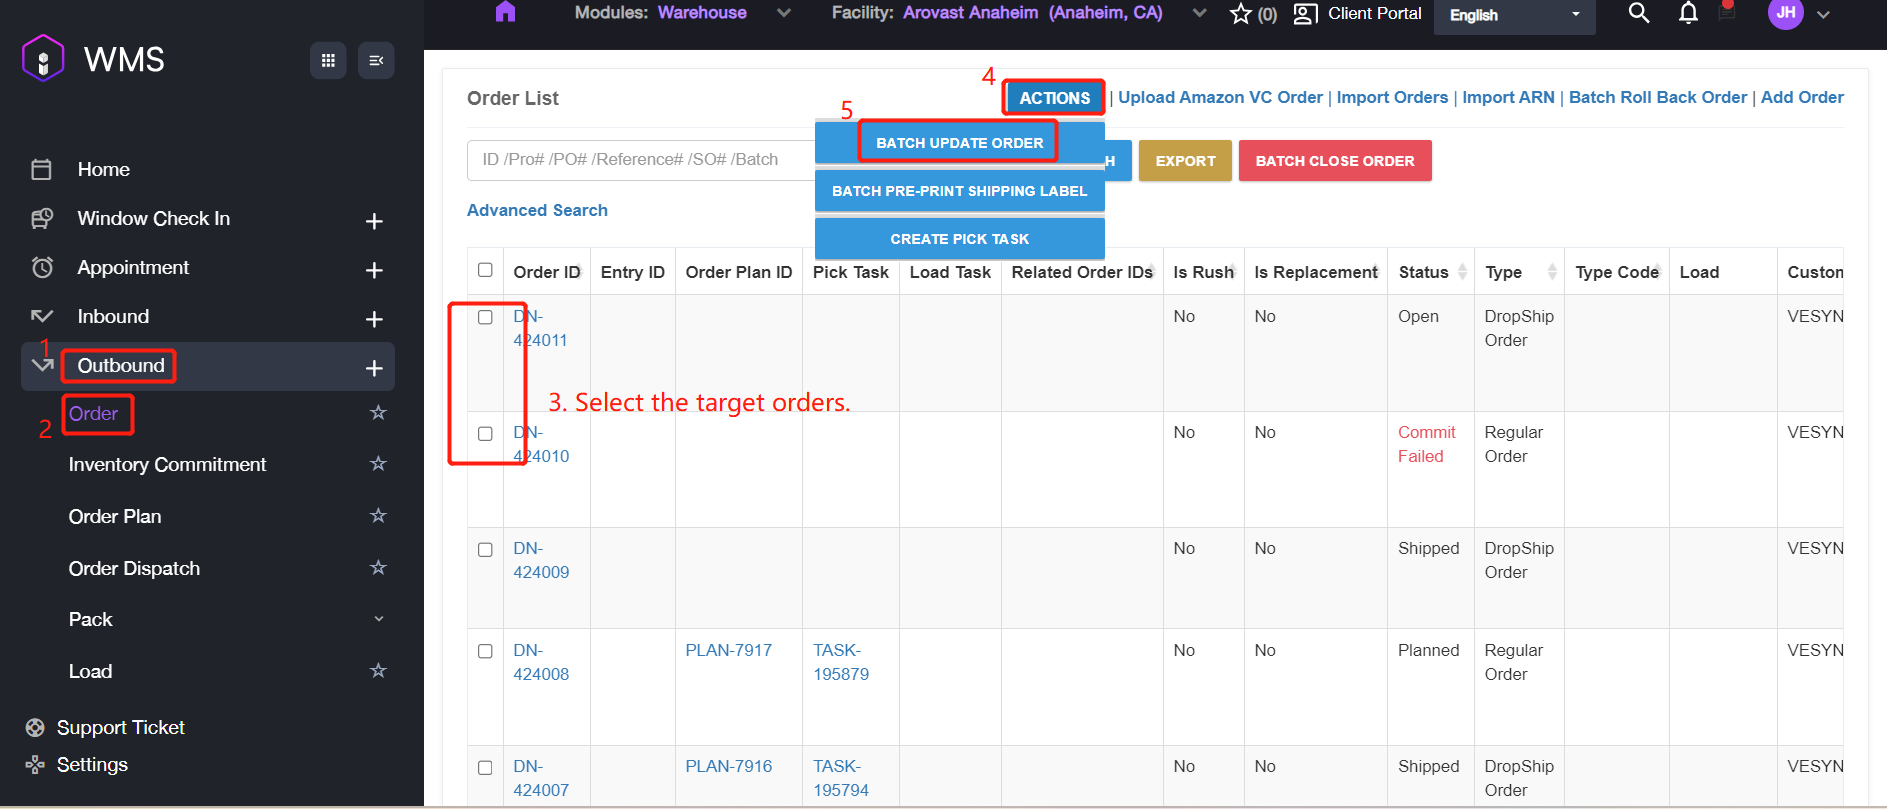
Batch Update Order
If you want to update some same parameters within different orders, it supports to modify the orders in batch so that you don’t need to modify them one by one.
-
Navigate to Outbound > Order, select the target orders then click ACTIONS > BATCH UPDATE ORDER.
-
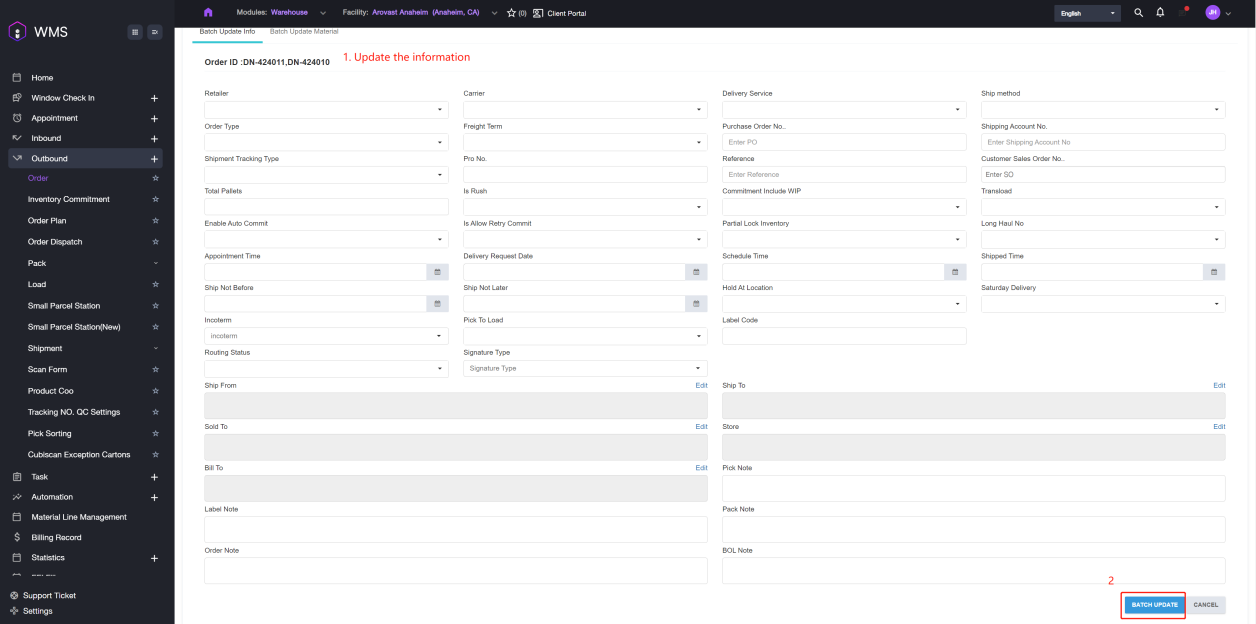
Fill in the information you want to update, then click BATCH UPDATE to complete.
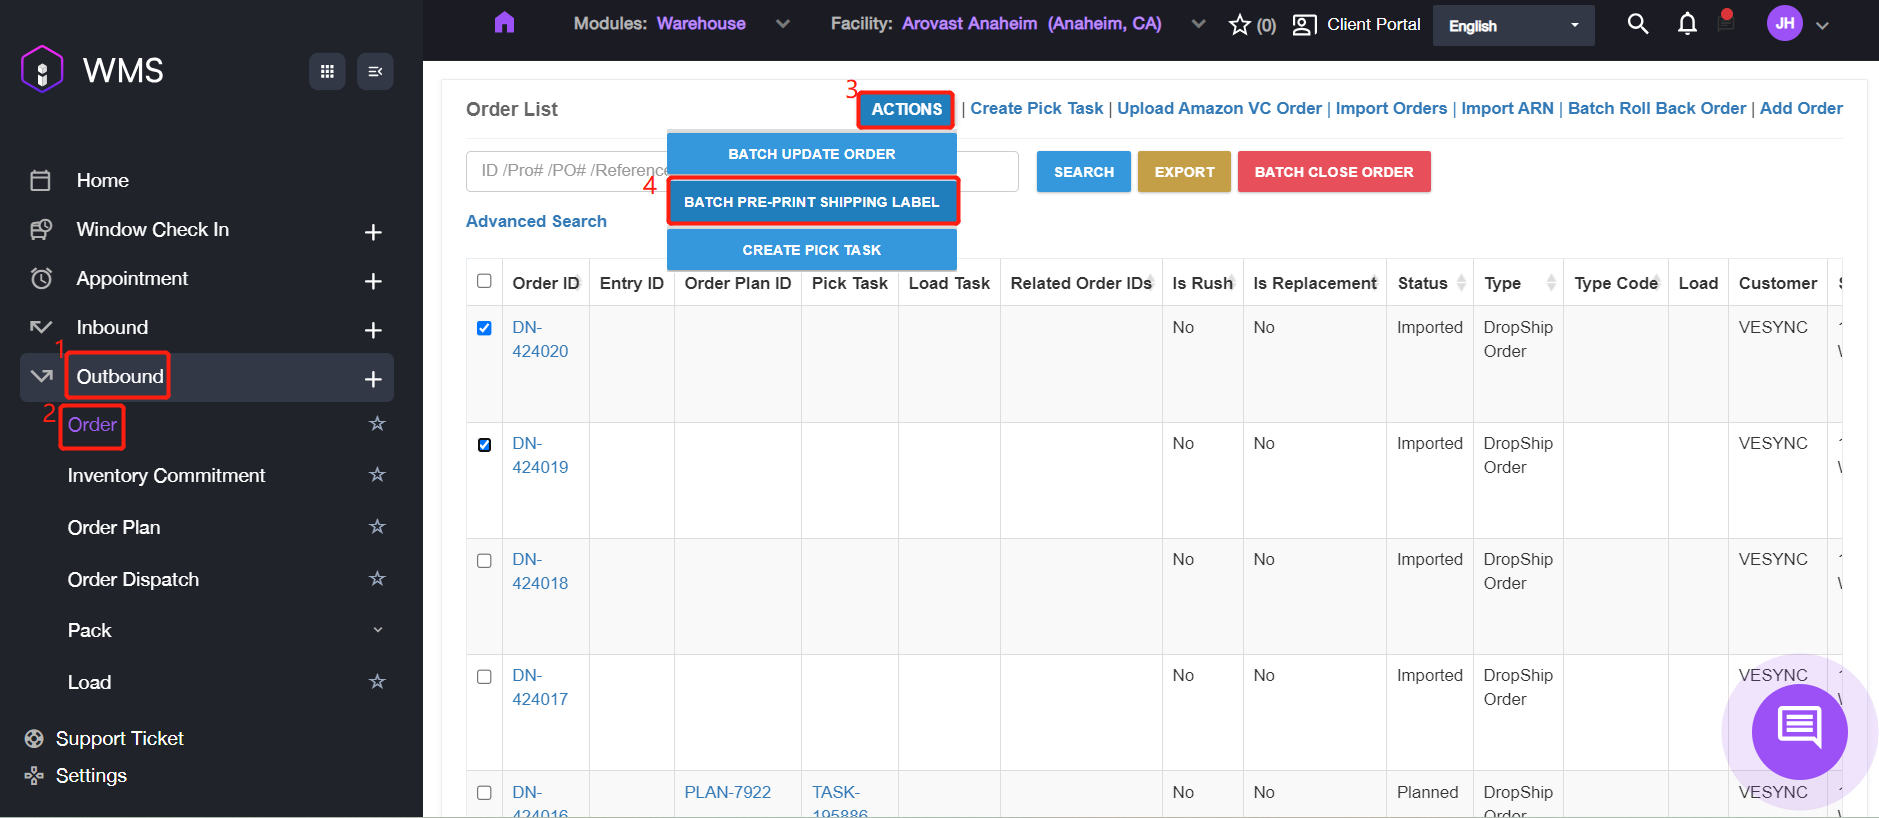
Batch Pre-print Shipping Label
- Navigate to Outbound > Order, select the target orders and then click ACTIONS > BATCH PRE-PRINT SHIPPING LABEL.
2.Confirm the Product Qty Per Package and setup the ZPL Printer. Please click Batch Pre-Print Shipping Label button for printing if the addition information is all correct.
