Add New Locations
There are two methods to add new locations: manually adding and bulk importing data. It is recommended to adding locations via importing, if you want to add multiple locations at once, this will improve the efficiency and simplify the operations.
How to Add a New Location Manually
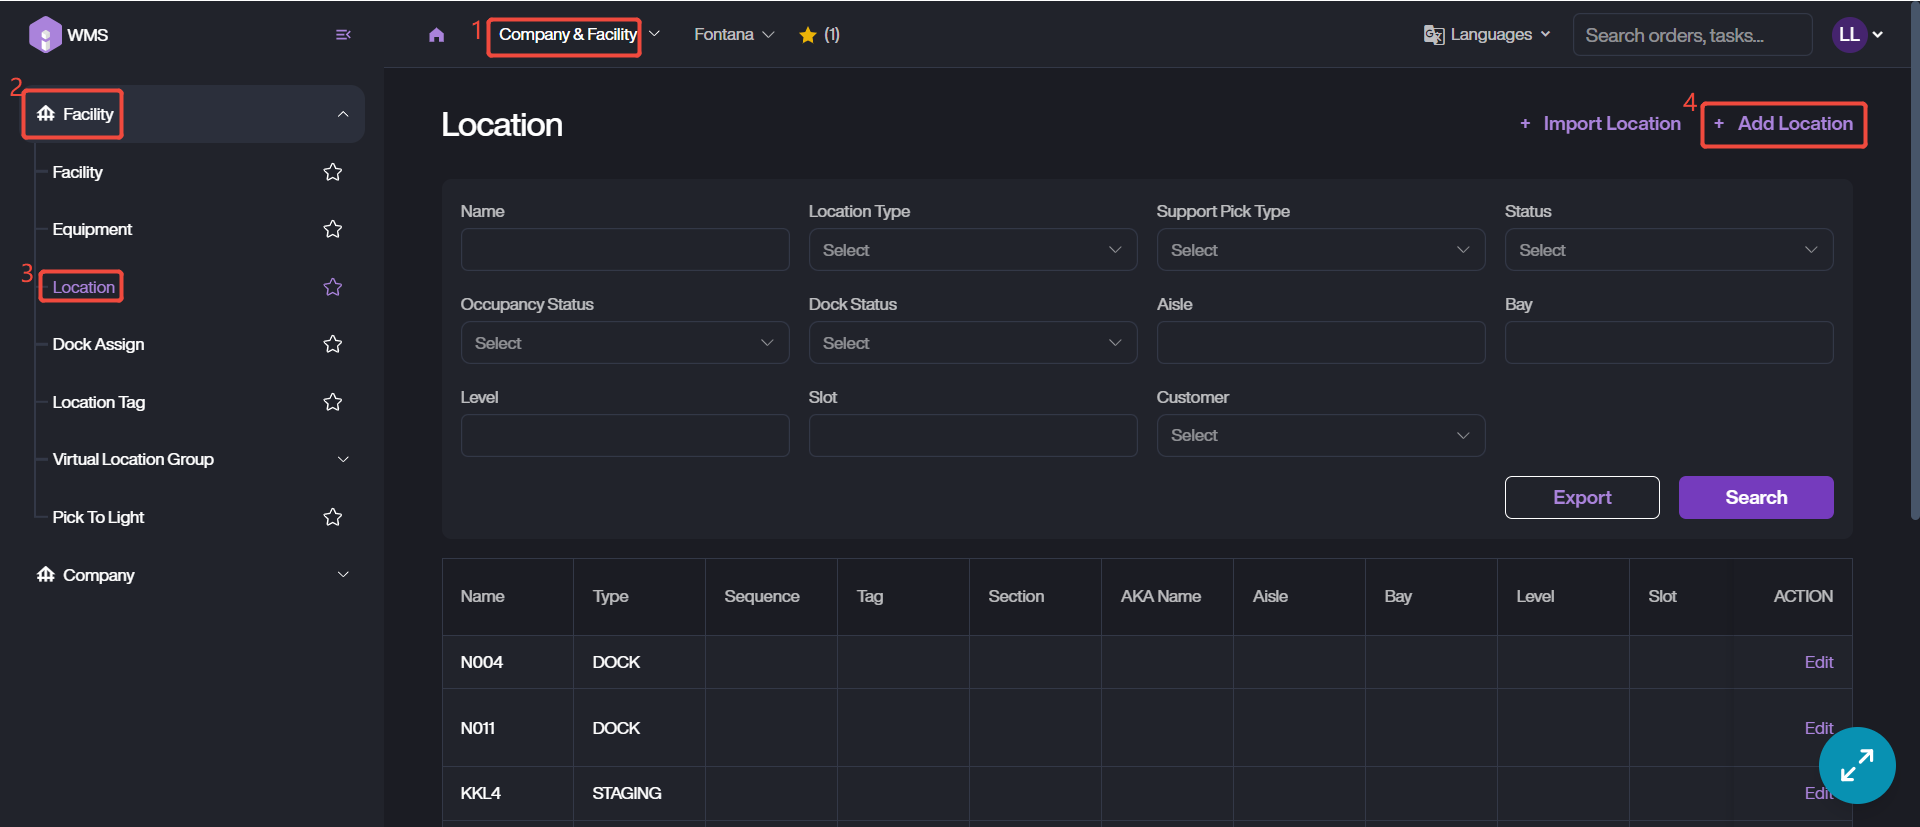
- Navigate to Company & Facility Module > Facility > Location, click + Add Location.
-
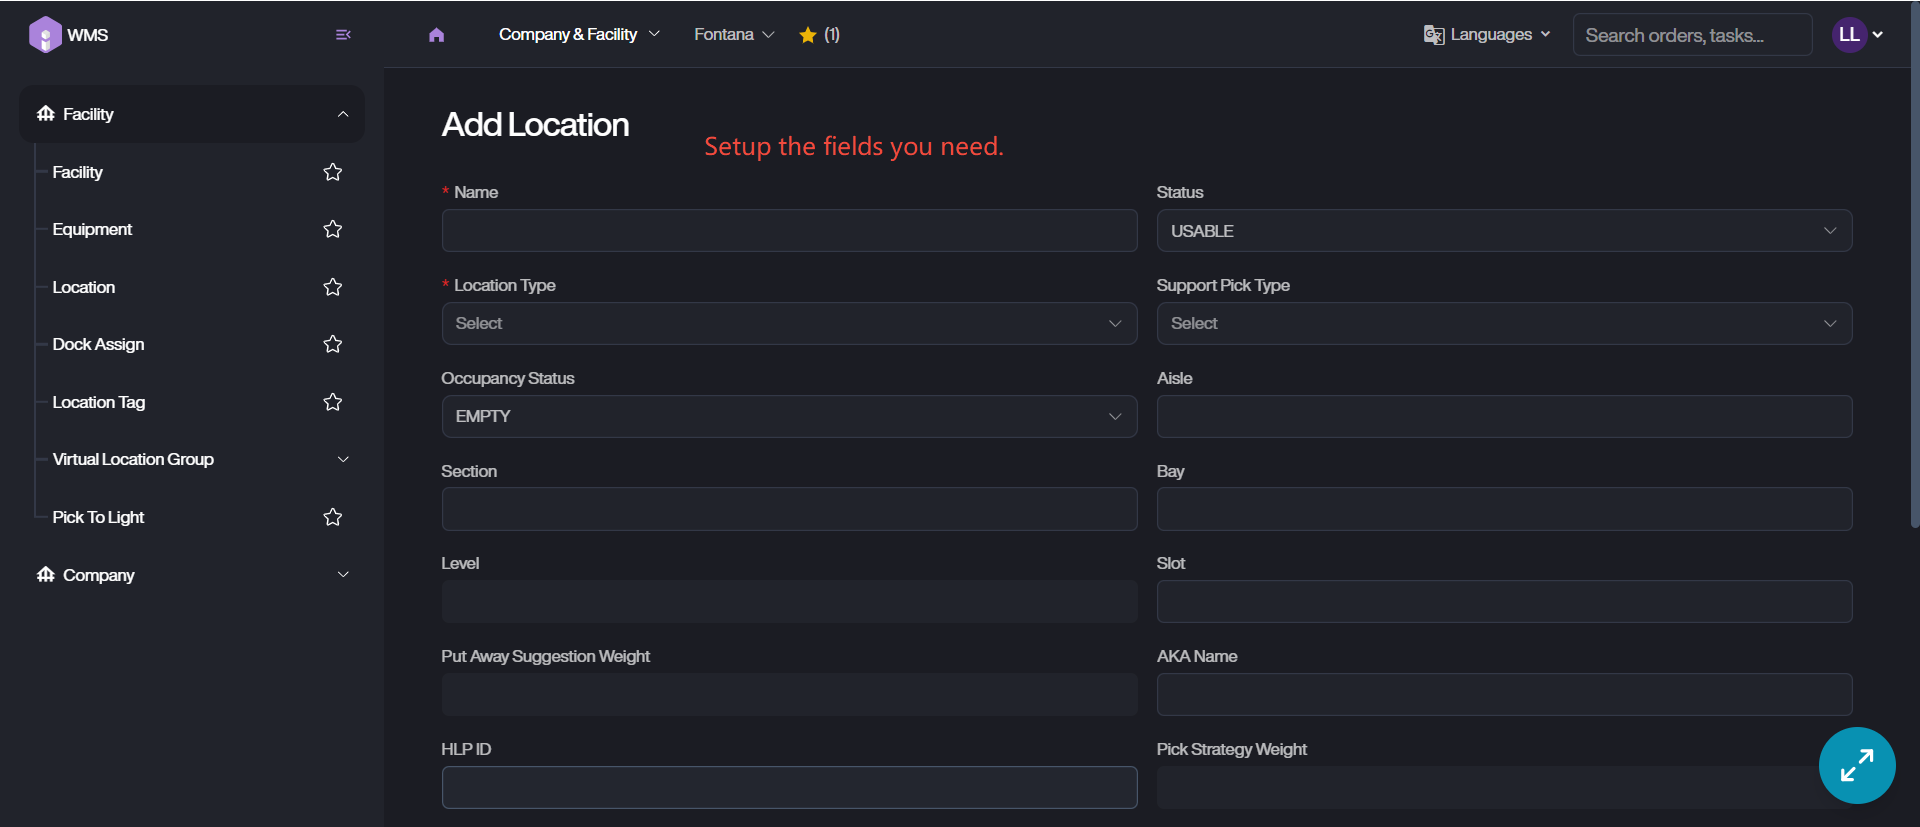
Fill in relevant fields. The field which is marked with red *, meaning it is required.
-
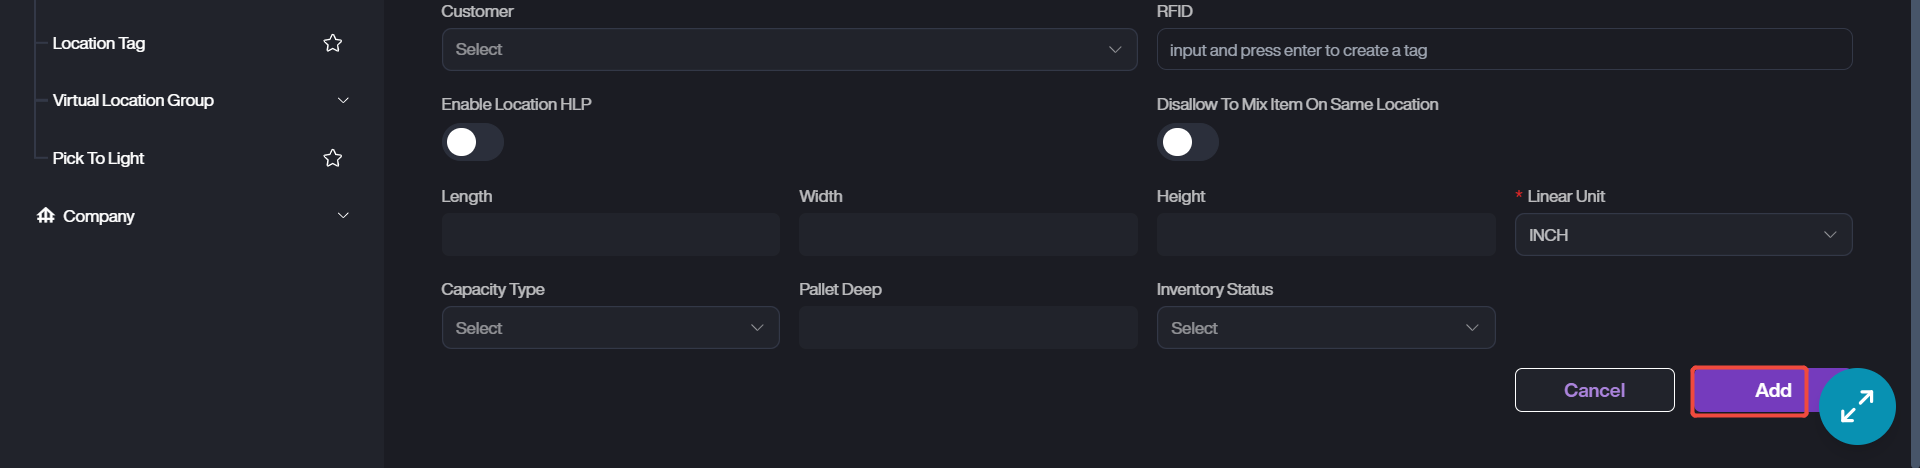
Click Add when you already entered all information needed. The new location will appear in the location list.
| Location Type | Description |
|---|---|
| Location | Regular location. |
| Staging | A staging area for temporarily storing picked items before Inbound or Outbound. |
| Pick | The picking area specifically used for picking items for orders. |
| Dock | The docking area for loading and unloading, it usually connects to the entrance/exit of the warehouse. |
| Rework | A designated area where defective or non-conforming items are temporarily stored for inspection, repair, or repackaging before being returned to inventory or disposed of. |
| Automated Location | An area that utilizes automation technologies, to optimize inventory movement and retrieval with minimal manual intervention. |
| Off-Site | An area to manage inventory stored in third-party warehouse. |
| RMS | An area used to sync inventory between RMS and WMS. Note: it doesn’t allow user to do any operation to adjust the RMS inventory. |
| Location Status | Description |
|---|---|
| USABLE | Indicates the location is currently available. |
| DISABLED | Indicates the location is currently unavailable. |
| DELETE | Indicates the location will be removed permanently after warehouse reorganization. |
| MERGED | Indicates the location has been merged with another. To optimize space, two adjacent shelf locations will be combined to a large location. |
| MIXTURE | Indicates the location currently stores mixed items or batches. |
How to Add Locations via Importing
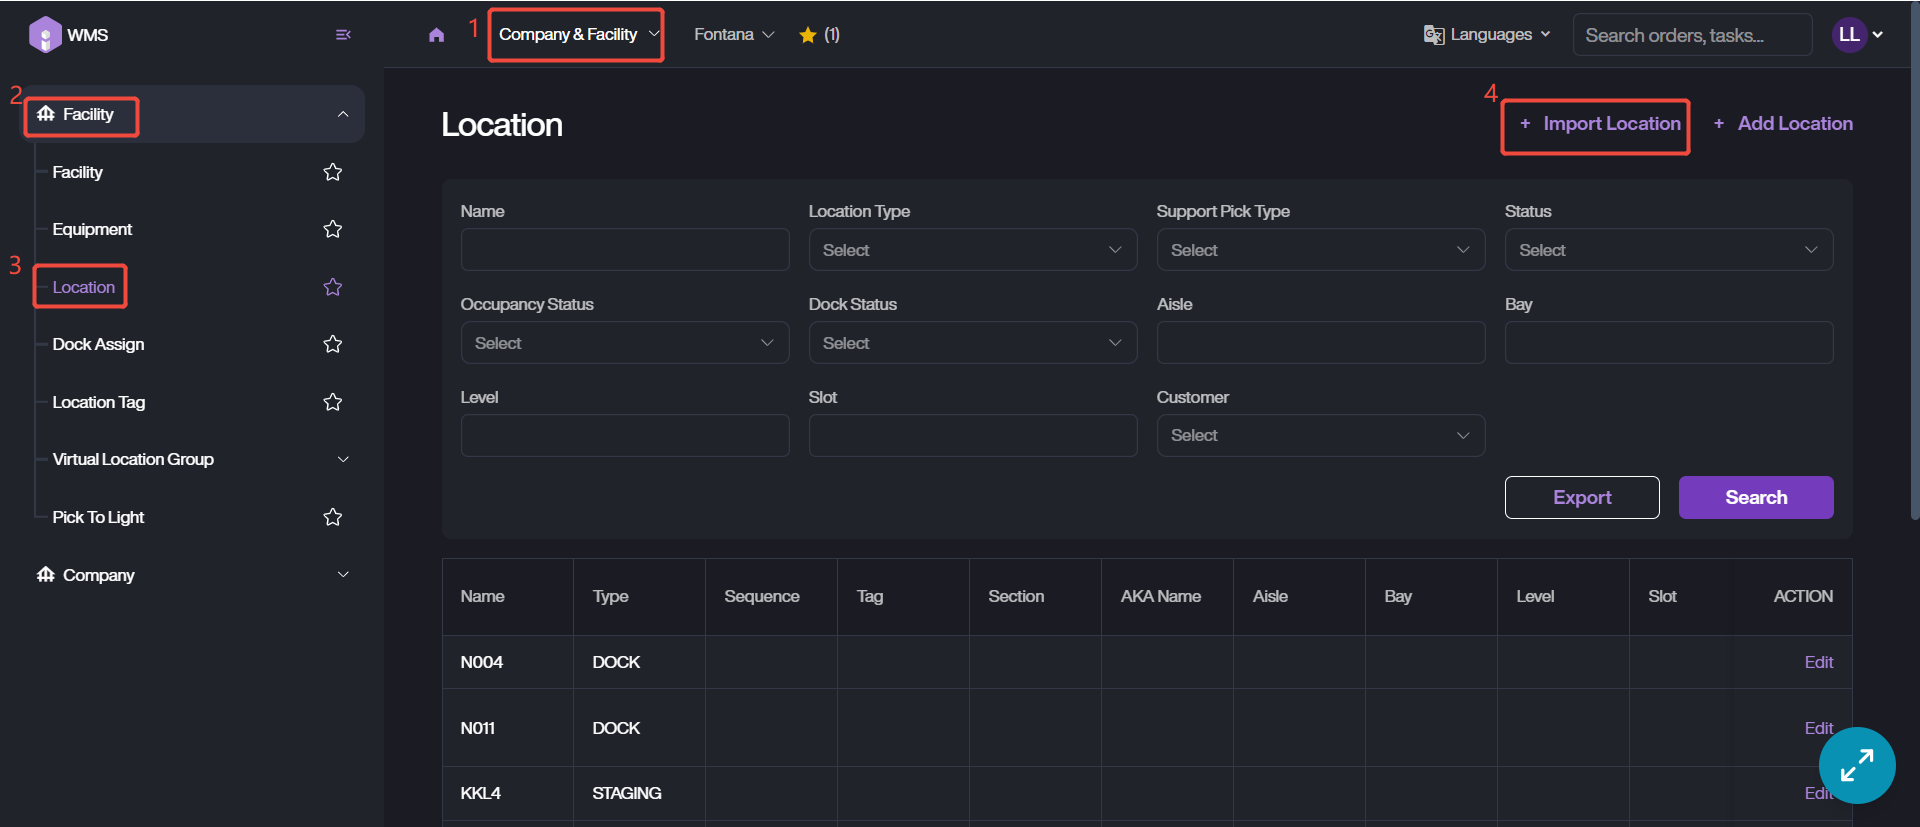
- Follow the same path to access location section as manual adding, then click + Import Location to continue.
-
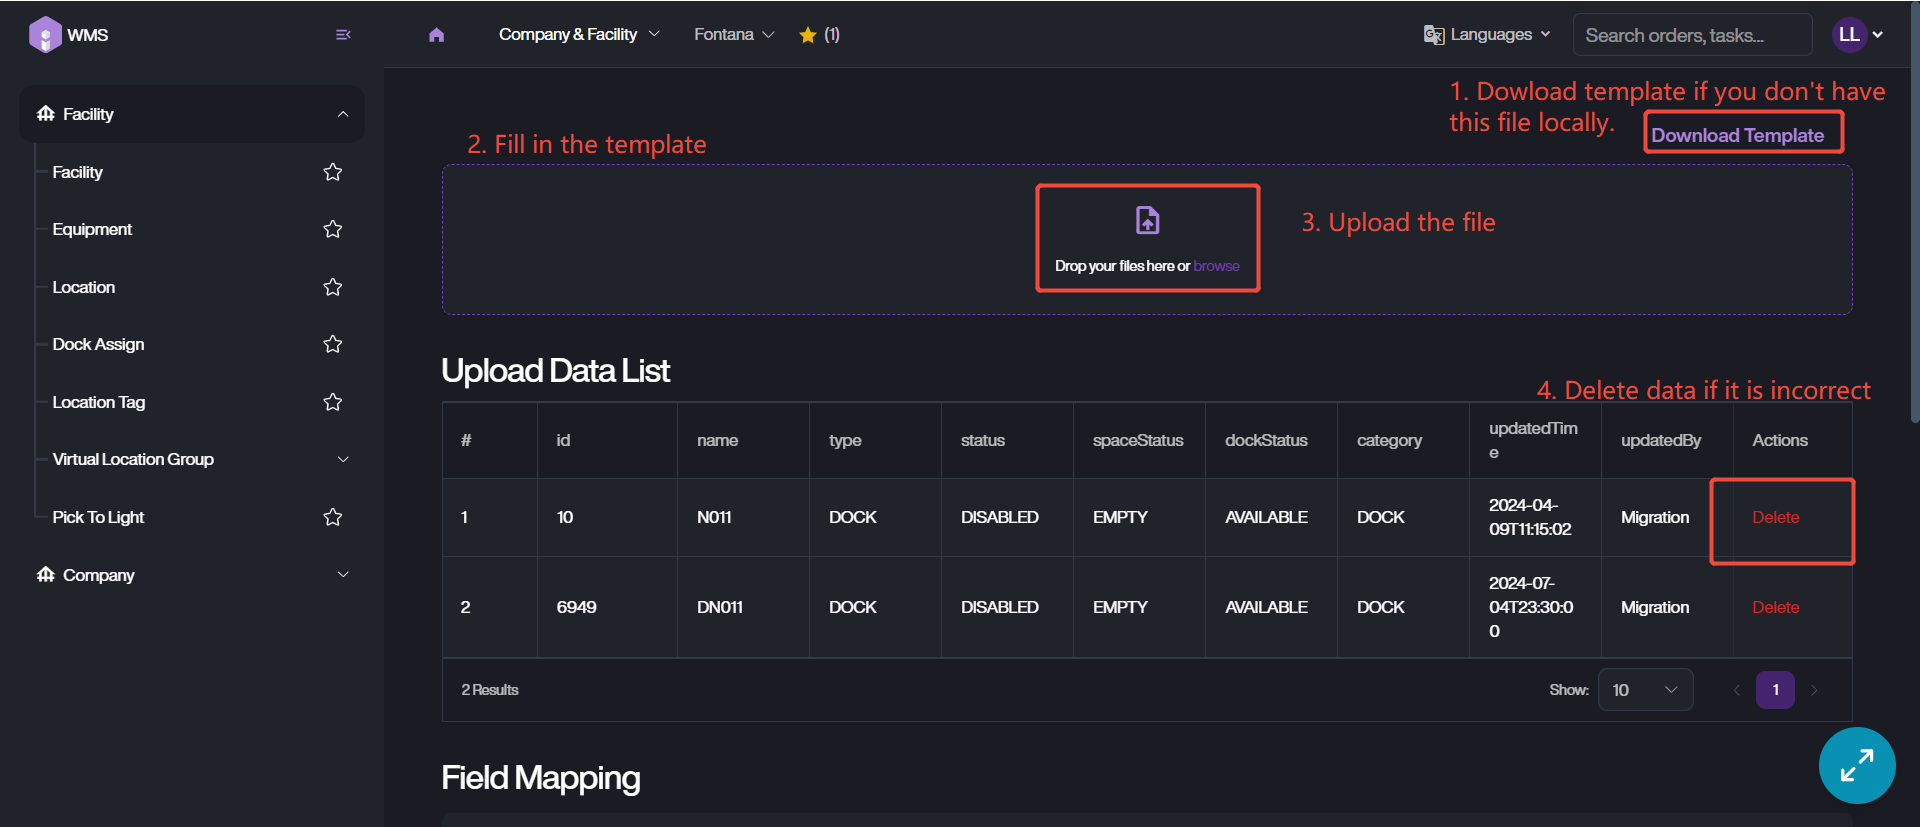
If you don’t have the importing template locally, please click Download Template to get template file firstly.
-
Fill the details for each location into the excel file.
-
Drag and drop or upload the file to Item WMS. The locations will be displayed in Upload Data List, please confirm the correctness. If there is anything incorrect or unwanted, just click Delete to remove corresponding data.
- Then, click Submit button to complete the adding process.