Data Mapping
Data mapping is a critical process for integrating third-party channels with item systems, ensuring smooth and accurate data flow between systems.
When product SKUs, shipping services, UOM, or freight terms on third-party channels differ from those used in item systems, or when data undergoes updates or changes, you must map the original data to the corresponding values in item systems. This ensures that item OMS can:
- Extract data from third-party channels.
- Apply the mapped data using data mapping tables.
- Post the correct data back to the relevant channels, maintaining data consistency across systems.
Currently, item OMS supports mapping for Channel Shipping Mapping, Products, Units of Measure (UOM), Warehouse Shipping Carrier Mapping (Reverse) and Retailer Mapping.
Channel Shipping Mapping
Use the Channel Shipping Mapping feature to define how shipping information from each sales channel is aligned with OMS shipping rules.
Add Mapping
You can create mapping rules to standardize carrier names, delivery services, and shipping methods imported from different platforms.
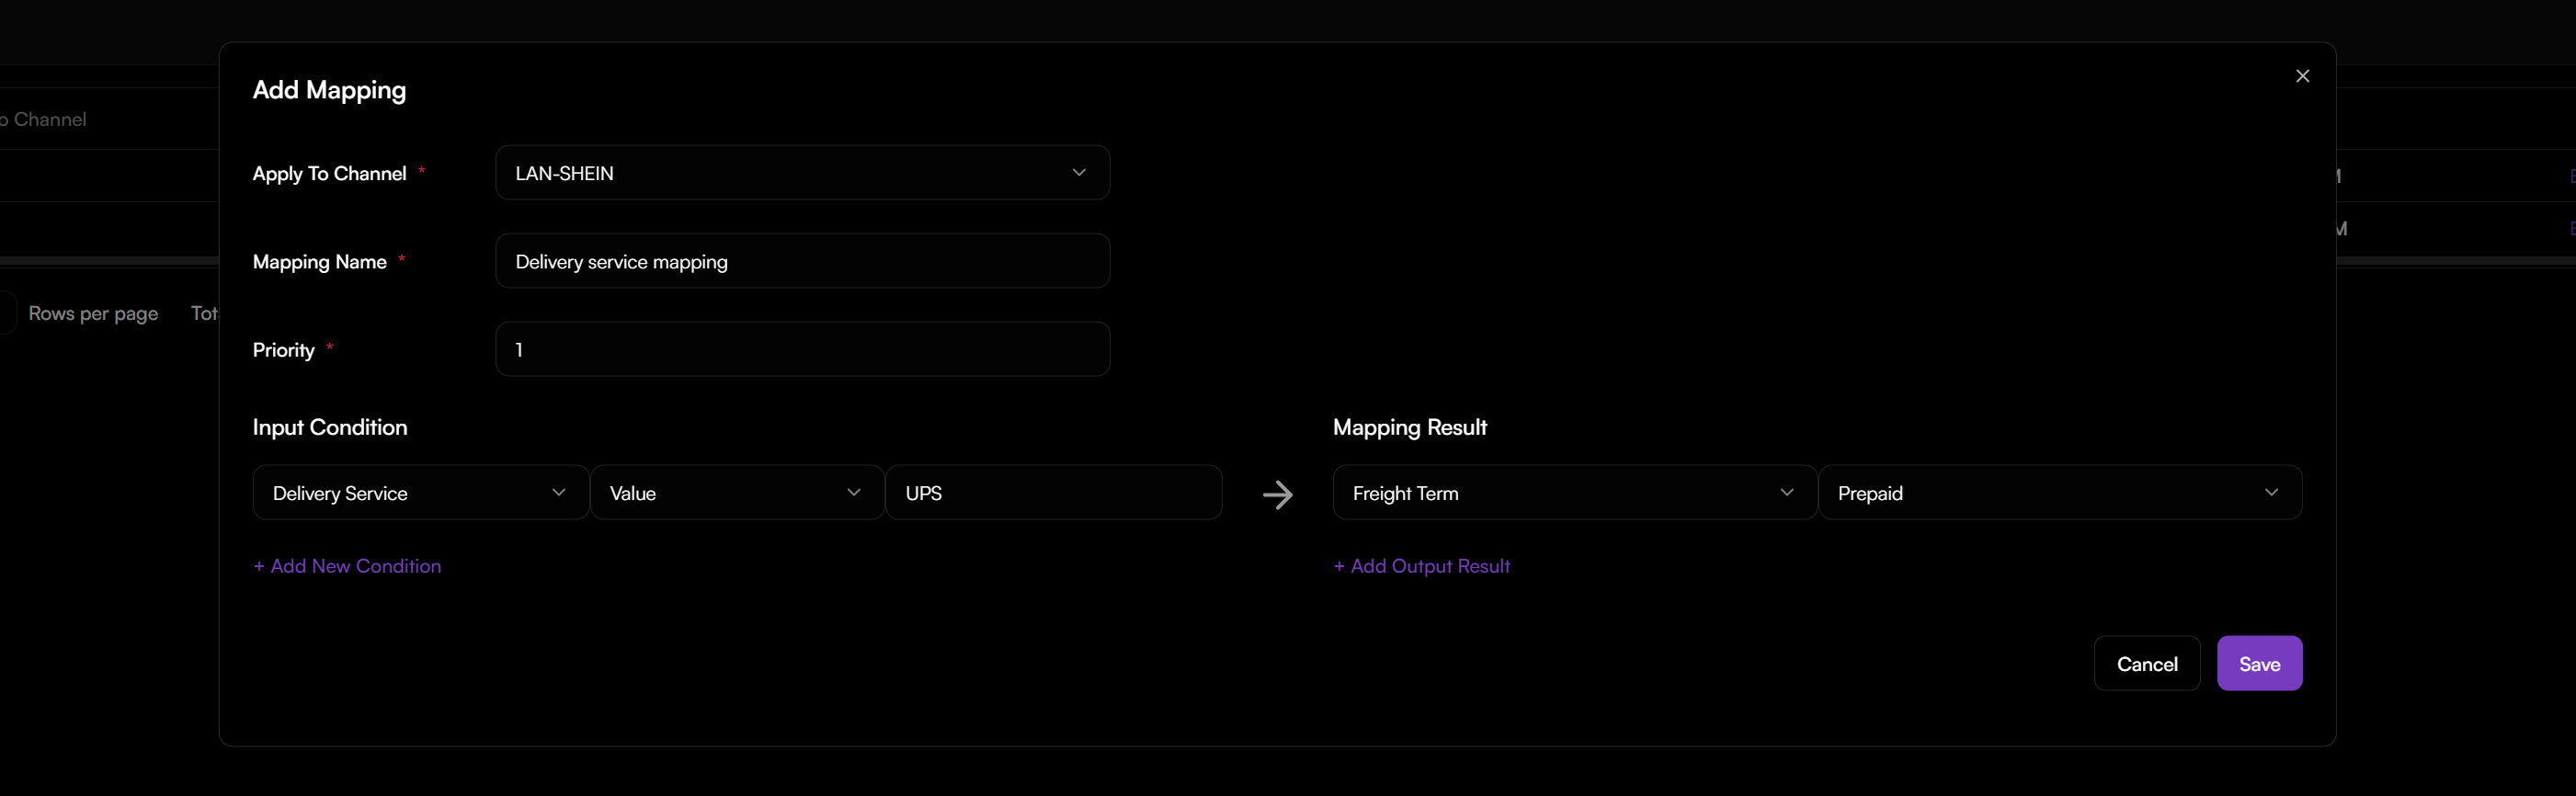
To add a channel shipping mapping rule:
- Go to Automation > Mapping > Channel Shipping Mapping.
- Click + Add.
- In Apply To Channel, select the channel store.
- Enter a Mapping Name and assign a Priority.
- Under Input Condition, define the source values that trigger the rule.
- Select one or more attributes such as Delivery Service, Ship Method, Carrier, Freight Term, or Shipping Address.
- Enter the exact value used in the channel data.
- Under Mapping Result, specify the value that should be replaced.
- Click + Add Output Result to include multiple mappings in one rule.
- Click Save.
Product Mapping
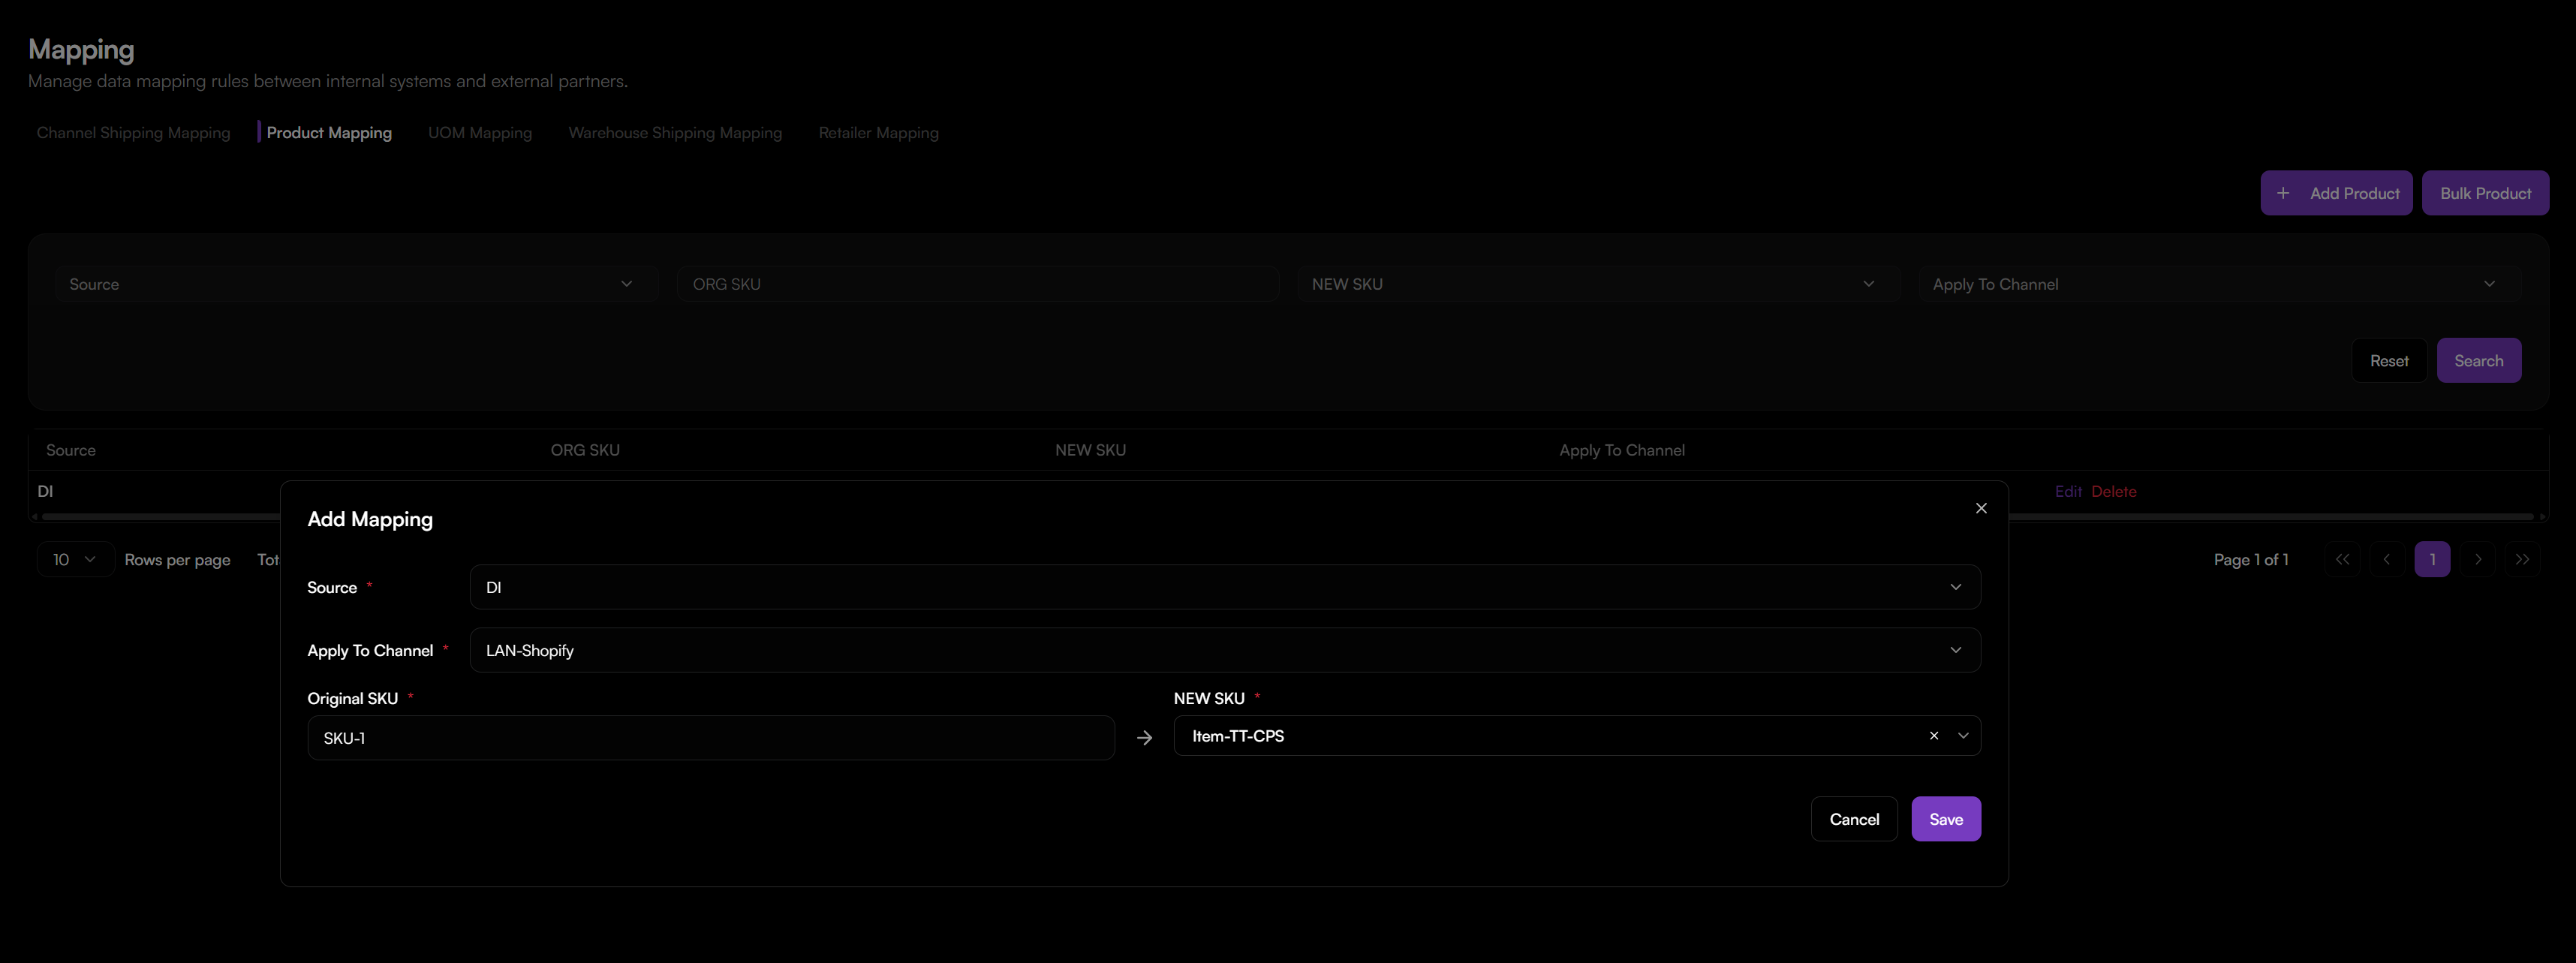
To adding Product Mapping:
- Sign in to item OMS with your account and navigate to Mapping > Product Mapping.
- Click + Add. The new product mapping window will appear.
- Enter the Original SKU and select the NEW SKU from the drop-down menu.
- Select the channel to apply this mapping.
- Click Add Mapping.
UOM Mapping
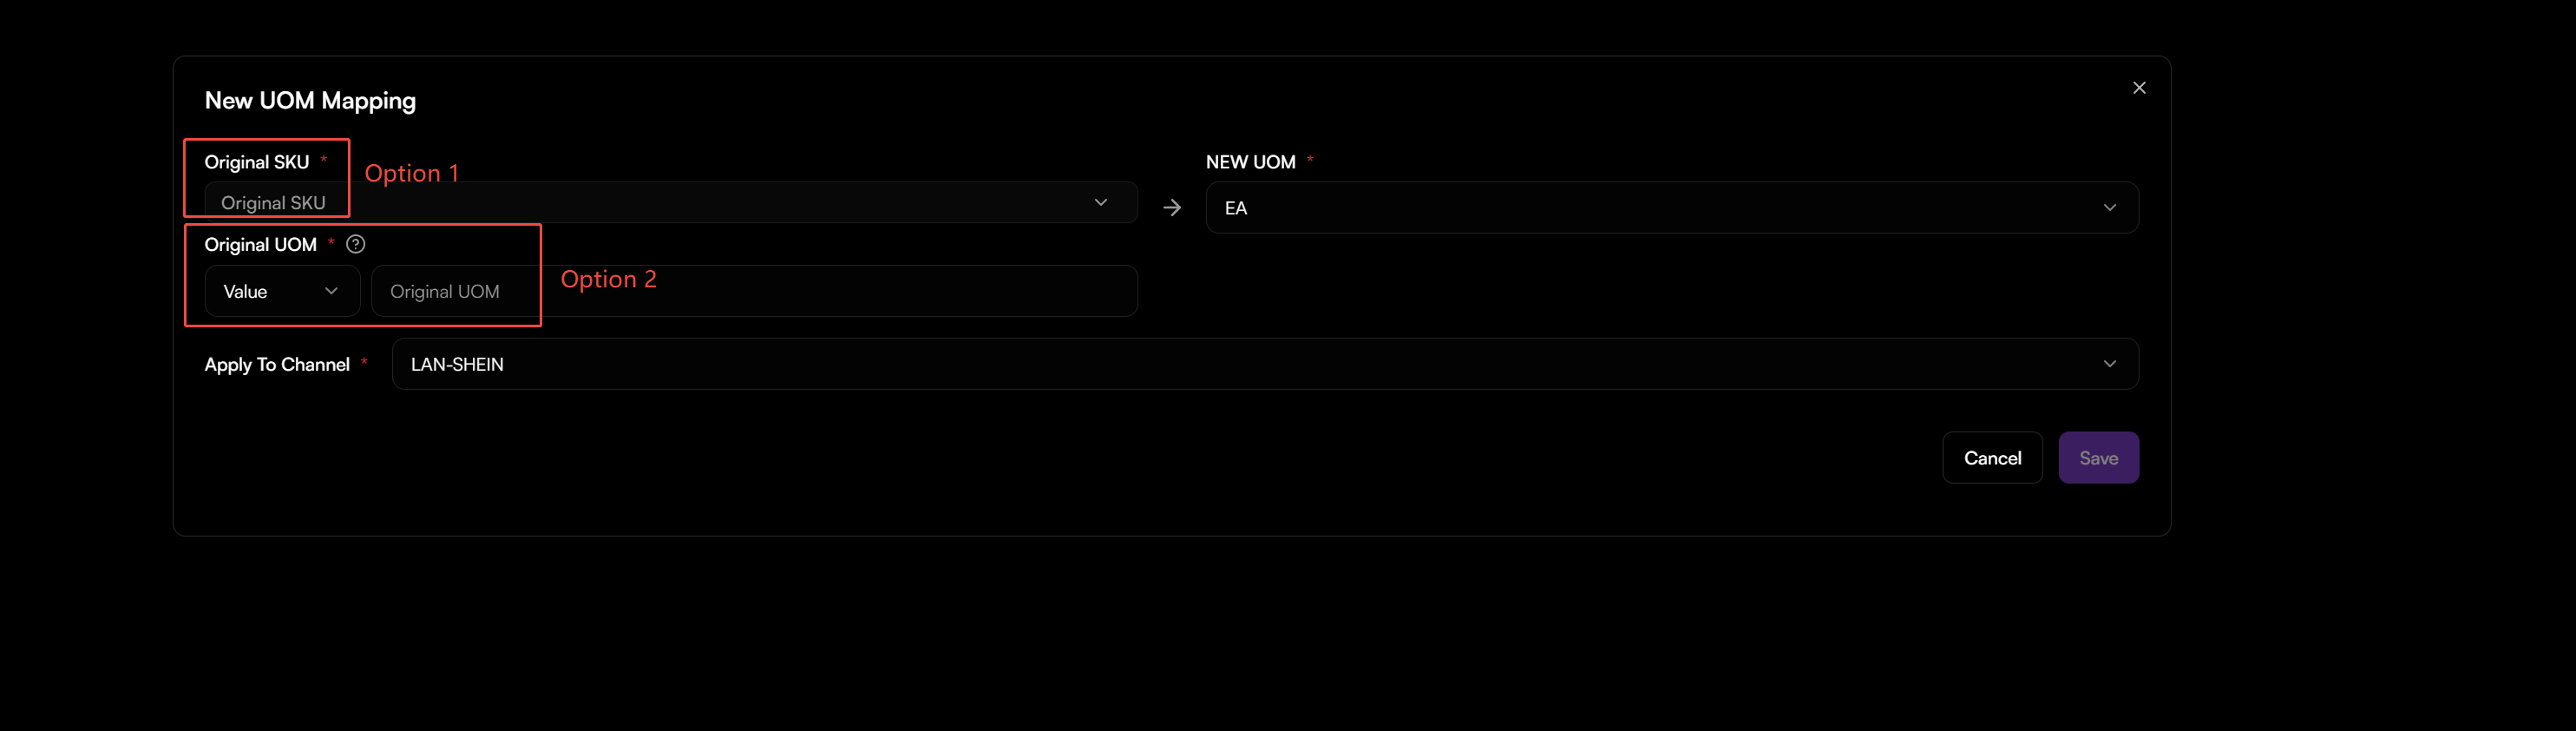
To add UOM Mapping:
- Navigate to Mapping > UOM Mapping.
- Click + Add. The UOM mapping window will appear. You can either choose Specific SKU Mapping or Original UOM Mapping:
- SKU Mapping: Select the product (multiple selection supported), and choose the NEW UOM from the drop-down menu.
- Original UOM mapping: Select the value type and enter the value of the Original UOM.
- Select the New UOM from the drop-down menu.
- Select the channel to apply this mapping.
- Click Add Mapping.
Warehouse Shipping Carrier Mapping (Reverse)
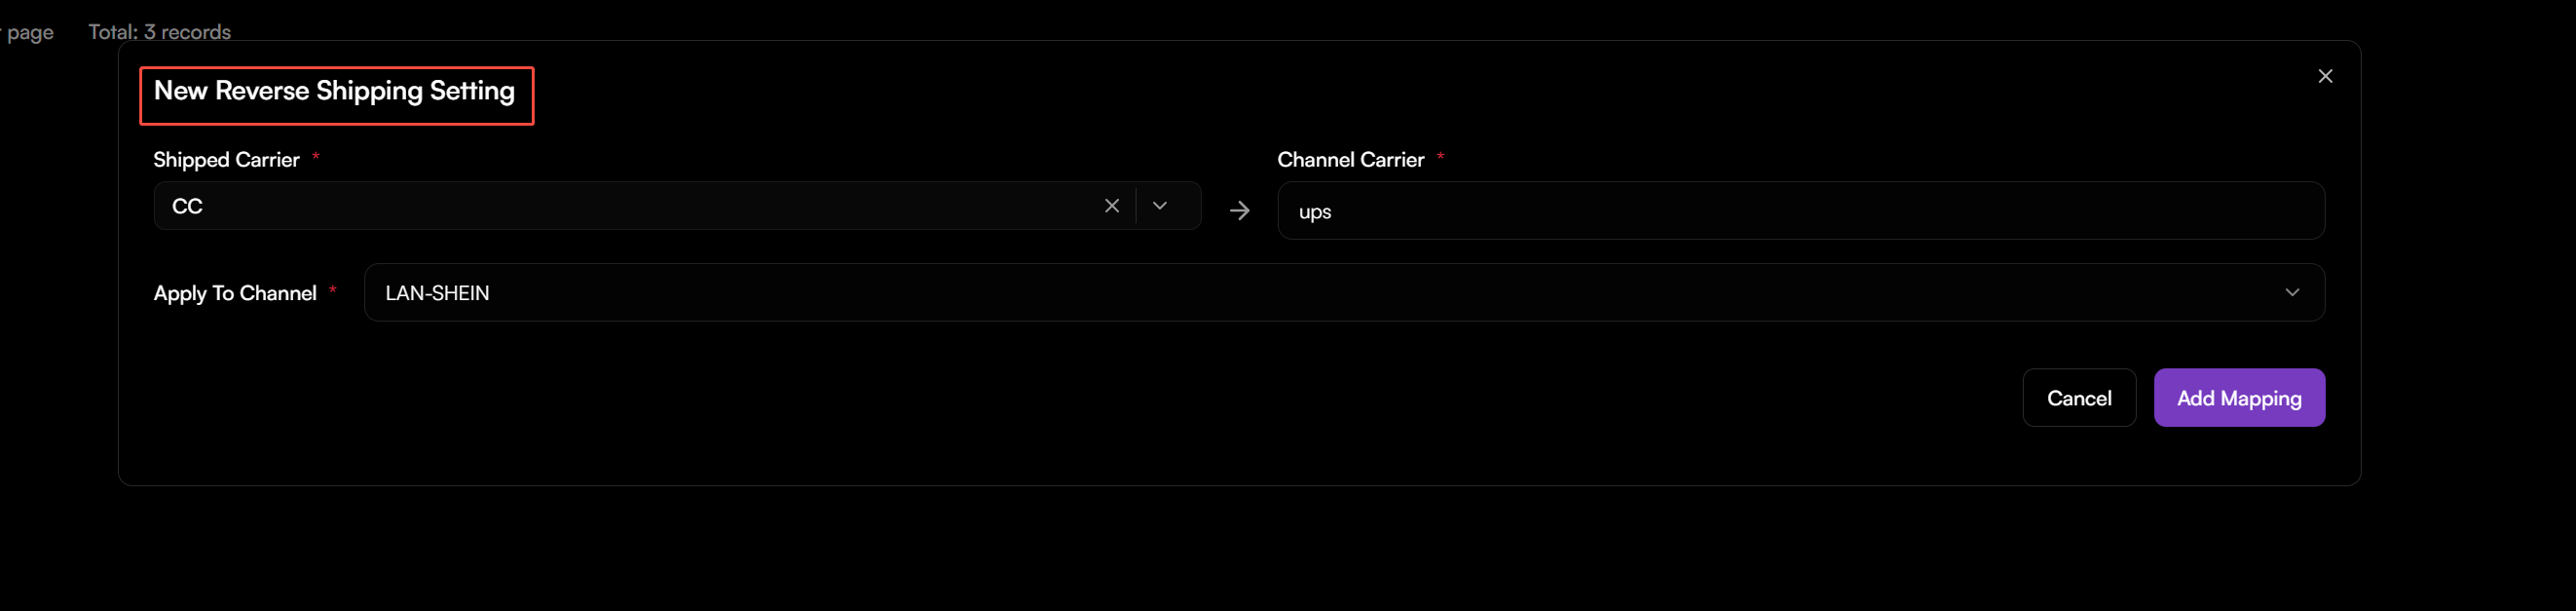
Use this mapping to translate the internal carrier or service codes used within your WMS to the specific carrier names required by each sales channel. It ensures accurate carrier information is communicated back to the channel for customer tracking and reporting when fulfilling orders.
To add Warehouse Shipping Carrier Mapping:
- Navigate to Mapping > Warehouse Shipping Carrier Mapping.
- Click + Add.
- In Shipped Carrier, enter the carrier/service name from your WMS.
- In Channel Carrier, enter the corresponding name for the sales channel.
- Select the target channel from the Apply To Channel dropdown.
- Click Add Mapping.
Retailer Mapping
This mapping standardizes the seller or store name from different sales channels to a single, internal identifier. It ensures orders from the same retailer are grouped correctly for consistent reporting, financial reconciliation, and downstream warehouse processing.
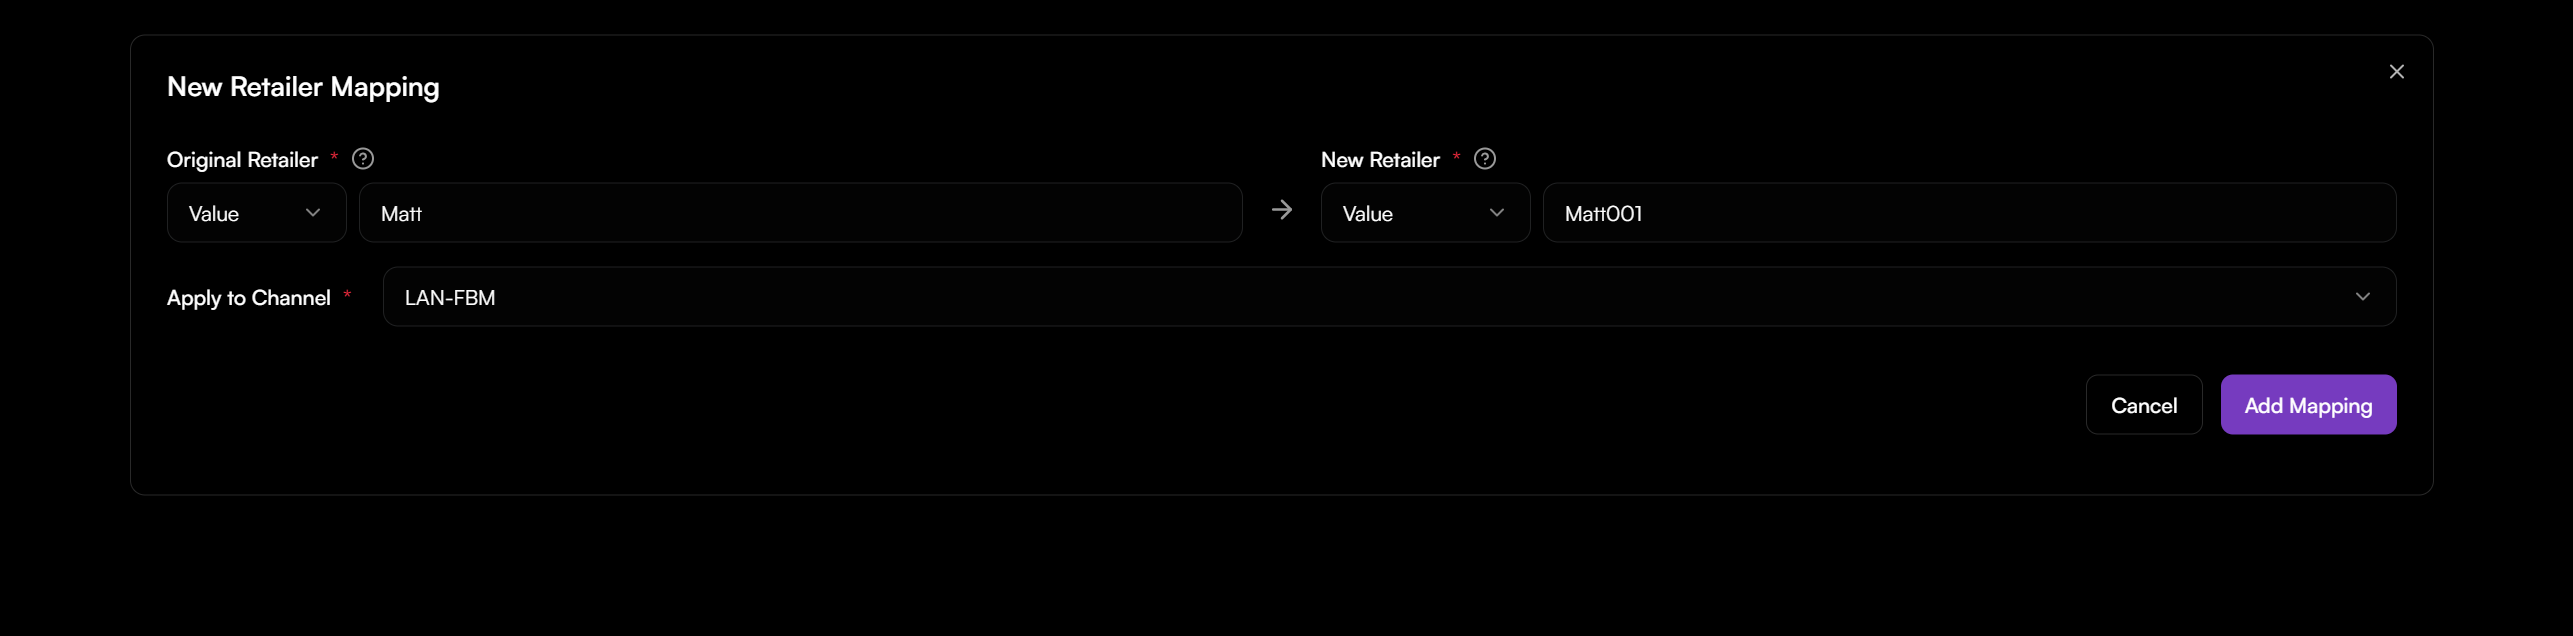
To add Retailer Mapping:
- Navigate to Mapping > Retailer Mapping.
- Click + Add.
- Enter the Original Retailer name as it appears in the source sales channel.
- Enter or select the internal New Retailer identifier.
- Select the sales channel from the Apply to Channel dropdown.
- Click Add Mapping.
Edit / Delete Mapping
You can add multiple mappings using the steps above. Item DI will apply the mapping data table when pulling data from third-party channels and post the original data back.
To edit or delete a mapping:
- Select the mapping.
- Click the pencil icon to edit or the "-" icon to delete the mapping on the right side.
These steps ensure that your data remains consistent and accurate across all integrated channels.