Purchase Request
In the Purchase module, you can manage your purchase plan, purchase order and vendor.
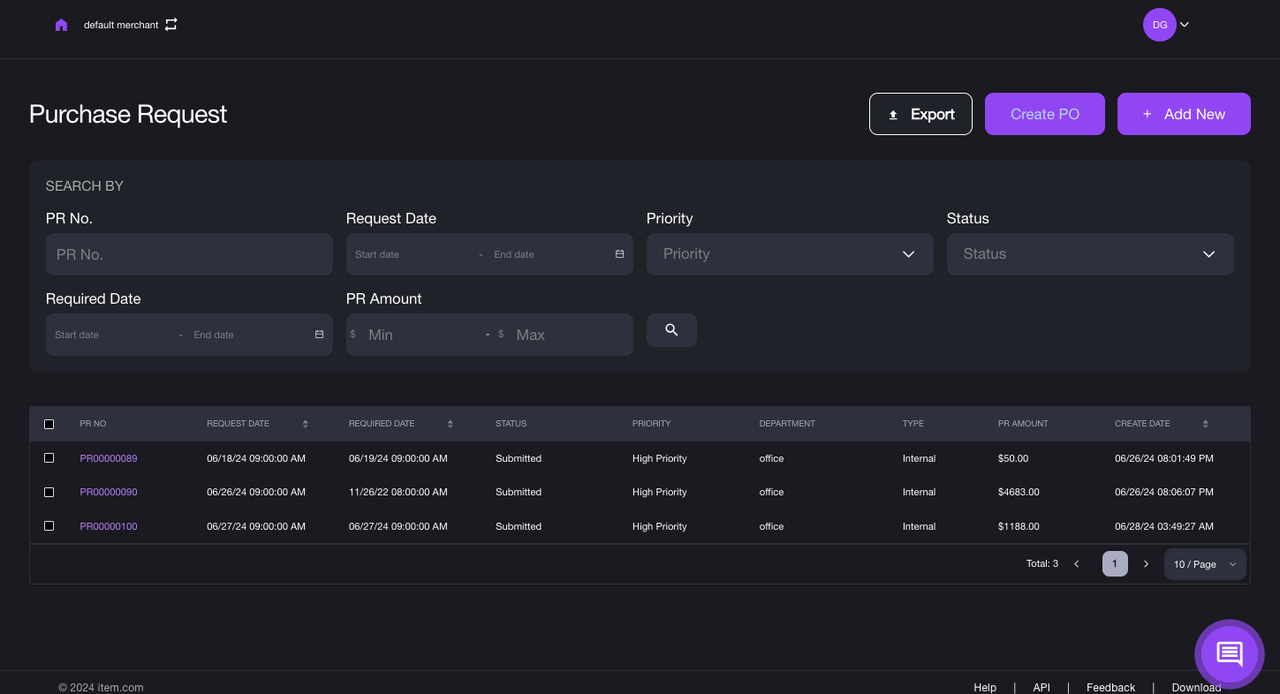
- Click Purchase, then select the sub-menu Purchase Request from the navigation panel on the left side of the main interface. The Purchase Request page shown in the image below will be displayed.
-
All your purchase requests are listed in the table. You can review the basic information of the purchase request, including: PR NO., Request Date, Required Date, Status, Priority, Department, Type, PR Amount and Create Date.
- PR NO.: Purchase request number.
- Request Date: The date when the purchase request is initiated.
- Required Date: The date by which the products in the purchase request needs to be delivered.
- Status: The current status of the purchase request.
- Priority: The needed dealing level of the purchase request.
- Department: The organization that issues the purchase request.
- Type: The scope of the purchase request.
- PR Amount: The total amount of the purchase request.
- Create Date: The date the purchase request is created.
You can also filter the specific purchase request by inputting the value for the following one or multiple parameters: PR NO., Request Date, Priority, Status, Required Date, PR Amount, and clicking the search icon, in the SEARCH BY section.
Notes:
a. In this module, you can manage your purchase plans based on the inventory status of your store. The purchase order will be pushed to WMS to automate product inbounding into its warehouse.
b. You can also export the purchase request list by clicking on the Export button.
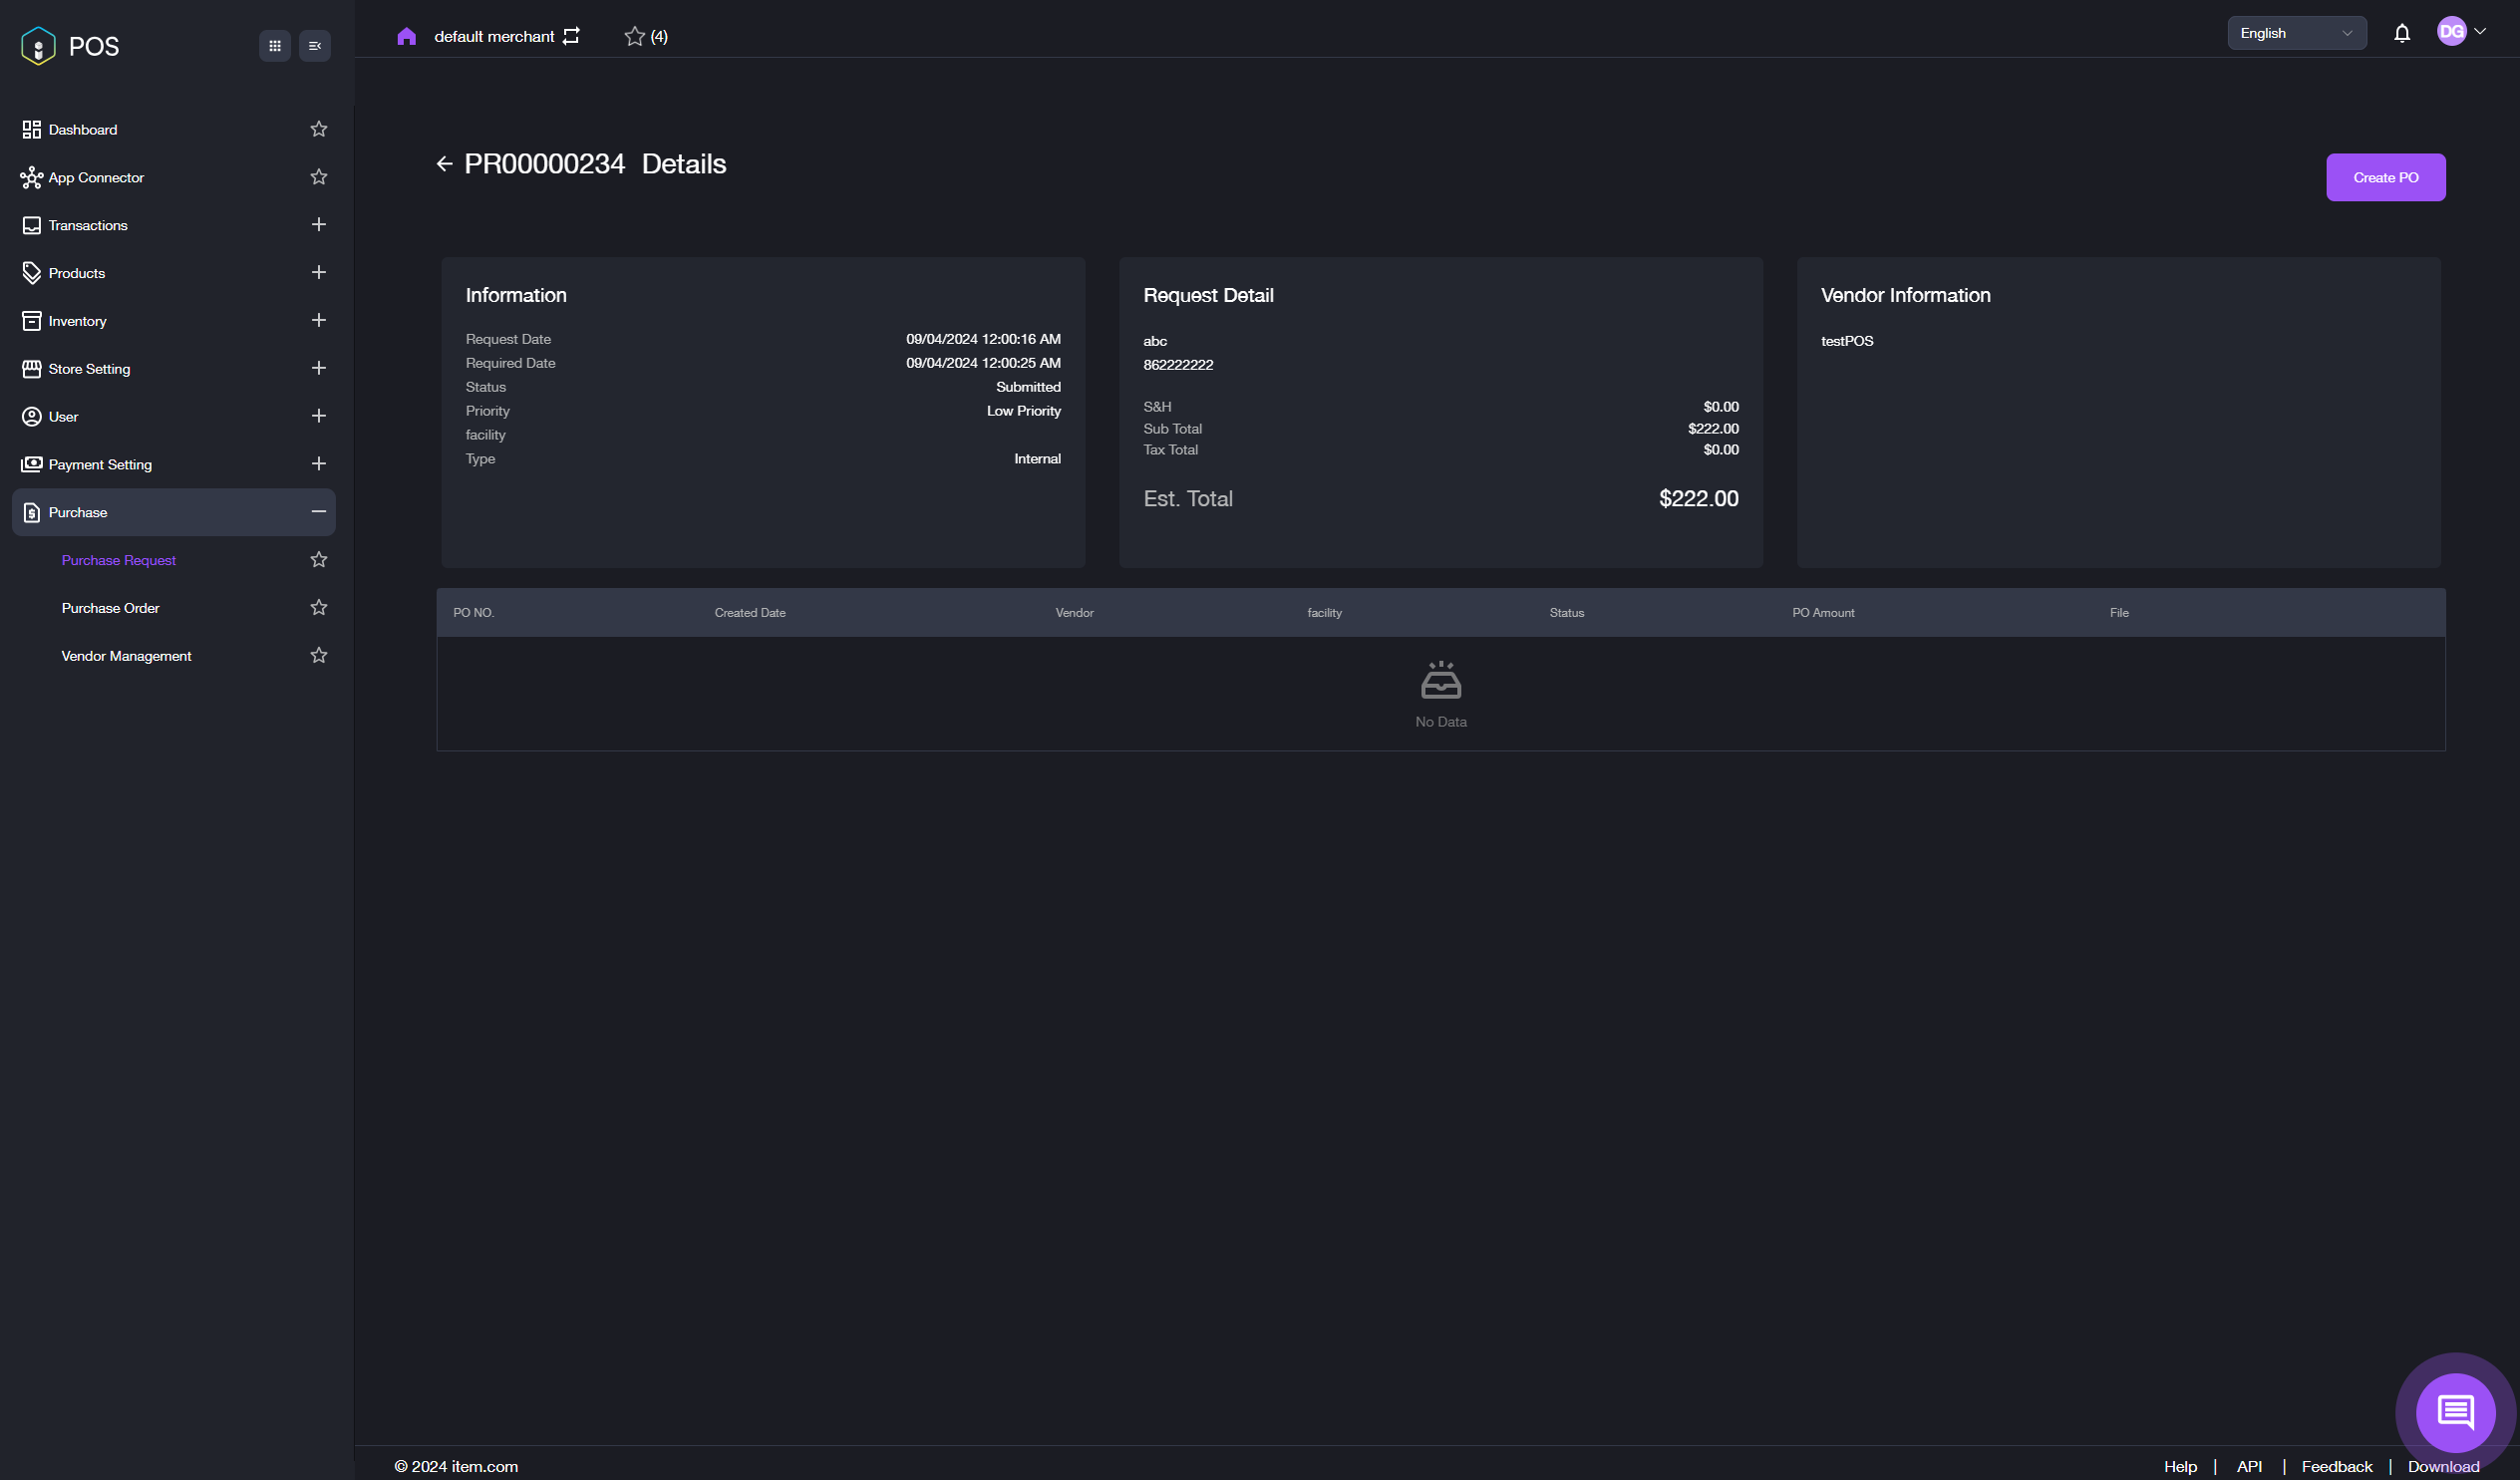
c. Click the purchase number to enter the purchase request detailed page. You can review the details of the request for this purchase number.
-
Create a purchase order accordingly.
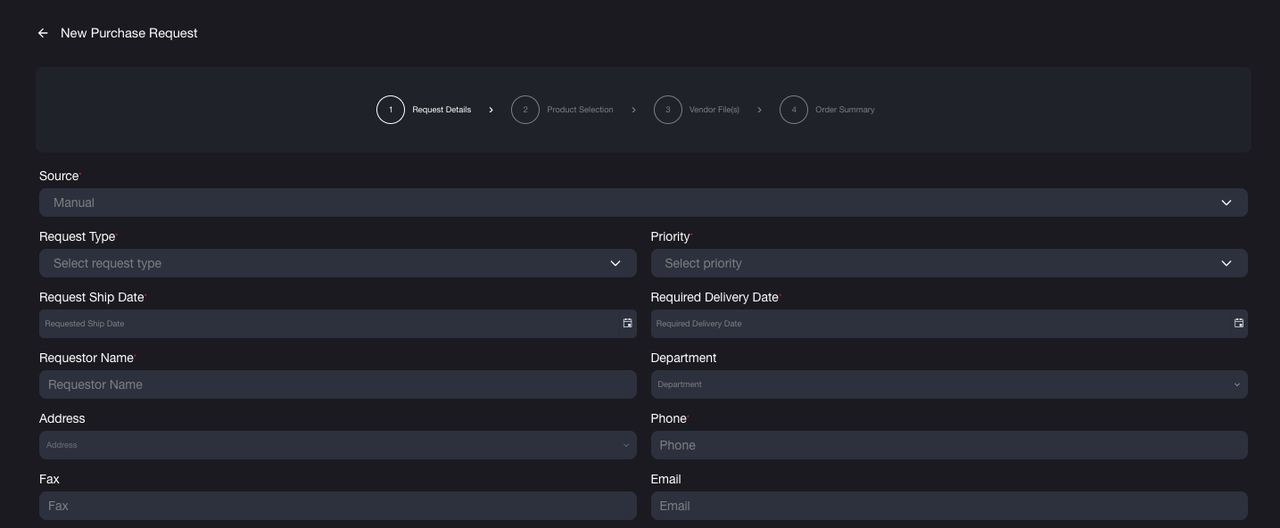
1) Click the Add New button in the top right corner of the Purchase Request page. The New Purchase Request page shown in the image below will be displayed.
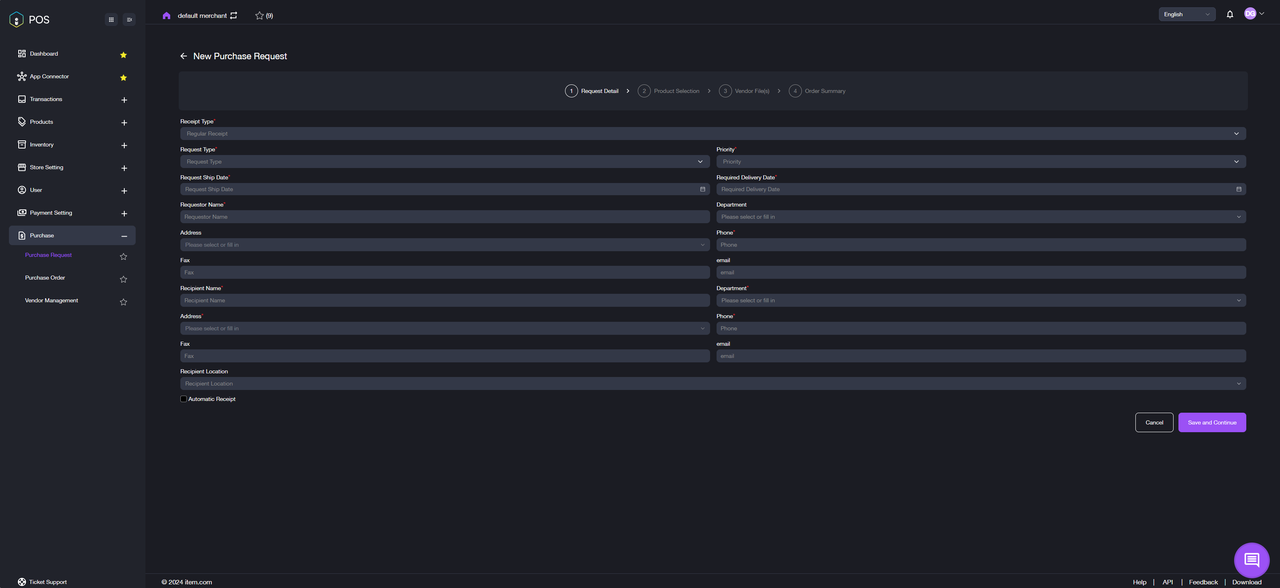
2) Enter the value or select one from the drop-down menu for each requested field. Click the Save and Continue button. The interface shown in the image below will appear.
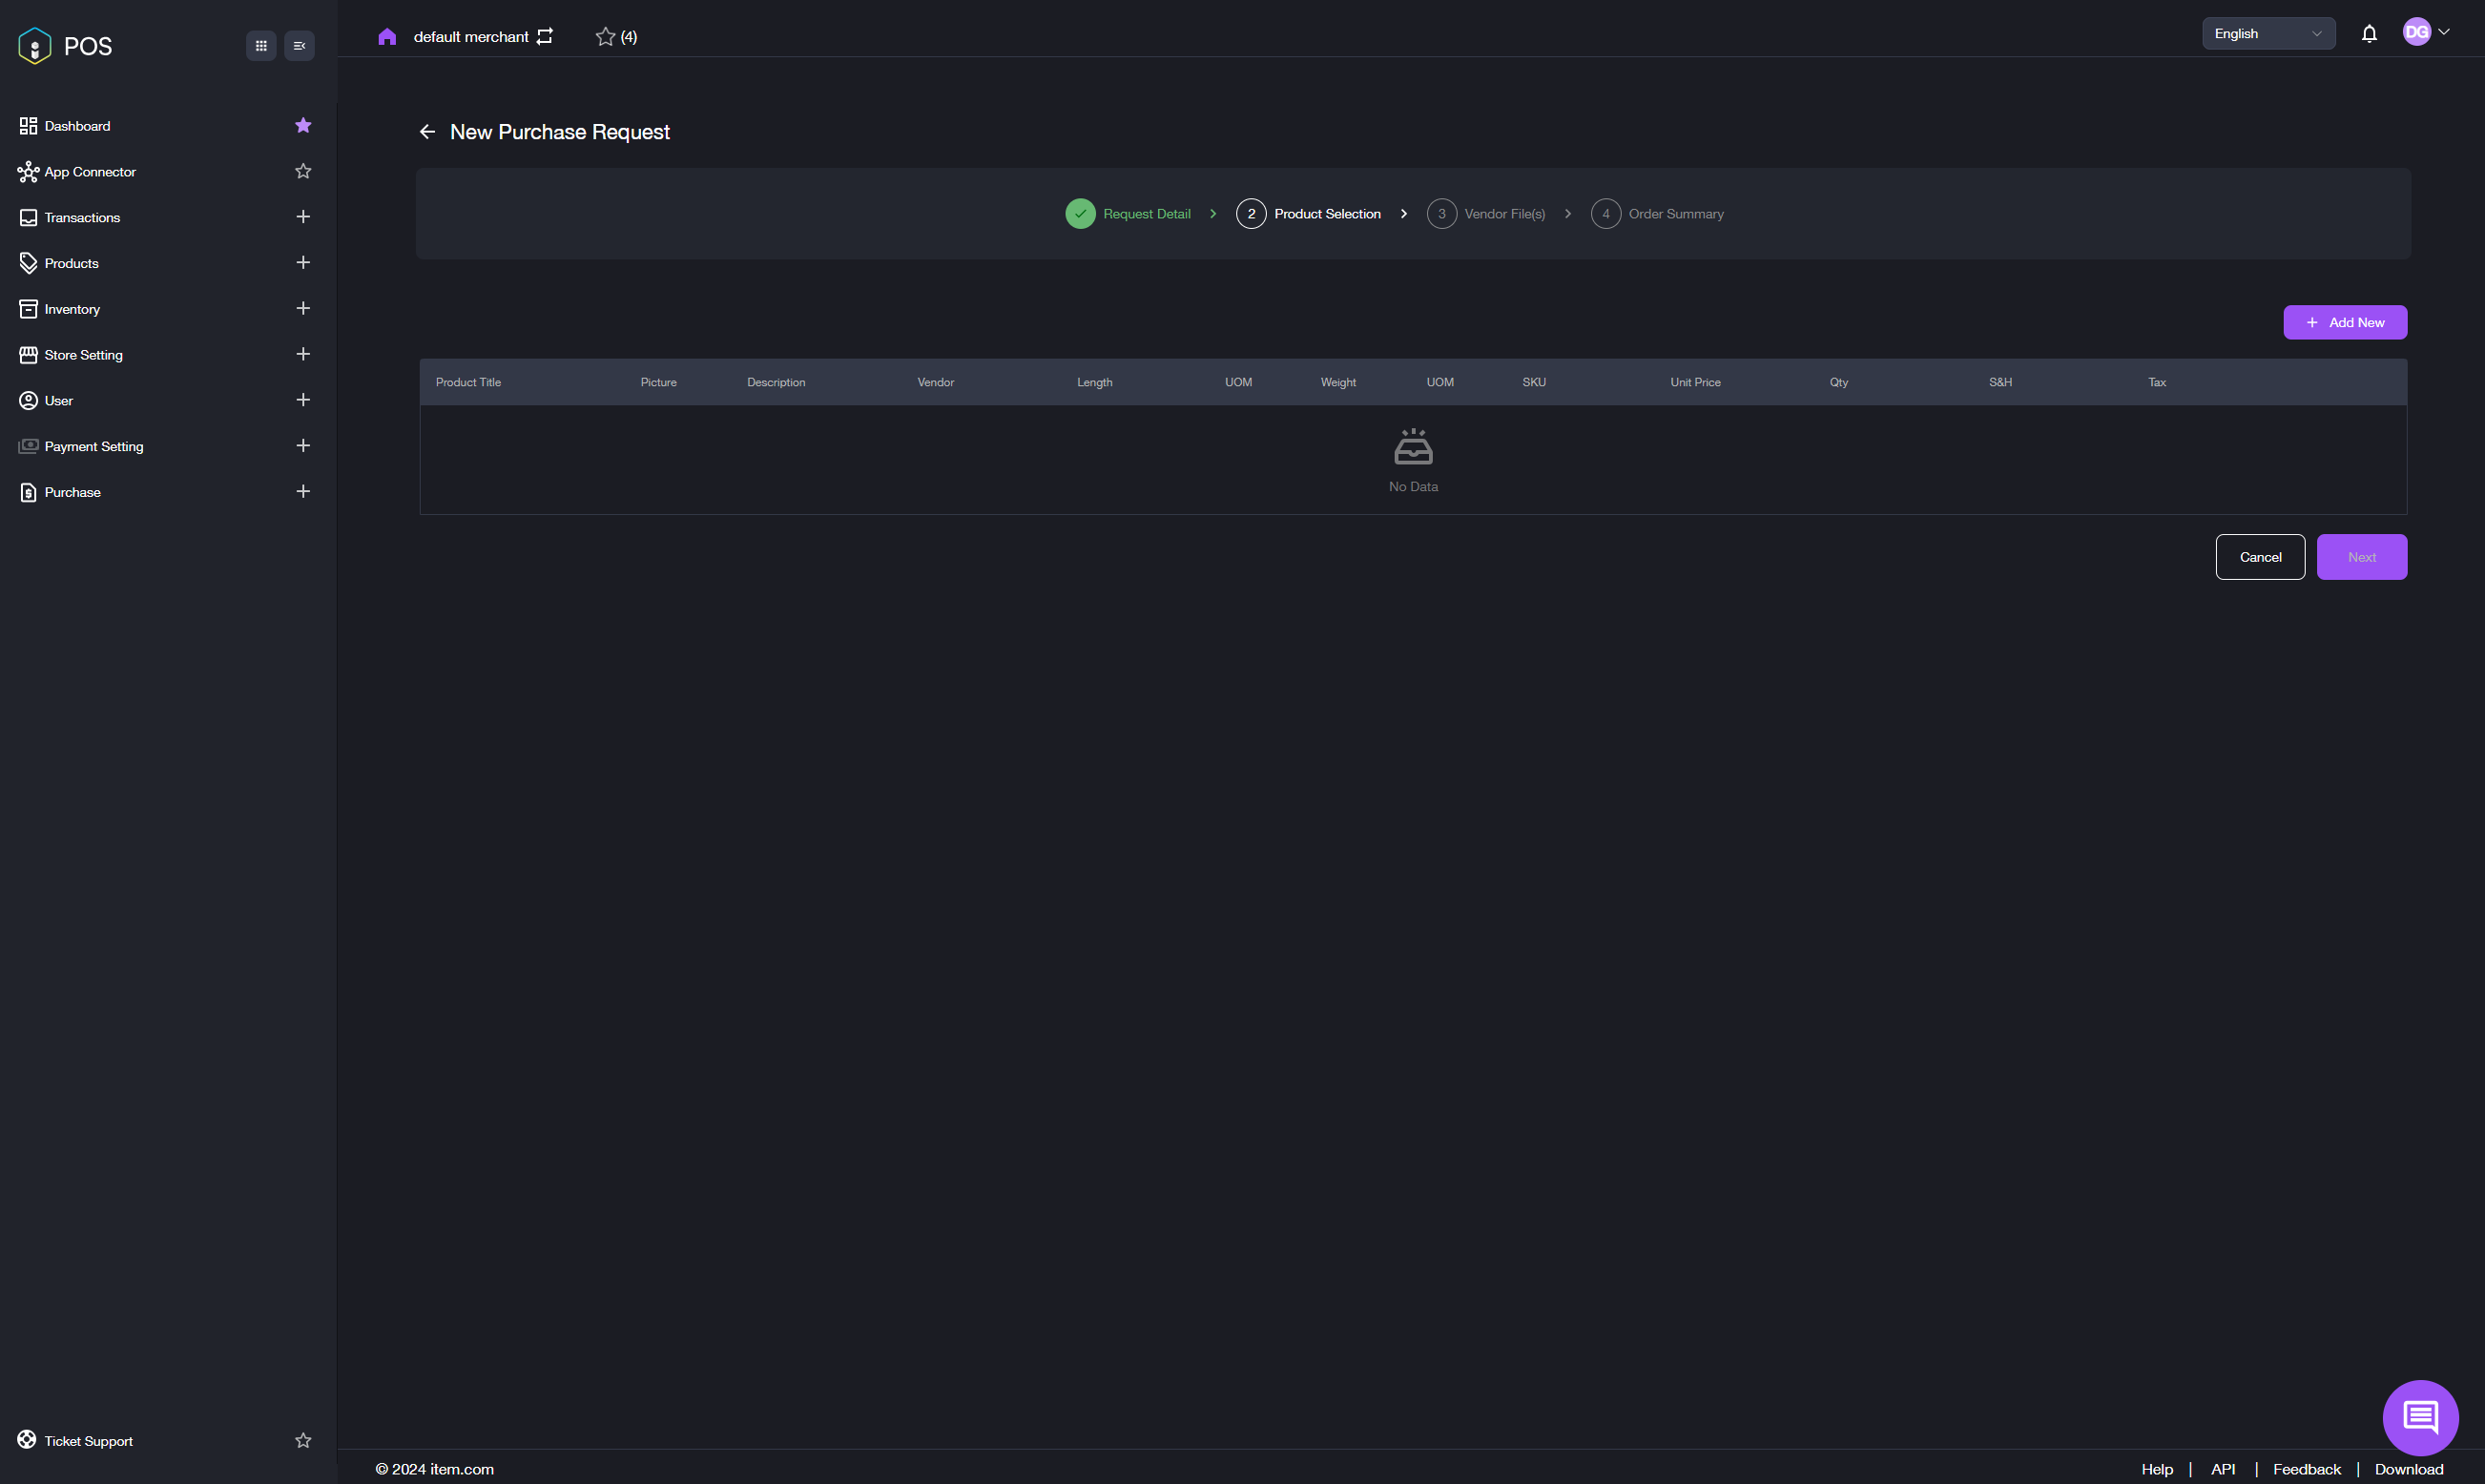
3) Click the + Add New button. The dialogue box shown in the image below will pop up.
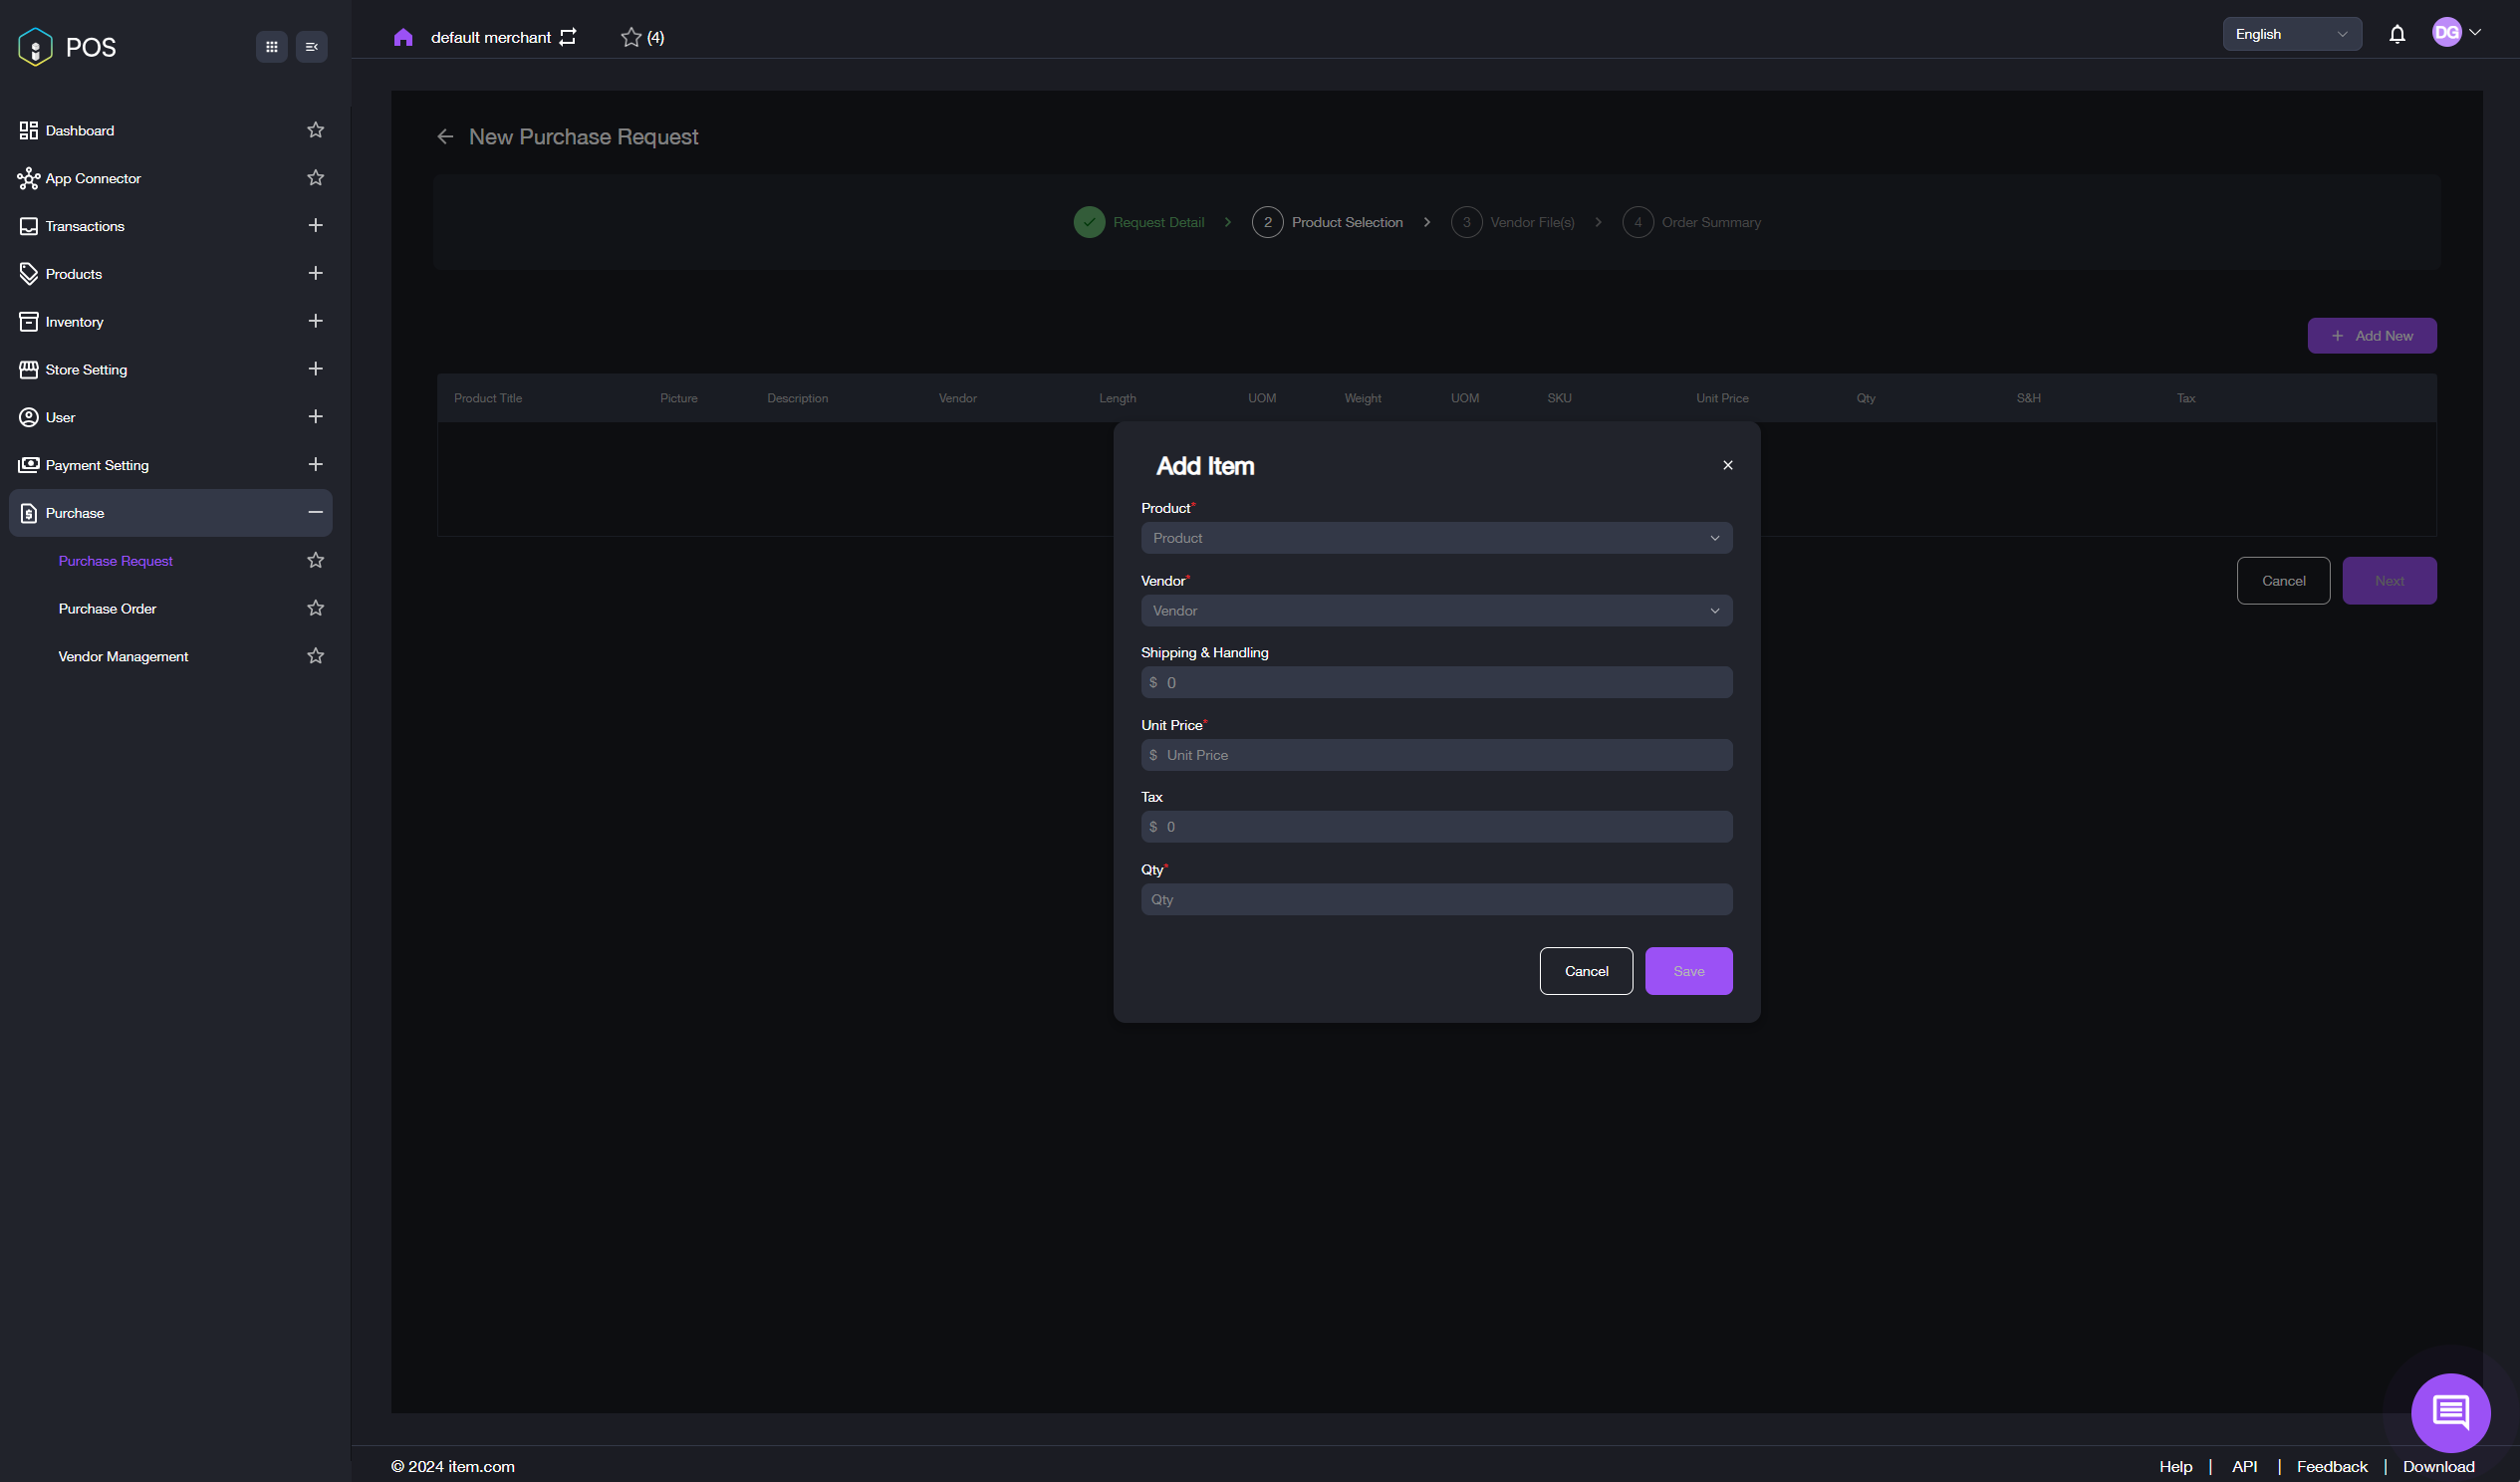
4) Fill in the required information and click the Save button. The interface shown in the image below will then appear.
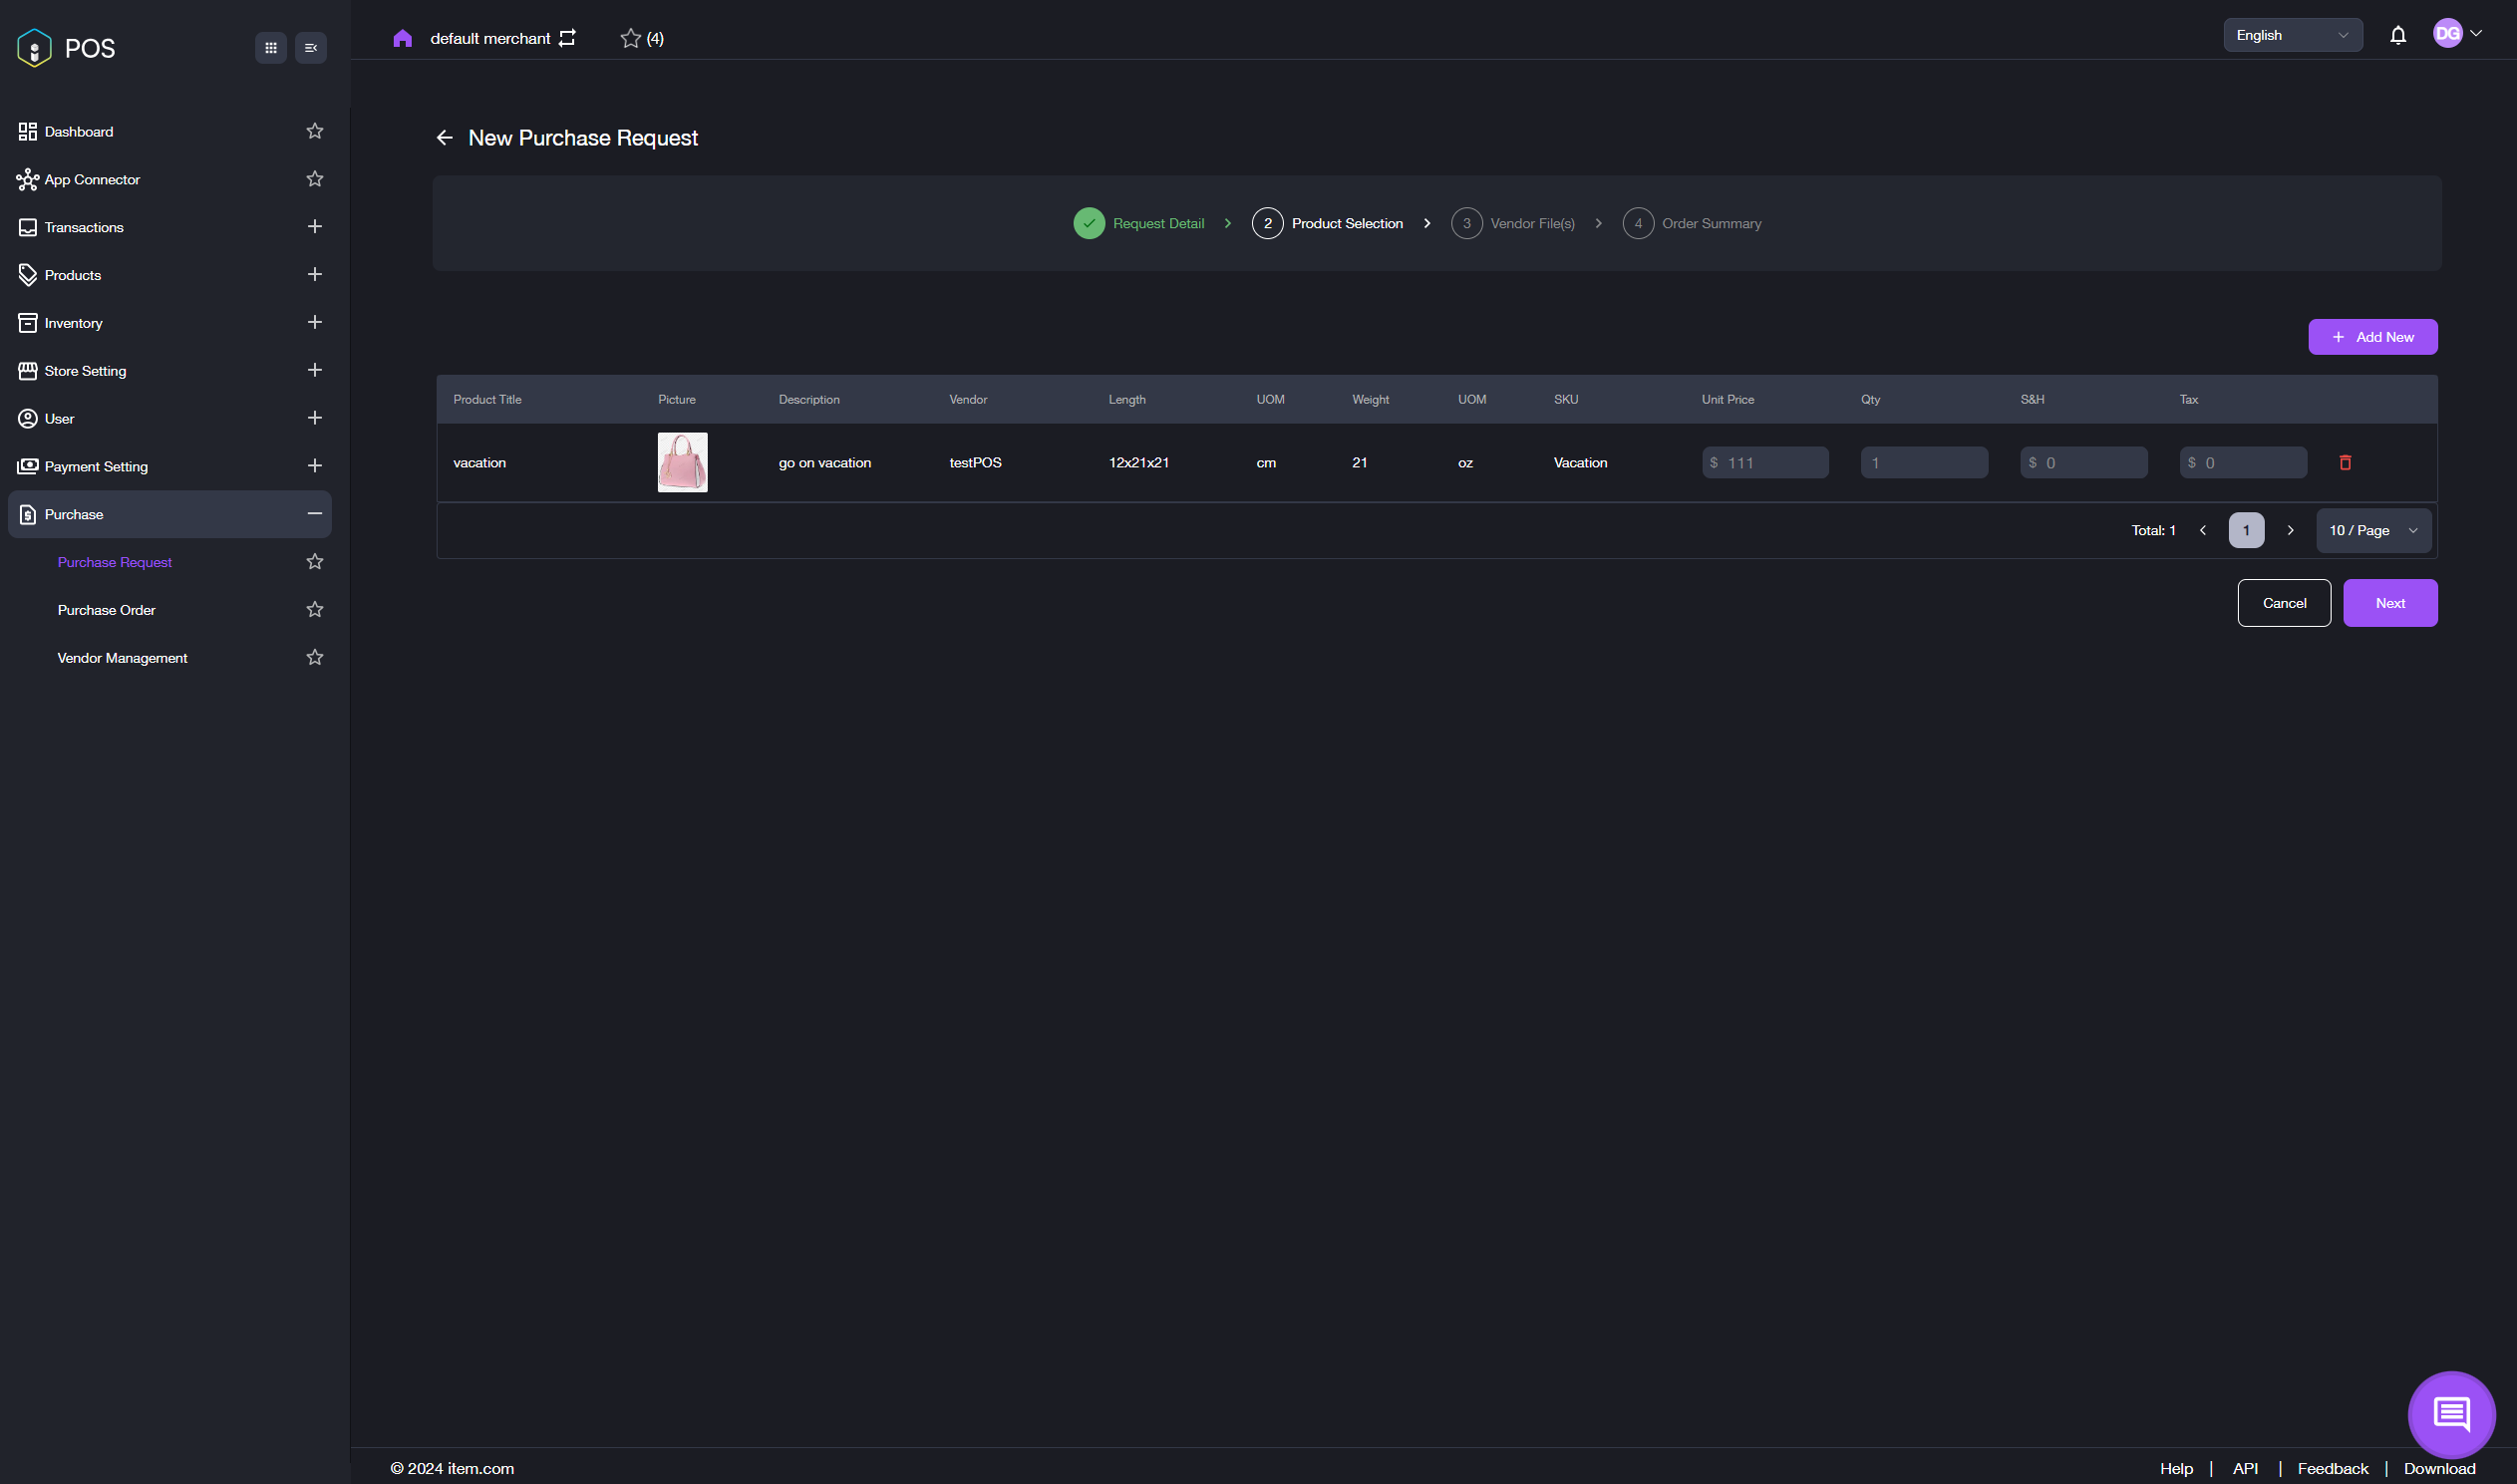
5) Click the Save button. The interface shown in the image below will appear.
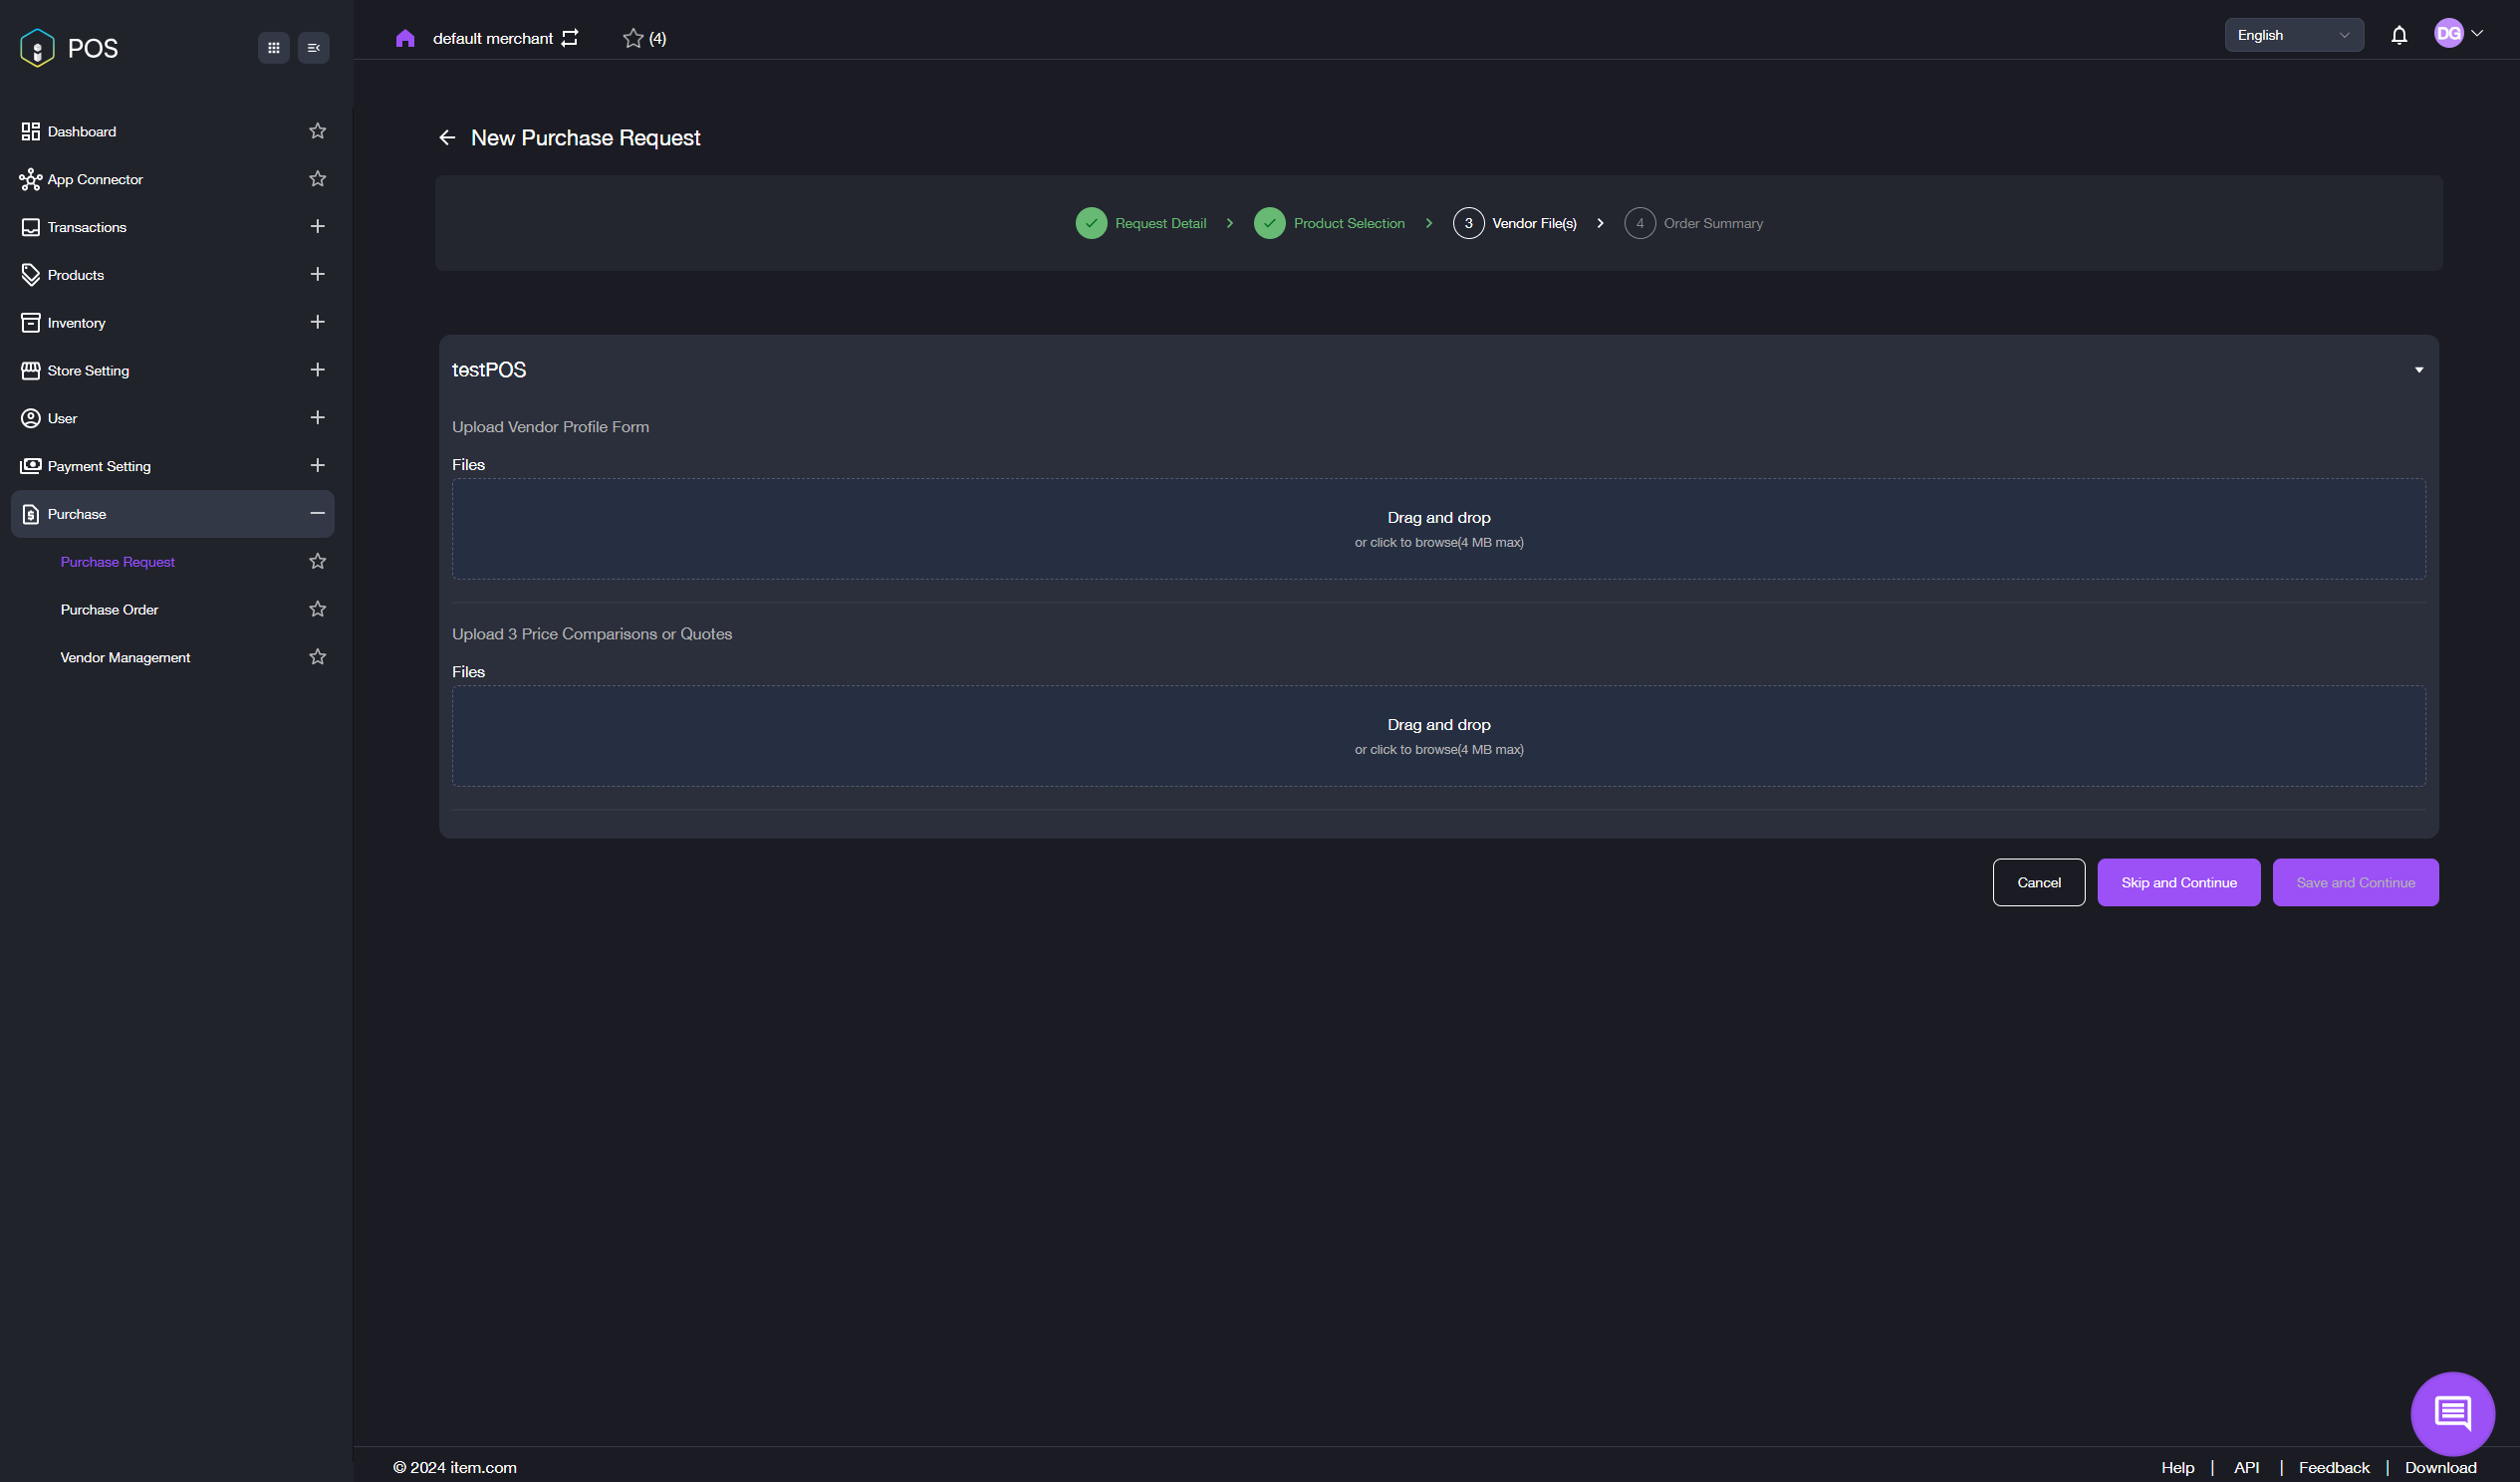
6) Click the Save and Continue button after uploading the Vendor Profile Form, or click the Skip and Continue button if no file is uploaded. The interface shown in the image below will appear. On this page, you can view a summary of the requesting party, delivery receiving party, and the vendor information.
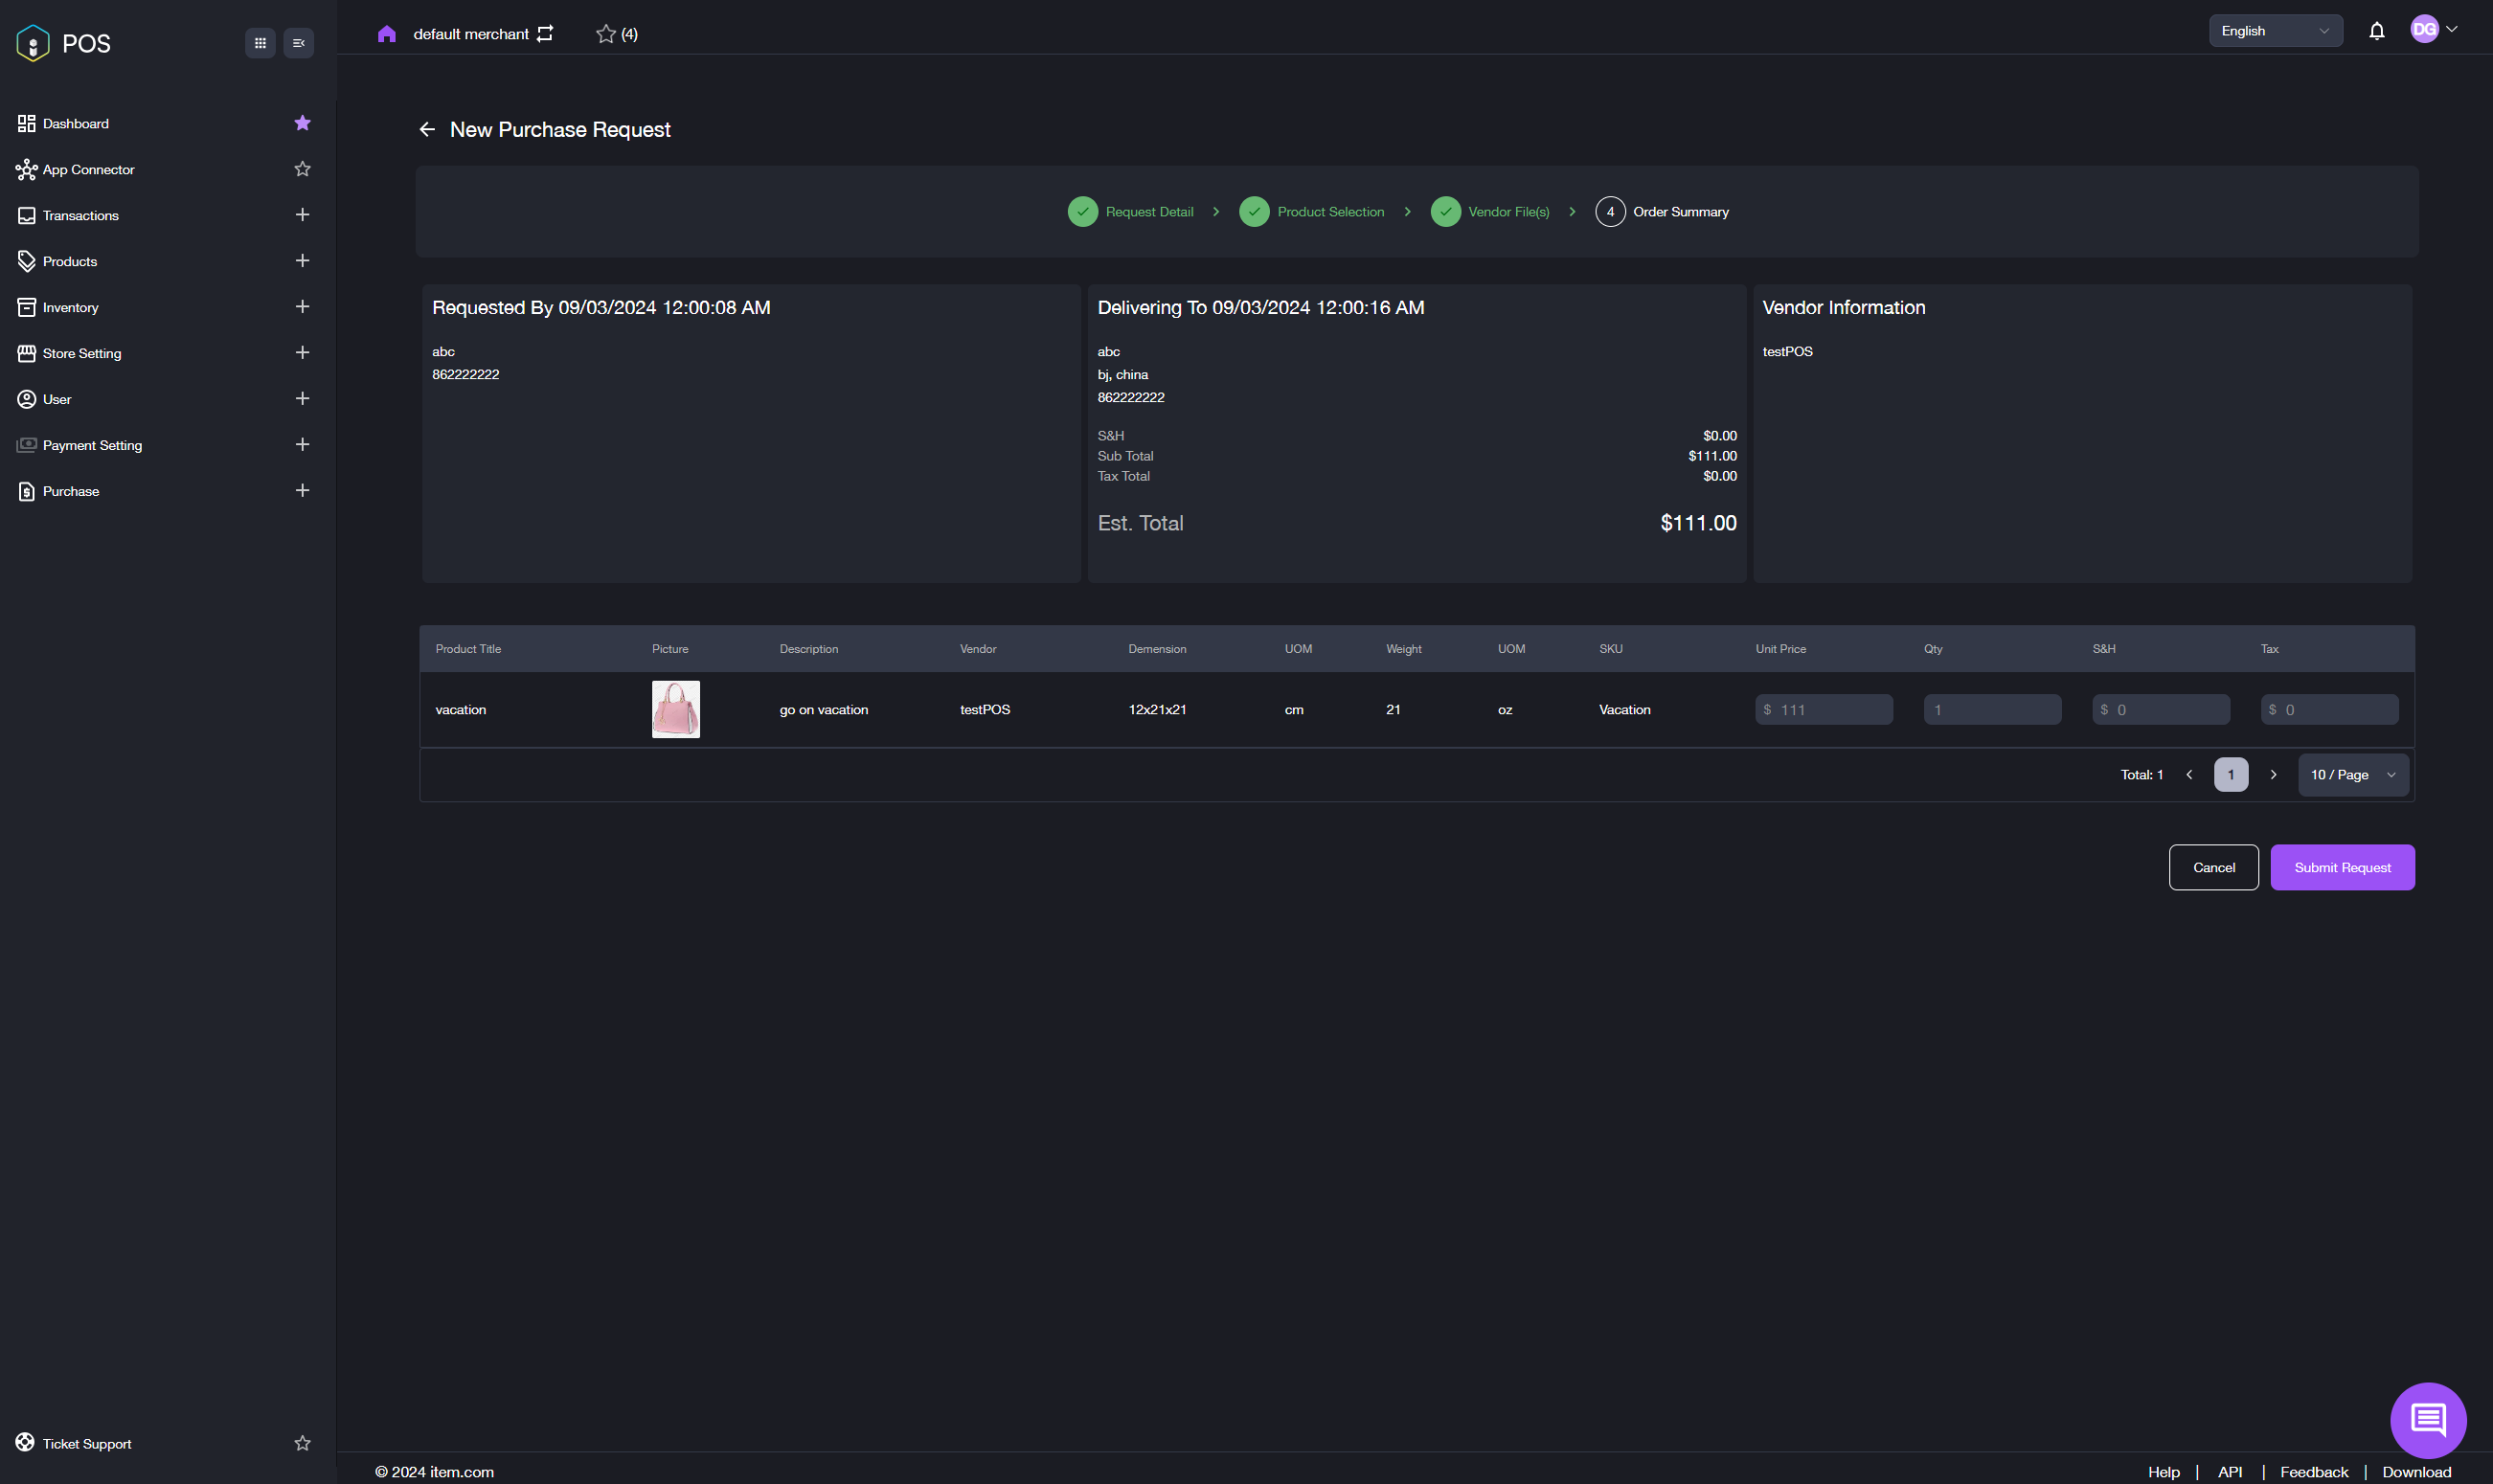
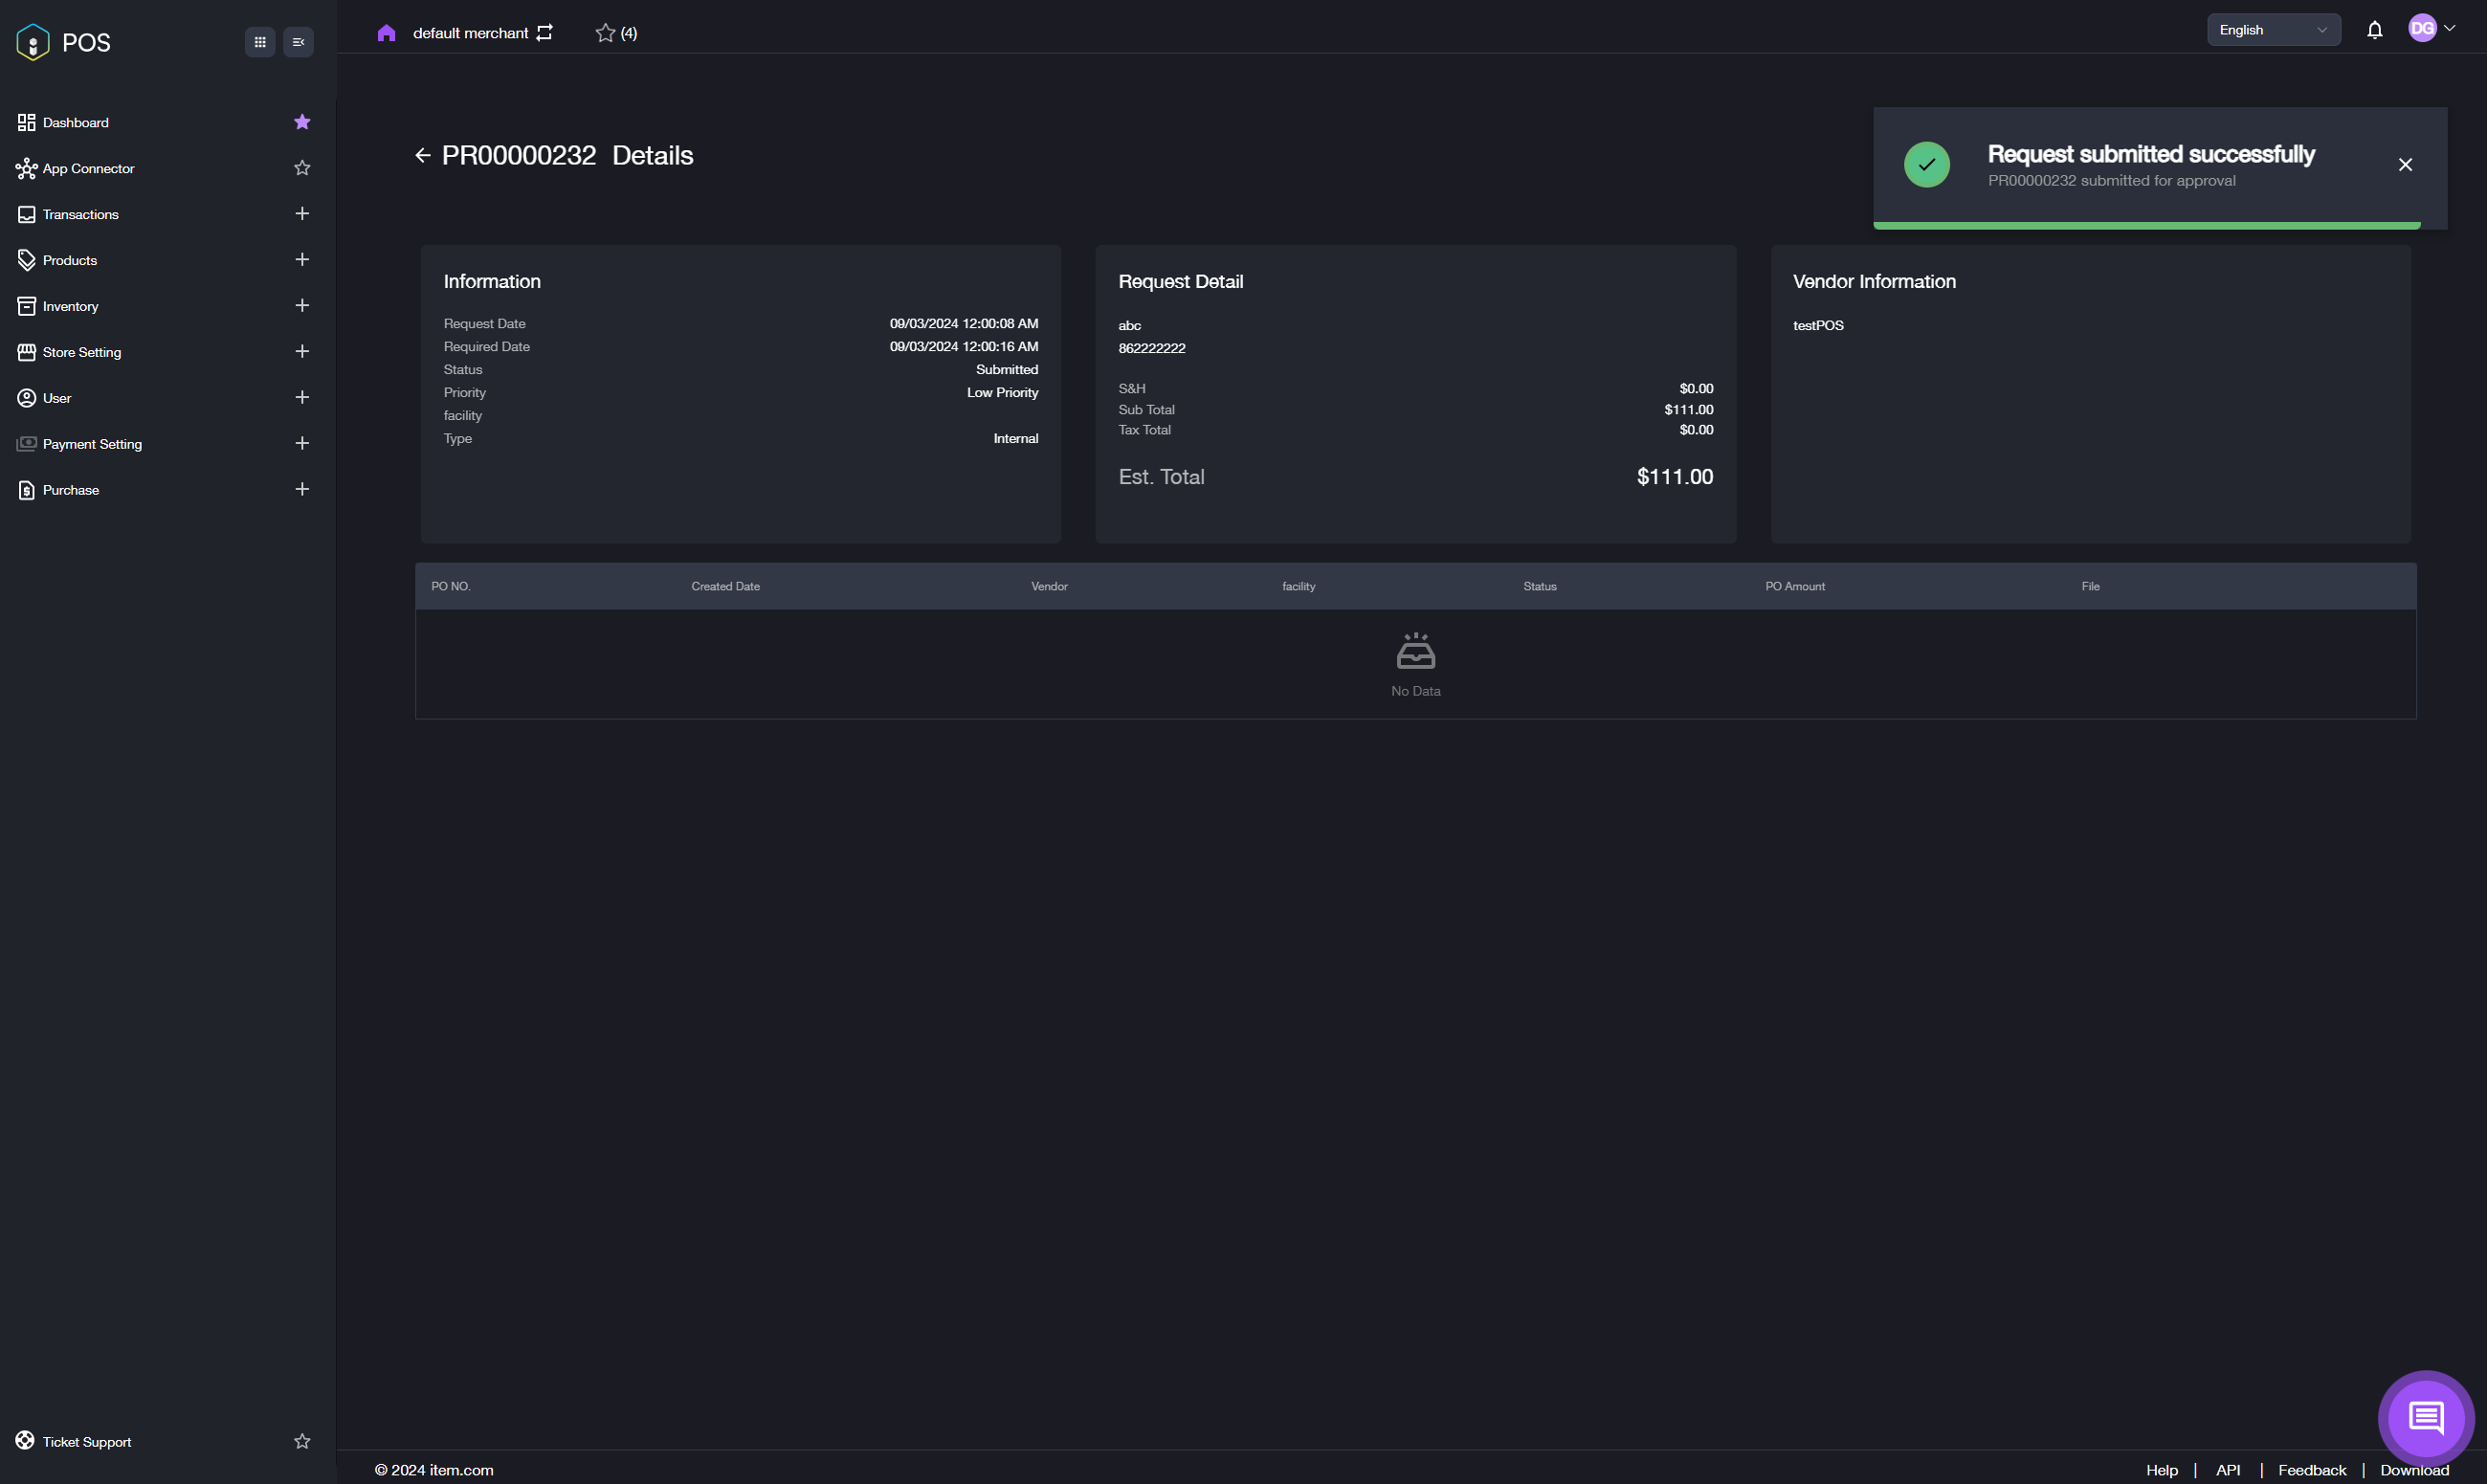
7) Click the Submit Request button. The interface will switch to the page shown in the image below with a pop-up notification indicating that the request has been submitted successfully. Once the notification fades out, you will see the Create PO button in the top right corner of this page.
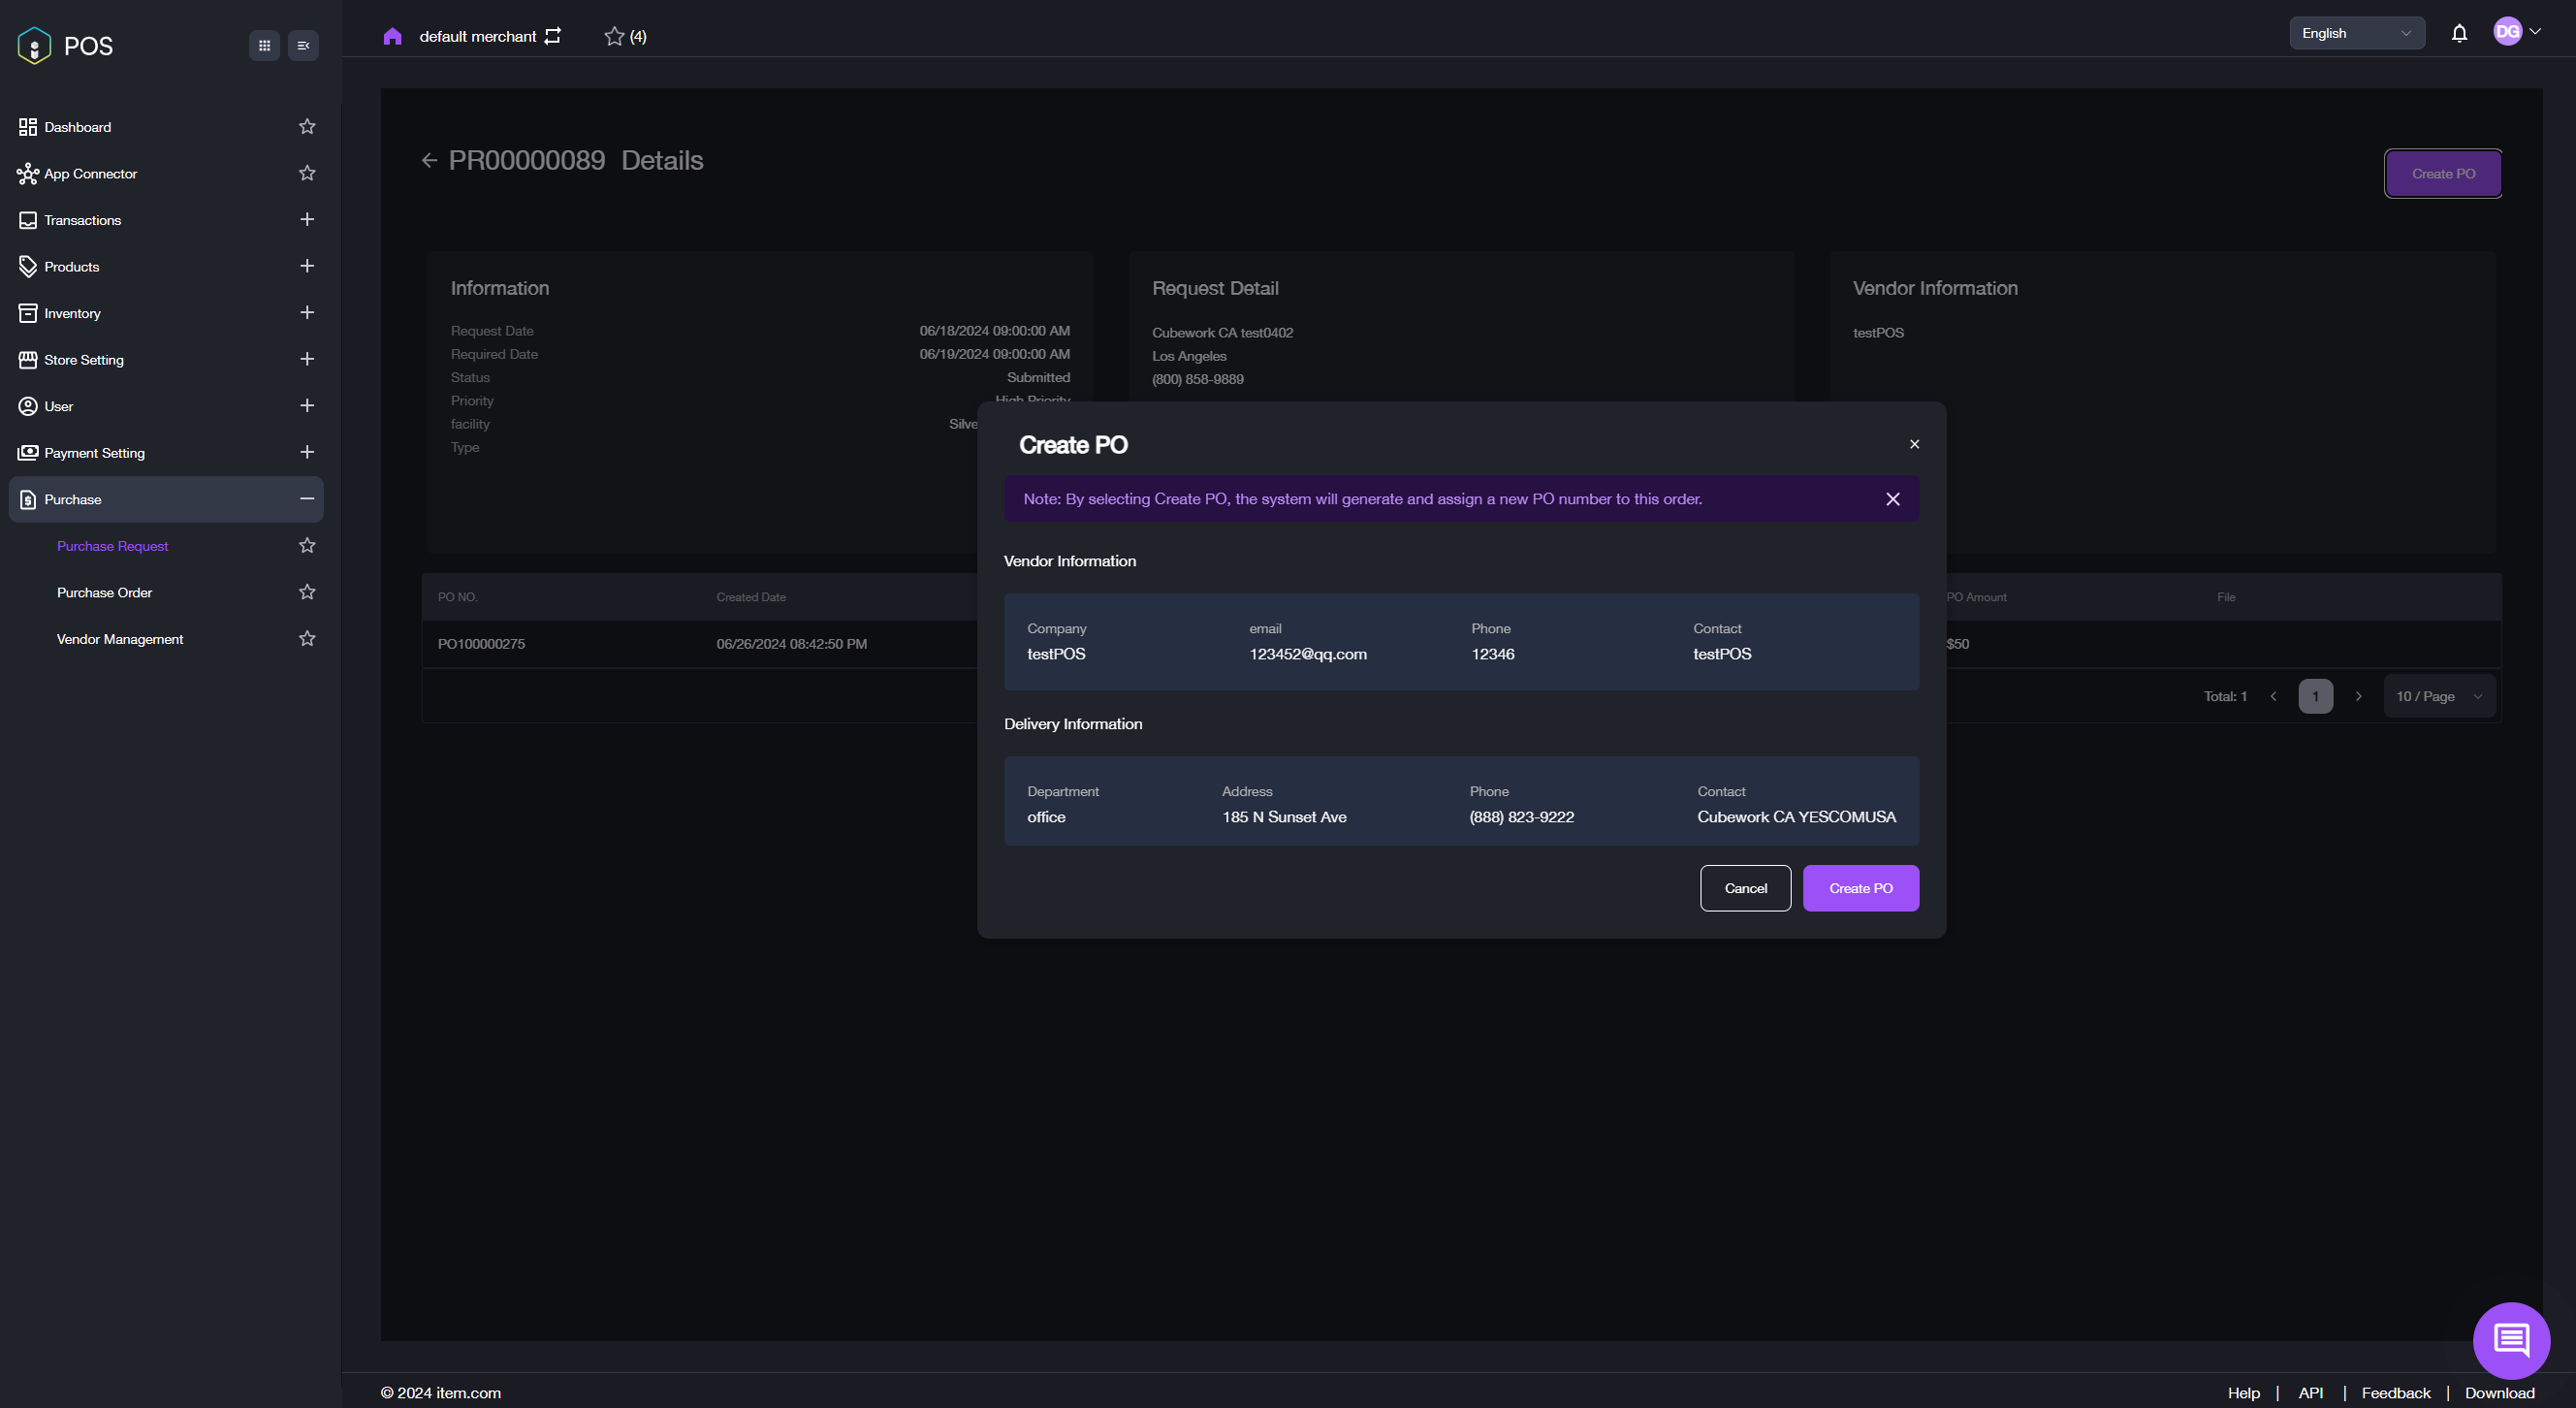
8) Click the Create PO button. The Create PO dialogue box will pop up.

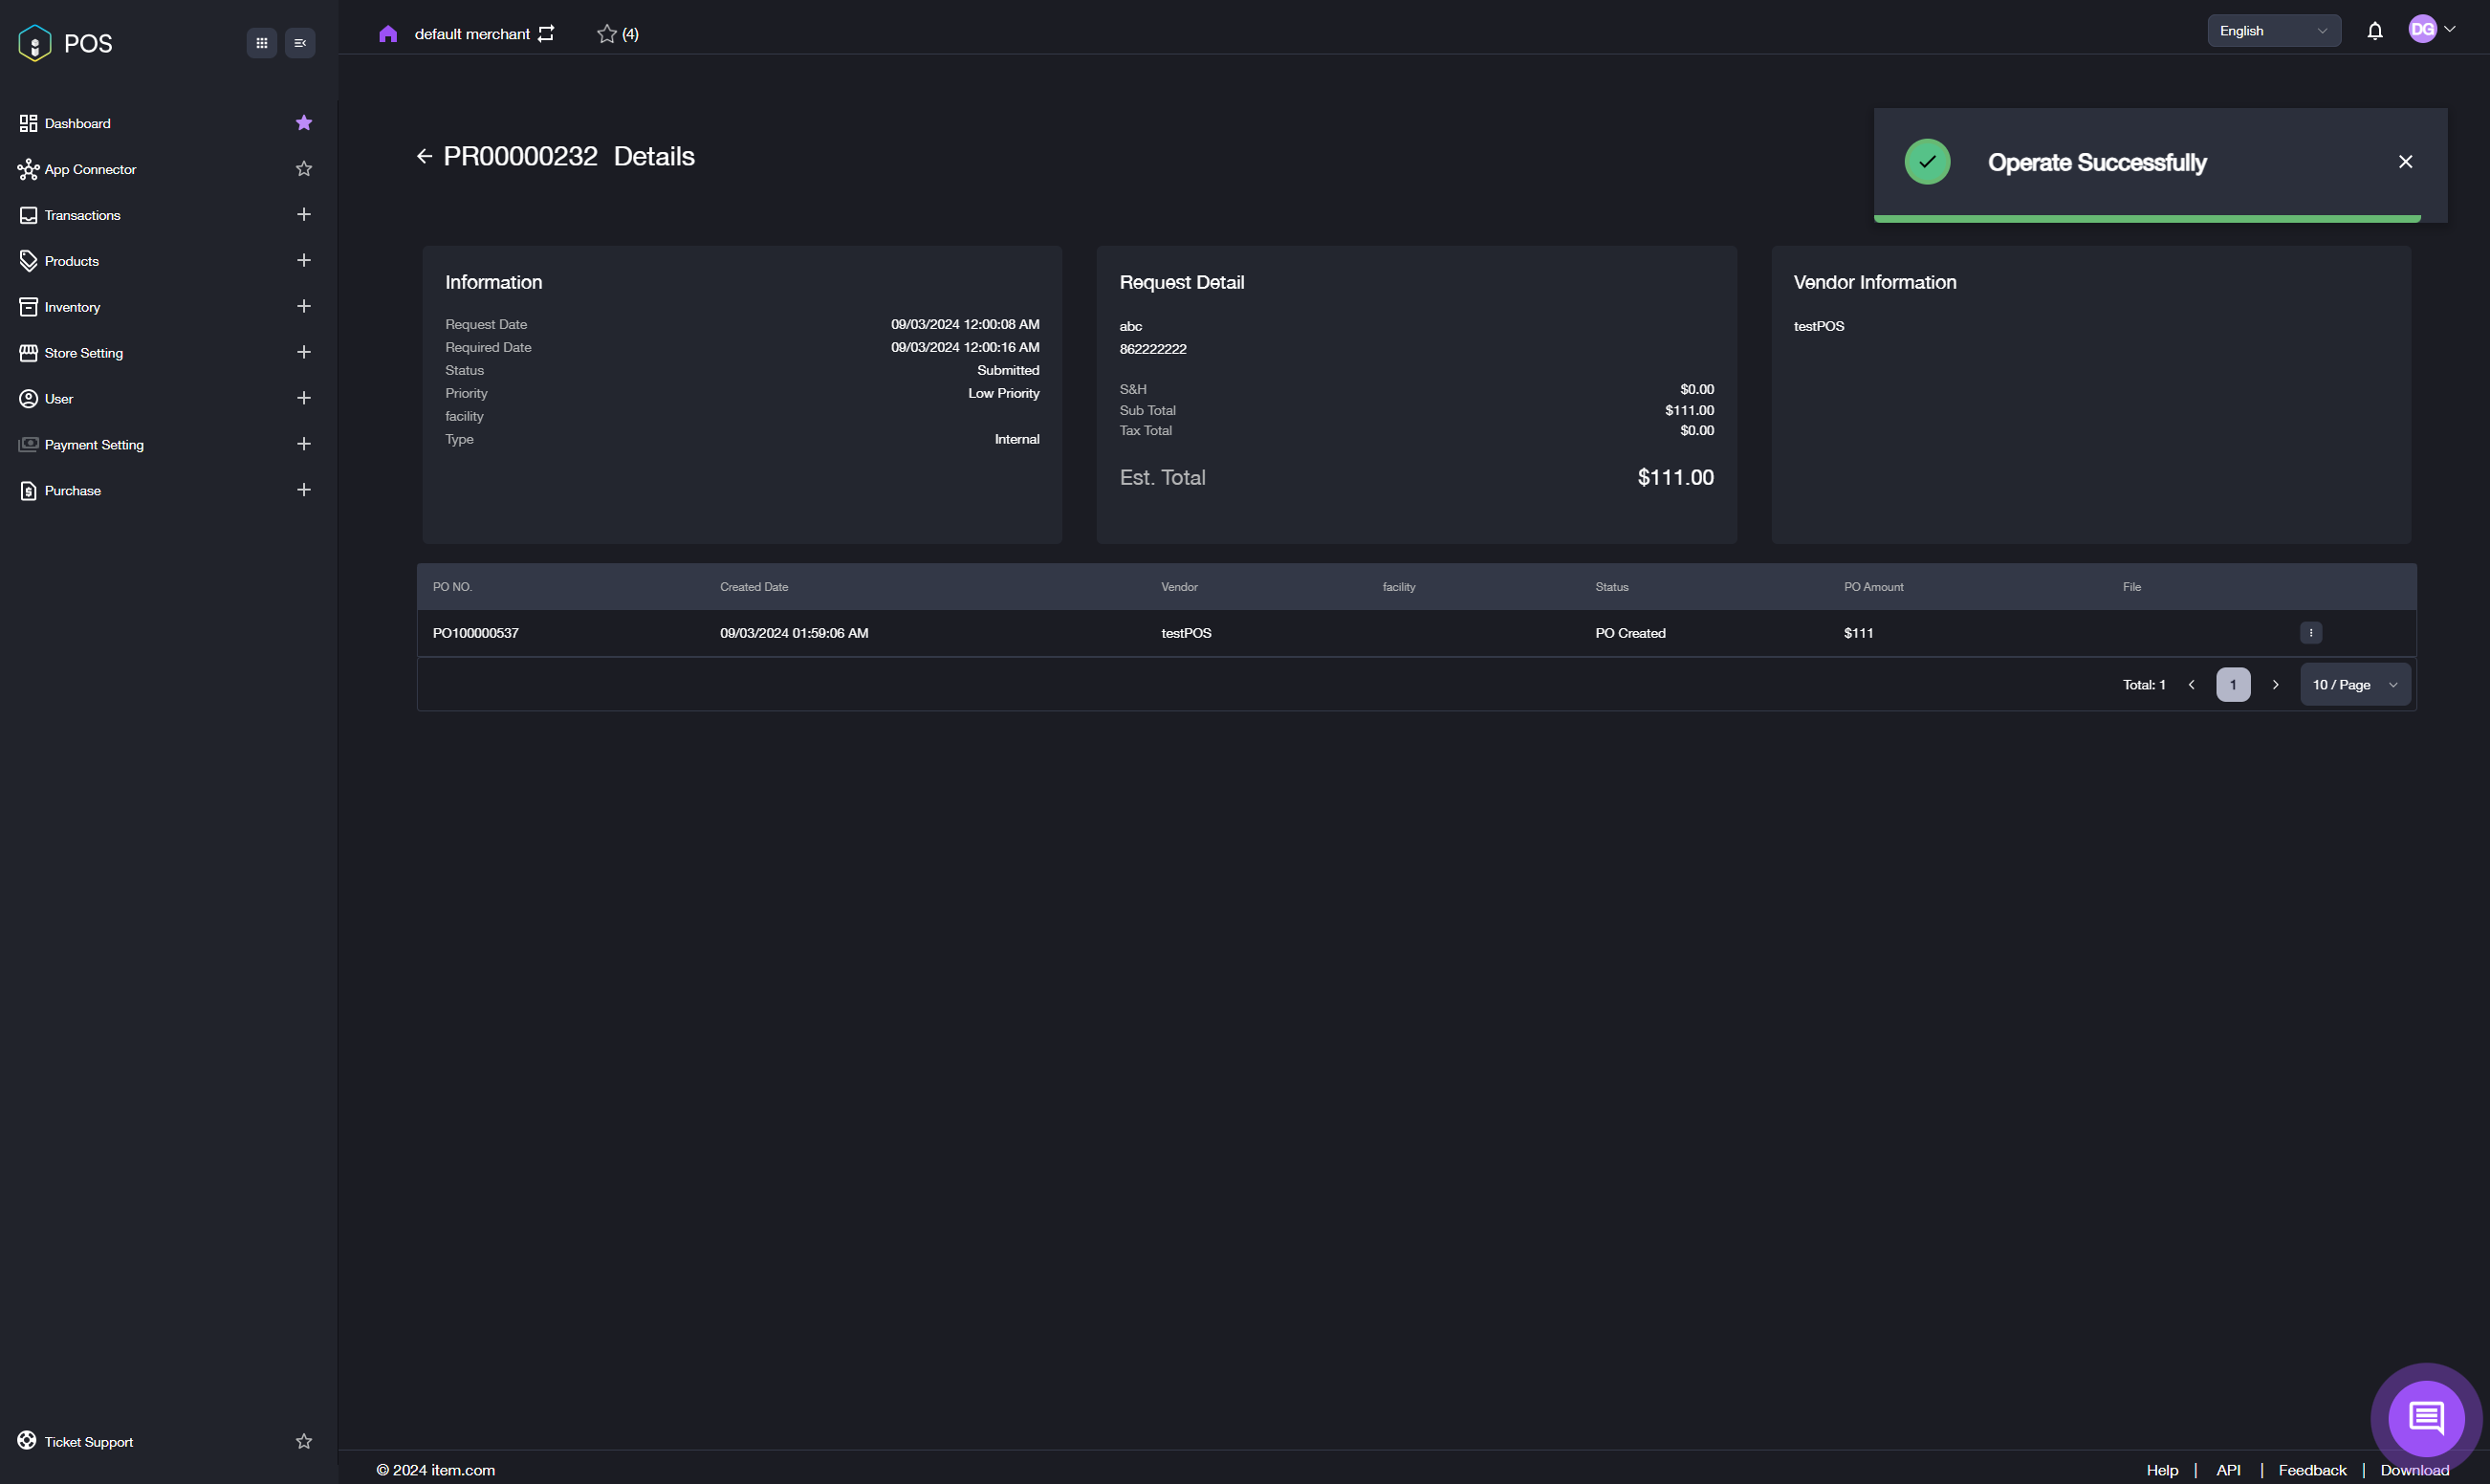
9) Carefully review the vendor information and delivery information. If there are no issues, click the Create PO button. The interface will return to the order details page with a notification indicating the success of the operation.
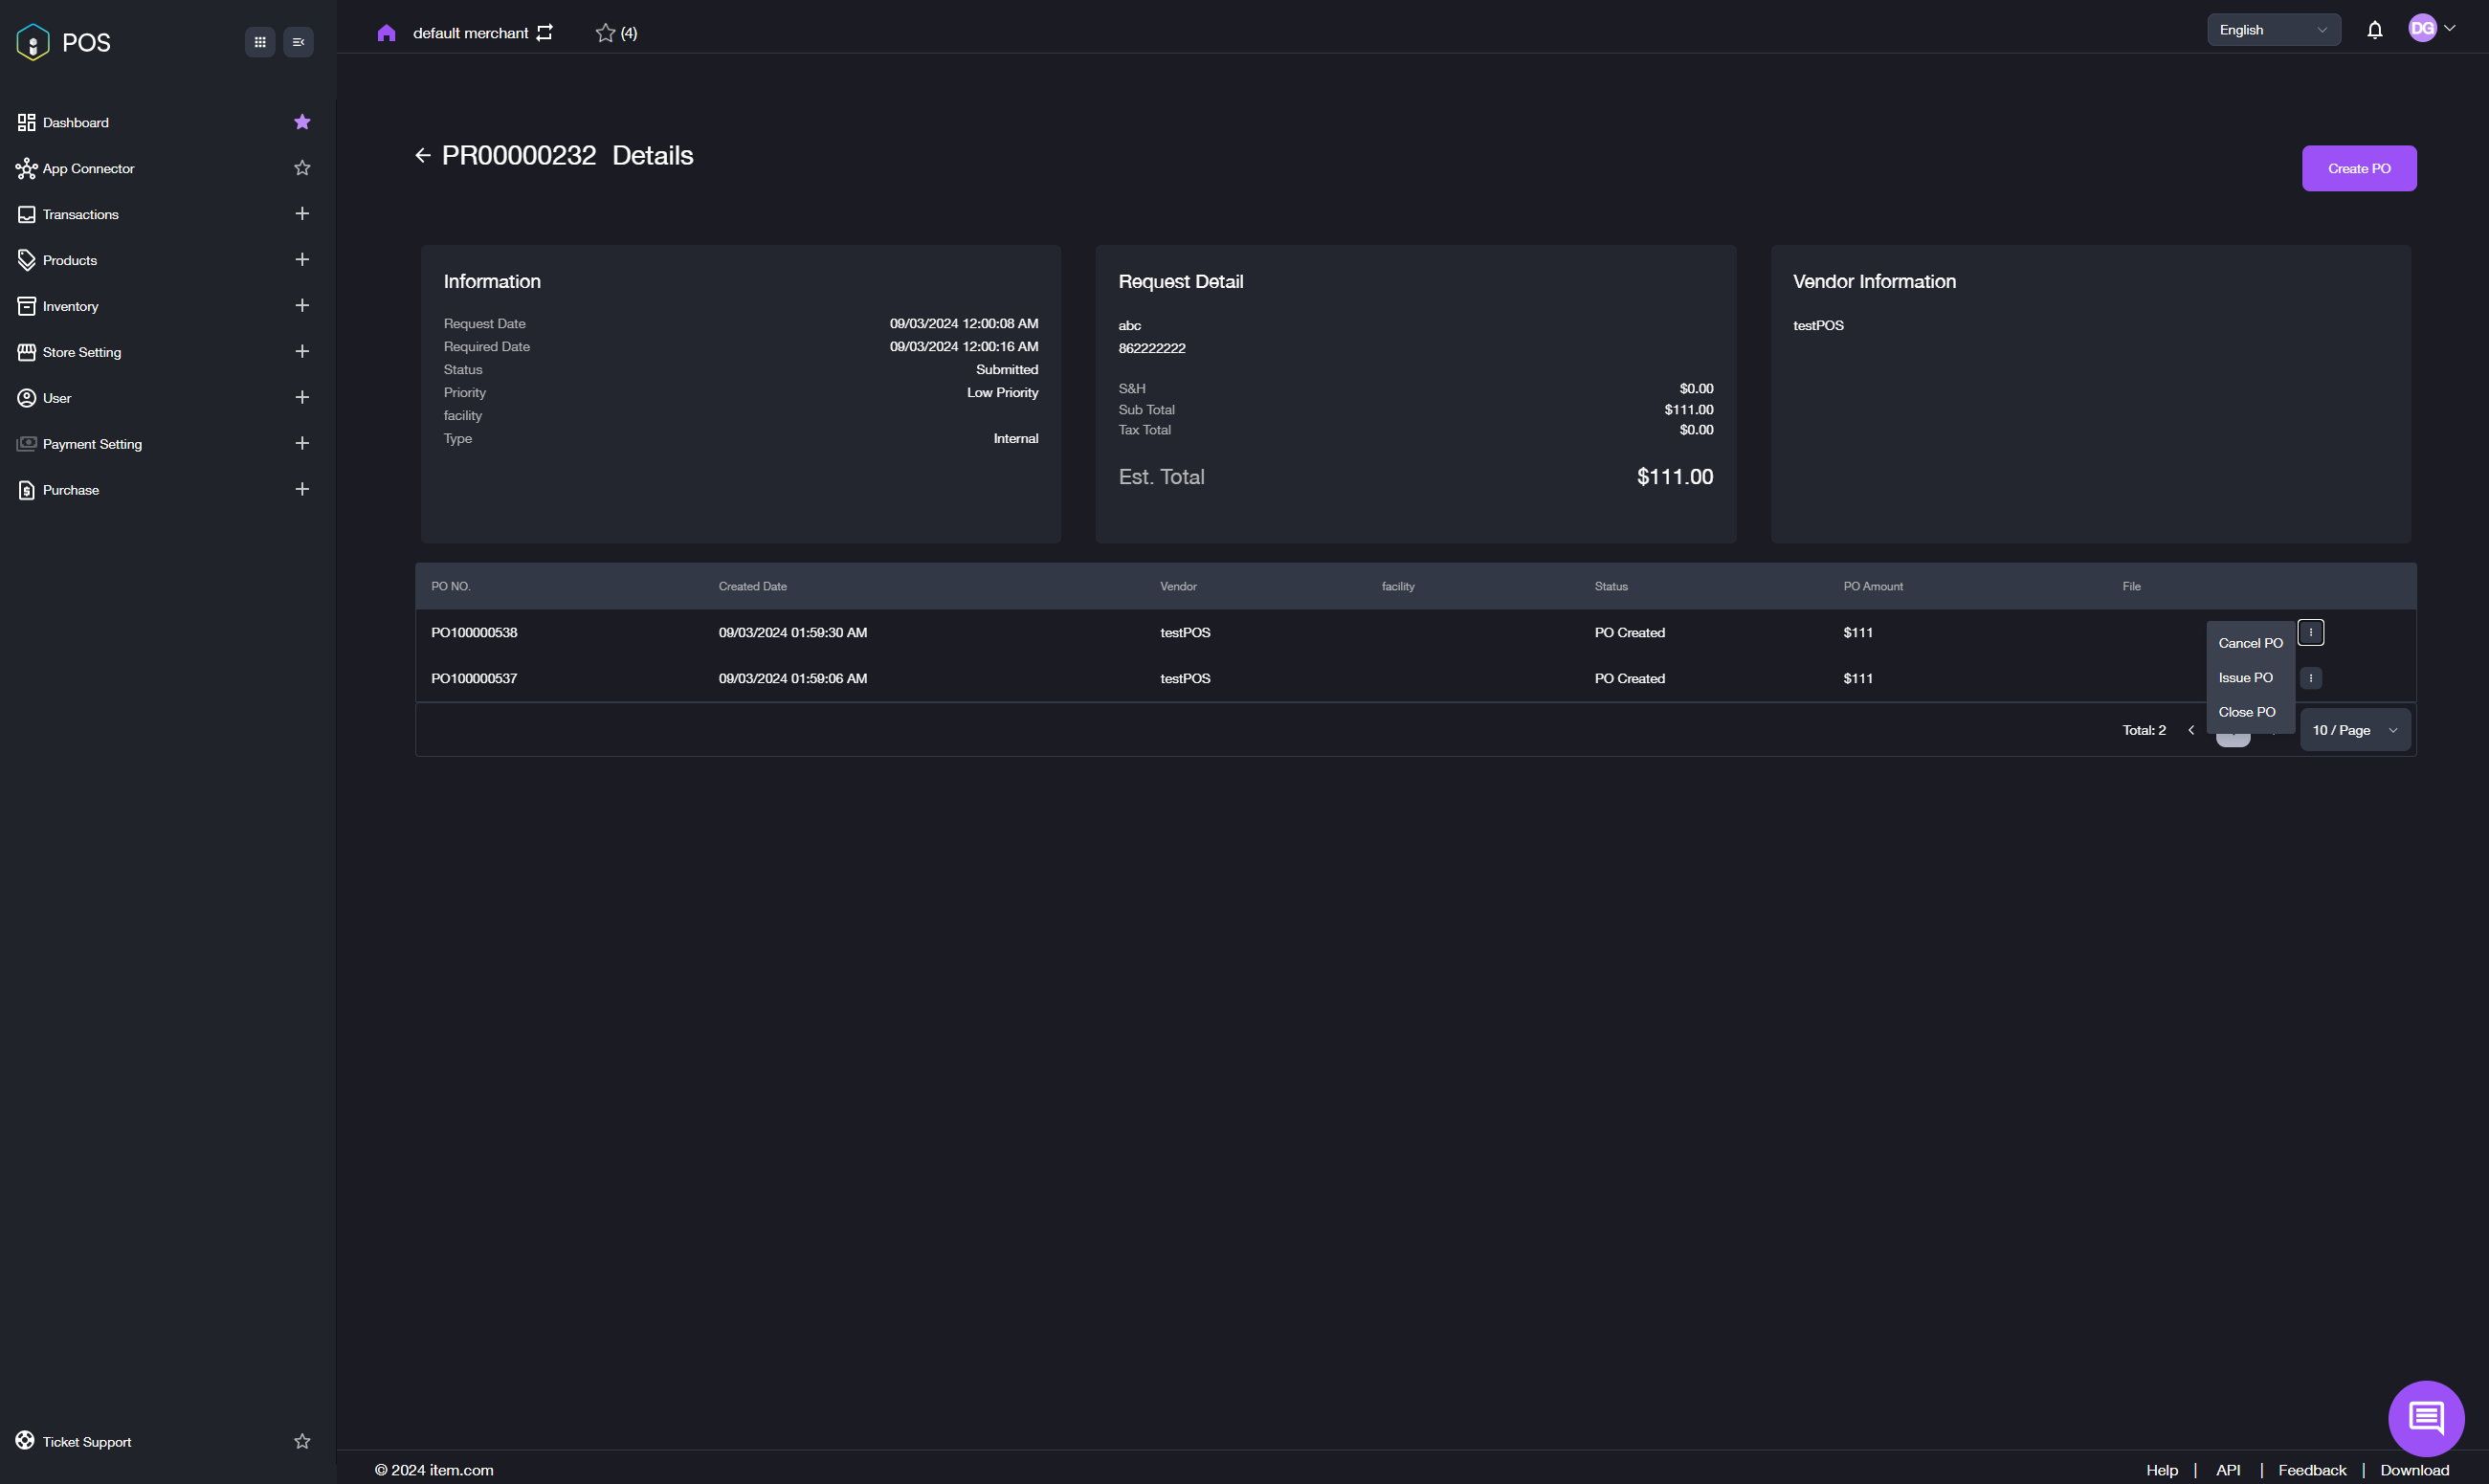
10) Once the "Success" notification fades out, you can see and click on the Create PO button again to create another purchase order. You can also change the order status at any time by clicking the three-dot icon in the order list and selecting the appropriate option from the drop-down menu.
-
Generate a purchase order for the listed purchase request.
a. Click the PR NO. Of the purchase request.
b. The "Create PO" page, along with the purchase request details, will appear as shown in the image below.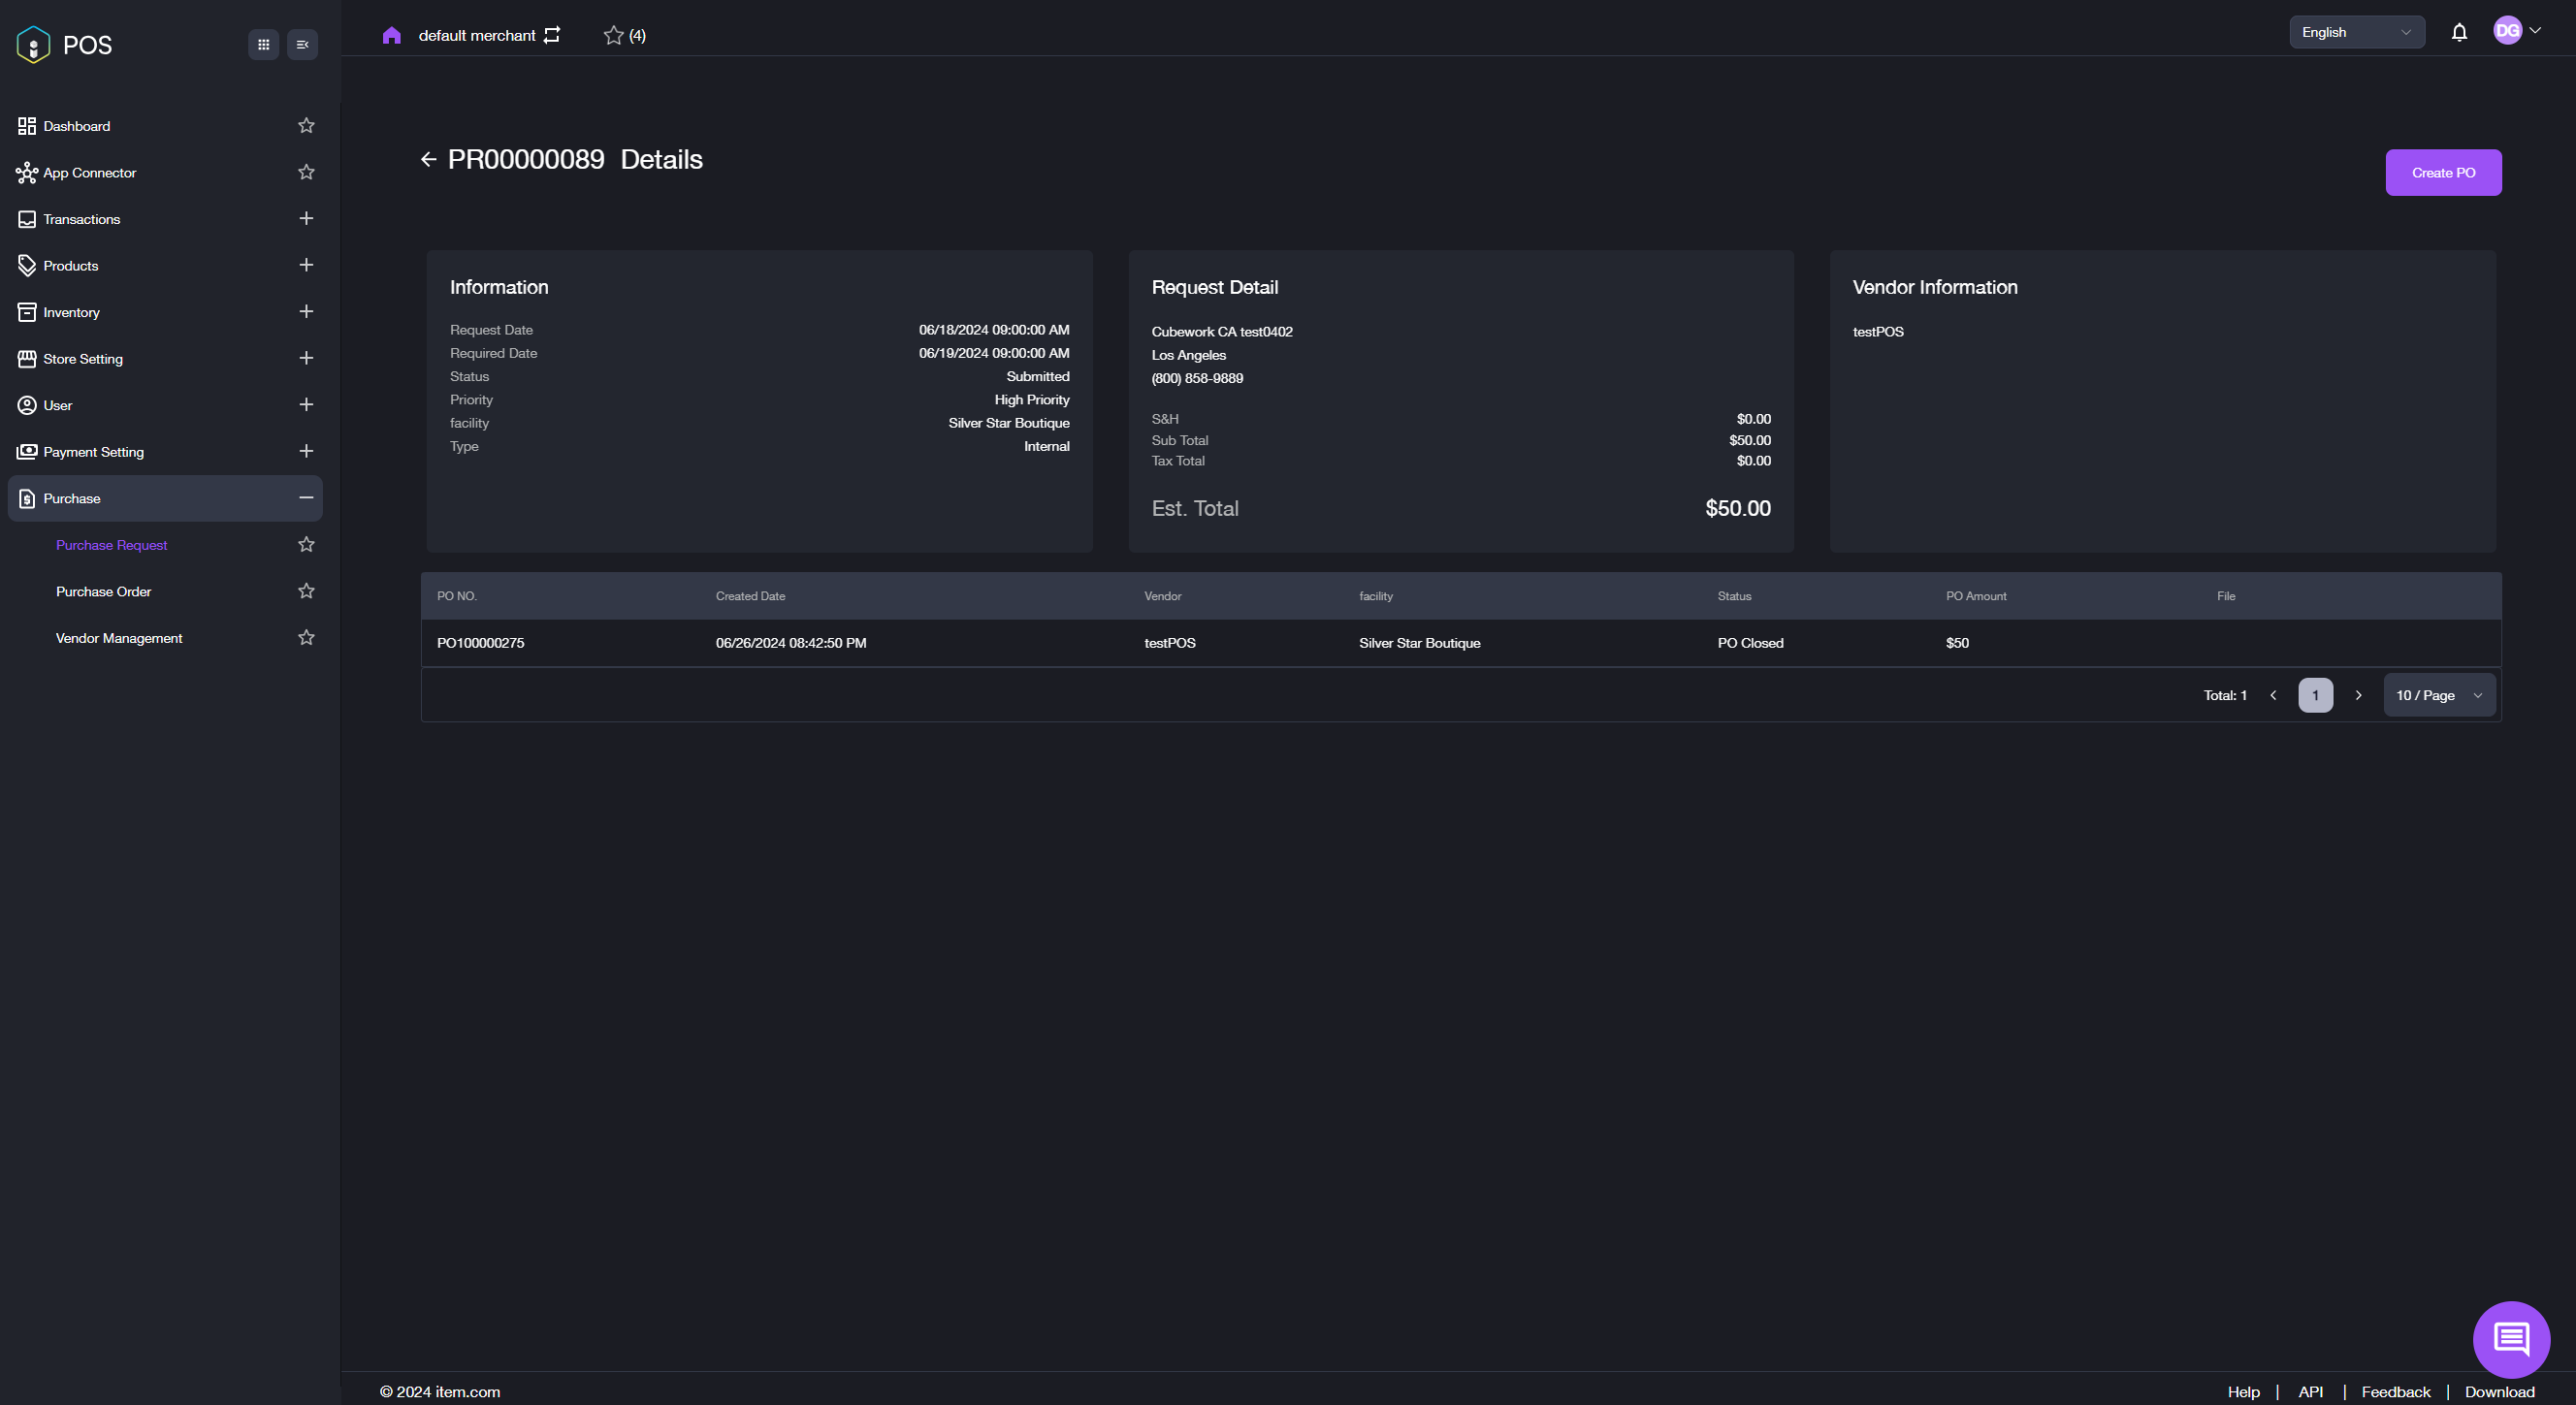
c. Click the Create PO button. The "Create PO" dialogue box will pop up.
d. Follow the steps 9) and 10) under step 3 to create purchase orders.
Important: If the store is created in the POS system, you must select ITEM POS as the option Source. Otherwise, this procedure can only be completed after renting a physical entity warehouse in the WMS.