Warehouse Settings
Configure warehouses for order routing, inventory sync, and fulfillment. You can assign WMS versions for system integration or add local warehouses for manual management.
Configuring a Warehouse
To enable a warehouse for sales order allocation and fulfillment:
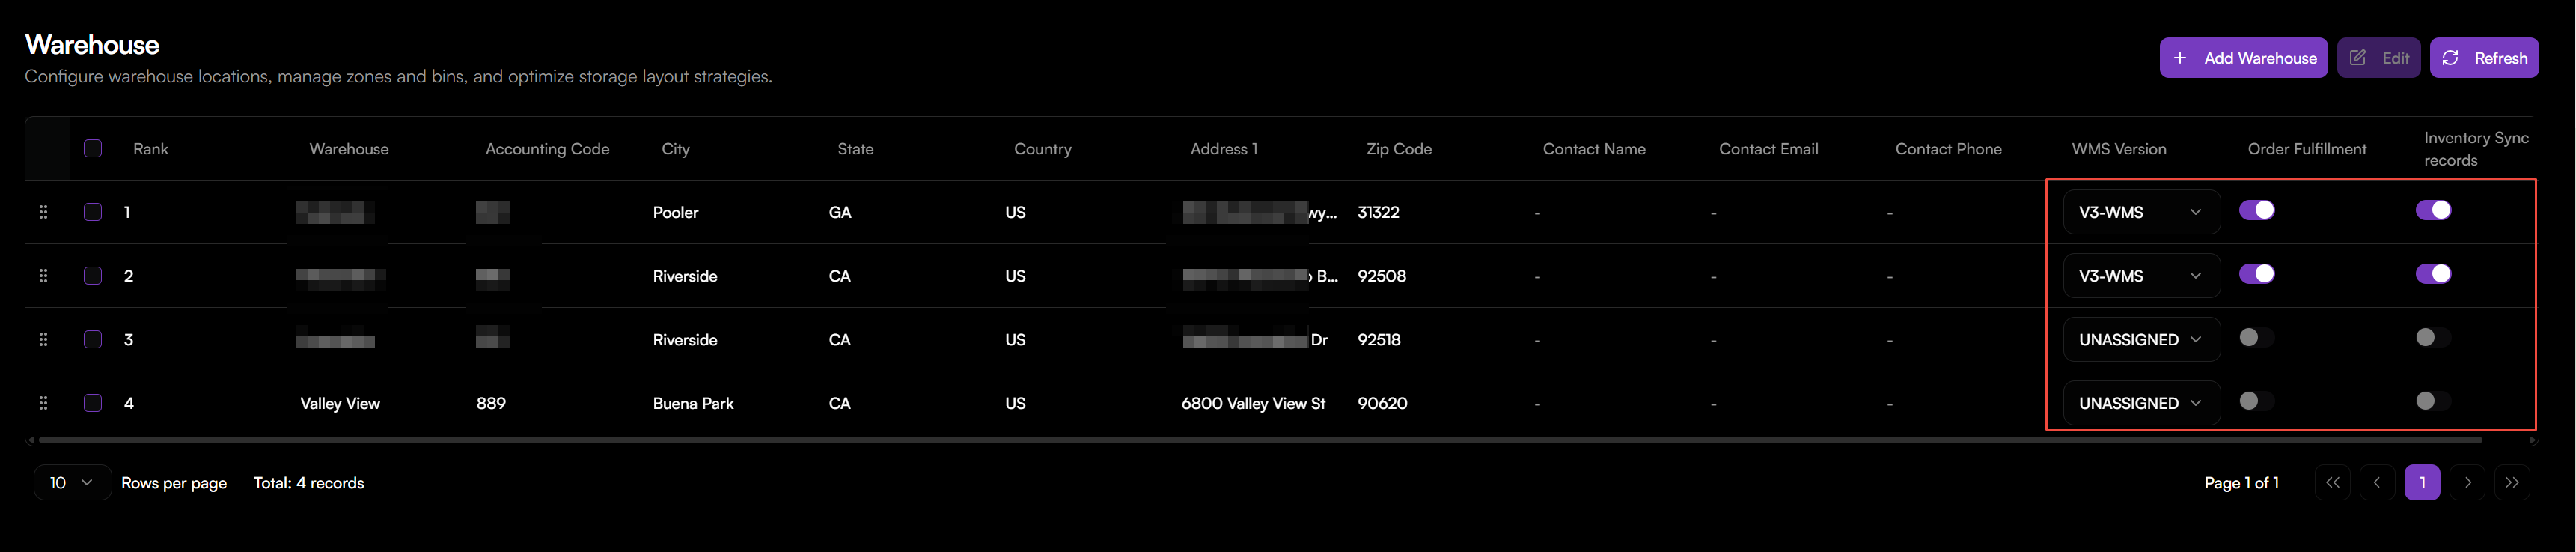
- Go to Inventory > Warehouse.
- View all available warehouse records in the list.
- Locate the warehouse you want to configure.
- Select a WMS Version from the dropdown list:
- V2-WMS
- V3-WMS
- UNASSIGNED (default)
- Toggle Order Fulfillment to ON to allow orders to be routed and fulfilled from this warehouse.
- Toggle Inventory Sync Records to ON to enable inventory updates for this warehouse.
- Drag the warehouse record to adjust its Rank. The system prioritizes higher-ranked warehouses for order routing.
- Click Batch Configure if you want to update multiple warehouses at once.
Notes:
- Warehouses are unassigned by default. You must set a WMS version before they can be used for routing or synchronization.
- The Rank determines the routing priority when multiple warehouses meet the same allocation conditions.
- Ensure that each active warehouse is linked to a valid WMS version to complete the fulfillment flow.
Adding a Local Warehouse
If you need to manage a warehouse outside of the integrated WMS systems, you can add it as a local warehouse.
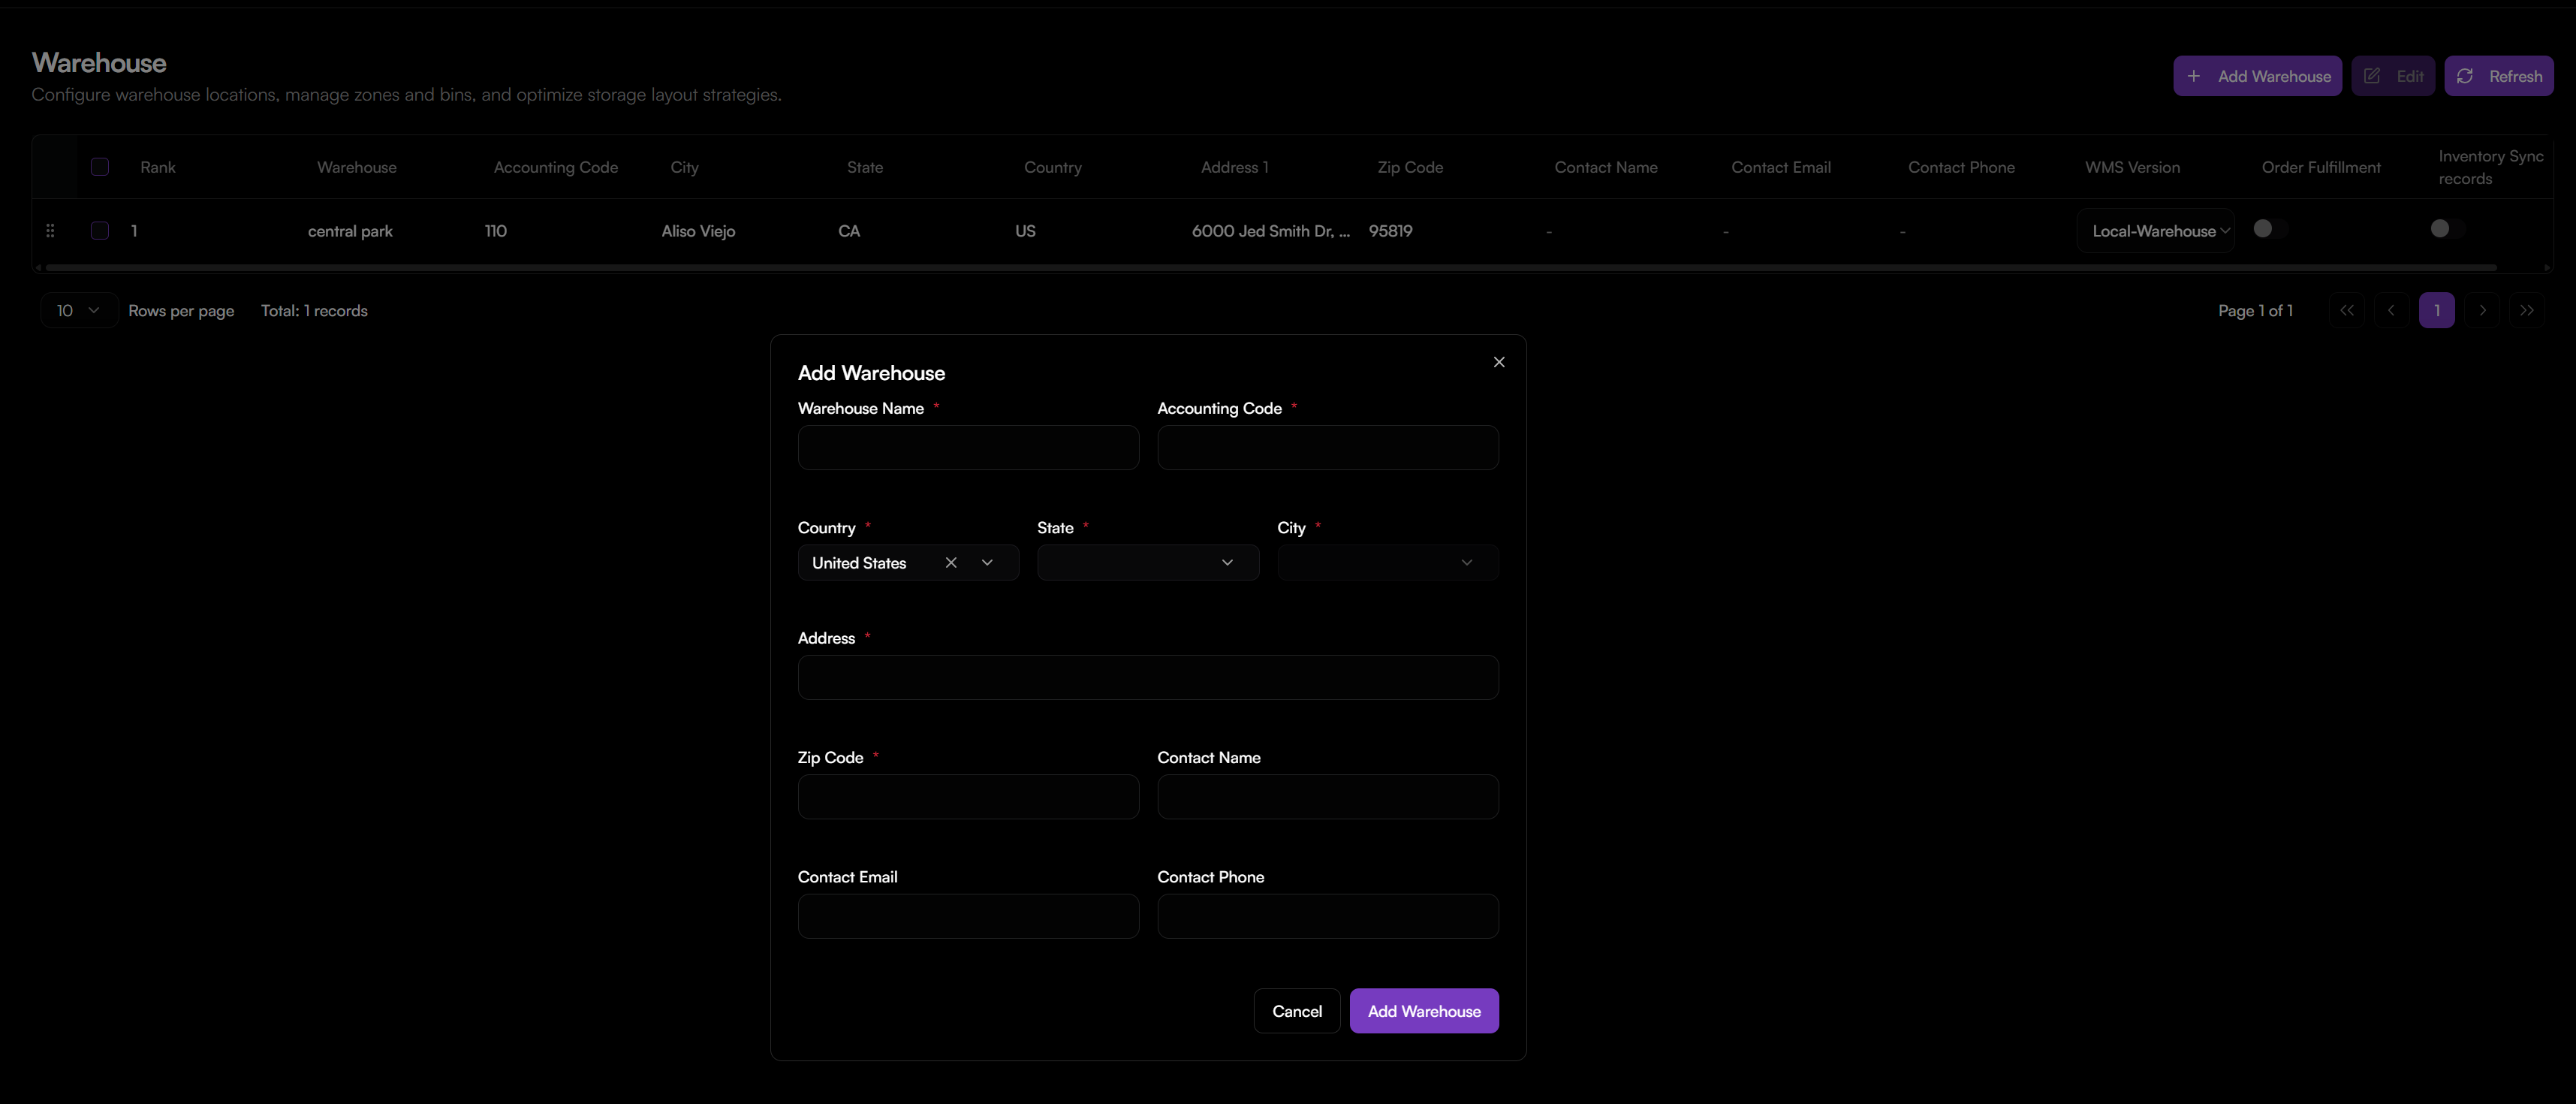
- Go to Inventory > Warehouse.
- Click + Add Warehouse.
- Fill in the required warehouse details:
- Warehouse Name: Enter a unique name for identification.
- Accounting Code: Enter the financial code used for this warehouse.
- Country: Select the warehouse's country.
- State: Select the state or region.
- Address: Enter the full street address.
- Zip Code: Enter the postal code.
- Contact Name (Optional): Primary contact person.
- Contact Phone (Optional): Contact phone number.
- Click Add Warehouse.
After creating, the local warehouse is auto-set to WMS Version: Local Warehouse. Order Fulfillment is disabled by default and cannot be enabled for local warehouses.