Shopify Integration
This guide explains how to set up and configure the data transfer between Shopify and item ecosystems using Item DI (V3). It covers the whole process from prerequisites to troubleshooting common issues.
It includes:
- How to Connect to Shopify via Connector
- Choose Authentication Methods
- Set Up Flows for Order, Product, Inventory and Shipment Sync
- How to View Logs and Debug
- FAQ
Connect to Shopify via Connector
Step 1 Obtain the Client ID and Client Secret from Shopify
- Log in to the Shopify Partner Portal.
- Navigate to Apps > All apps > Create app.
- Select Create app manually and give it a name.
- Copy the Client ID and Client Secret for later use.
Step 2 Create a Connector in Item DI
- Login to Item DI (V3) (opens in a new tab) with your account credentials.
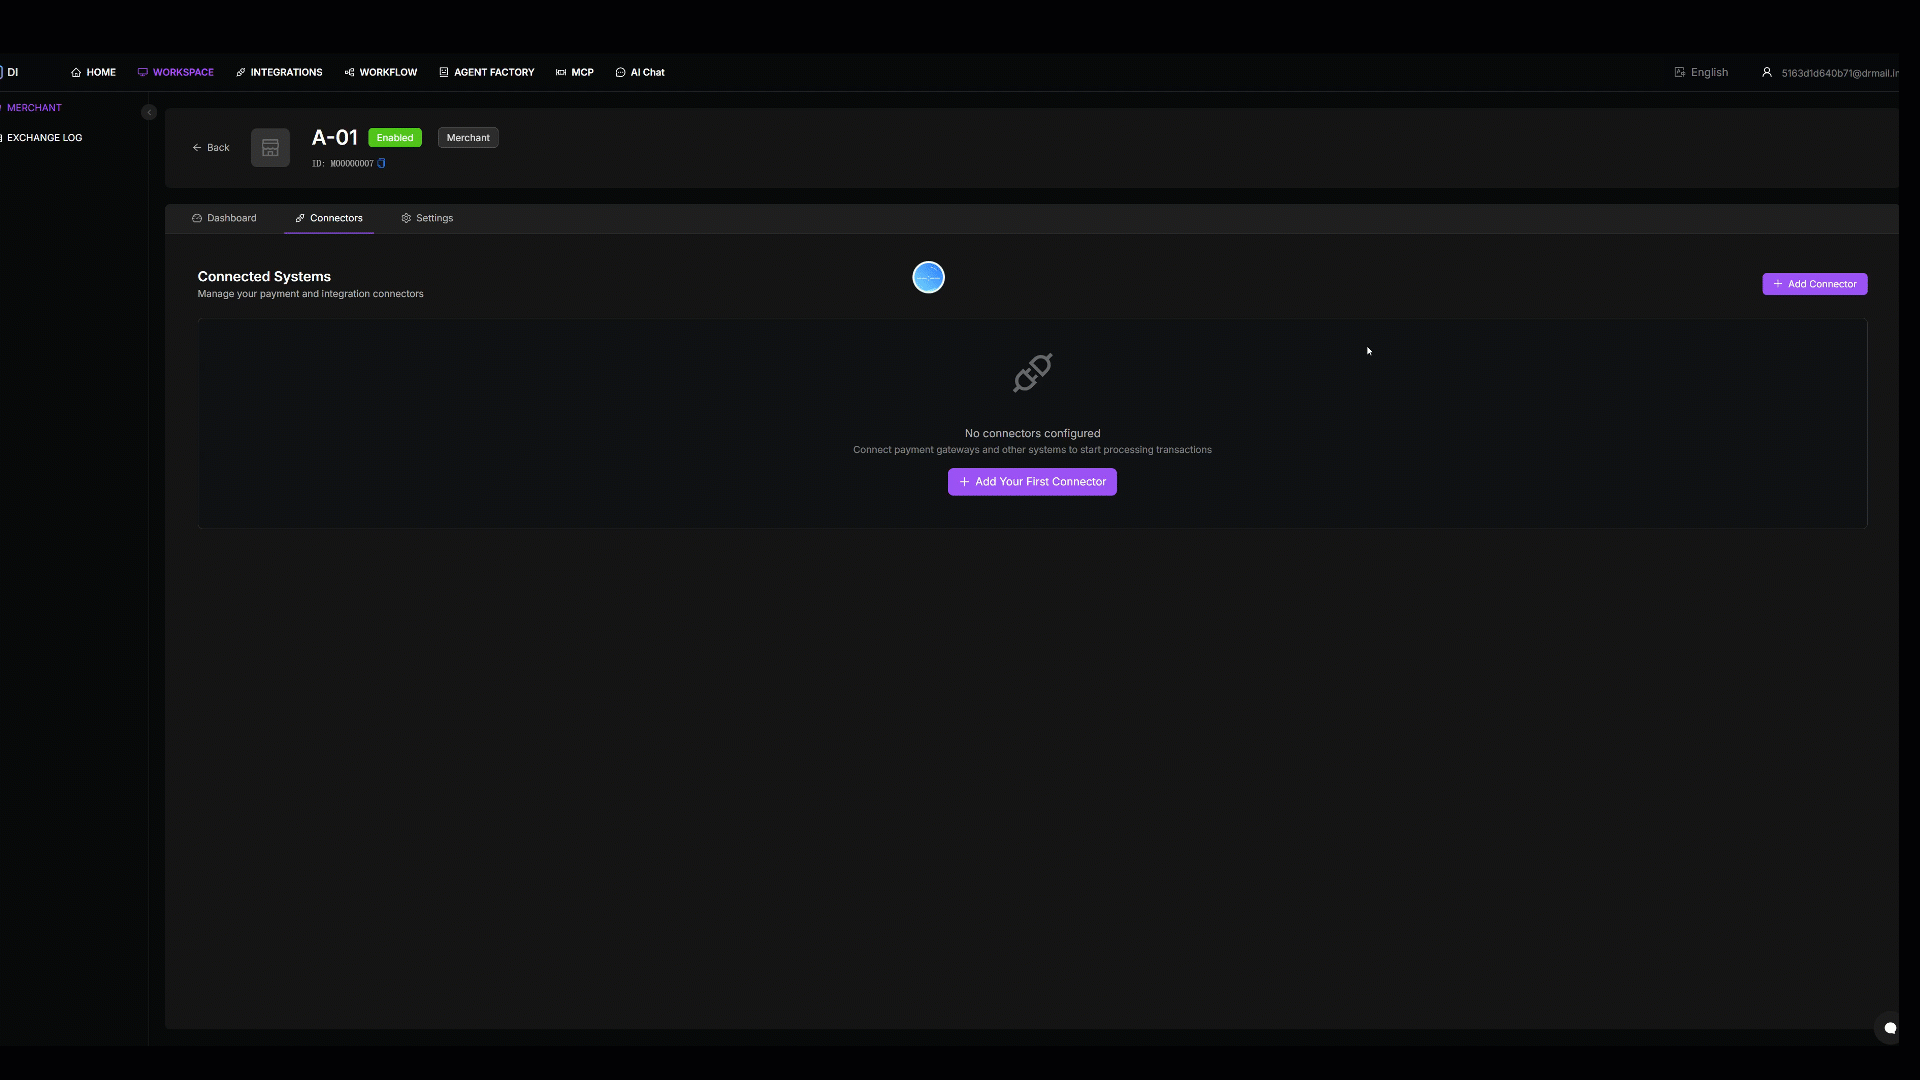
- Navigate to Workspace > Merchant, select a specific merchant and go to Connectors.
- Click + Add Connector. The new connector window will appear.
- Fill in the required fields:
- Connector Name: Enter a descriptive name (e.g., "Shopify Connector").
- Connector: Type keyword to search Shopify V3 from the dropdown.
- Shop domain: Enter your Shopify store domain (e.g.,
yourstore.myshopify.com). - Authentication Type: Choose Basic, API key or OAuth V2 code based on your preference.
- If you selected Basic, enter the API Key and API Secret.
- If you selected API Key, enter the API Secret.
- If you selected Oauth, Click Go to Verify, this will take you to the Shopify authorization page.
- Sign in to your Shopify store. Once signed in, you will be redirected back to the channel connection page.
- Click Test Connection. If the "Connection Successful" message appears, click Submit. The Shopify channel will be connected and listed in the connectors list.
Set Up flows for Order, Product, Inventory and Shipment Sync
It includes the following flows:
- Inventory update oms to Shopify
- Inventory update oms to Shopify by sku
- Product feed shopify to item wms V2 √
- Tracking push oms to Shopify
- OMS Shipment sync to Shopify
- Cancelled order sync shopify to oms
- Order sync shopify to oms Real time
Product feed shopify to item wms V2
This guide explains how to configure a scheduled flow in Item DI to sync products from Shopify to Item WMS V2, including prerequisites, setup steps, and verification instructions.
Prerequisites
Make sure you have the following before starting:
- Valid Item DI (V3) login account
- Shopify API credentials (API Key & Secret)
- Item WMS V2 connection information (Company ID, Customer ID, Username, Password)
Step 1: Configure Merchant and Connectors
-
Log into Item DI (V3) (opens in a new tab) with your account credentials.
-
Go to Workspace > Merchant, and click + Add Merchant.
-
Fill in the required merchant information. (Tip: Use the AI assistant to help auto-complete merchant setup.)
-
After creation, locate the merchant and open the Connectors tab.
-
Create two connectors—one for Shopify and one for Item WMS V2.
-
Click + Add Connector:
- Enter a Connector Name (e.g., "Shopify Products").
- Choose Shopify V3 from the connector dropdown.
- Select the Basic authentication type.
- Enter the API Key and API Secret.
- Click Test Connection. If successful, click Submit.
-
Repeat the above process:
-
Choose Item-WMS-V2 from the connector dropdown.
-
Default auth type is Session.
-
Fill in the following required fields:
- Company ID
- Customer ID
- Username
- Password
-
Click Test Connection. If successful, click Submit.
-
-
Once configured, both connectors will appear in the Connector List.
Step 2: Set Up the Flow
-
Go to the Settings tab in Workspace. Click + Add Setting.
-
From the Template dropdown, choose
[Basic] Push Shopify Products to Item WMS V2. -
Select the Run Interval (e.g., 1 hour, 1 day, or 1 month).
-
Assign the connectors:
- Shopify Connector: select the one you just created.
- Item WMS V2 Connector: select the one you just created.
-
Click Save Settings.
-
The setting will now appear in the Settings List, showing
Onlinestatus. -
Navigate to Workflow > My Workflows to confirm the associated workflow is also
Online.
Step 3: Verify the Flow
- Log in to your Shopify Admin account.
- Create a new product, fill in the product details, and click Save.
- Return to Item DI, go to Workflow > My Workflows, and click Run to trigger the flow manually (bypassing the interval schedule).
- Log into Item WMS, navigate to: Settings (Foundation Data) > Product > Product Spec.
- Verify that the newly created product appears and the data is synced correctly.
- Back in Item DI, open My Workflows, locate the flow, and click Log to view execution records.
- Confirm the product sync was successful. Use the HTTP Logs for further troubleshooting if necessary.
FAQ
Why is the Shopify inventory not syncing with the internal system?
- In Item WMS or the inventory module, check whether the product has available stock in the internal system.
- Go to Item DI > Logs > Inventory, and see if a sync record exists for this product.
- If a sync record exists, open the Sync Data log. Check if there is an error message returned by Shopify.
- If the error indicates syncing is disabled, go to the product in Shopify Admin and enable the inventory sync toggle for this item.
Why is the Shopify order not pushed to Wise?
-
In the Orders tab of Item DI, search for the order using the account name, platform name, or store name.
-
If the order exists:
- Check the
statusfield. - If status =
processing, the order has been successfully pushed to the Wise system. You can click into the order and view Dispatch Detail under the Product tab to confirm which warehouse received the order. - If status =
exception, the top of the order detail page will display the error reason. Based on the message, modify the order as needed.
- Check the
-
In Item DI > Logs > Order, search by merchant name or channel order number. Click on Sync Data to view the full upstream and downstream request/response values.