Inventory Adjustment
Inventory Addition
Important: Adding new inventory is only available for "No Warehouse" merchants.
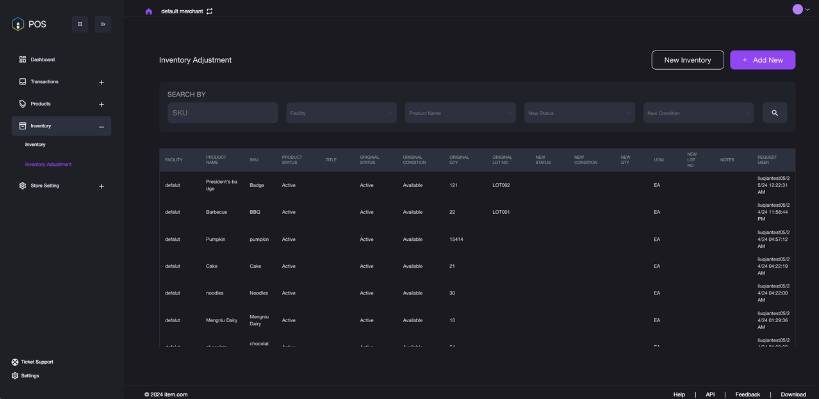
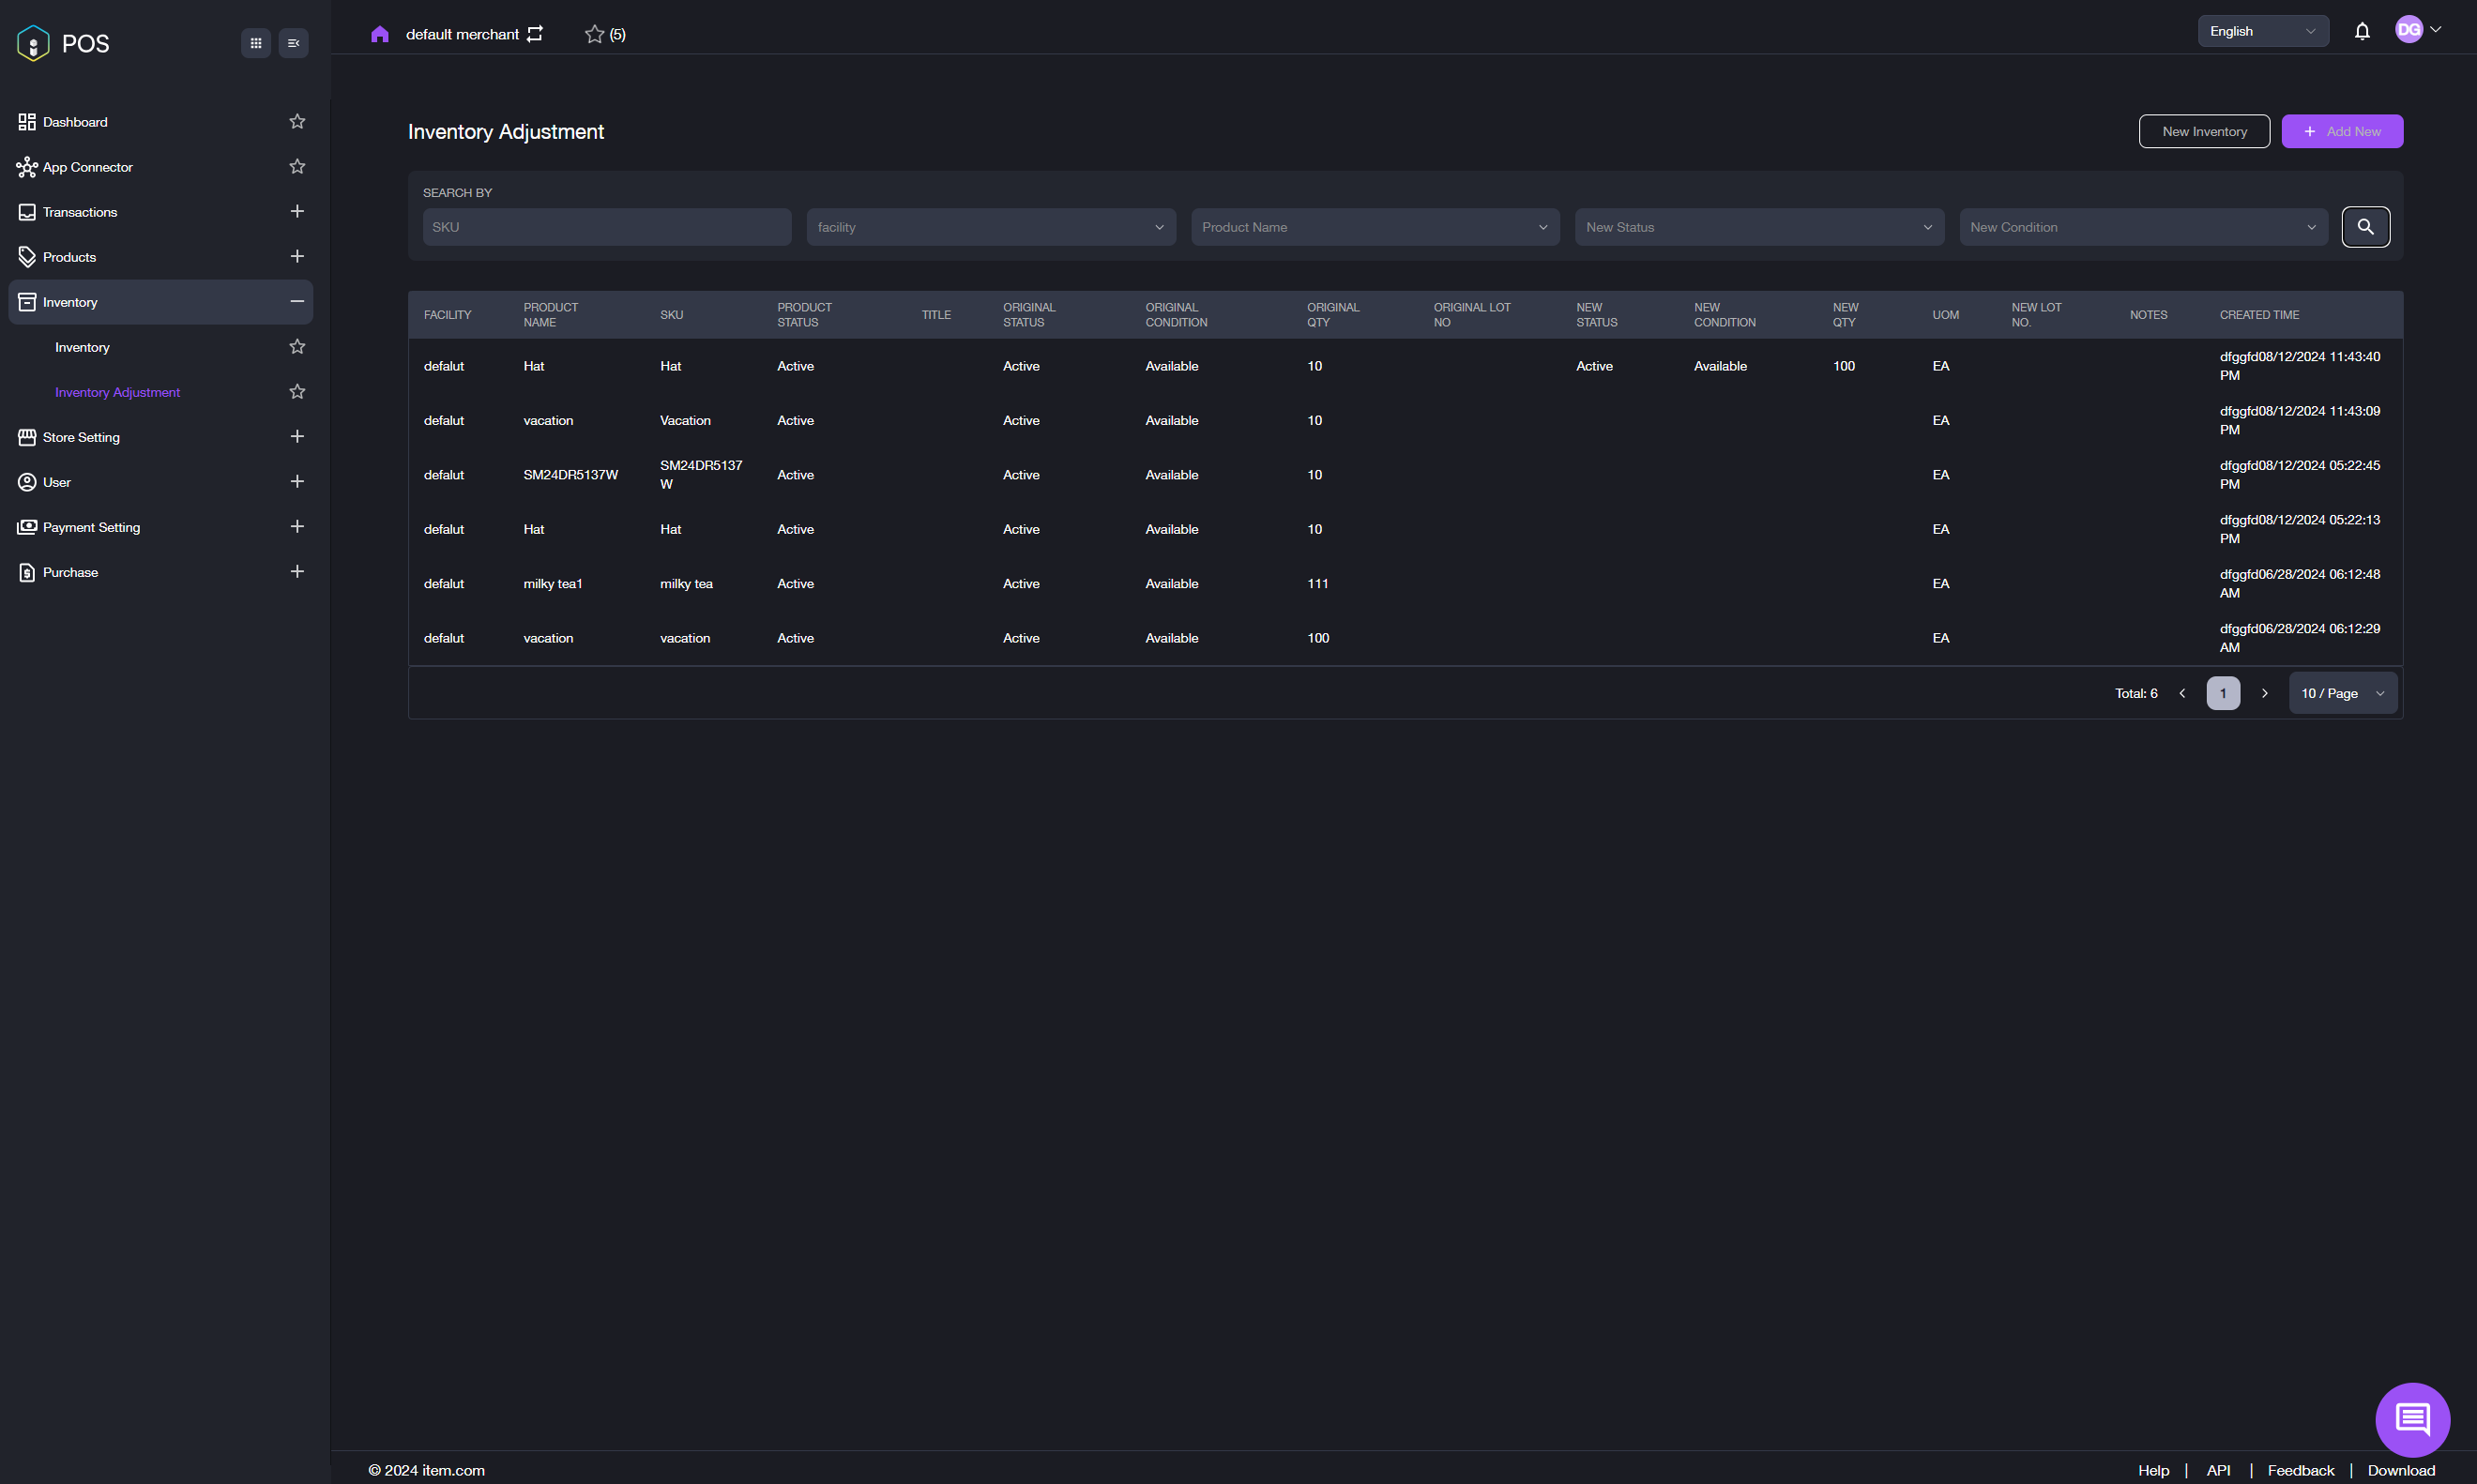
- Click Inventory, then select the sub-menu Inventory Adjustment from the navigation panel on the left side of the main interface. The Inventory Adjustment page shown in the image below will be displayed.
-
You can view the inventory information across several dimensions, including: Facility, Product name, SKU number, Product status, Original status, Title, Original condition, Original quantity, Original LOT number, New status, New condition, New quantity, UOM (Unit of Measure), New LOT number, Notes and Created time.
- Facility: The warehouse where the products are stored.
- Product name: The names of the items.
- SKU: The SKU number of the products.
- Product status: The current status of the product.
- Original status: The previous status of the product.
- Title: The title or description of the item.
- Original condition: The previous condition of the product.
- Original QTY: The previous number of products.
- Original LOT NO.: The previous LOT number of the products.
- New status: The current general status of the inventory item.
- New condition: The current condition of the product.
- New QTY: The current number of products.
- UOM: The unit used for the product size.
- New LOT NO.: The current LOT number of the products.
- Notes: Remarks for the products.
- Created time: The time when the new inventory was created.
-
You can also use the Search by function to filter the product inventory you intend to review. Select an option from the drop-down menus of SKU, Facility, Product Names, New Status, or New Conditions. Then click the search icon to display the relevant products in the list below.
-
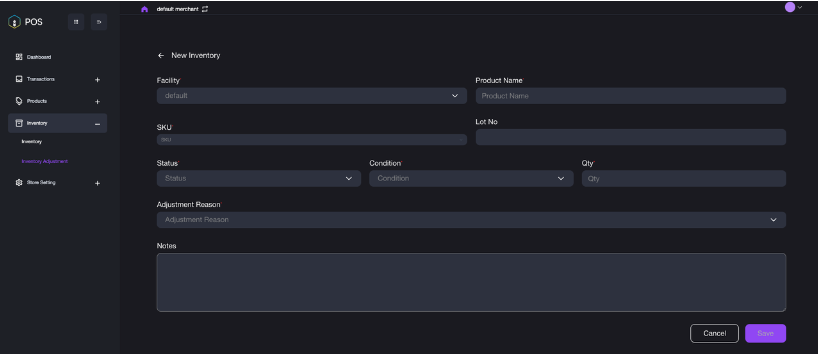
Click the New Inventory button to add inventories for newly added products.
-
Select the SKU of the newly added product. Fill in/edit the detailed information.
-
Click the Save button to store the information. The inventory is added successfully.
Inventory Editing
Important: The inventory adjustment function is only available for the inventories that do not have a fixed warehouse.
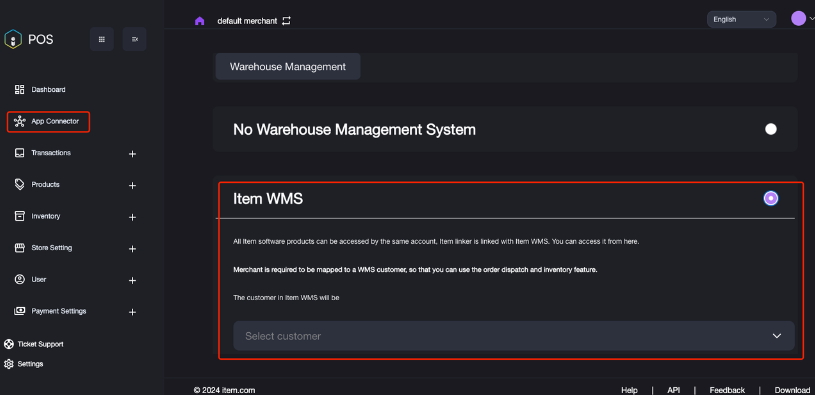
- First, set the warehouse type in the App Connector module.
- If No Warehouse Management System is selected, you will need to manage the inventory manually. In this case, the inventory quantity will not be automatically deducted when products are sold.
- If Item WMS is selected, you will need to follow the procedures for inbound purchasing, outbound sales, and returns. The inventory will be adjusted based on the corresponding receipts.
- Click the sub-menu Inventory Adjustment from the navigation panel on the left side of the main interface to enter the Inventory Adjustment page. Search the products by using SKU, Facility, Product Name, New status or New condition.
-
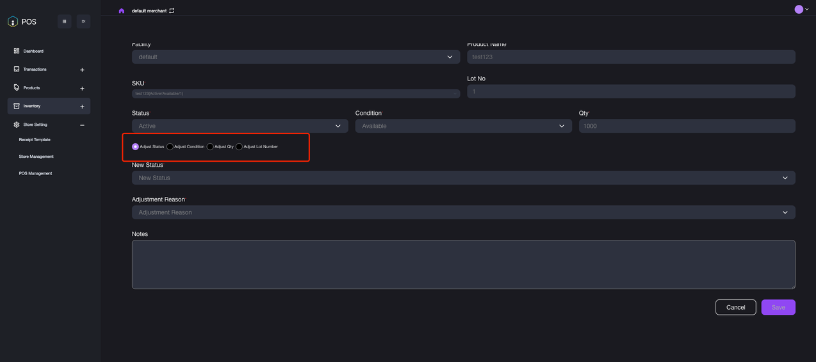
Click the + Add New button to adjust the inventory for the products.
- Select the SKU of the product that needs to adjust its inventory.
- Select the options for Adjust Status, Adjust Condition, Adjust QTY or Adjust Lot Number, and then edit the information for each category as needed.
- Click the Save button to store the updated information.