How to Create a New Location
In the Warehouse Management System (WMS), a location is a specific area or spot within the warehouse to store goods. Each location has a unique identification to manage and locate the inventory. By accurately managing these locations, Item WMS can ensure inventory accuracy and improve operation efficiency.
This article introduces how to create new locations and guides the relevant operations.
Create New Locations
Item WMS supports two methods to add the locations: manual and in bulk.
Manual Adding
-
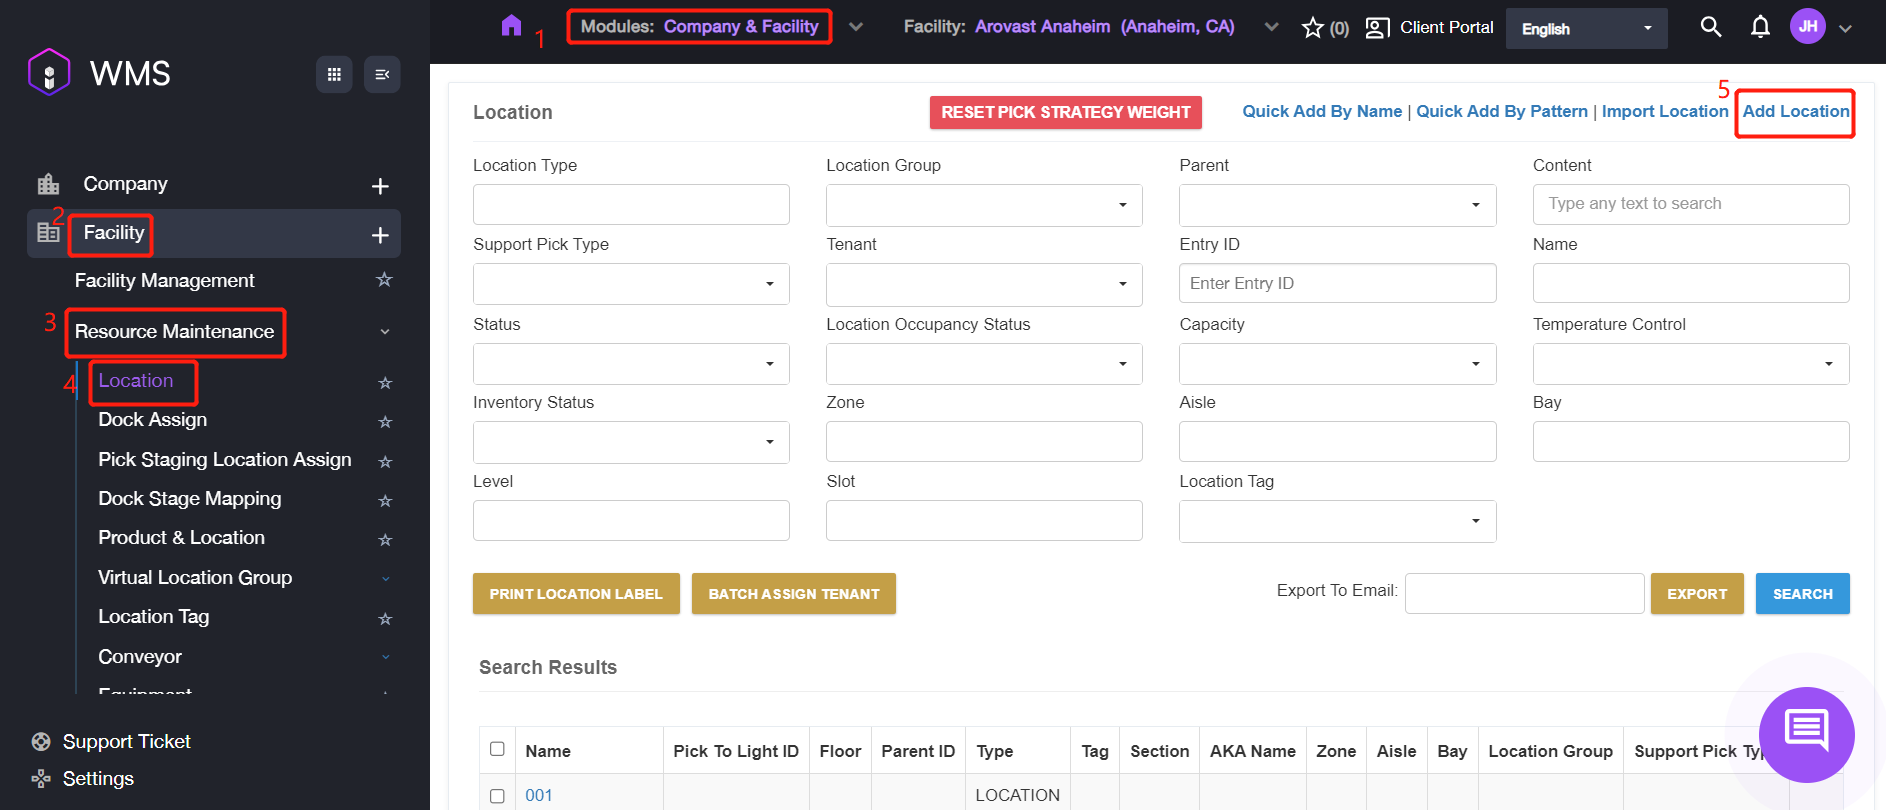
Navigate to Company & Facility Modules > Facility > Resource Maintenance > Location, click Add Locations button at the top right corner.
-
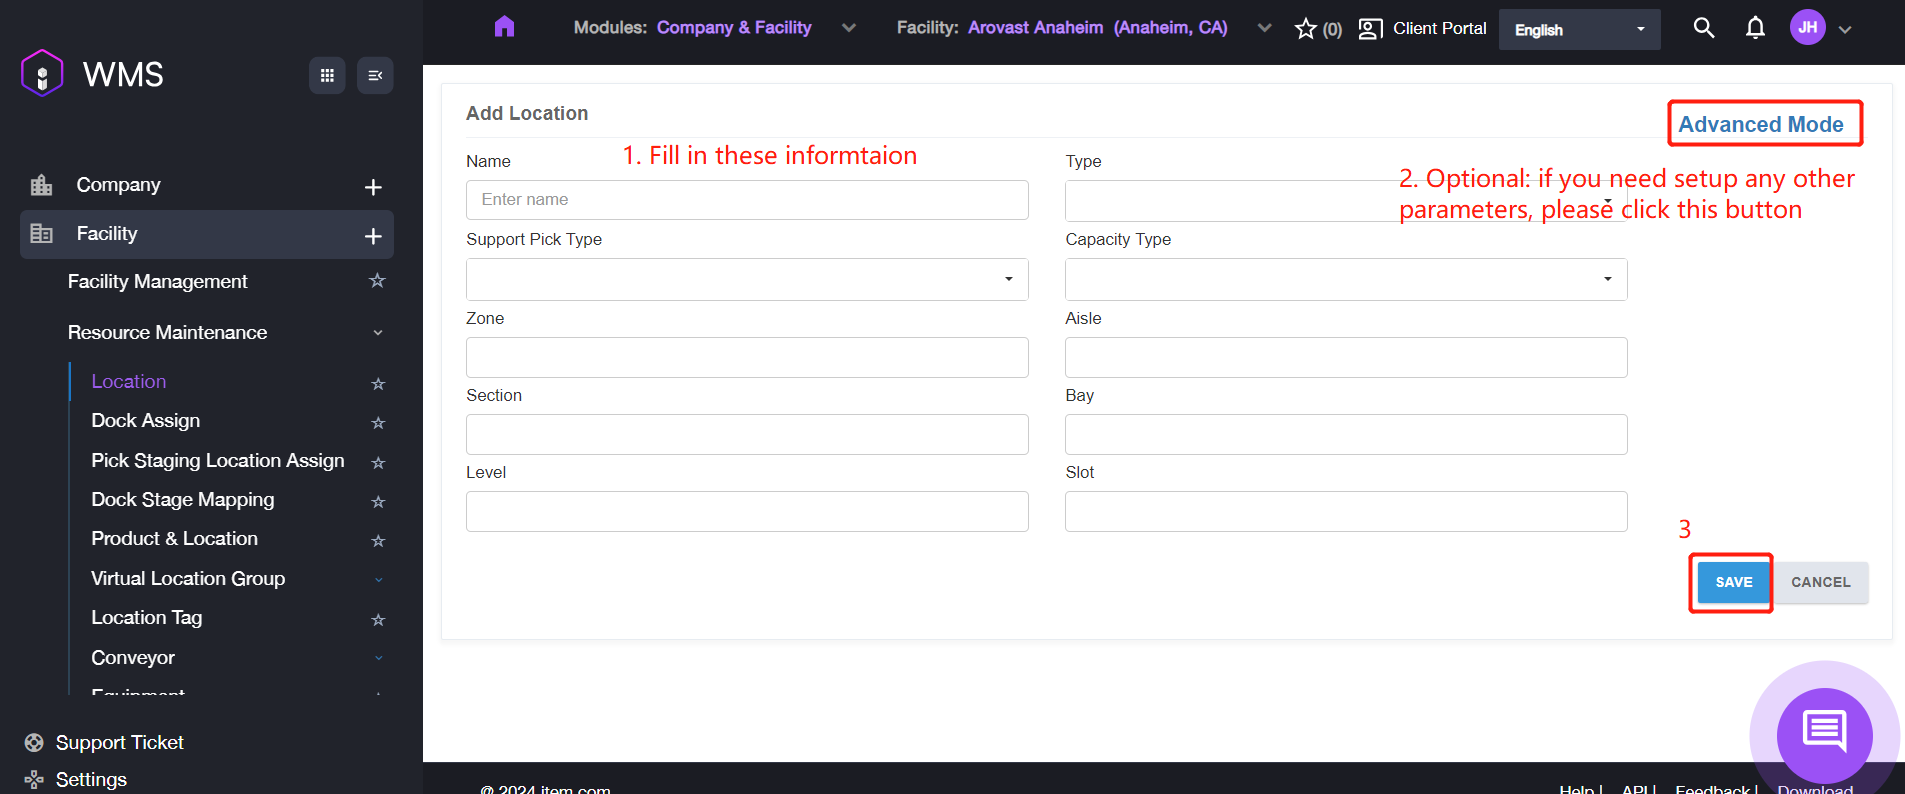
Fill in the Location Name, setup Location Type and other parameters. If you need to configure any additional parameters such as Location Status or Tenant, please click Advanced Mode to complete it.
| Type | Description |
|---|---|
| Zone | |
| BUFFER_ZONE | It is for forklift, the buffer zone for human and forklift. |
| LOCATION | Regular location |
| PICK | The picking area specifically used for picking items for orders. |
| STAGING | A staging area for temporarily storing picked items before Inbound or Outbound. |
| PARKING | The parking area for forklists, EPJ and other vehicles. |
| DOCK | The docking area for loading and unloading, it usually connects to the entrance/exit of the warehouse. |
| BASE | The infrastructure area of the warehouse, such as office area, rest area and etc. |
| SPOR | A specific place, which can be any particular location within the warehouse for special operations or store. |
| OTHER | Others locations. |
| OFF_SITE | An area to manage inventory stored in third-party warehouse. |
| RMS | An area used to sync inventory between RMS and WMS. Note: it doesn’t allow user to do any operation to adjust the RMS inventory. |
| ITEM | |
| ASSET |
| Status | Description |
|---|---|
| USEABLE | It indicates that the location is currently available. |
| DISABLED | It indicates that the location is currently unavailable. |
| DELETE | The location (which is marked as delete) will be removed permanently after warehouse reorganization. |
| MERGED | It indicates that the location has been merged with another. To optimize space, two adjacent shelf locations will be combined to a larger location. |
| MIXTURE | It indicates that the location currently stores mixed items or batches. |
- Click SAVE button to complete adding the new location.
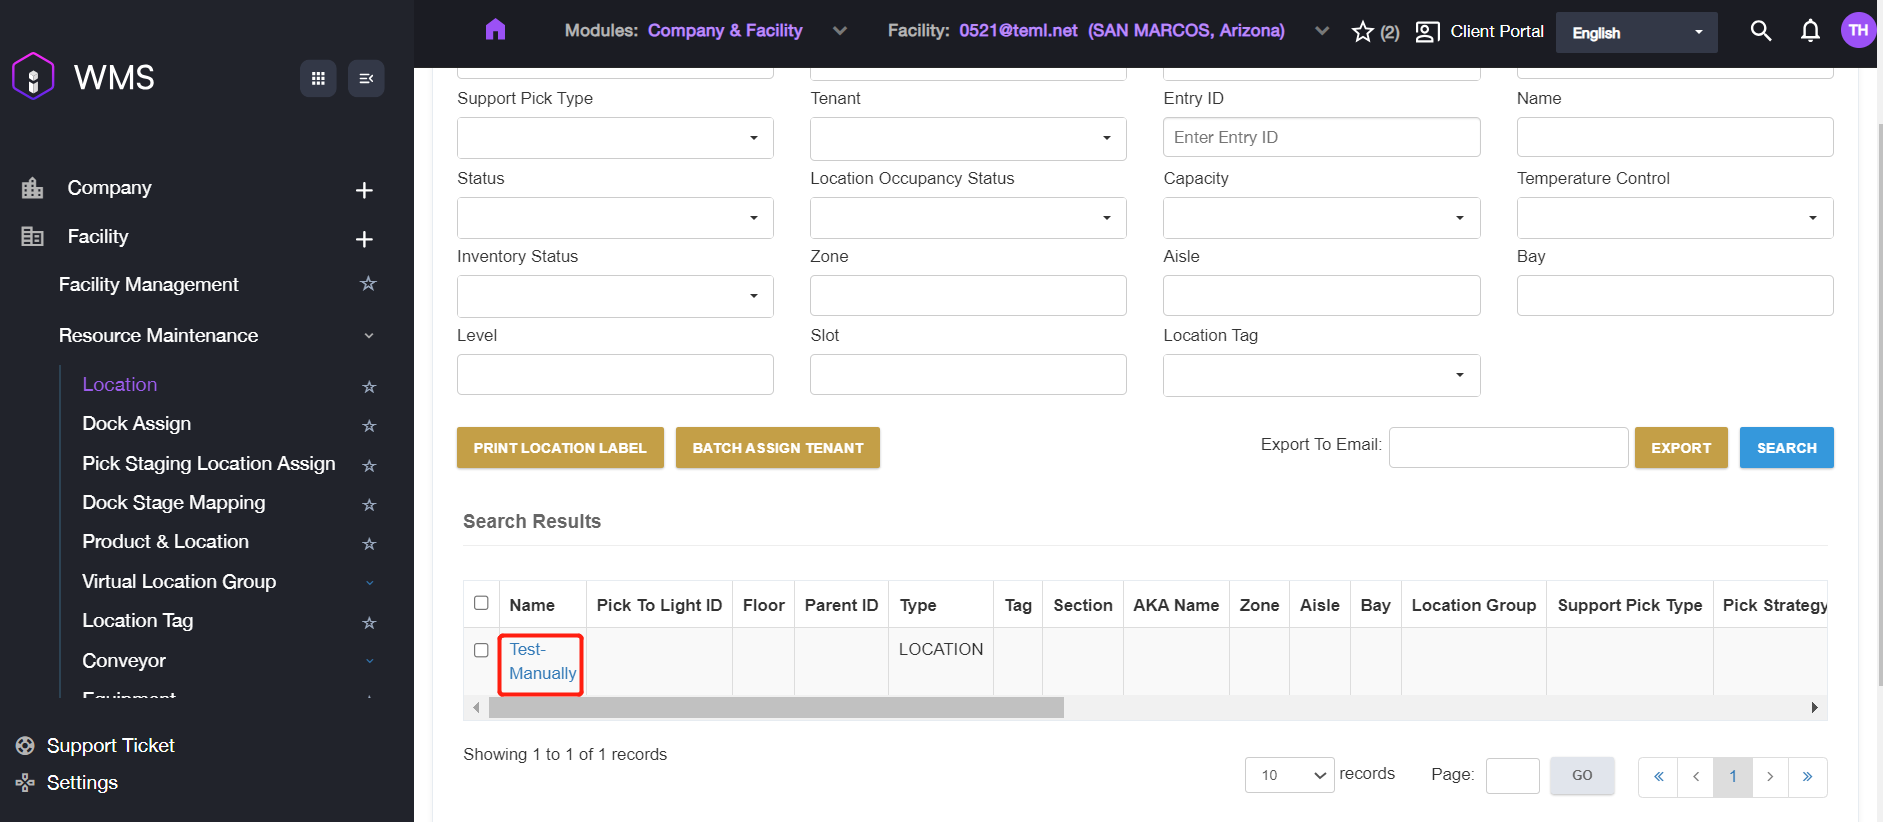
After saving successfully, the corresponding location will be displayed in the location list.
Add In Bulk
The system supports to add the locations in bulk via importing the template, it will cost less time when you want to add multiple locations at once.
-
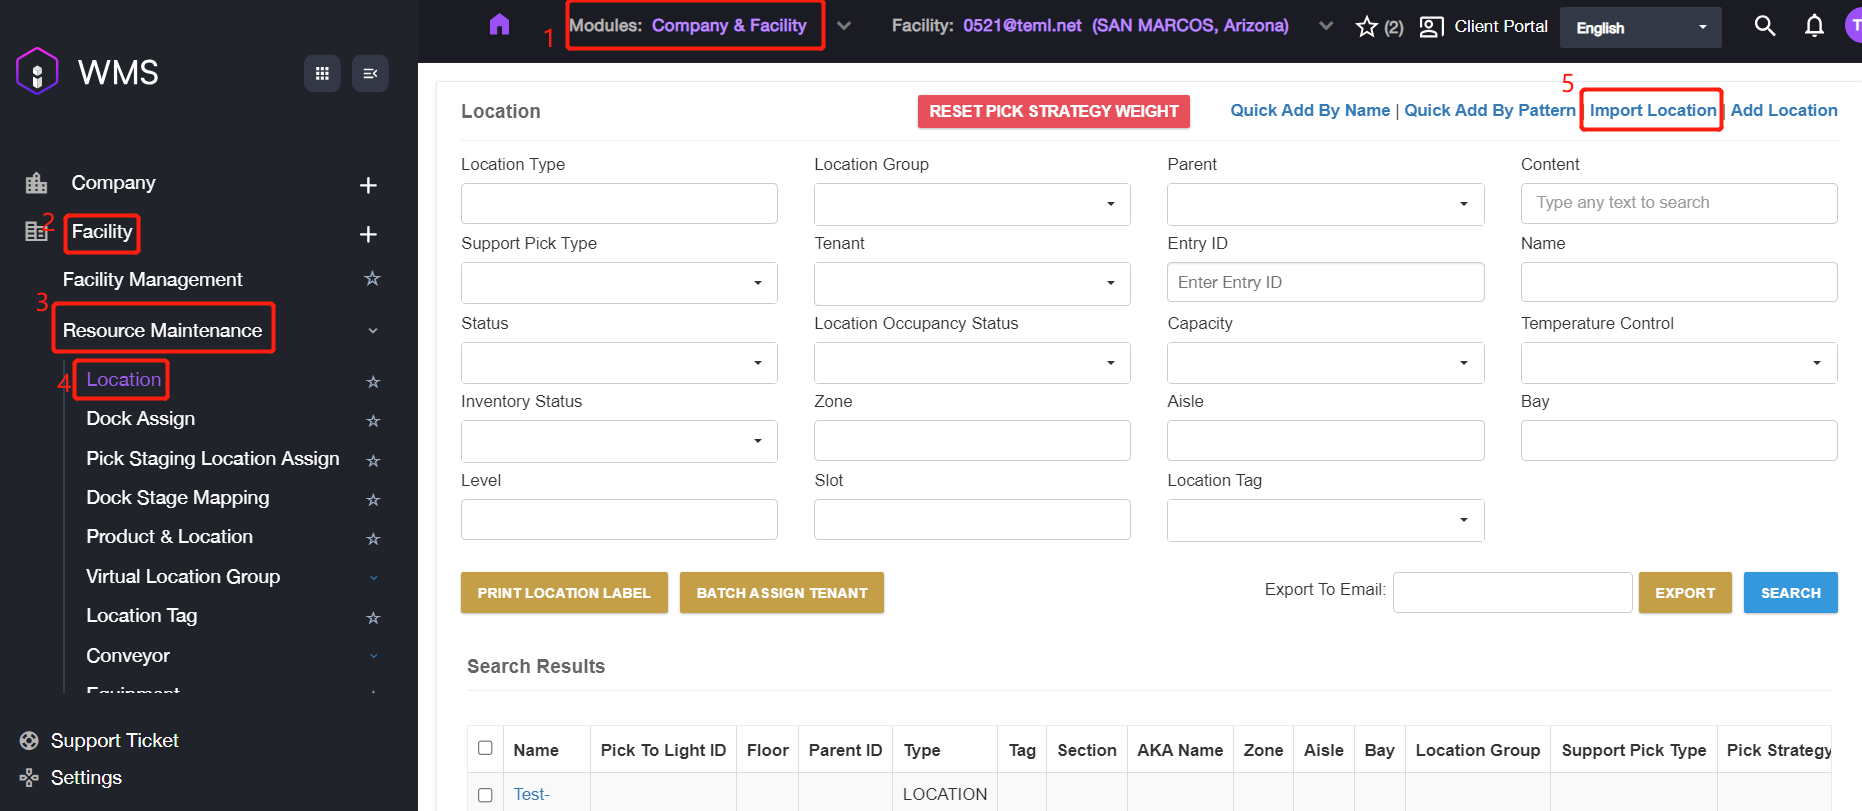
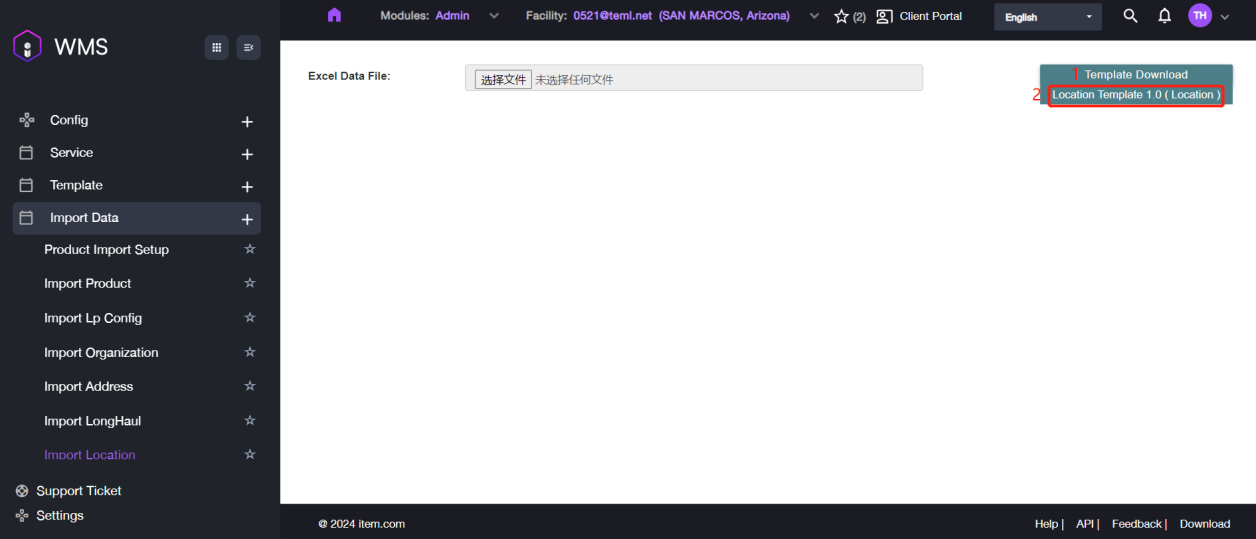
Navigate to Company & Facility Module > Facility > Resource Maintenance > Location, click Import Location button to next step.
-
If you have not prepared the template file, please go to Template Download > Location Template 1.0 ( Location ) to download the template firstly.
-
Open the excel file and fill in the location information. Attach the screen of the template file below:

-
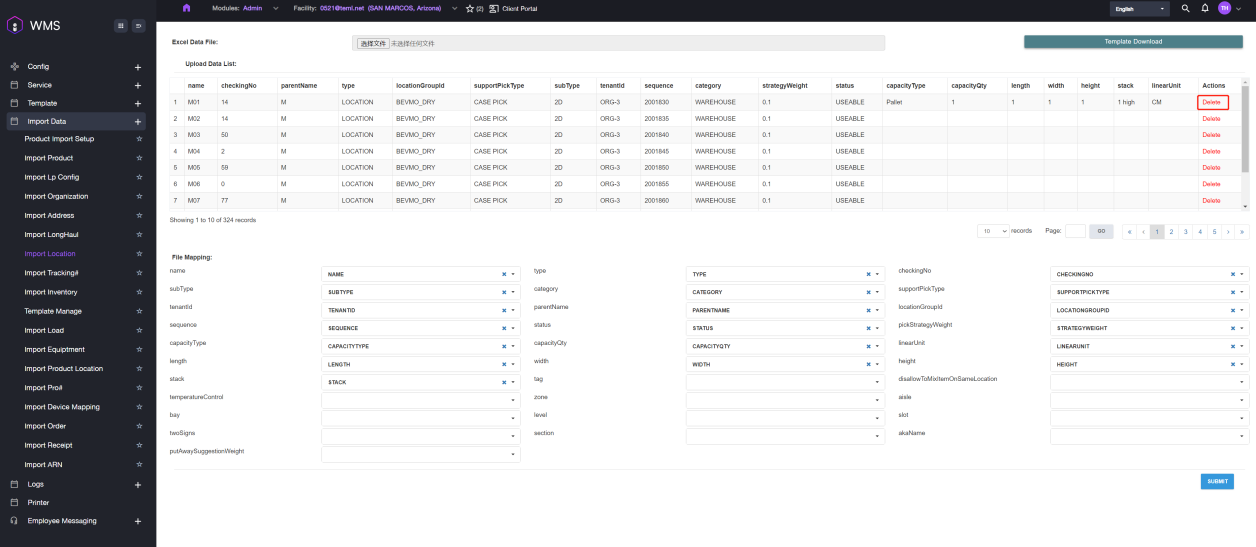
Click Choose File to select the template file, the page will display the content for preview. It also supports to preview the data on this page, if there is any incorrect data or you want to delete, you can click Delete action button to remove the specific location data.
-
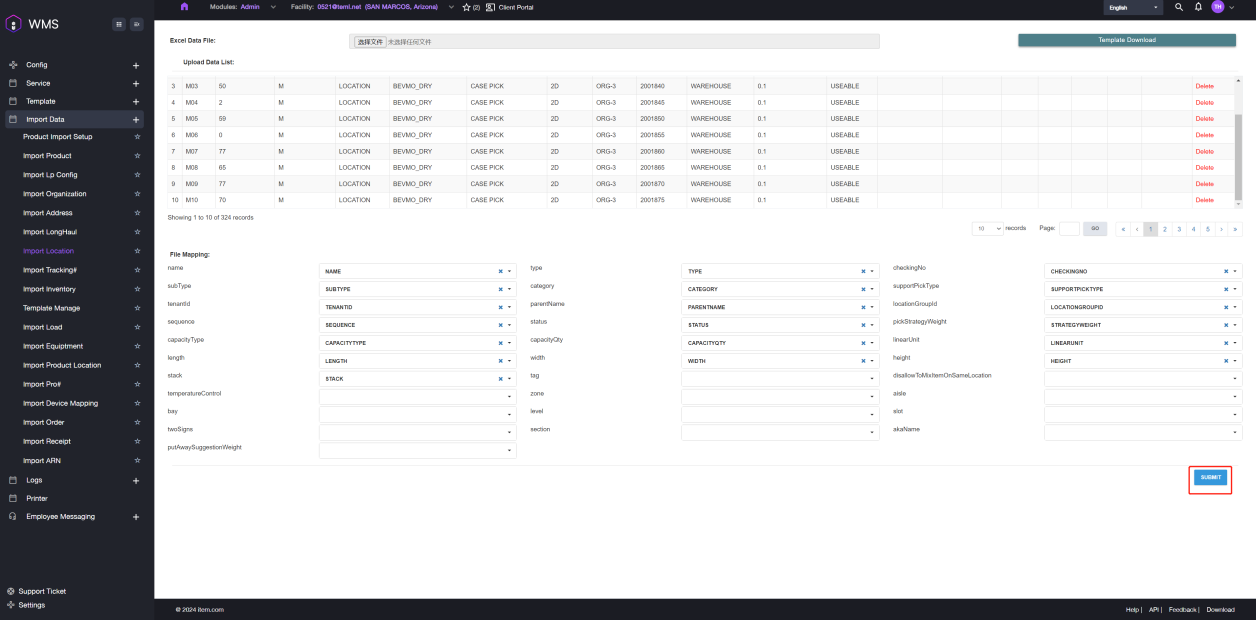
Please click SUBMIT button if the all information is correct.
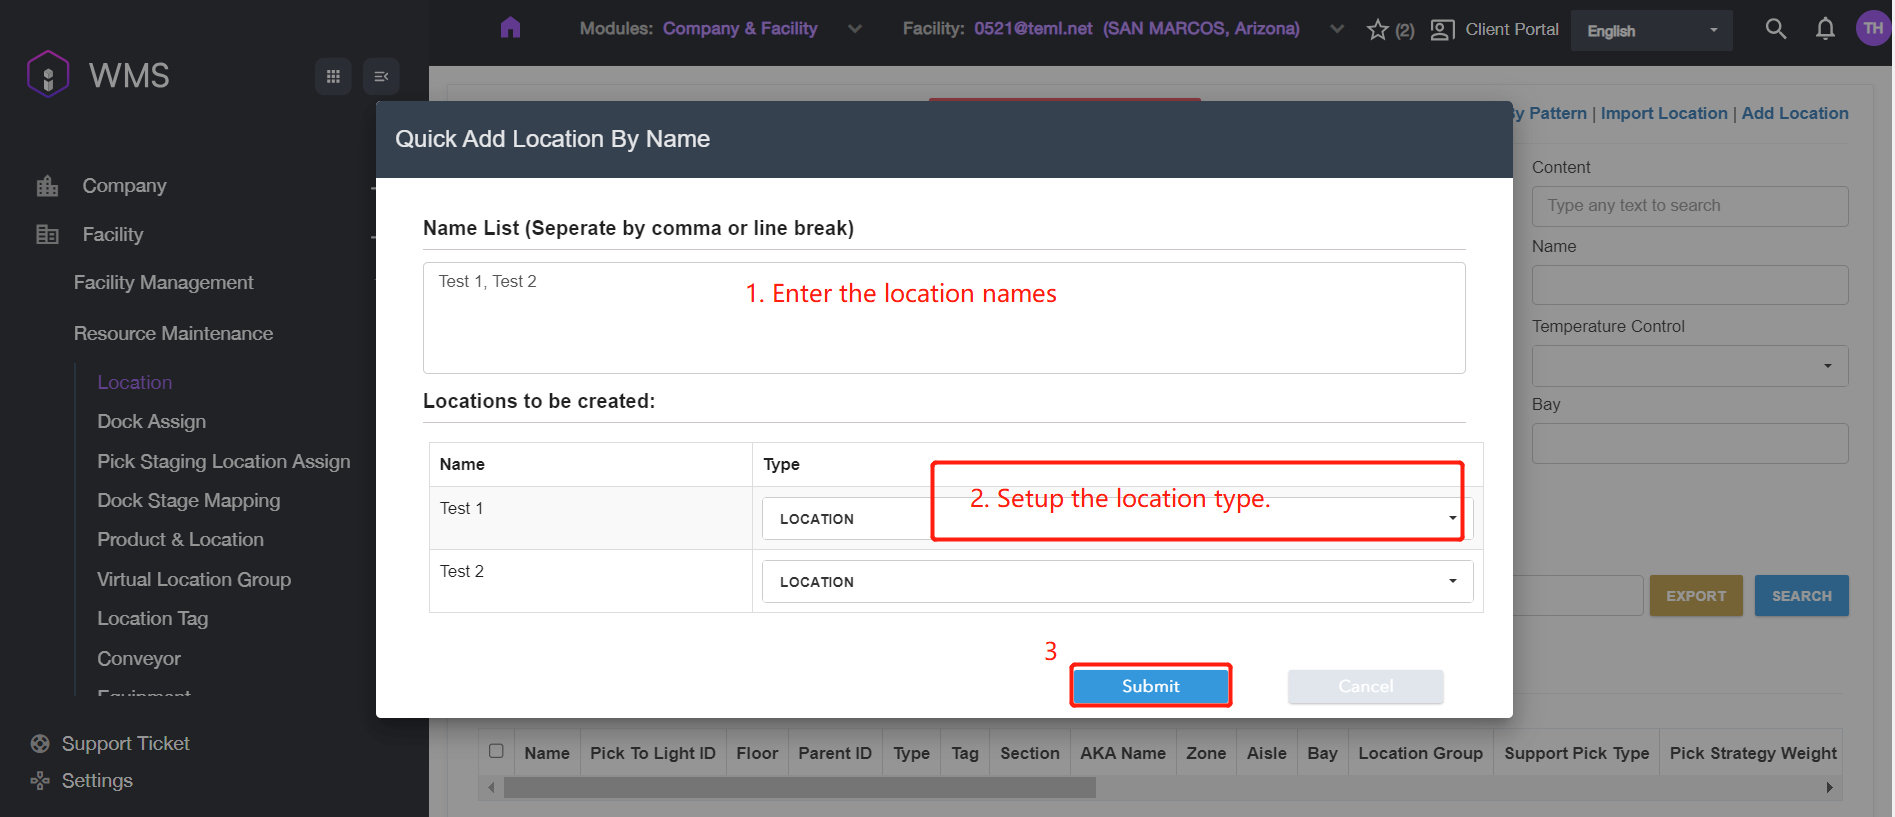
Quick Add By Name
There is a simple and quick method to add locations using only the Location Name and Location Type.
-
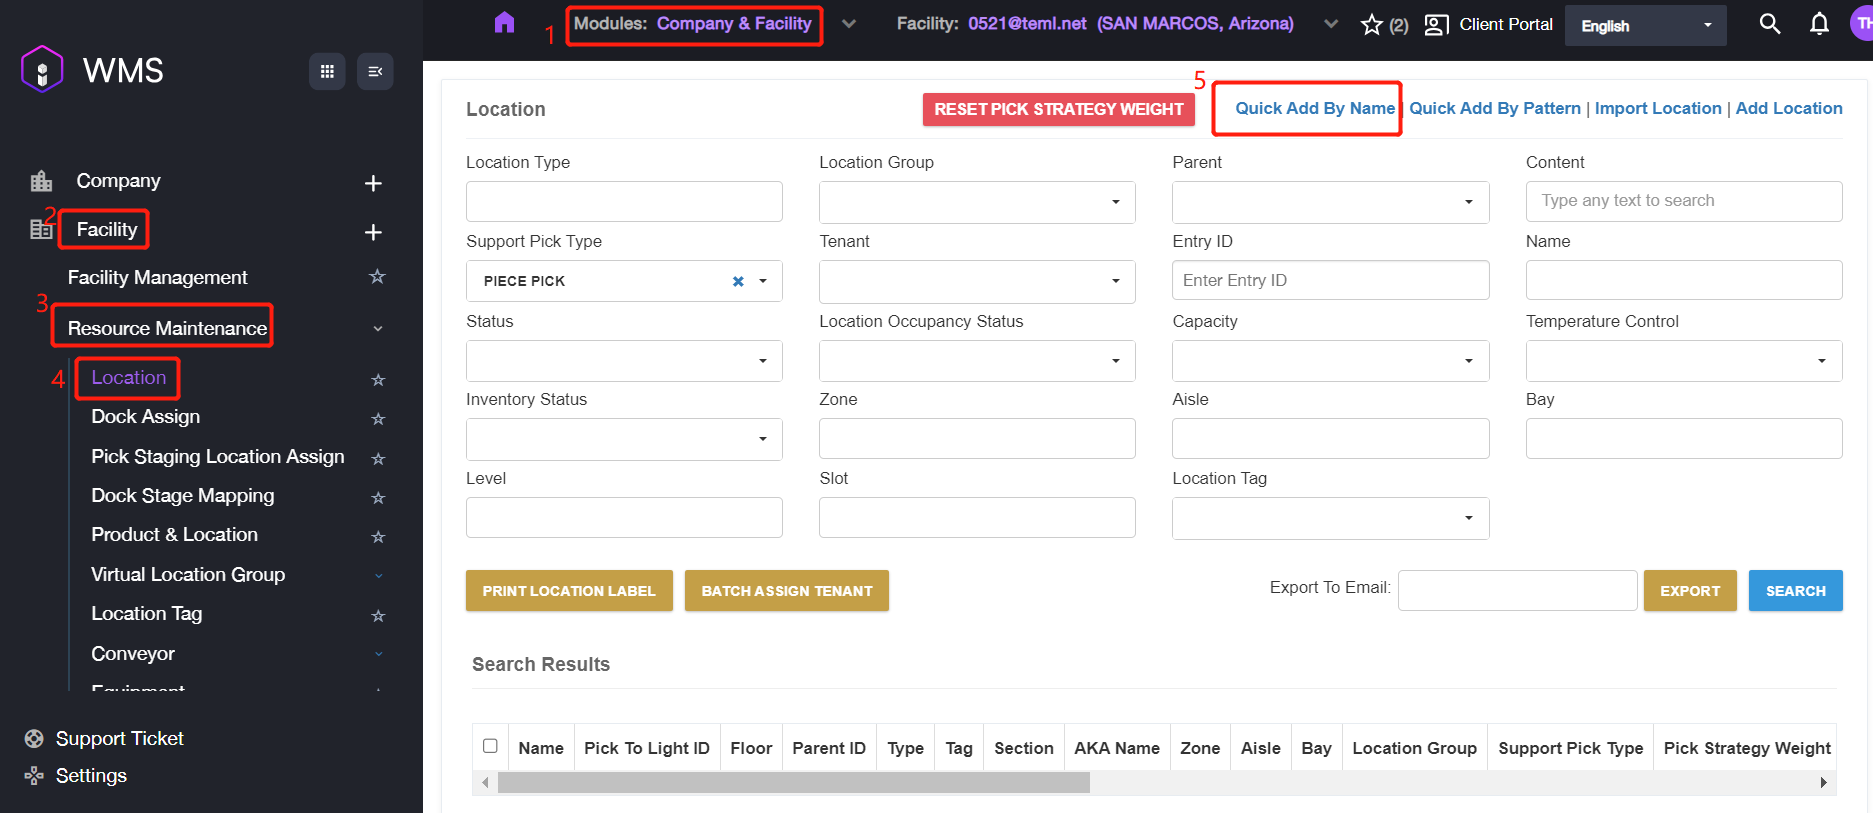
Navigate to Company & Facility Module > Facility > Reasource Maintenance > Location, click Quick Add By Name button at the right side.
-
Enter the location name in the Name List, if you enter multiple location names, please use comma or line break to separate the names.
-
The corresponding data row will be displayed after entering location name, please setup the Location Type on the corresponding row.
-
Click Submit button to complete adding.
-
There is a popup after submitting the location information, please click OK button to close it.
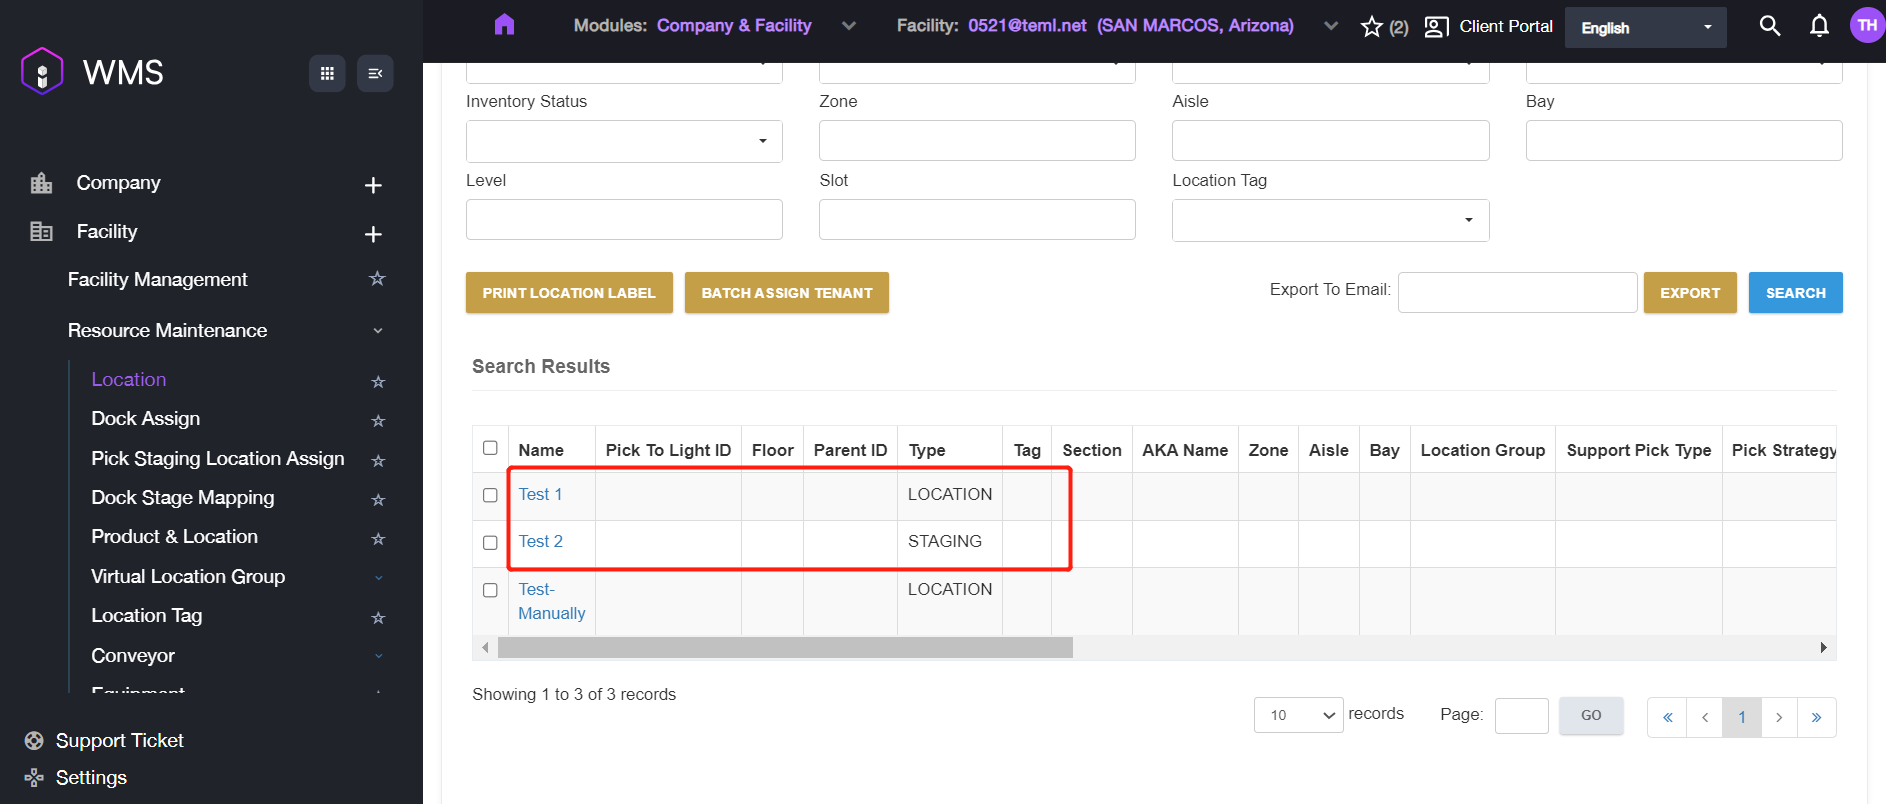
After that, you can see the locations in the Search Results.
Quick Add By Pattern
There is a another quick adding method by pattern if you want to identify the locations via pattern.
Pattern is the Support Pick Type, including Pallet Pick, Piece Pick and Case Pick.
-
Navigate to Company & Facility Module > Facility > Resource Maintenance > Location, click Quick Add By Pattern to add new locations.

-
Fill in the corresponding fields, then click SUBMIT button to complete adding.
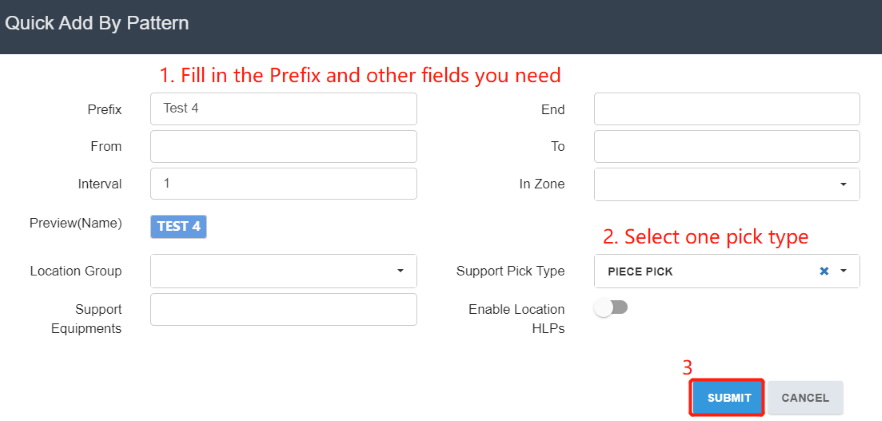
The prefix will be display as the location name.
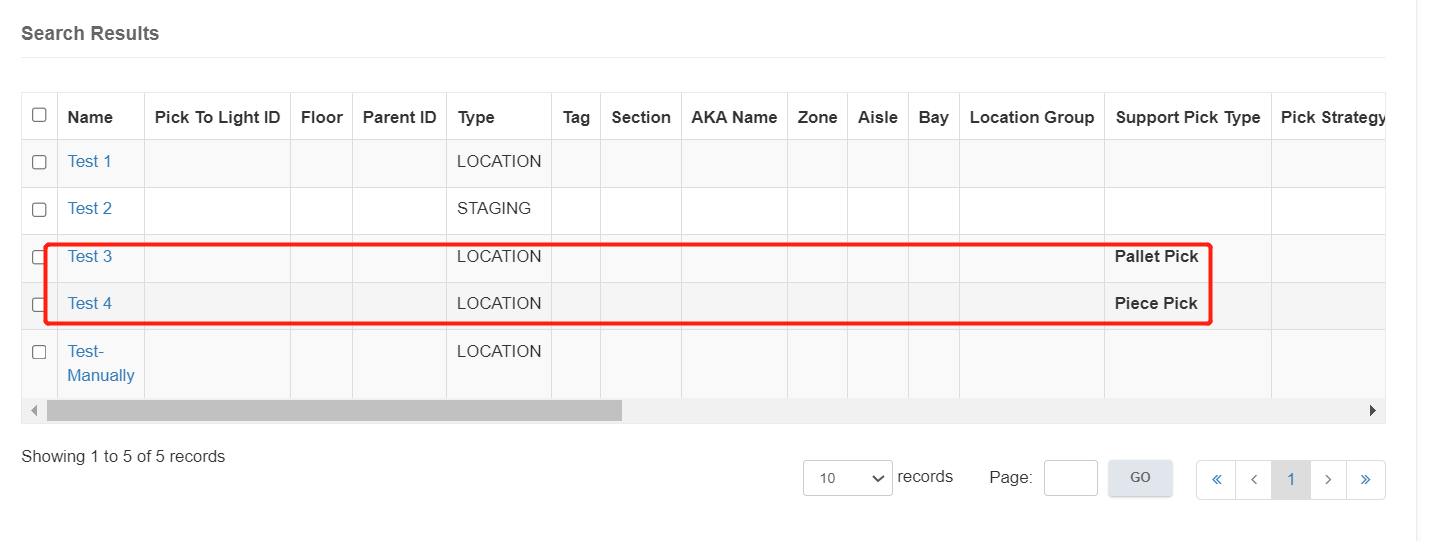
After that, the data will be displayed in the Search Results. The default location type is LOCATION, it can be identified through the location name or support pick type.
Other Features
In location section, there are also some other features such as quick search or edit existed location. This section will introduce the operations for the corresponding process.
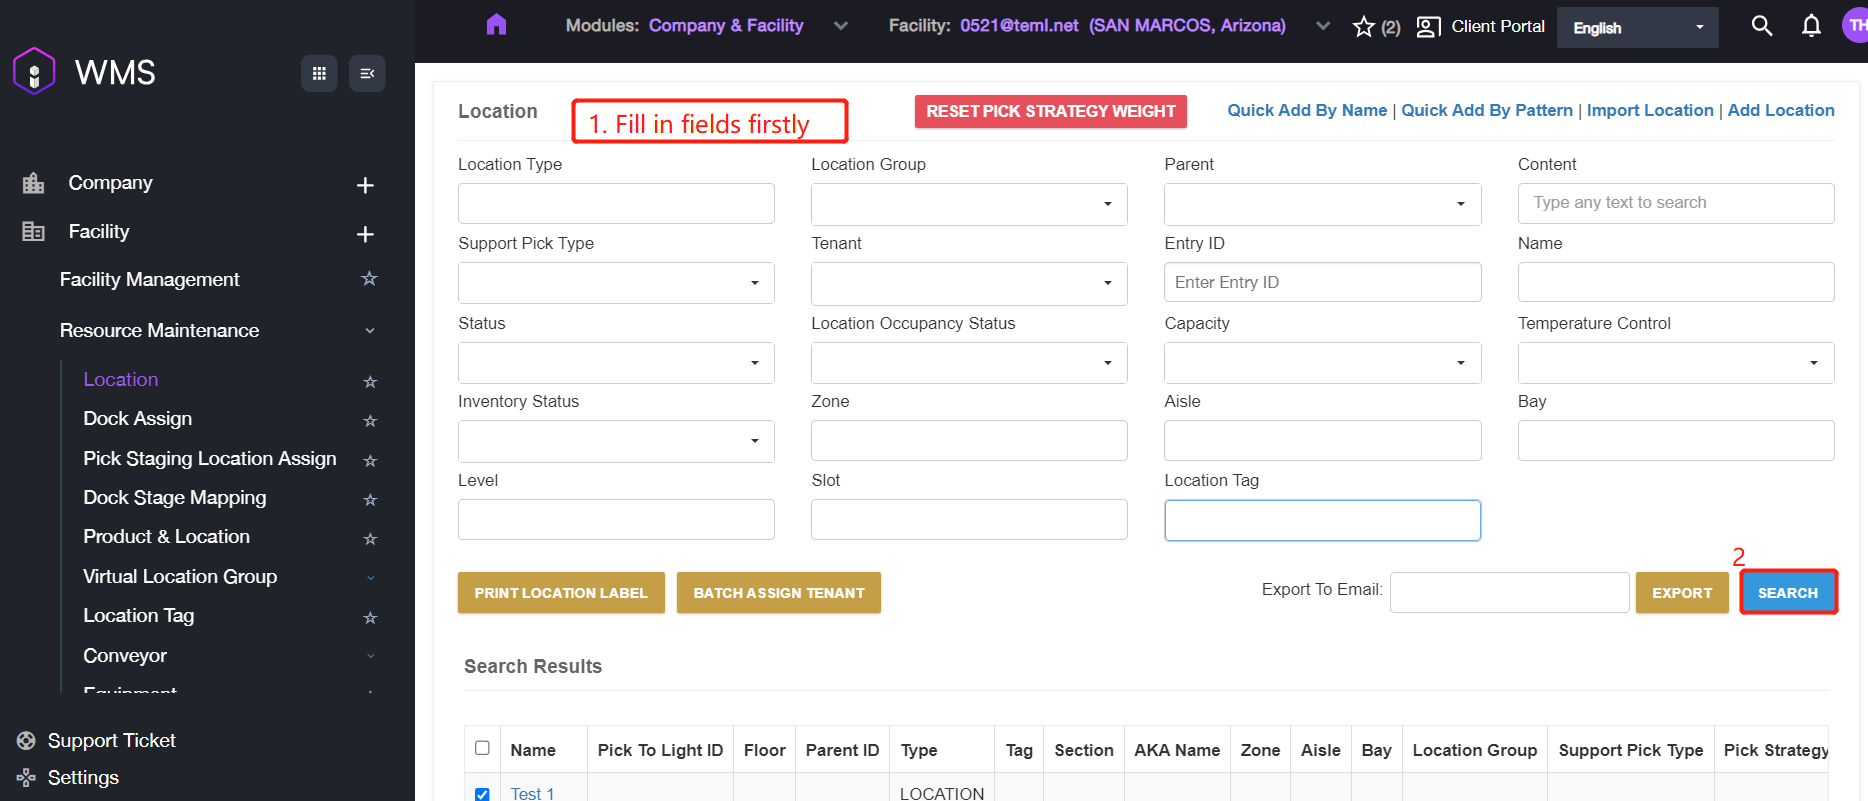
Quick Search
It supports to search the location via multiple fields, such as Support Pick Type, Location Tag, Status and etc. Simply fill in the fields and click SEARCH button.
Export
Item WMS supports two export ways: directly export on the web browser and send the data via email.
Directly Export: please select the data you want then click EXPORT button.
Email: fill in the email in Export To Email, then click EXPORT button.
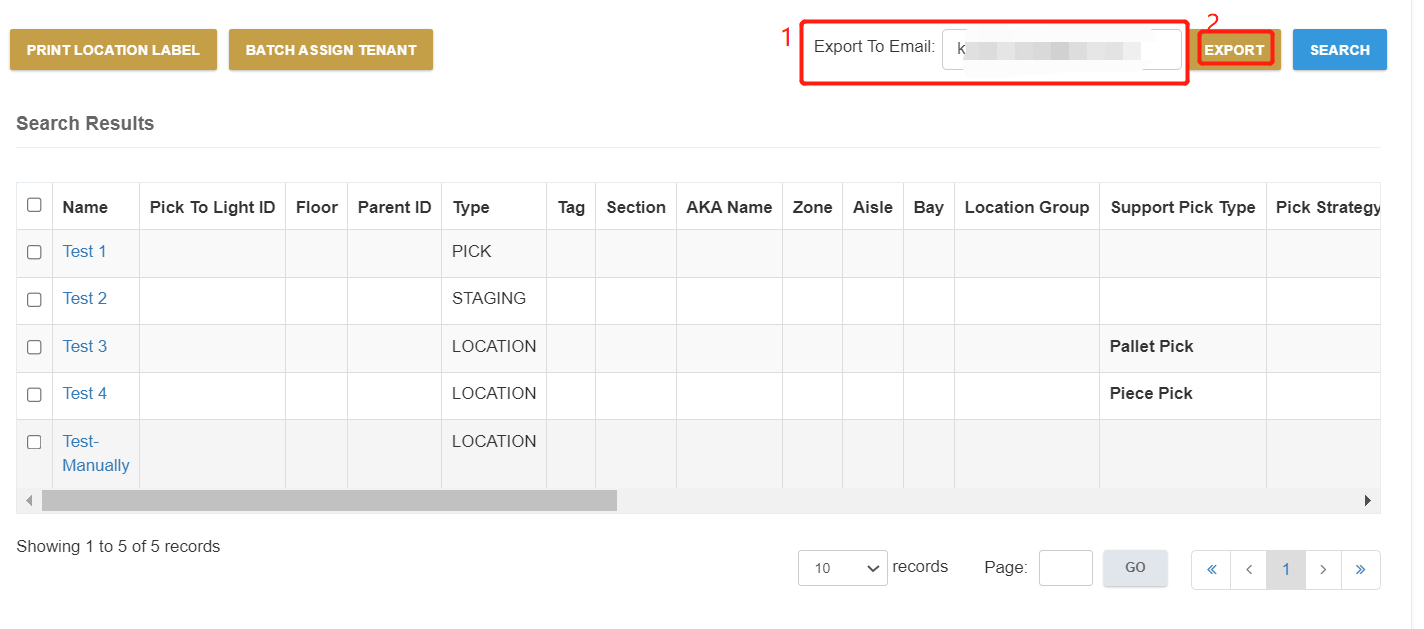
The system will send the data to the email address you filled. Then it will prompt a popup, simply click OK button to close.
How to Edit Existed Locations
If there any location changed the responsibility and you need to update the data, please refer the following steps to do.
-
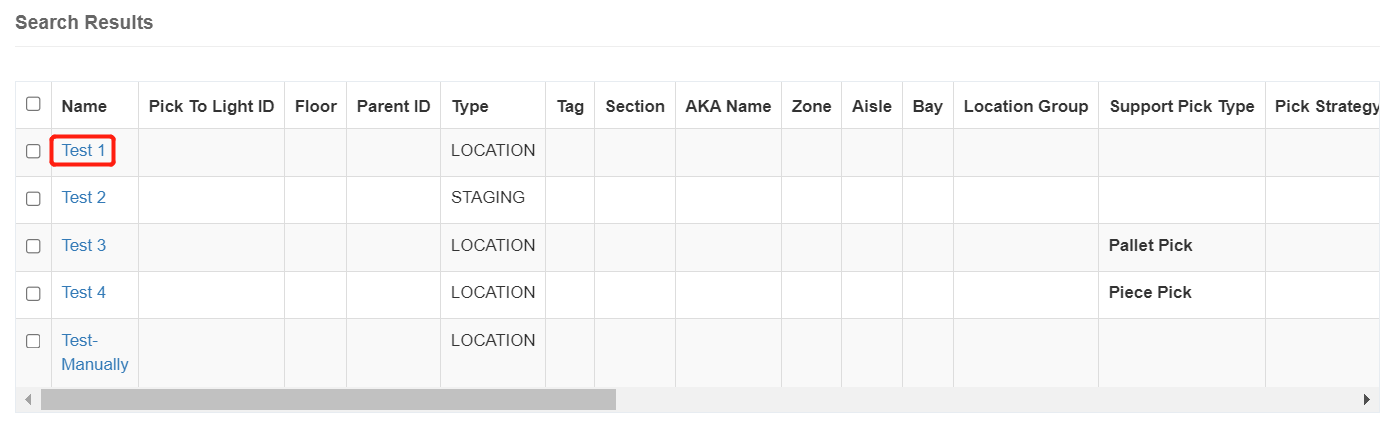
Go to the Search Results section on the Location page.
-
Confirm the target location then click Location Name to enter the edit page.
-
Modify the fields which needs to be updated. If you requires to modify some additional parameters, please click Advanced Mode to edit.
-
Click UPDATE button if you complete all information updating.
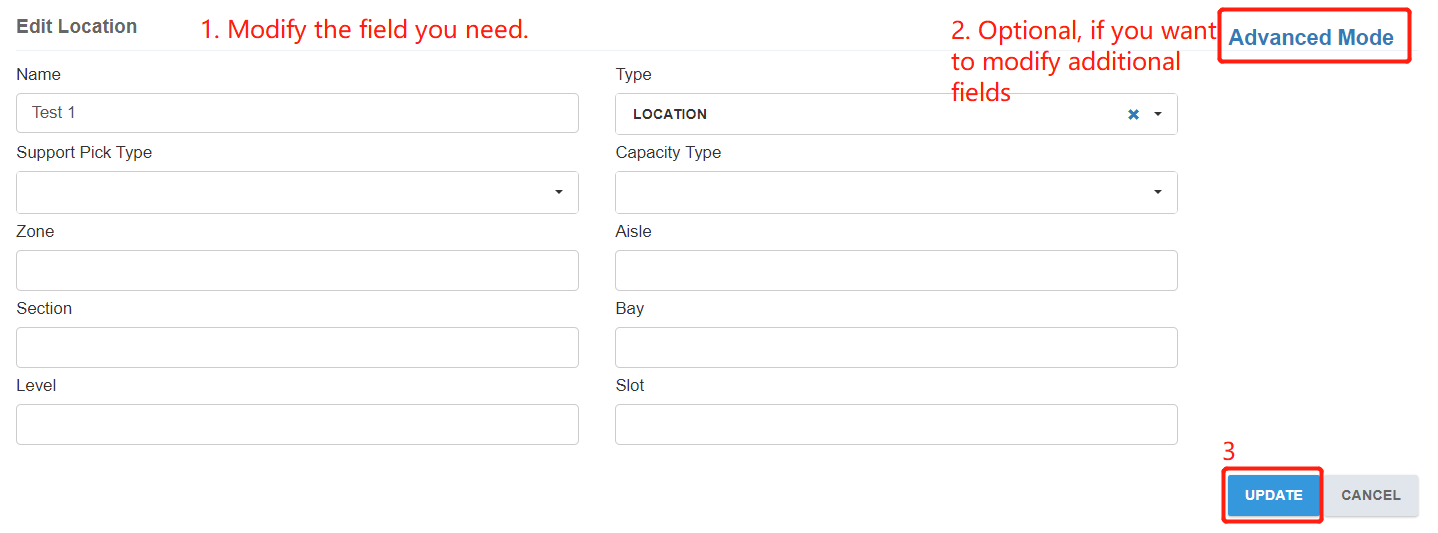
-
Click OK button to close the popup.
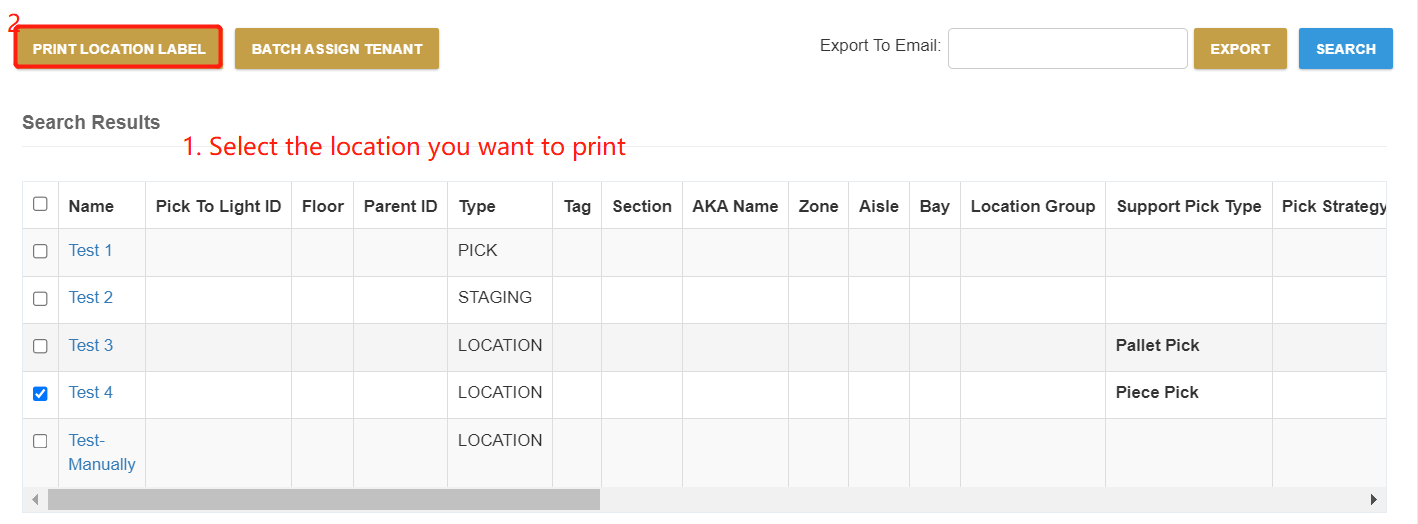
Print Location Label
If you want to print the location label, please refer the following steps to do.
-
Select the location you want to print, the click PRINT LOCATION LABEL button.
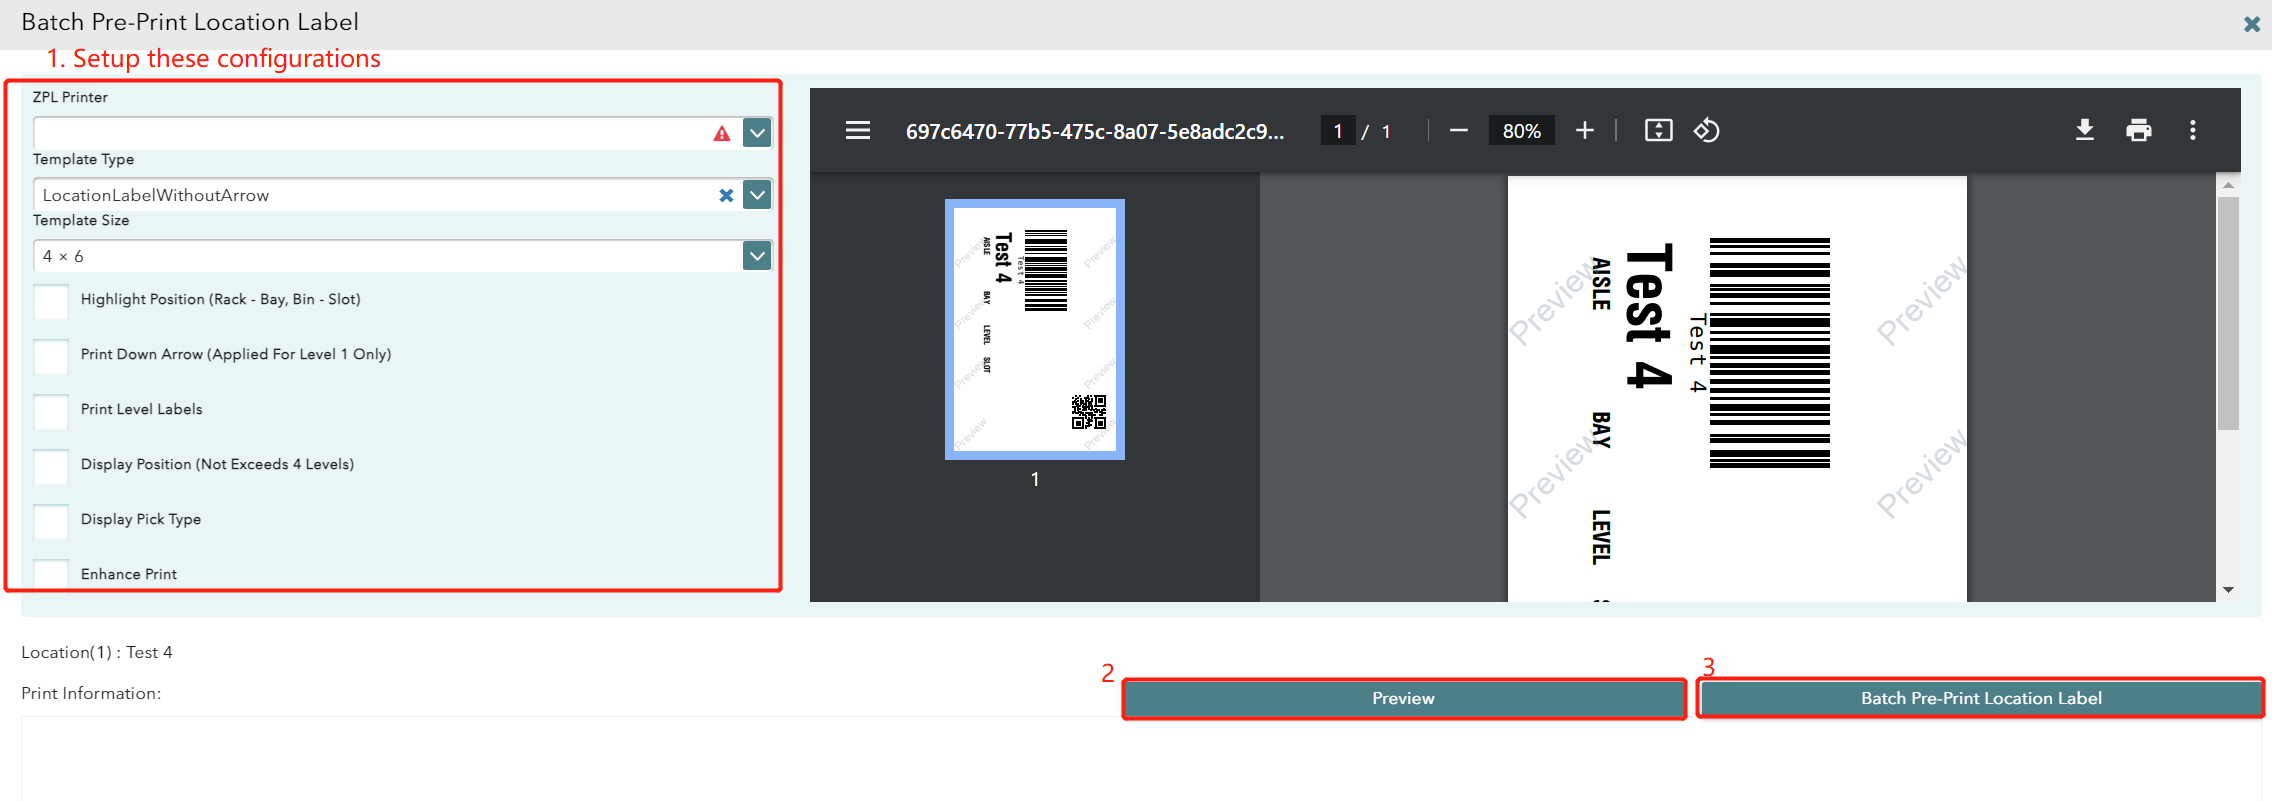
-
Setup the ZPL Printer, Template Type and Template Size. Then click Preview to check if it meets your requirements.
-
If anything is correct, please click the Printer icon or Batch Pre-Print Location Label to print.
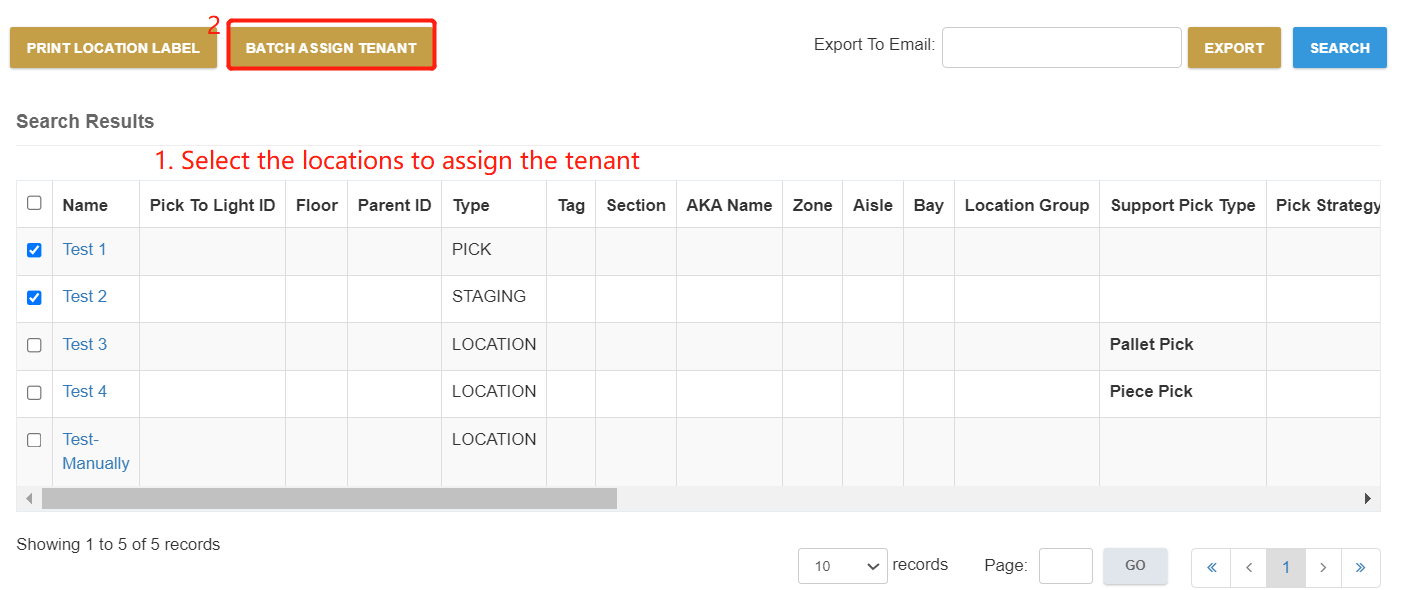
Batch Assign Tenant
If multiple locations are with the same tenant, it supports to assign the tenant for the locations in bulk.
-
Select the target locations then click BATCH ASSIGN TENANT button.
-
Select the tenant from the list. Then click Save button to complete assigning.
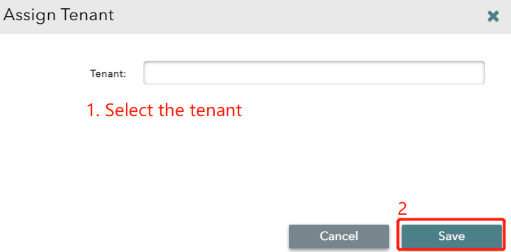
-
Click OK button to save the popup and you will see tenant fields has changed accordingly.
