How to Do Inventory Adjustment
Performing an inventory adjustment can be an necessary task for a variety of reasons, such as correcting errors, tracking losses or damage, or updating inventory counts due to new stock arrivals.
This article introduces how to do inventory adjustment on web and mobile app.
How to Do Inventory Adjustment on web
-
Navigate to Inventory Module > Adjustment, there are two user interface for Adjustment: Adjustment and Adjustment(New), simply select one page to continue.
-
Take an example, go to Adjustment(New), click Create Adjustment button at the top right corner.

-
There are 12 kinds of the adjustment. Please select one type then fill in the corresponding fields.
For example, you need to adjust the quantity for the specific LP. Select Adjust QTY type, then fill in LP, Reason and Adjust to QTY and then click Add button to complete the inventory adjustment adding.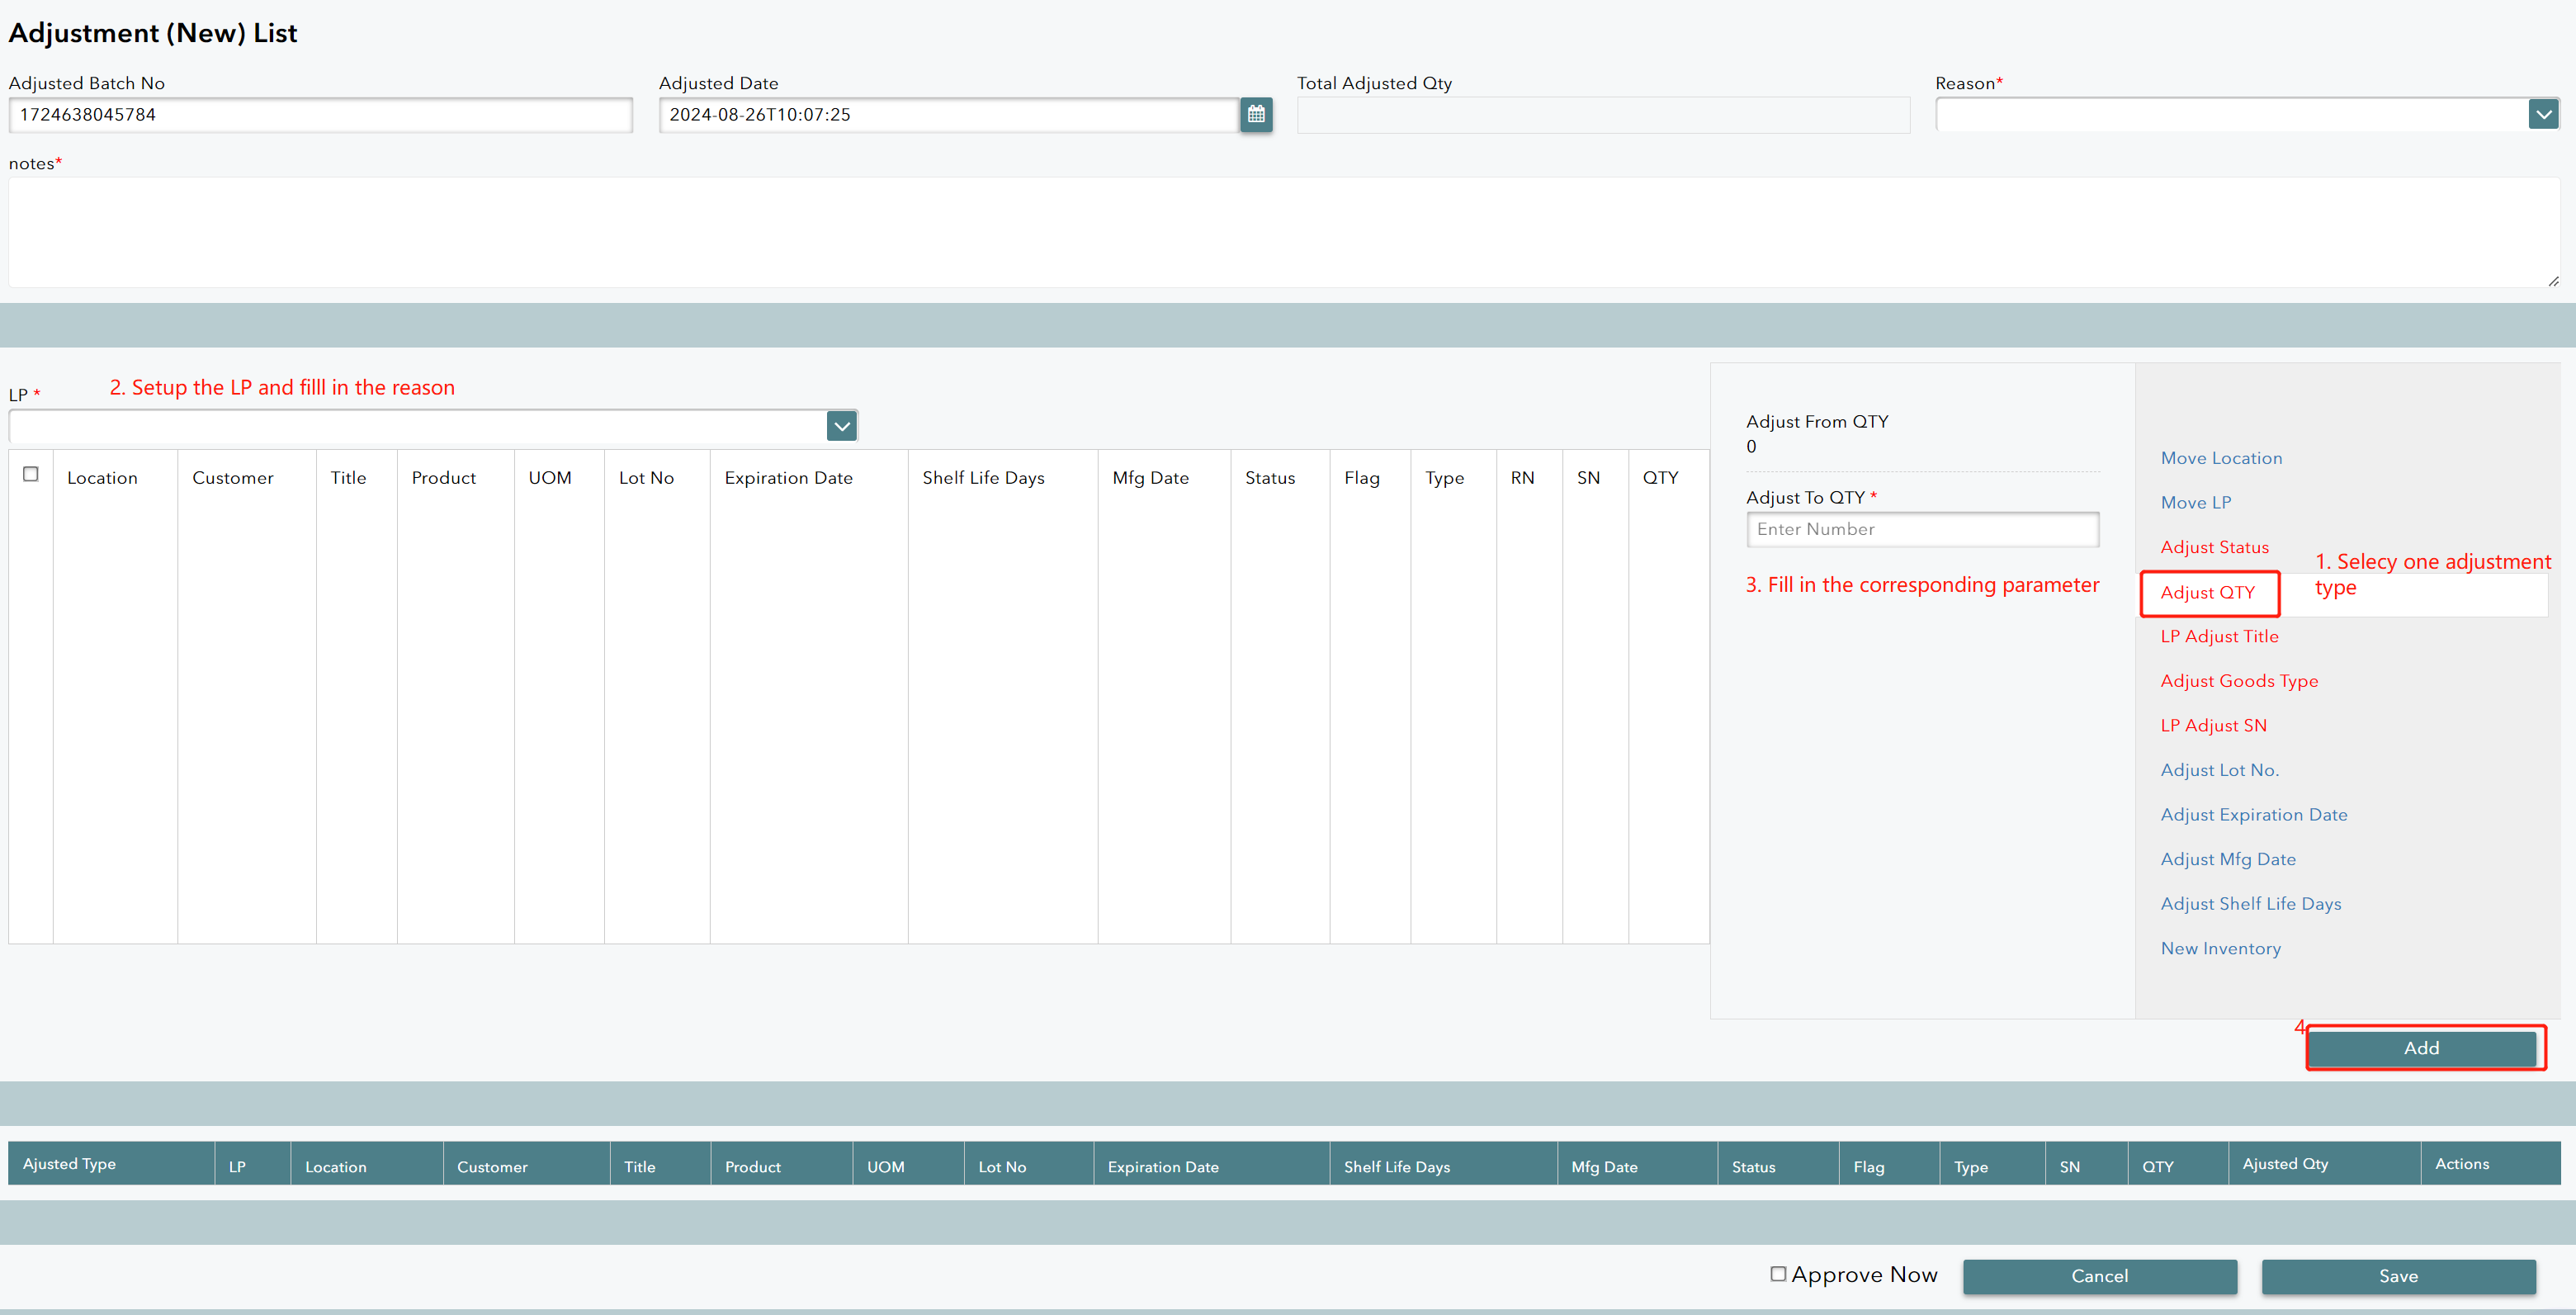
-
After successfully adding the adjustment, please approve the adjustment record if the information is all incorrect.
How to Do Inventory Adjustment on App
-
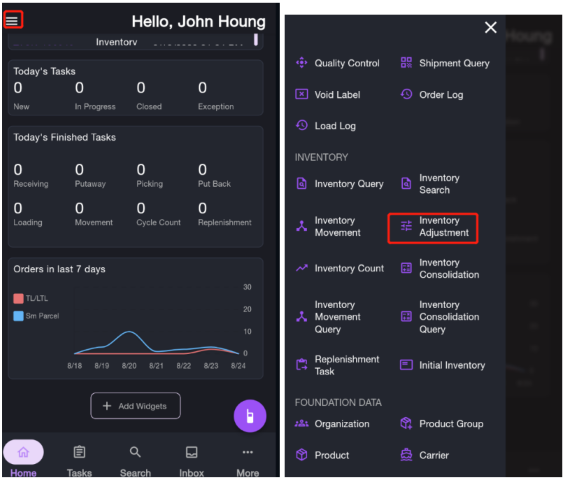
Go to Home page and tap the menu button to expand all modules and sub menus.
-
Go to Inventory Module > Inventory Adjustment.
-
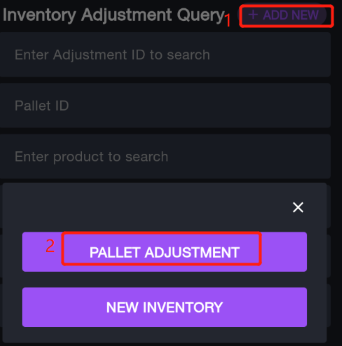
Click + ADD NEW to select the type of the adjustment. Pallet adjustment and new inventory is available on App. Take Pallet Adjustment as the example, tap PALLET ADJUSTMENT.
-
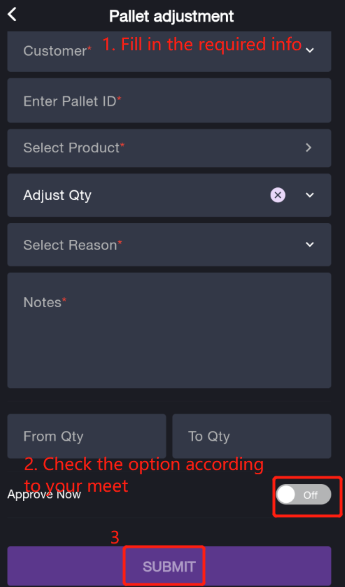
Fill in the required fields, such as Customer, Product, etc.
-
If supervisor approval is required, click SUBMIT to send an adjustment request. If no approval is needed, check the Approve Now option then click SUBMIT. It will prompt a success message to remind you have now successfully completed an inventory adjustment.