Payment Account
General Introduction
Setting up a payment account and ensuring its proper functionality is a crucial segment for operating the POS system smoothly and maximizing its usability and advantages. This chapter provides detailed guidance on how to set up the payment account, open a third-party payment account, and configure the payment method through the POS system.
Set up the Payment Account
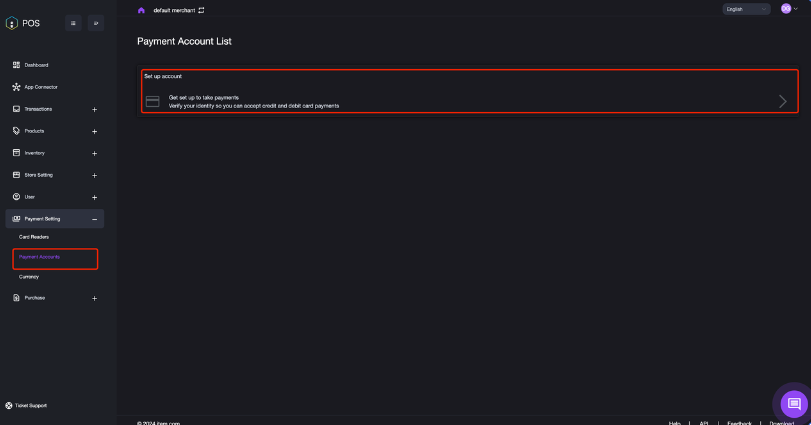
- Click Payment Setting, then select the sub-menu Payment Account from the navigation panel on the left side of the main interface. The Payment Account List page, as shown in the image below, will be displayed.
-
Click Set up account bar to access the account setup interface.
-
You will be redirected to the payment account registration platform, which is powered by a third-party. Follow the instructions to create an account.
a. Input email account and submit.
b. Follow the required format to input the password and then click Submit.
c. Proceed the second login verification according to the instructions.
d. Scan the QR code on the screen by using Google Authenticator.
e. Click Next Step after scanning the QR code.
f. Find the verification code on the Google Authenticator app and input the code.
g. Save the emergency code and proceed to the next step.
h. Click Continue after setting the company address and type.
i. Fill in and verify your personal information.
j. Truthfully and accurately fill in your name, date of birth, address, phone number, and SSN information.
k. Check and make sure all information is correct. Then click Continue.
l. Set up a receiving account to accept payments.
m. Select a bank and authorize it.
n. Then select an account and continue.
o. Add public information, such as the after-sales phone number, after-sales address, etc. Then click Continue.
p. Check all the information.
q. If there is incorrect information, click Edit to revise it.
r. If all information is correct, click Submit.
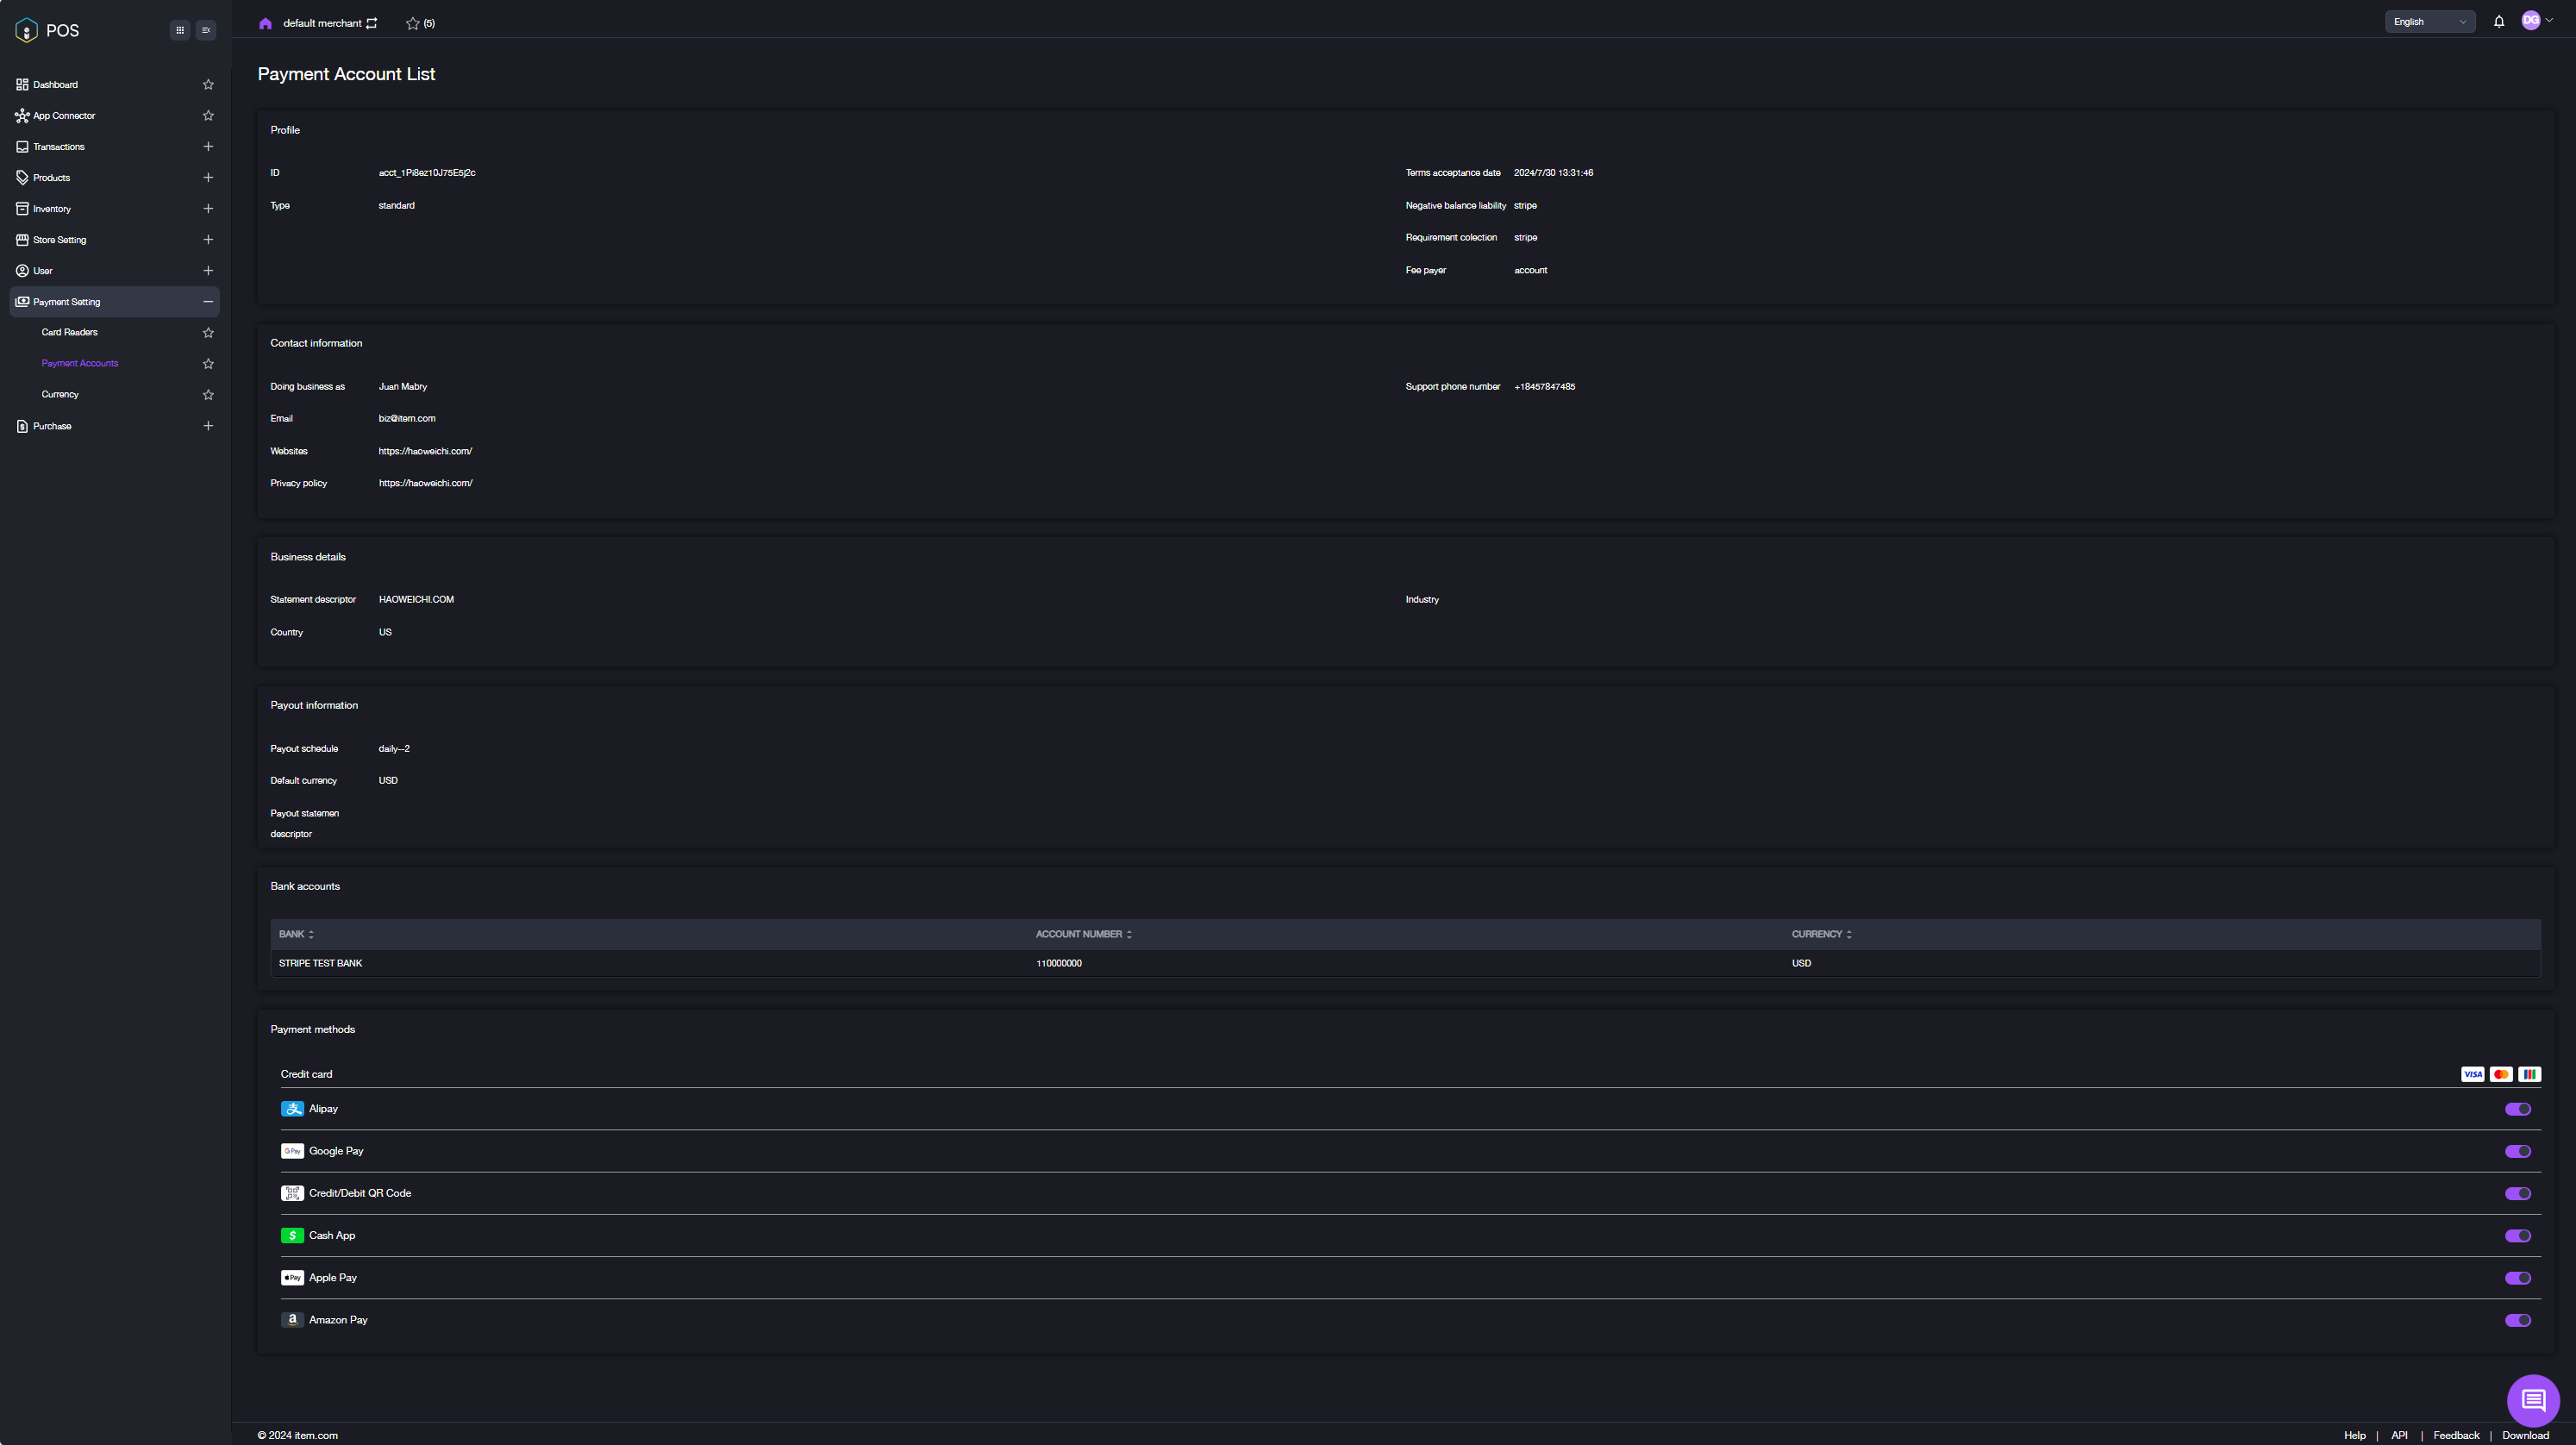
s. Once the submission is successful, you will be returned to the POS system, where you can view the relevant information about the opened account. Meanwhile, available payment methods will be displayed at the bottom of the Payment Account List page. You can switch the button for each payment method to enable or disable it. Please refer to the image below.
- You will receive a notification if there is missing information in your account.
- Click "Set up Account" again to access the information input page and amend any missing information.
- You will be notified of any additional information needed.
- Submit again after making revisions.
- If the submitted information passes the review, you will be able to view the details of the receiving account and the payment methods available for accepting payments.