How to Complete an Inventory Count
Inventory count is a process of physically verifying the actual quantity of stock to ensure it matches the record accounts. This article introduces how to create and complete an inventory count on WMS App.
The operations are as below:
-
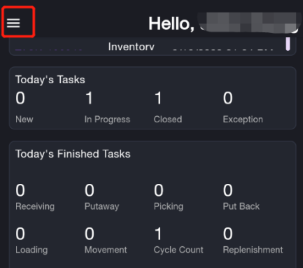
Run WMS App and tap the Menu button at the top left corner.

-
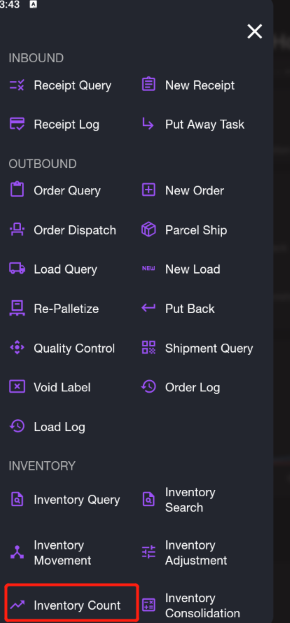
Scroll down to INVENTORY module and tap Inventory Count to create a new inventory count.

-
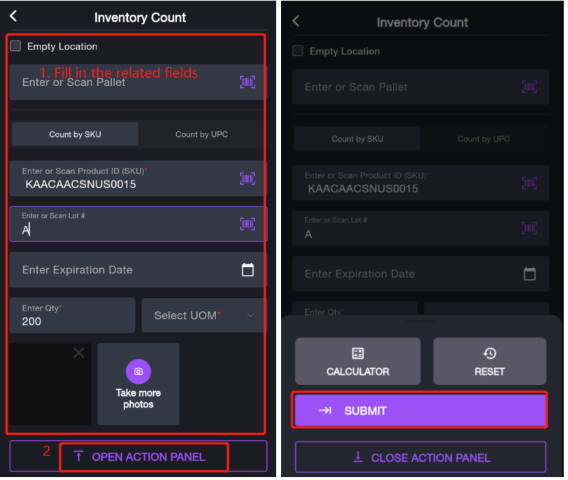
Enter or scan the location, enter or scan the pallet if needed.
-
Select the count method from Count by SKU or Count by UPC, fill in the corresponding fields.
-
Adjust the quantity and update the UOM.
-
If you want to take and upload the pictures of the product, please click Take Photos button to do. It is optional.
-
After setting up these parameters, please tap OPEN ACTION PANEL > SUBMIT at the bottom to submit the inventory count.

There will be a success message displaying on the top. The count record will be created automatically, and please go to web application to check and approve the record. The following steps are for reference:
-
Go to Inventory module > Inventory Count > Inventory Count, it will display the all count records on the right side.
-
Find the target record and click Approve button to approve the inventory updated. If there are lots of records displaying, you can enter the specific fields for quick search.

-
Click YES button on the confirmation window.
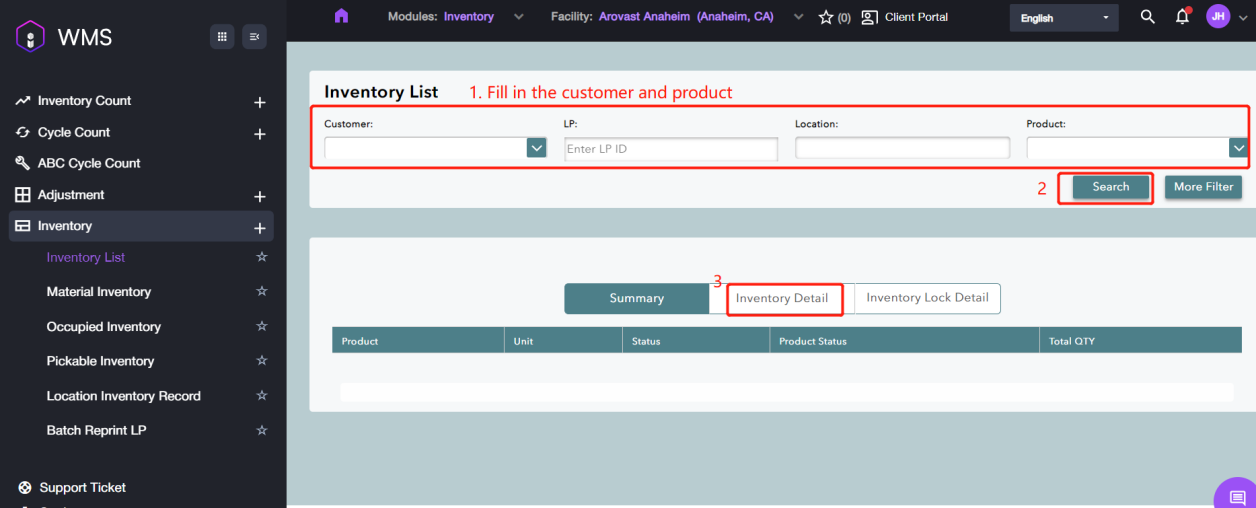
After approving the inventory count, you can go to Inventory > Inventory List, enter the Customer and Item fields then click Inventory Details to check the inventory.
