Create Purchase Requests
A Purchase Request (PR) is used to acquire inventory from vendors and serves as the basis for generating purchase orders.
To Create a New Purchase Request:
- Navigate to Inbound Order Management > Purchase Request.
- Click the Action button and select Add New PR from the drop-down list.
- Follow the steps below to complete the New Purchase Request form.
Step 1: Completing the Request Details Form
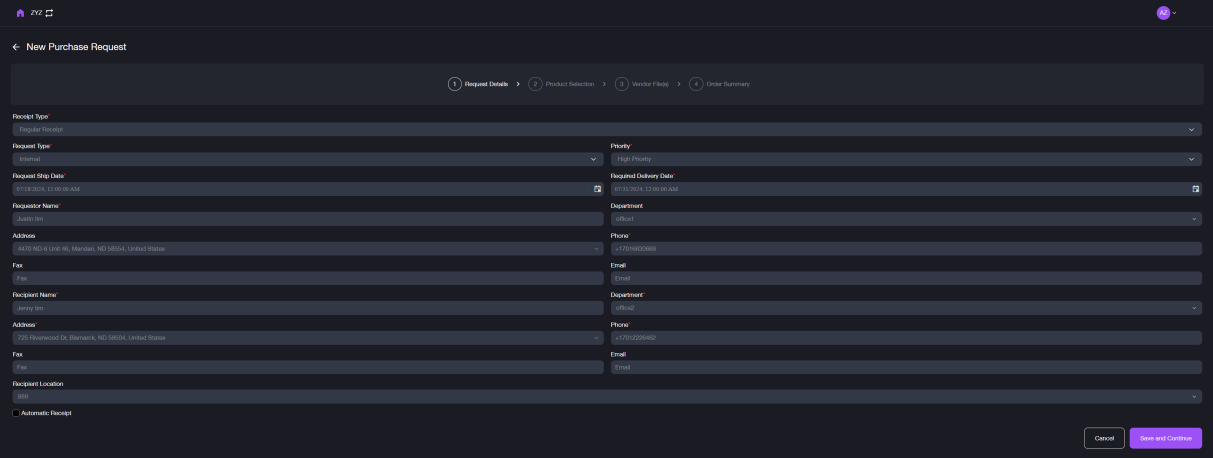
a. Enter the required information based on the field descriptions for the purchase request details.
b. Click Save and Continue.
| Field name | Description |
|---|---|
| Request Type | Select whether the request is Internal or External. |
| Priority | Choose the priority level of this request (High, Medium, or Low). |
| Request Ship Date | Specify the expected date for the vendor to ship the order. |
| Required Delivery Date | Indicate the expected delivery date to the facility. |
| Requestor Name | Enter the name of the person submitting the request. |
| Department | Select the requestor's department (configured in Settings > Department (opens in a new tab)). |
| Address | Select the requestor’s address (configured in Settings > Ship From (opens in a new tab)). |
| Phone | Provide the requestor's phone number. |
| Recipient Name | Enter the name of the recipient. |
| Department | Select the recipient’s department (configured in Settings > Department (opens in a new tab)). |
| Address | Select the recipient's address (configured in Settings > Ship From (opens in a new tab)). |
| Phone | Provide the recipient's phone number. |
| Automatic Receipt | If this feature is enabled, item WMS will automatically create the inbound receipt based on the purchase request. |
Step 2: Selecting Products
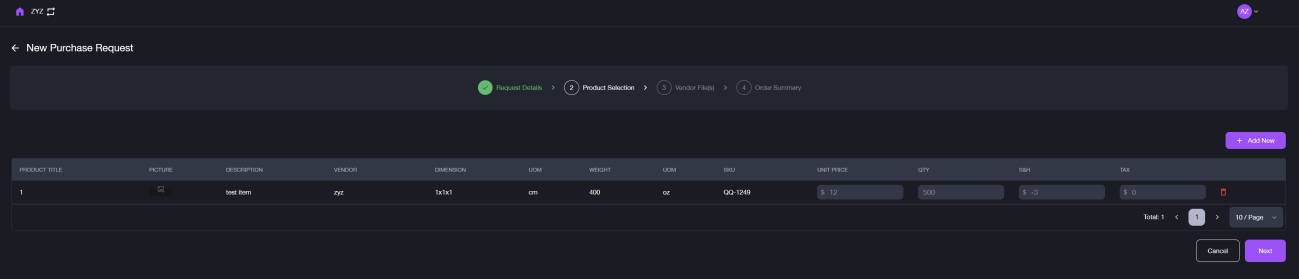
a. Click + Add New to add items to the purchase request.
b. From the drop-down menus, select the Product and Vendor. The unit price will auto-fill based on the selected product.
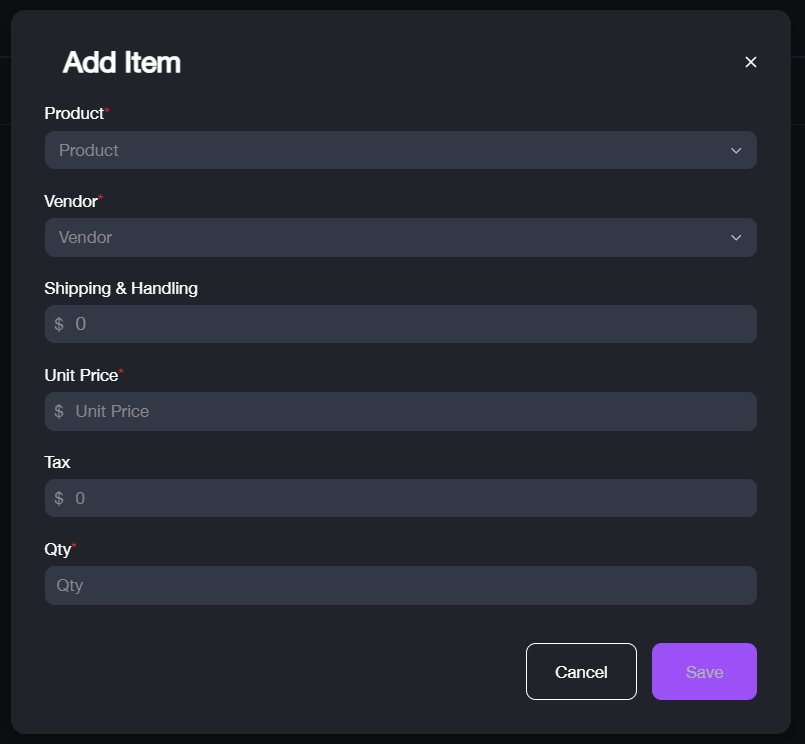
Note: To add multiple products to a single purchase request, repeat this step for each additional item.
c. Enter the Quantity and applicable Tax for the product.
d. Click Save.
e. Review the detailed info for the selected products displayed in the product list. Once confirmed, click Next to proceed to the next step.
Step 3: Uploading Vendor Files

a. Upload the necessary vendor profiles and quote files for reference. The system will use these files to calculate the best price, including the shipment fee.
b. Click Save and Continue.
Step 4: Previewing the Order Summary

a. Preview the order summary to ensure all info is accurate, including the request details, estimated total price, and selected products.
* Product quantities can still be adjusted at this stage.
b. If everything is correct, click Submit Request. A confirmation message, "Request Successfully Submitted" will indicate that the purchase request has been sent for approval.