How to Create a New User
This article introduces the different types of user accounts and the user-related operations.
- Primary user account: it has the highest permission. The account is usually used by the owner of a company. As they requires to setup admin user, but seldom to setup or configure regular employees’ account.
- Admin user account: it is a regular user account set as admin by primary account.This account has the same permission as the primary account expect the feature to set other account as admin, it is usually used by company’s managers. As they need to manage and configure the employees’ account under their department.
- Regular user account: the permission is assigned by the admin user account or primary user account. Regular user can view and edit their own account information, but can’t view the user list.
Note: this feature is only available for primary user and admin user.
When some new employees join to the company or some new accounts are required for some specific usages, please refer to the following steps to add new user accounts.
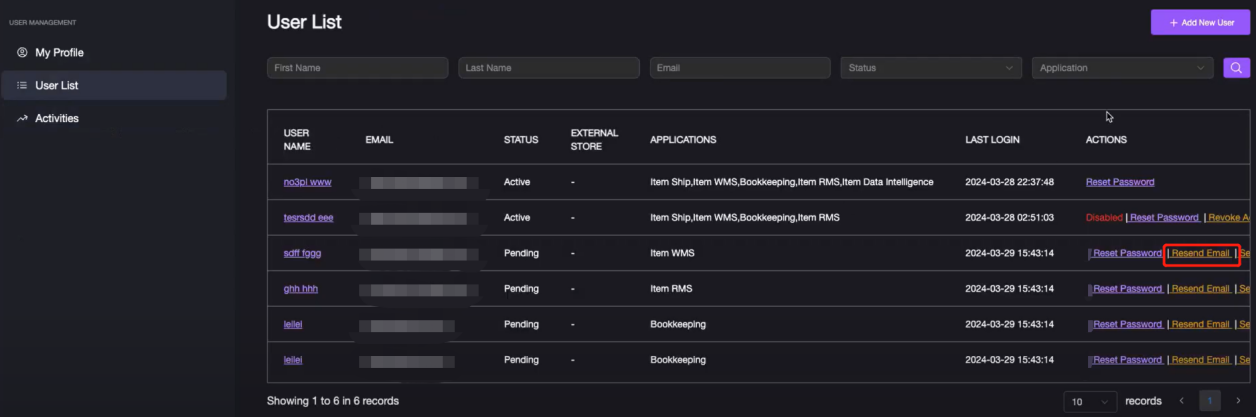
- Navigate to User List, click + Add New User at the upper right corner.

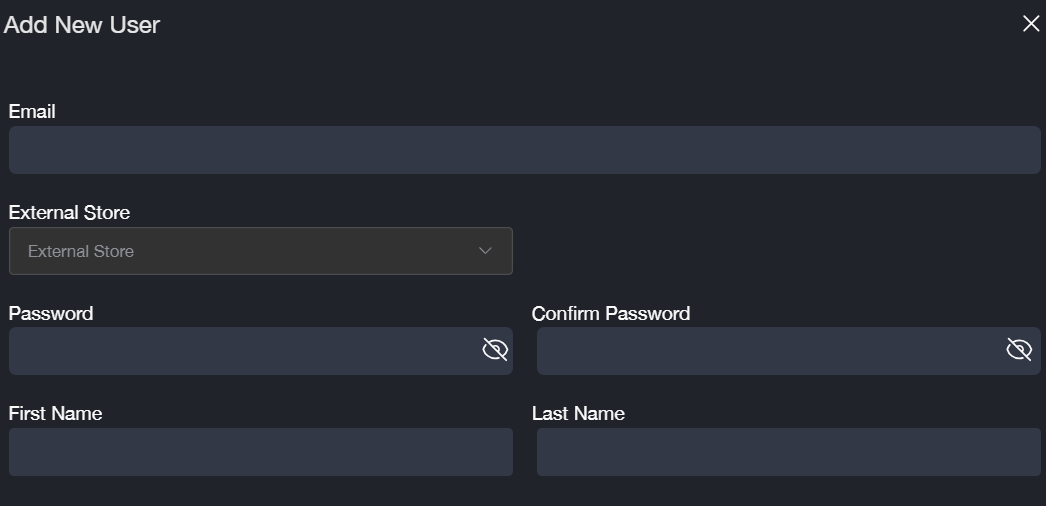
- Fill in the required information.
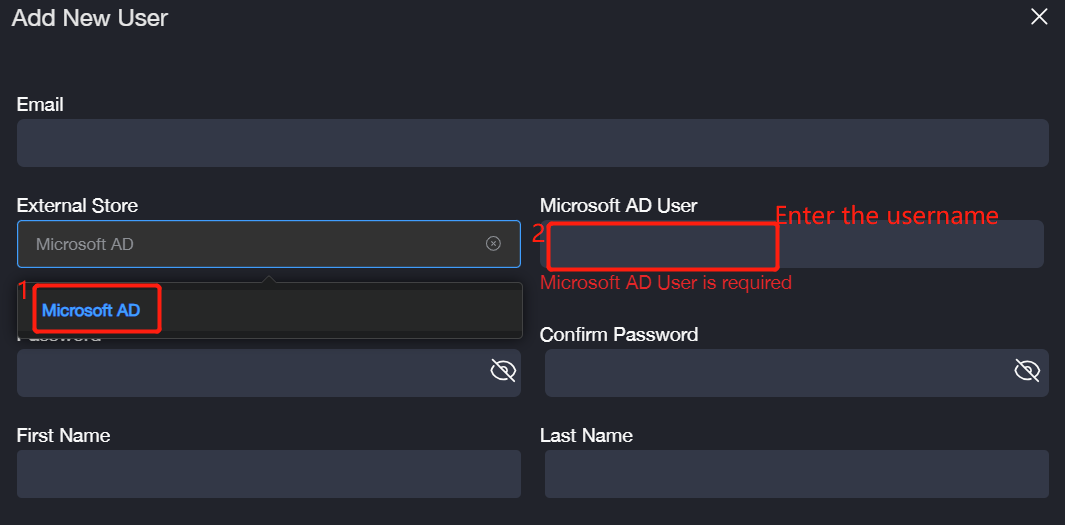
It also supports Microsoft AD as the External Store. If you want to use Microsoft account, please follow the steps below to fill in the required fields.
Setup Microsoft AD from External Store, enter the username of Microsoft AD User. Then fill in the other required information.
| Parameter | Description |
|---|---|
| Microsoft AD User | The username of the Microsoft AD account. |
After binding the Microsoft AD to your Item Pass account, it not only supports to sign in the system through the Item account, but also supports to login via Microsoft account.
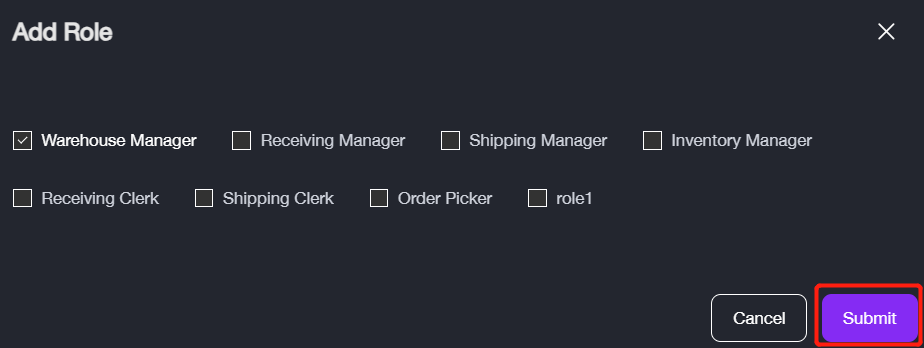
- Scroll down and go to Connected Application, select some applications you allow the user to access. Take WMS application as an example. Check the box and click Edit Role at the right side of the screen.
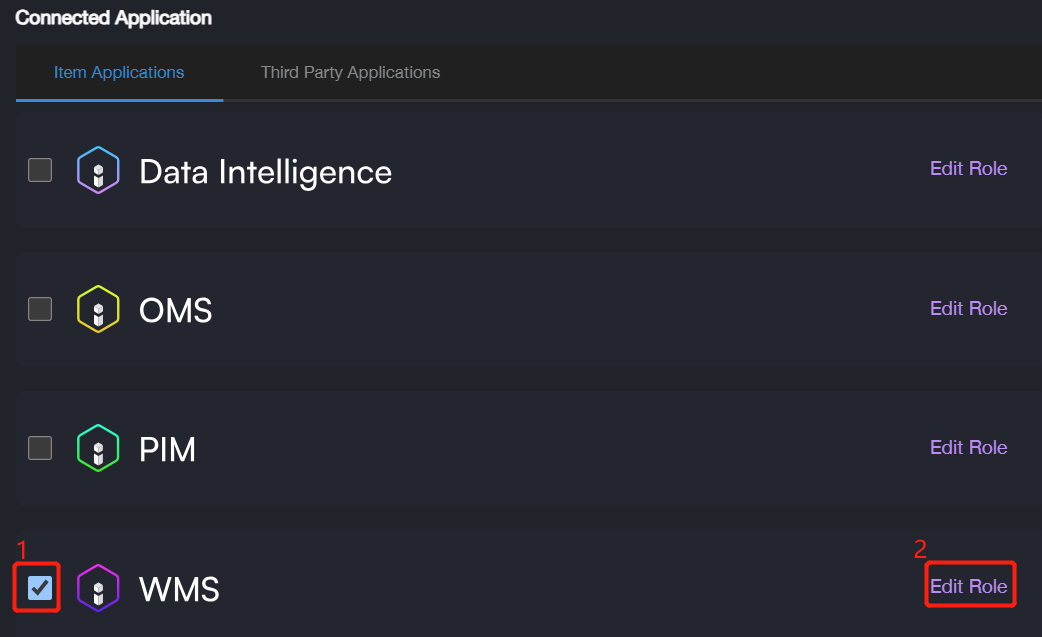
The system will assign the user page access permission according to the role settings.
For example, role A only supports to access three pages (Home/Inbound/Outbound). It will pre-set some admin roles which can access all pages on the system.
If you need some customized role, please go to the corresponding application to configure the roles. After adding roles on the application if you need, please continue the next step.
- Select the role you want to assign for the user and click Submit to complete.
- Scroll down and click Save to complete adding the user.

- Activate the new user account. New user will receive an email invitation to login to their new account, please click the link to activate the account.
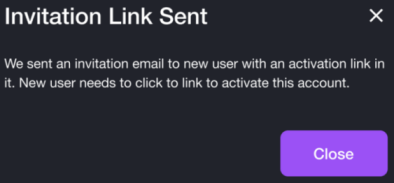
The status of the user account is Active if the account has activated successfully.

Pending Status means the account has not been activated, please click Resend Email to resend an invitation email for activation.