Assign Roles & Permissions to Users
You can create multiple users under the admin account and assign specific roles based on their responsibilities. Each role has unique permissions. Typically, the admin role has full access, while roles like manager, visitor, and assistant have limited access and permissions for specific modules.
Creating Roles

To add roles:
- Sign in to item Data Intelligence with your account.
- Navigate to User > Role.
- Enter the Role Label ad Click + to save.
- Repeat this step to create additional roles as needed.
Assigning role permissions
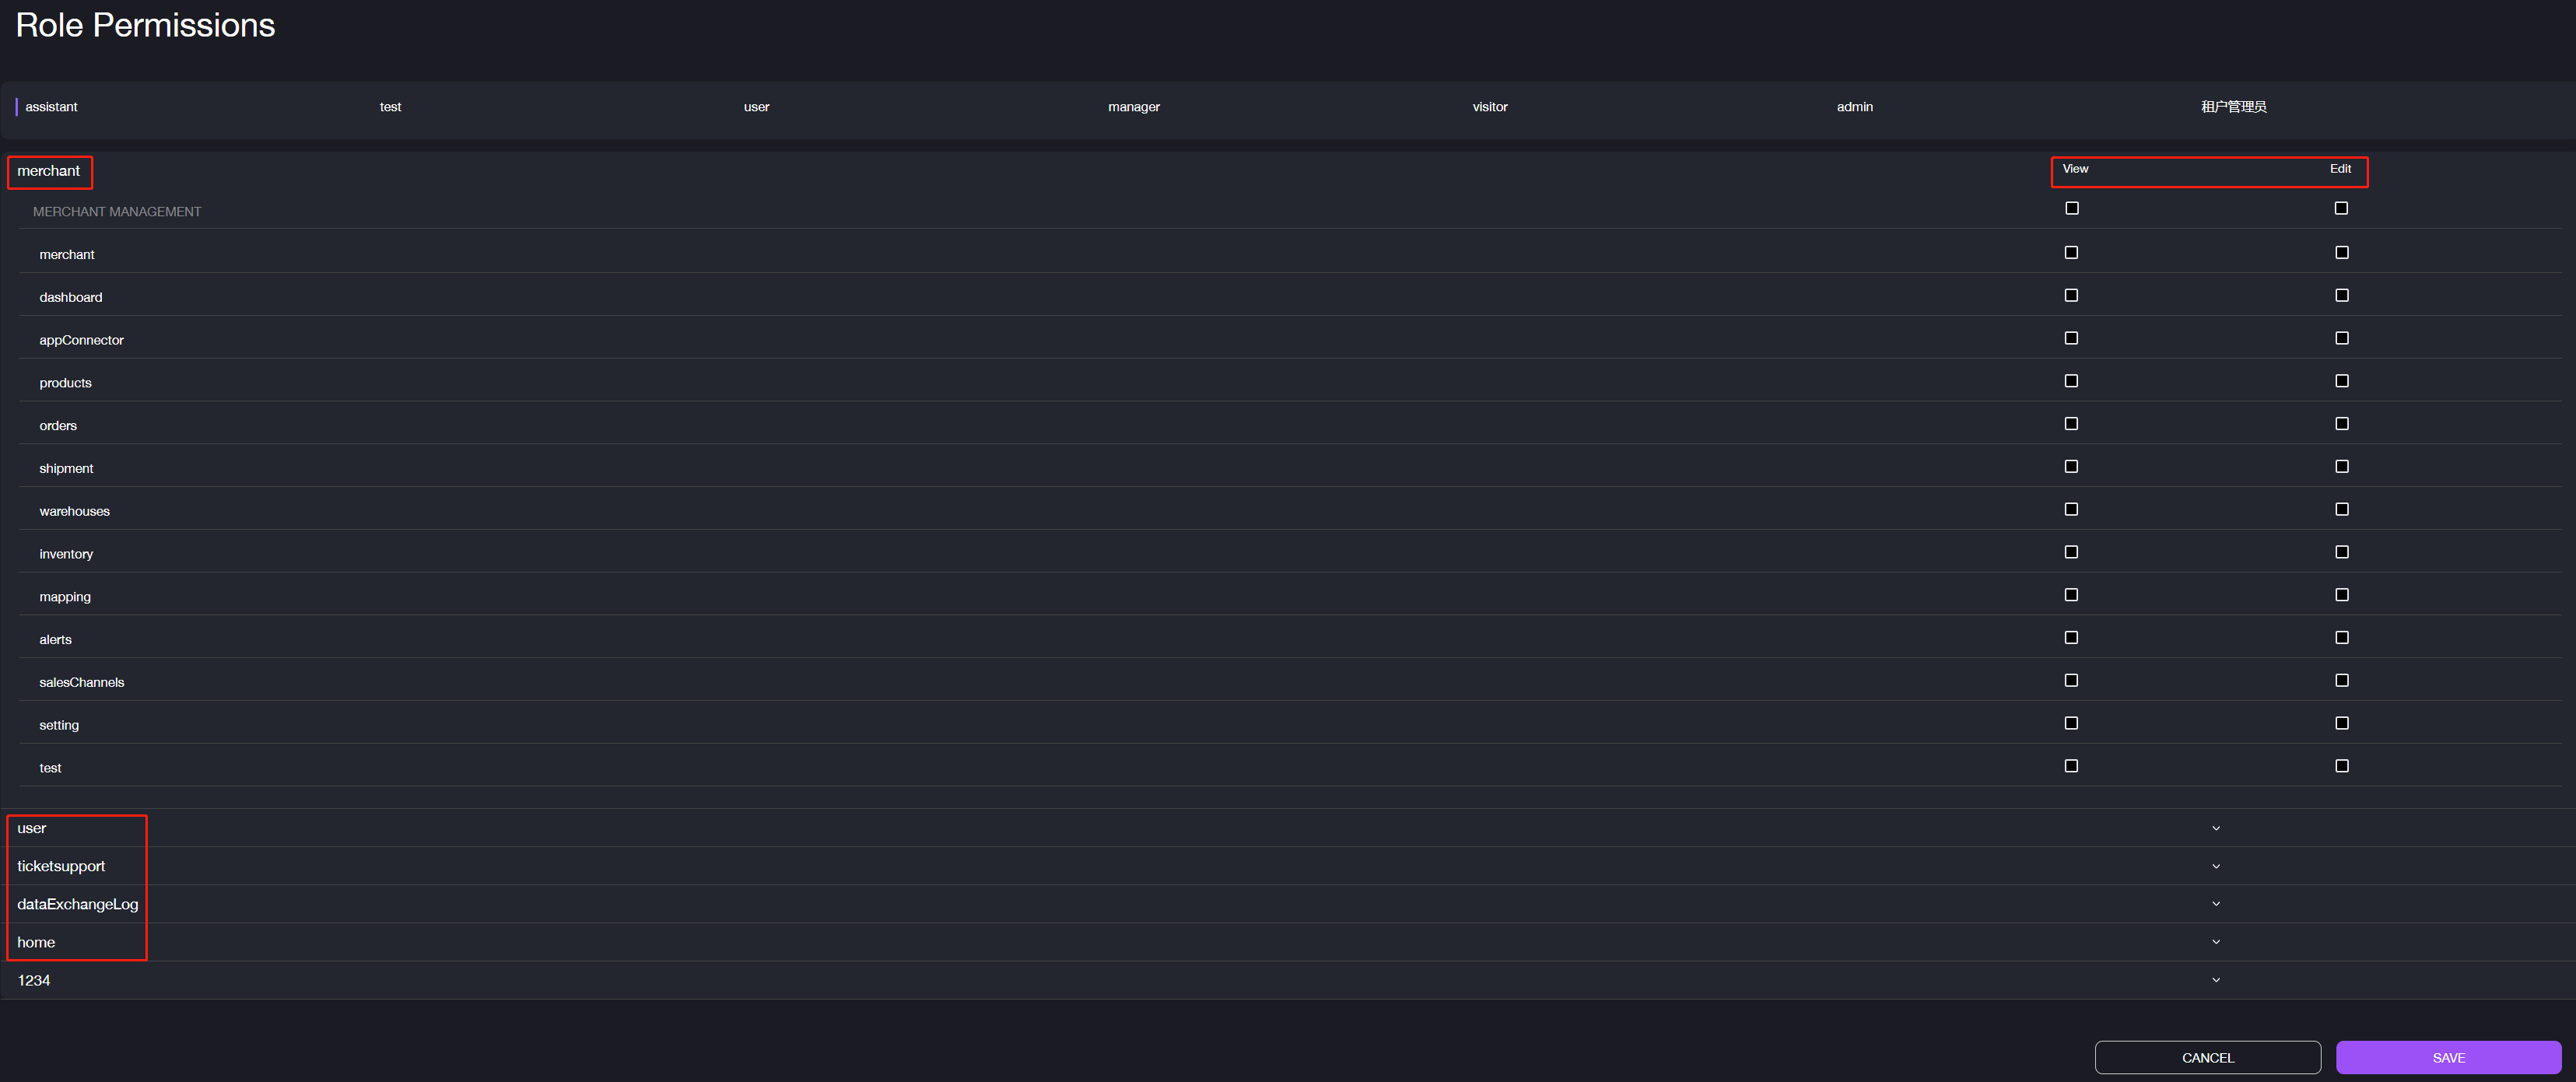
To assign role permissions:
- Navigate to User > Role Permission
- Grant access to each role to View or Edit specific modules and features, including Merchant, User, Ticket Support, Data Exchange Log, and Home.
- Click SAVE.
Creating users
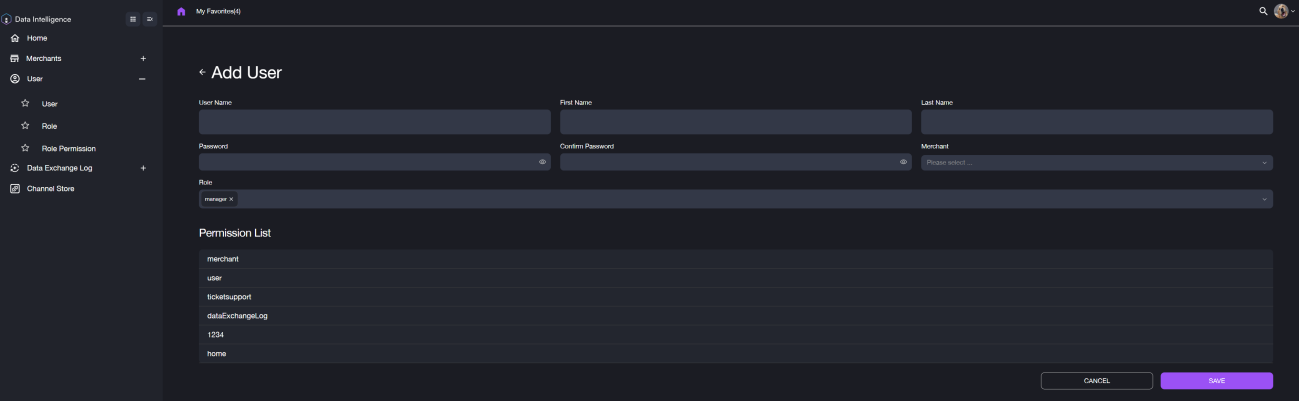
To add users:
- Navigate to User > User page.
- Click + Add User.
- Fill out the required fields:
- User Name
- First Name
- Last Name
- Password
- Confirm Password
- Assign the role and merchant to the user. When you select a specific role, the permission list will display accordingly. Double-check the permissions by clicking the module name.
- Click SAVE.
For user management, you can search users by Name, status and created Date, and also edit users, reset password or disable users.
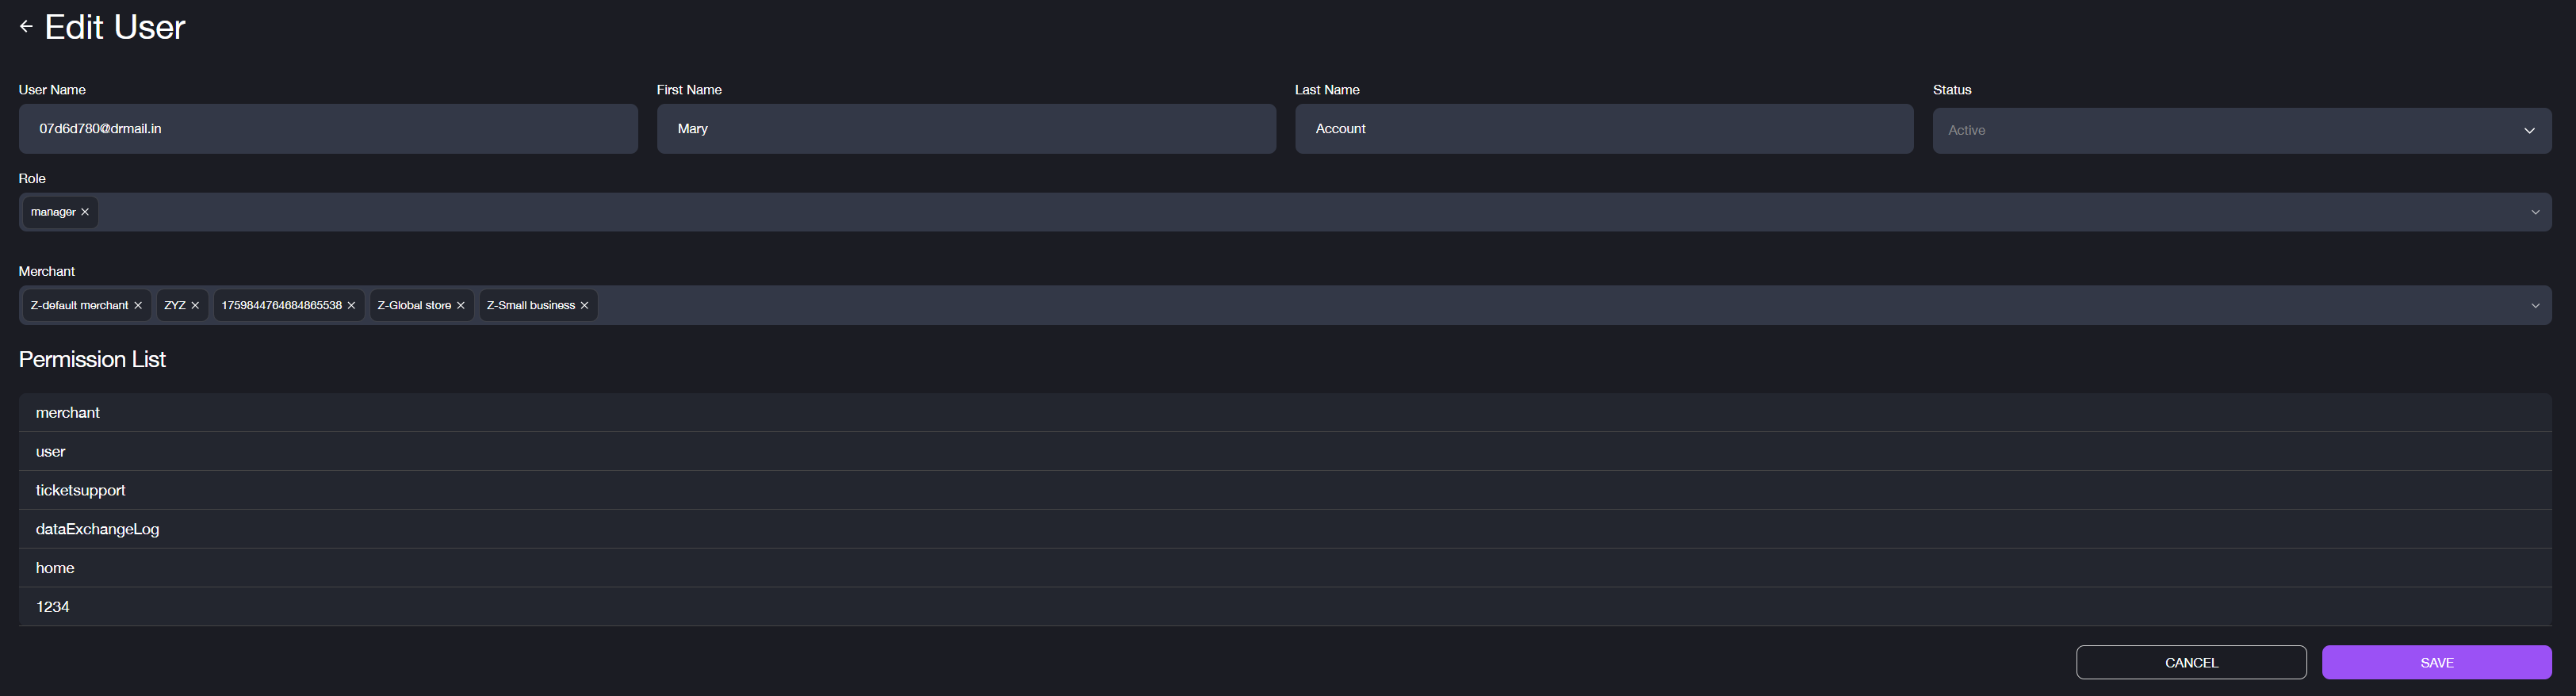
To Edit users:
- Choose the user on the user list and click EDIT.
- Edit the user information, status, assigned role or associated merchants.
- Click Save.
Note: If you change the role for this user, the role permission will be updated accordingly and the permission list here is only for you to double check.