Setting up the Receipt Template
- Click on the Store Setting module name in the left navigation panel, then select Receipt Template from the drop-down menu.
- On the Receipt Management page, you can set templates for two types of receipts: Order receipt and Return order receipt. Set the receipt template by defining the format and information under each category.
- Order receipt: Configure the parameters of Business Information Format, Order Receipt Format, and Printer Information.
- Return order receipt: Configure the parameters of Business Information Format, Return Order Receipt Format, and Printer Information.
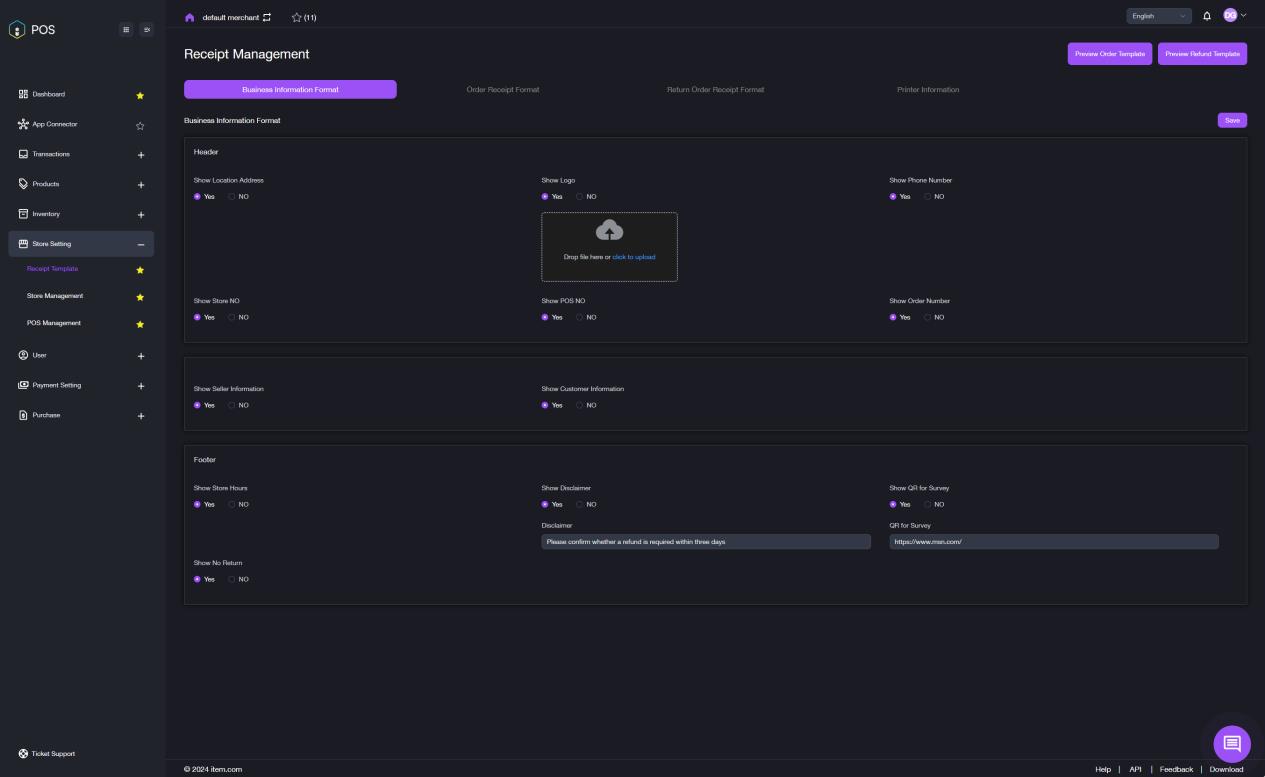
Business Information Format
- Click Business Information Format, the template settings shown in the image below will appear.
- Select Yes or No to set the basic store information to be shown on the printed receipt.
Note: You can also upload a logo, set a disclaimer statement, and show a QR code for a survey on the printed receipt by setting the relevant information accordingly.
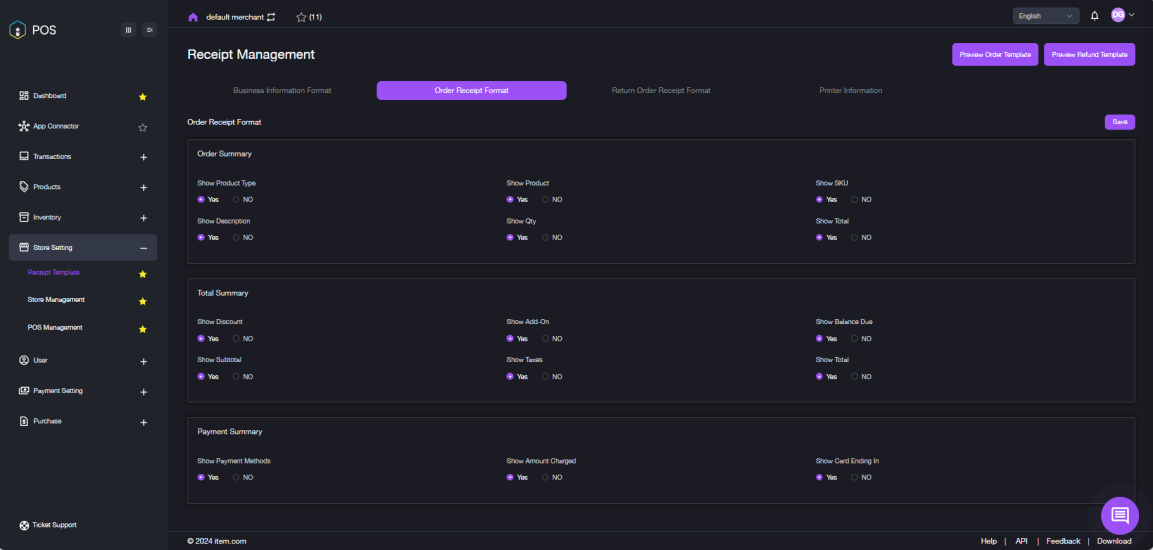
Order Receipt Format
- Click Order Receipt Format, the template settings shown in the image below will appear.
- Select Yes or No to set the product details and payment information to be shown on the printed receipt.
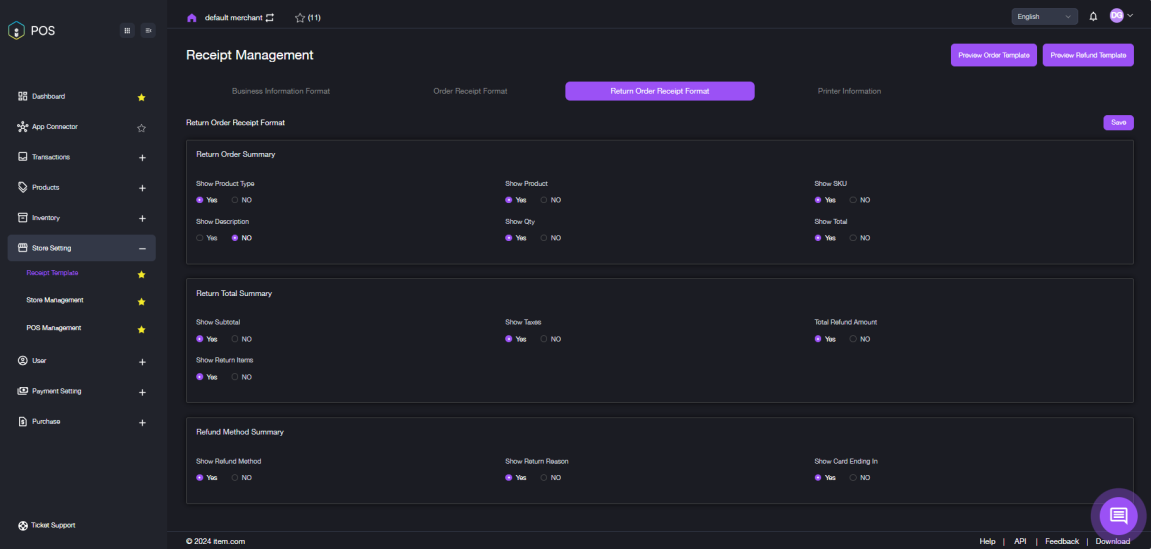
Return Order Receipt Format
- Click Return Order Receipt Format, the template settings shown in the image below will appear.
- Select Yes or No to set the product details and refund information to be shown on the printed receipt.
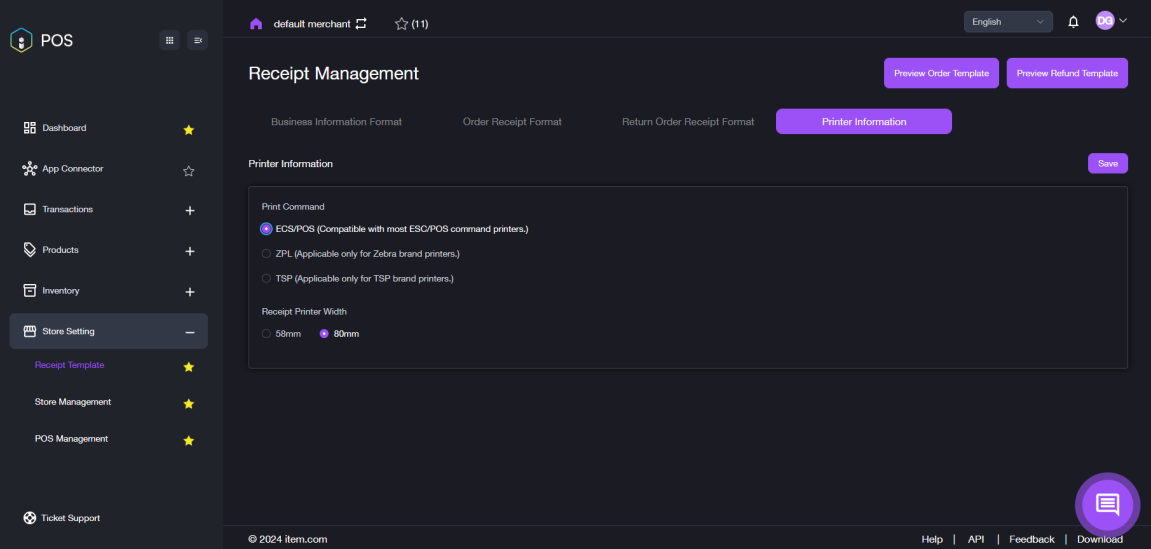
Printer Information
- Click Printer Information, the printer settings shown in the image below will appear.
- Set the printer brand and receipt paper width.
Note: Different printer brands support different options of receipt paper width.
Notes:
- The settings only take effect after they are saved at the end of each step.
- Click Preview Order Template to view the printing format of the order receipt.
- Click Refund Template to view the printing format of the return receipt.