Setting up the Printer (using POS APP)
Use the POS APP to connect the POS device to a printer. Before connecting, ensure the following:
- The printer is connected to a power source and turned on.
- The printer’s paper tray has receipt paper loaded.
- The paper is feeding correctly.
Steps:
-
Access the tablet's settings and go to Bluetooth Settings.
-
Pair with the printer to be connected.
Note: During the pairing process, some printers require confirmation on the printer itself to pair (e.g., Zebra printer).
-
Once pairing is successful, open the Item POS APP and log in.
-
Select the appropriate store and POS.
-
Tap the settings icon in the top right corner to access the settings menu.
-
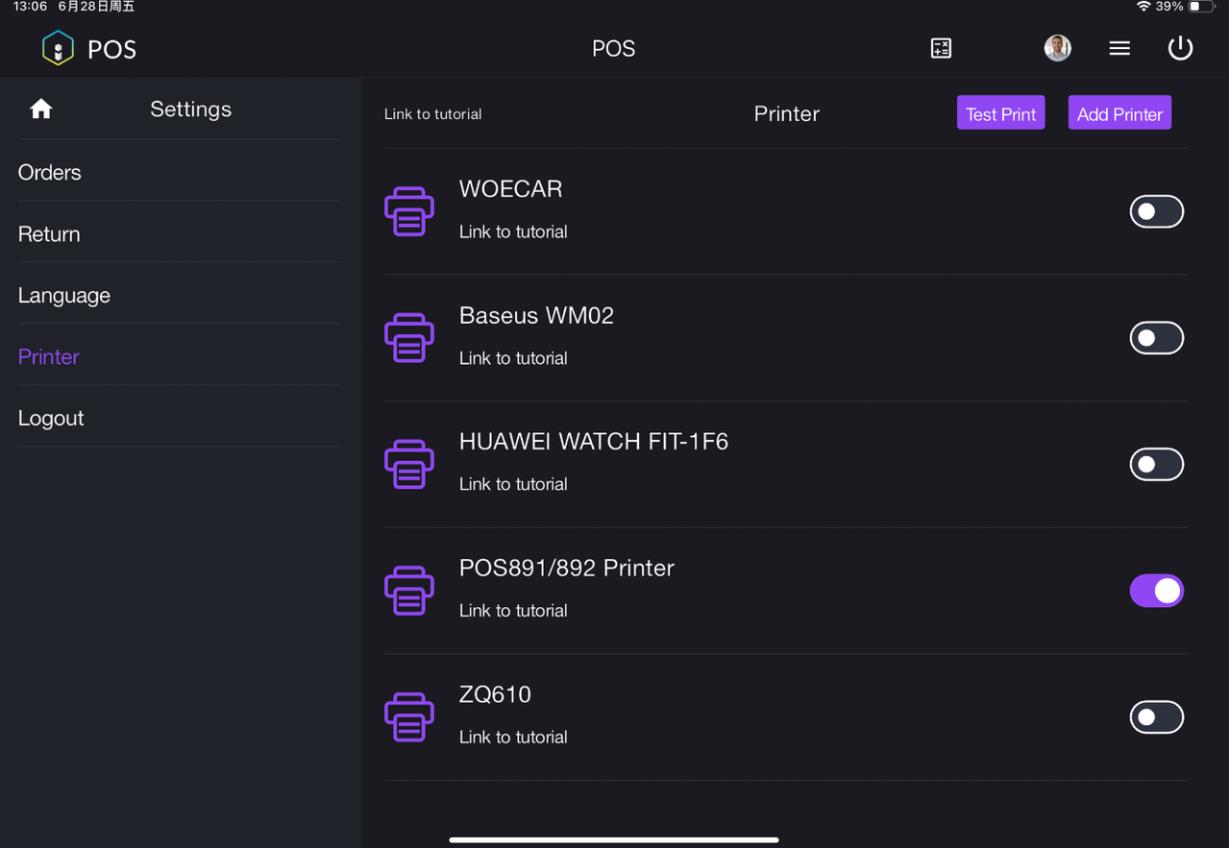
Find Printer in the menu on the left side and tap it.
-
Find Add Printer on the right side of the screen and tap it.
-
You will see a device list of available printers.
-
Find your printer and tap Test Print.
-
After the printing test is successful, tap Add to include this printer and return to the device list.
-
Manually activate the printer from the device list.
-
The printer is now successfully added.
Notes:
- Before adding the printer, set up the receipt template in the back-end management platform.
- Ensure that the APP has Bluetooth authorization and that the printer is functioning normally.