DI – Channel Setup for Shopify
Item Data Integration (DI for short) supports connecting multiple sales channels to your merchants, synchronizing and displaying sales data, such as orders and products.
In the following text is introduced the setup procedures for a Shopify channel.
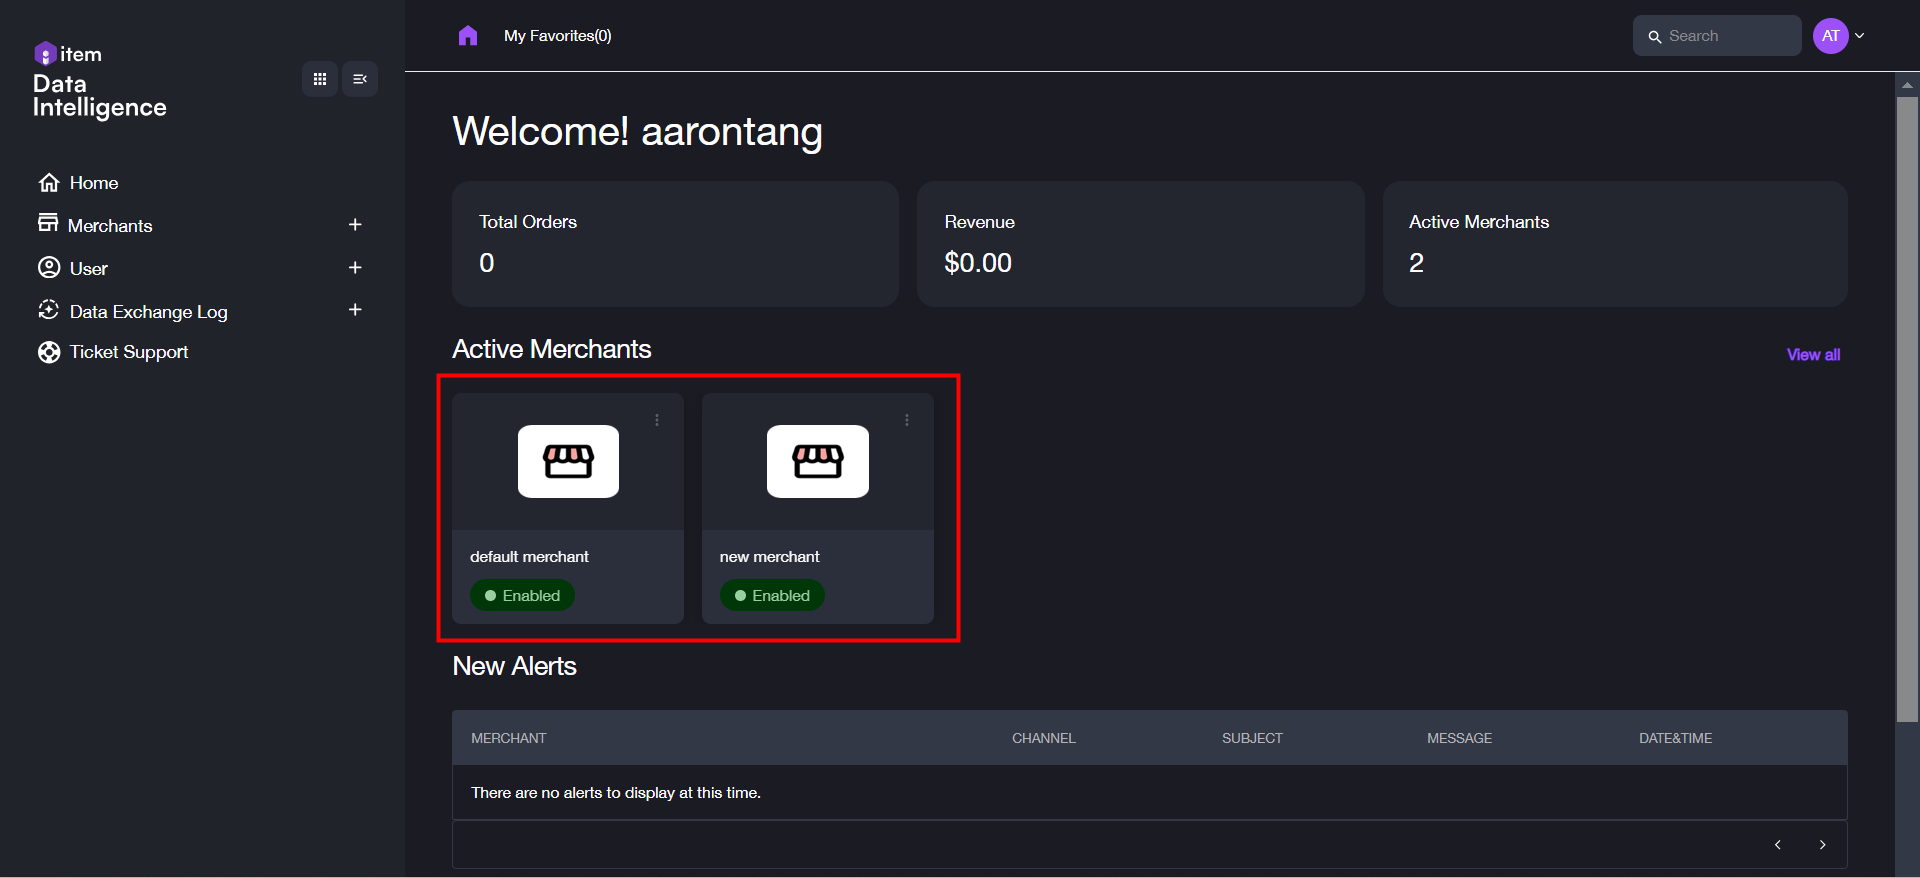
1. In the Home page or the Merchants page, click a desired merchant.
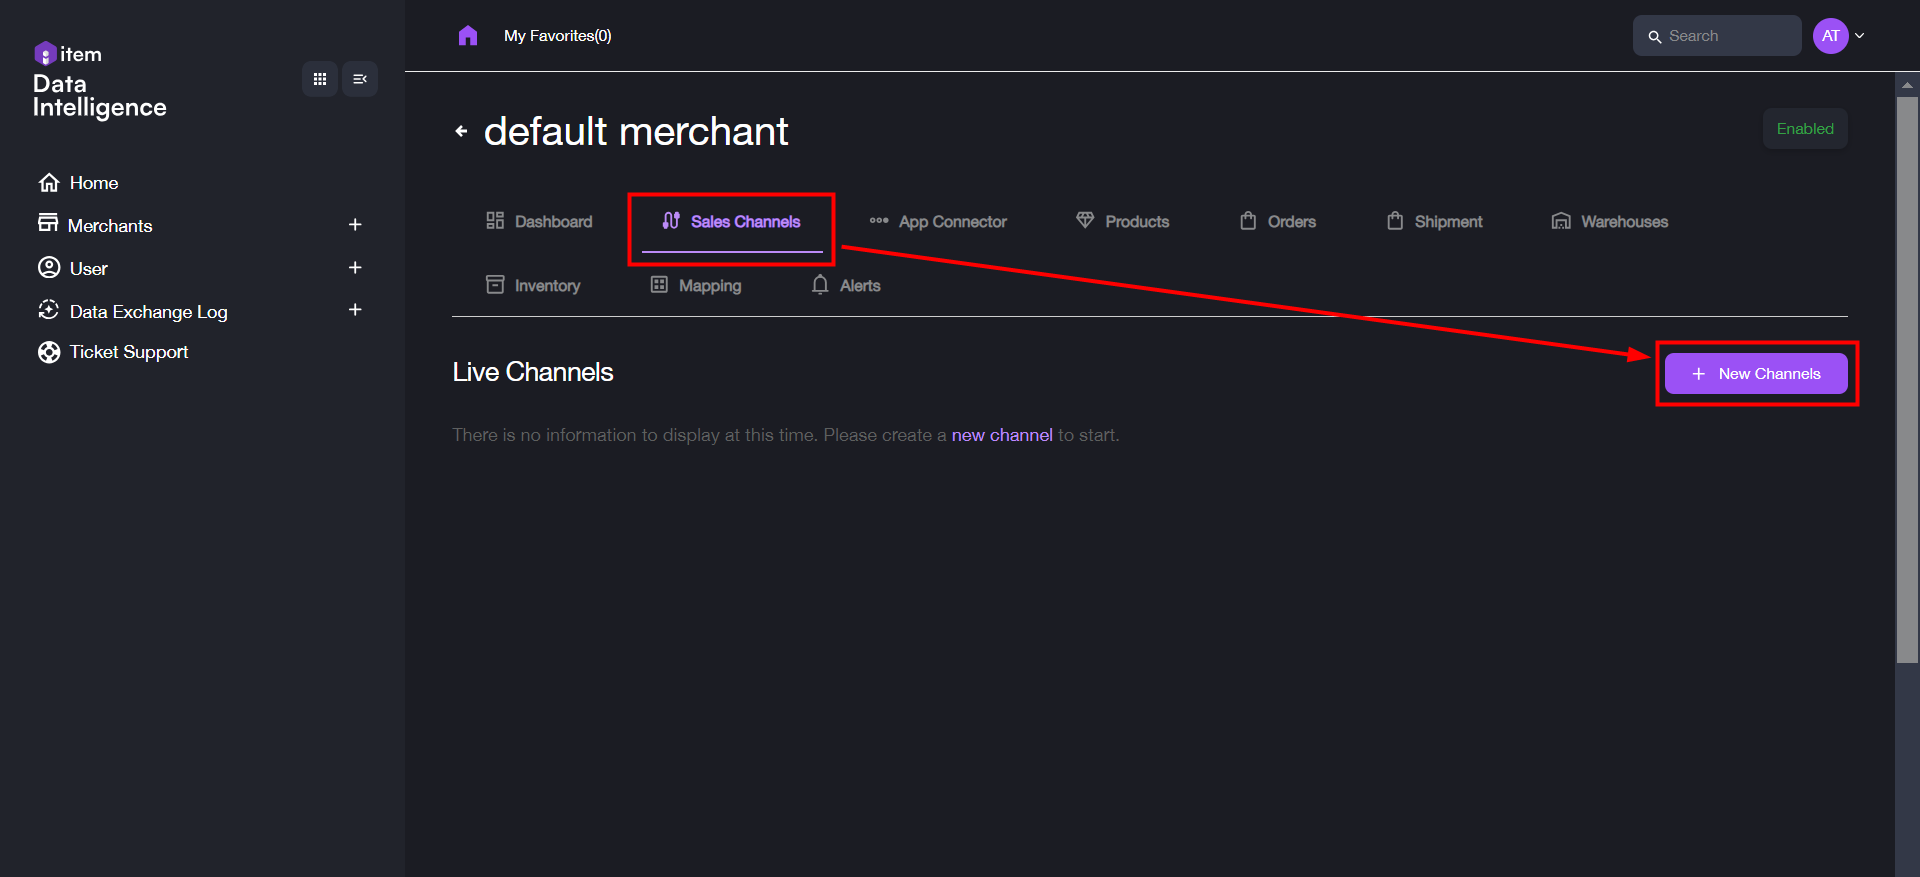
2. Navigate to the “SalesChannels” tab and click “+ New Channels”.
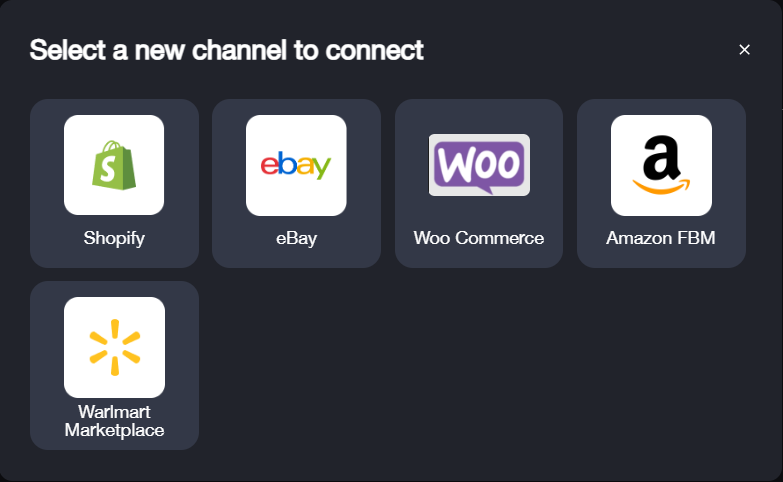
3. In the following dialog box, select a new channel. Shopify is taken for an example here.
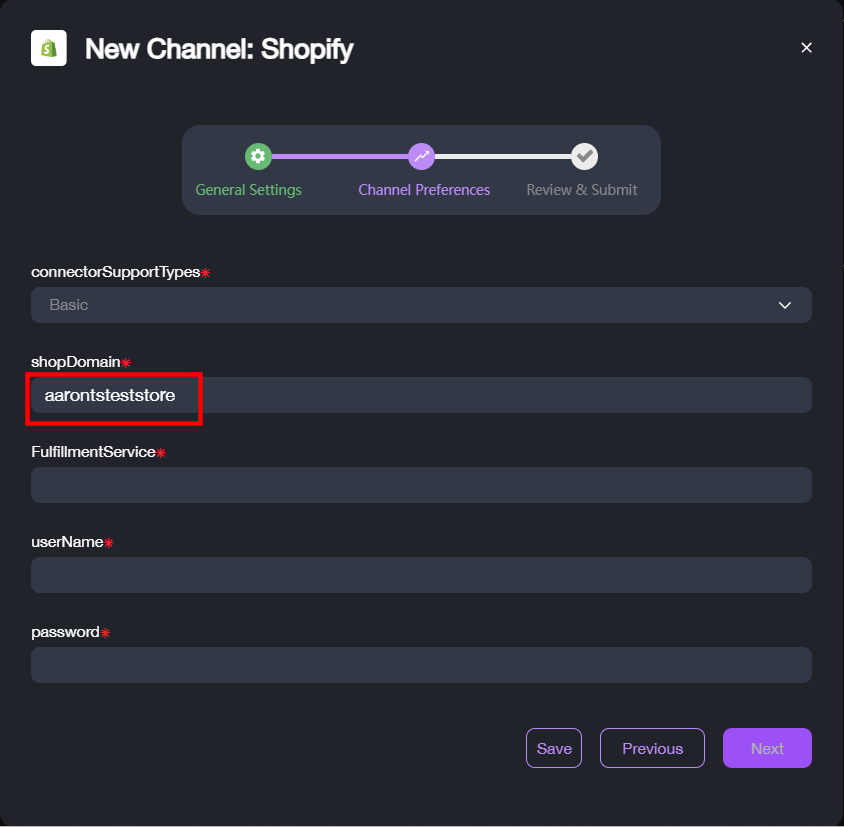
4. In “General Settings”, enter the required setting fields of the channel. Refer to the following list for the introduction to all the parameters.
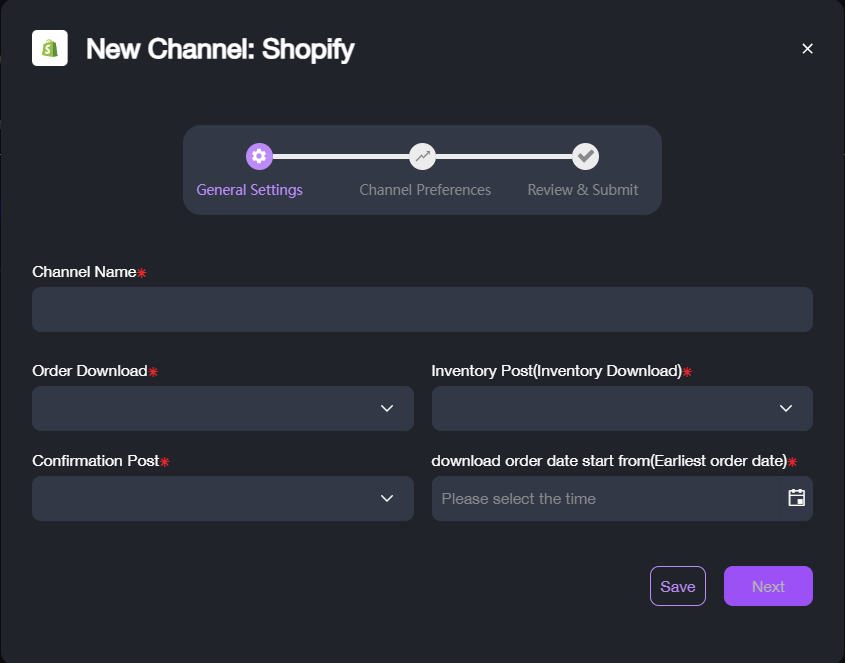
- Channel Name: Name of the channel to displayed in the list
- Order Download: Frequency to sync order data from the channel
- Inventory Post (Inventory Download): Frequency to download inventory data from the channel
- Confirmation Post: Frequency to download confirmation of shipment
- Download order date start from (Earliest order date): The earliest date and time to start downloading order data from the channel
5. Click “Next” to go to the next step.
6. In “Channel Preferences”, first select the “connectorSupportTypes” from the dropdown menu. Currently only “Basic” is supported. Also enter the fulfillment service name of your fulfillment partner.

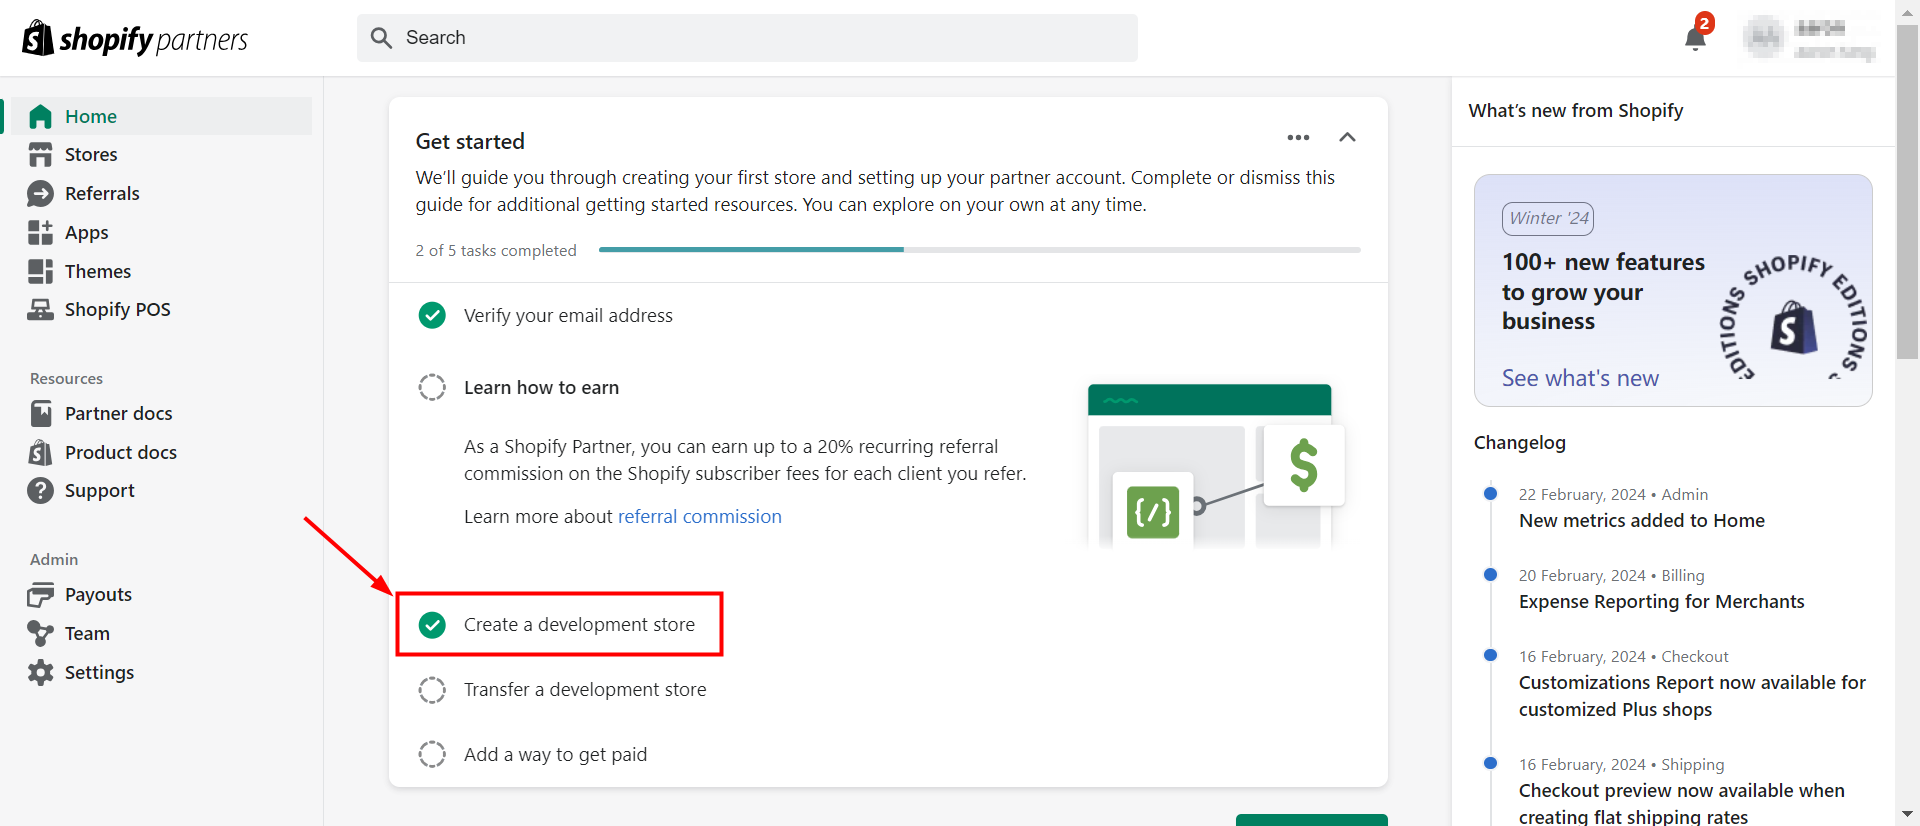
7. Next, navigate to https://www.shopify.com/partners in the browser and log in with your Shopify account. In this example here, let’s start with creating a new store first. Click “Create a development store” > “Add another store” in the Home page.
8. In the store creation page, configure the development store as follows:
- What’s the purpose of this store: Select “Create a storeto test and build”.
- Store name: Enter the name for the store, for instance, aaront'steststore.
- Build version: Select “Current release”.
- Data and configurations: Select “Start with an emptystore”.
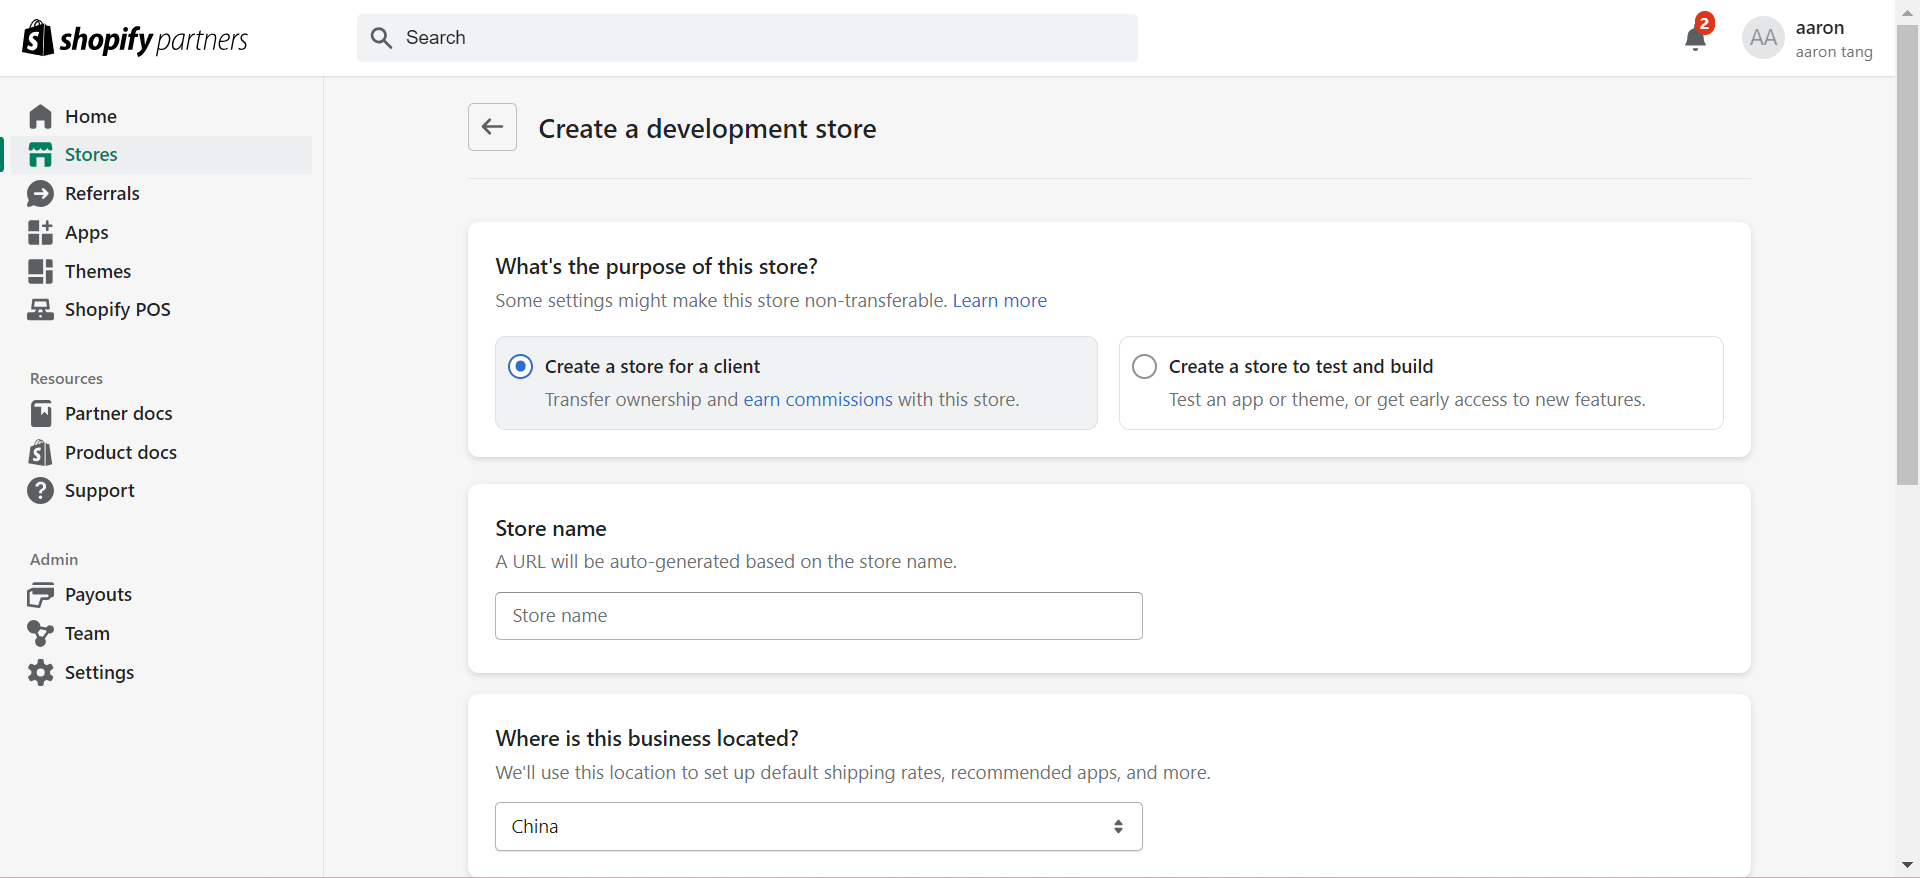
9. Click “Create developmentstore” in the bottom of the page.
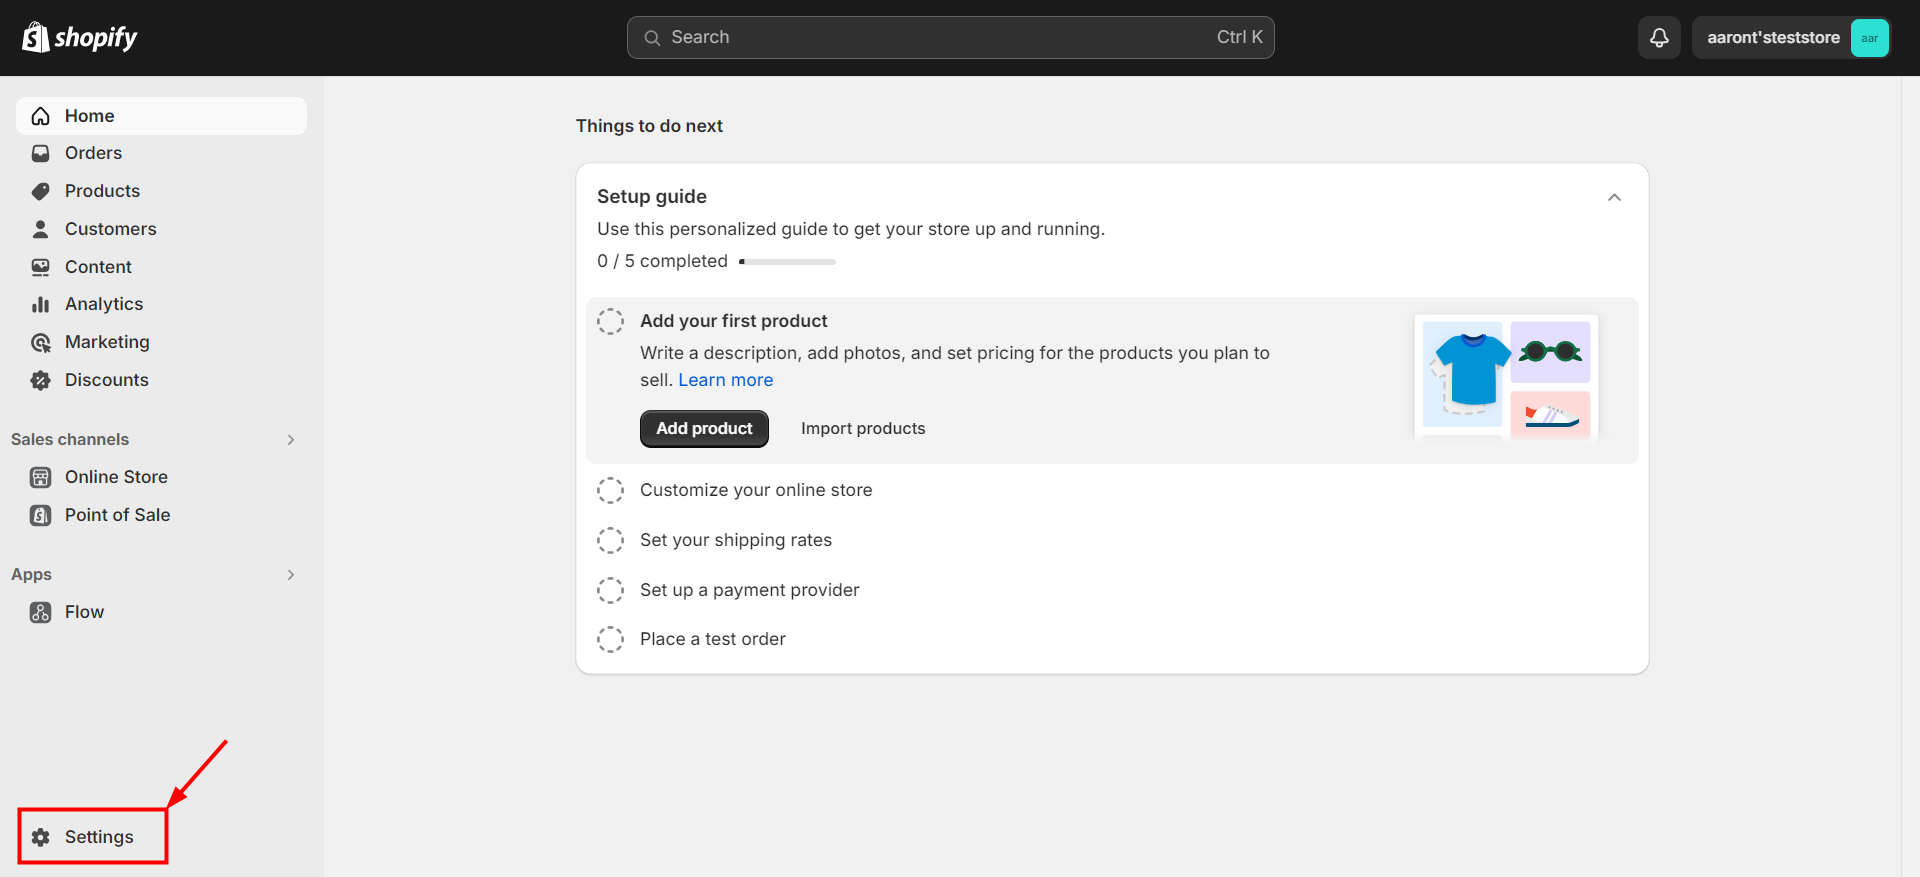
10. Click “Settings” in the lower left corner.
11. Go to “Domains” and copy the domain of the online store to be connected. Be noted to only copy the store name without ".myshopify.com". In the example here, the domain to be copied is “aarontsteststore”. Then navigate back to the “New Channel” page in Item Data Integration and paste the domain into the text box under “shopDomain”.

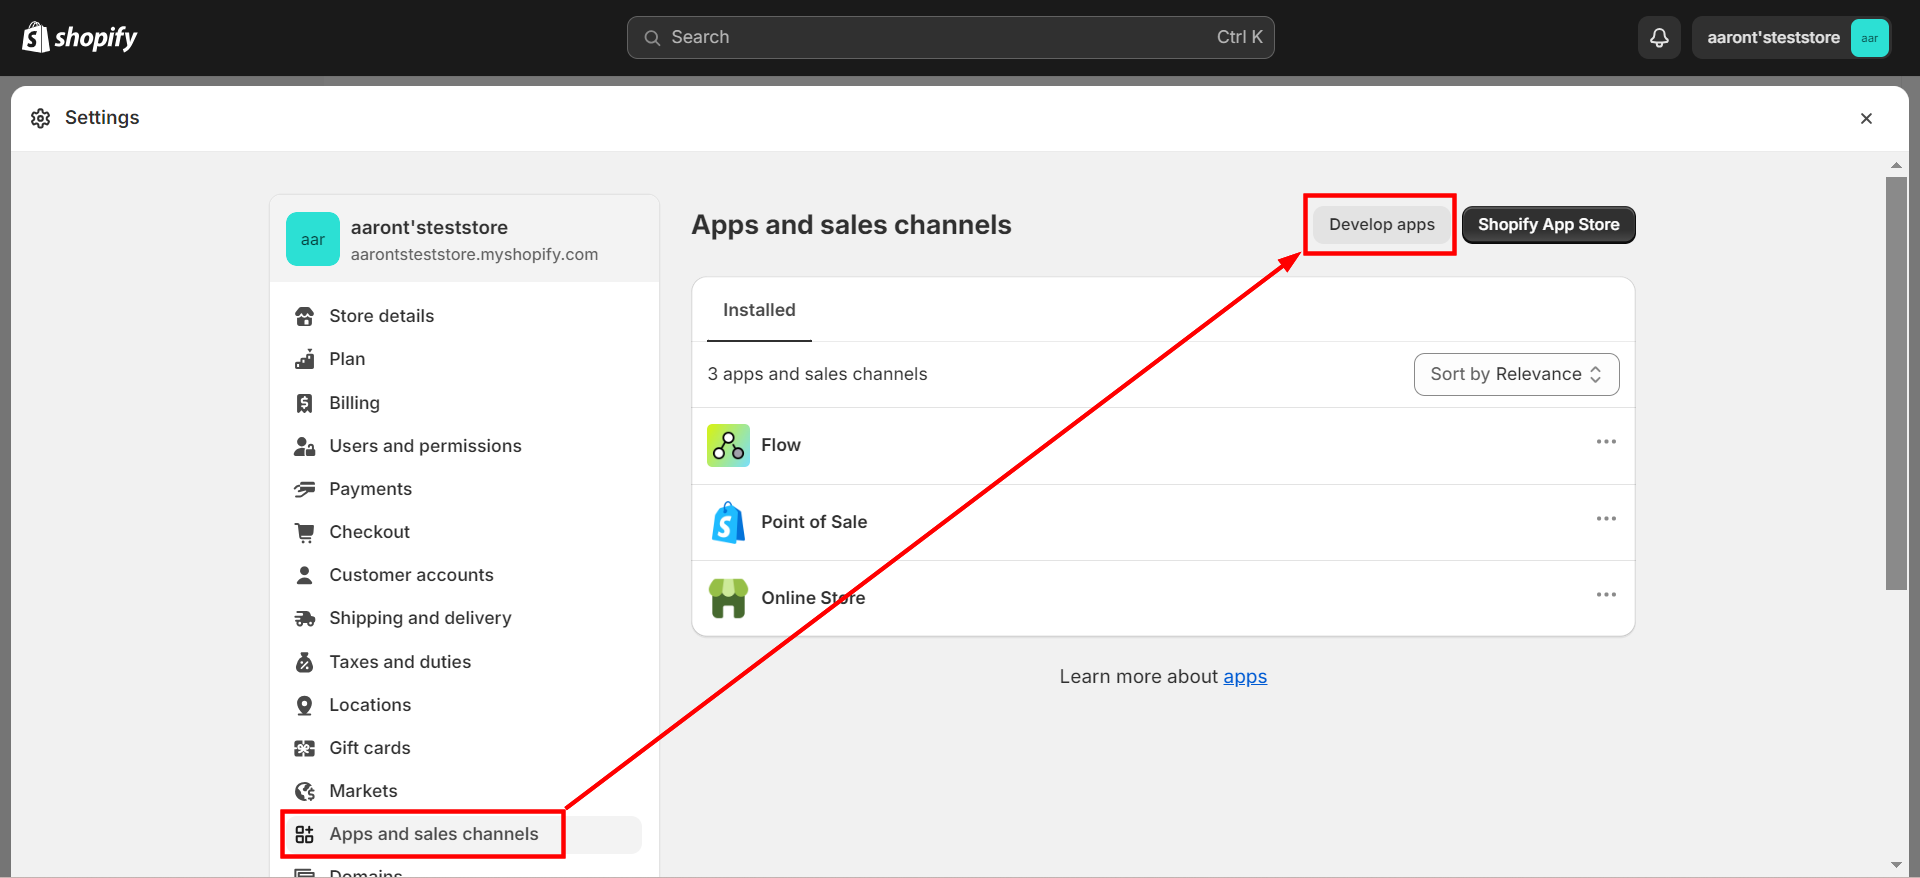
12. Go to “Apps and sales channels” and then click “Develop apps”.
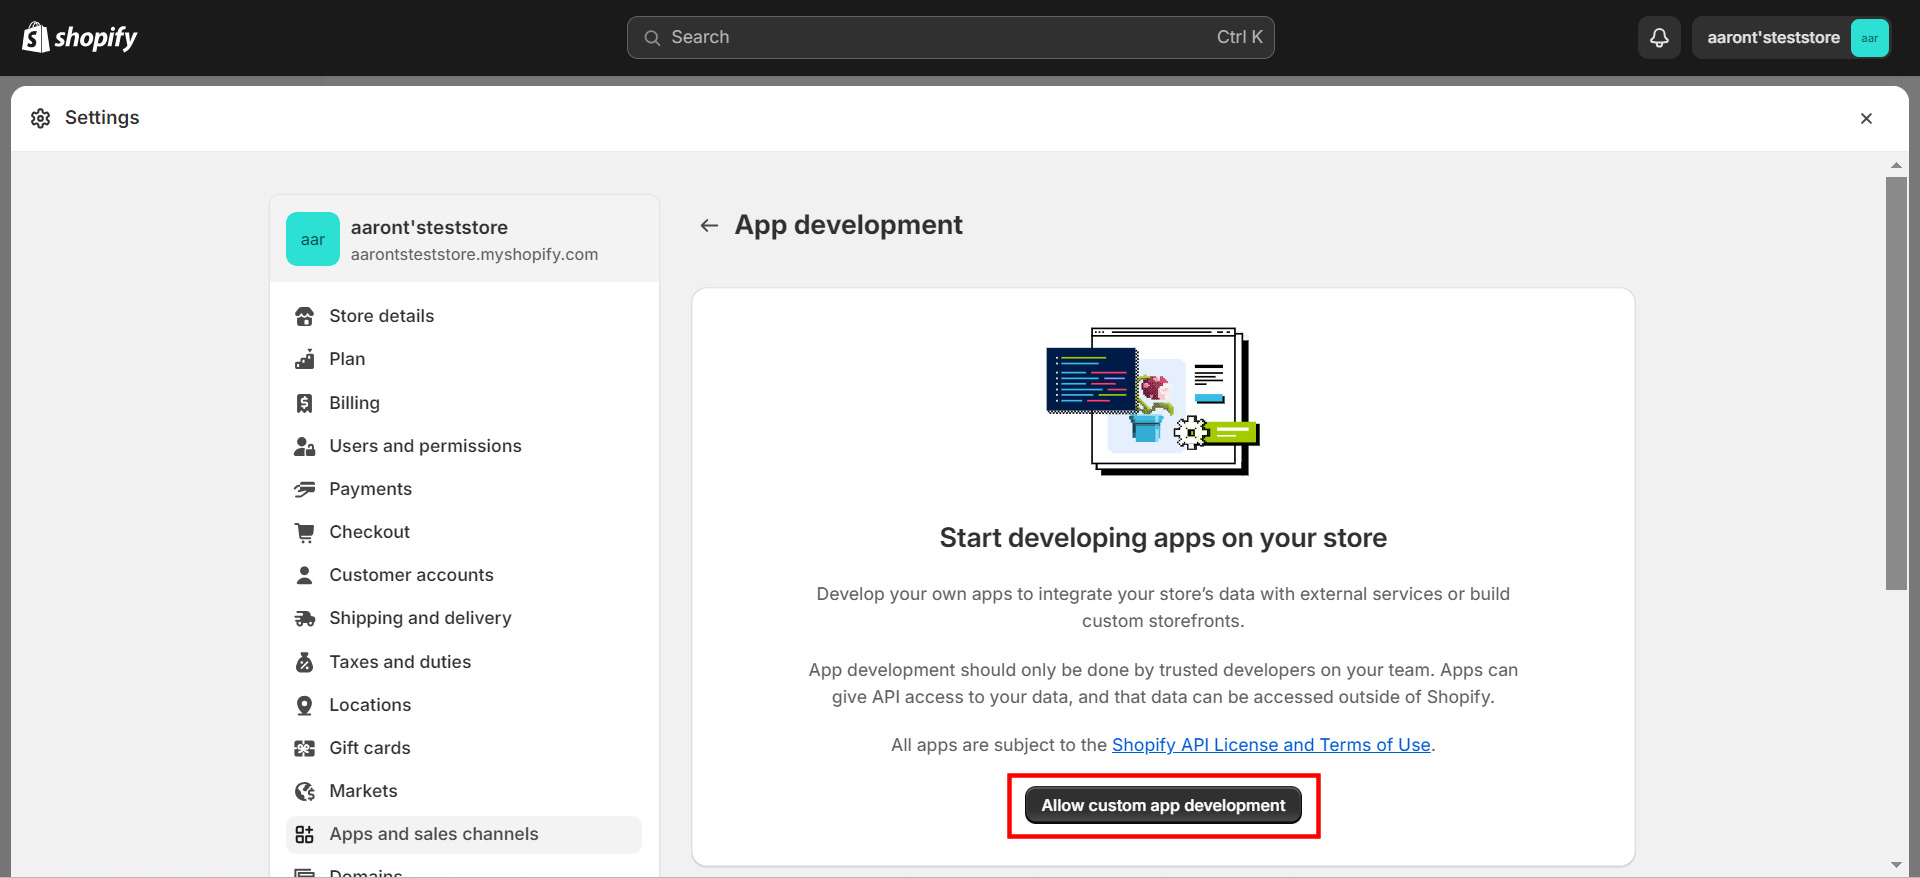
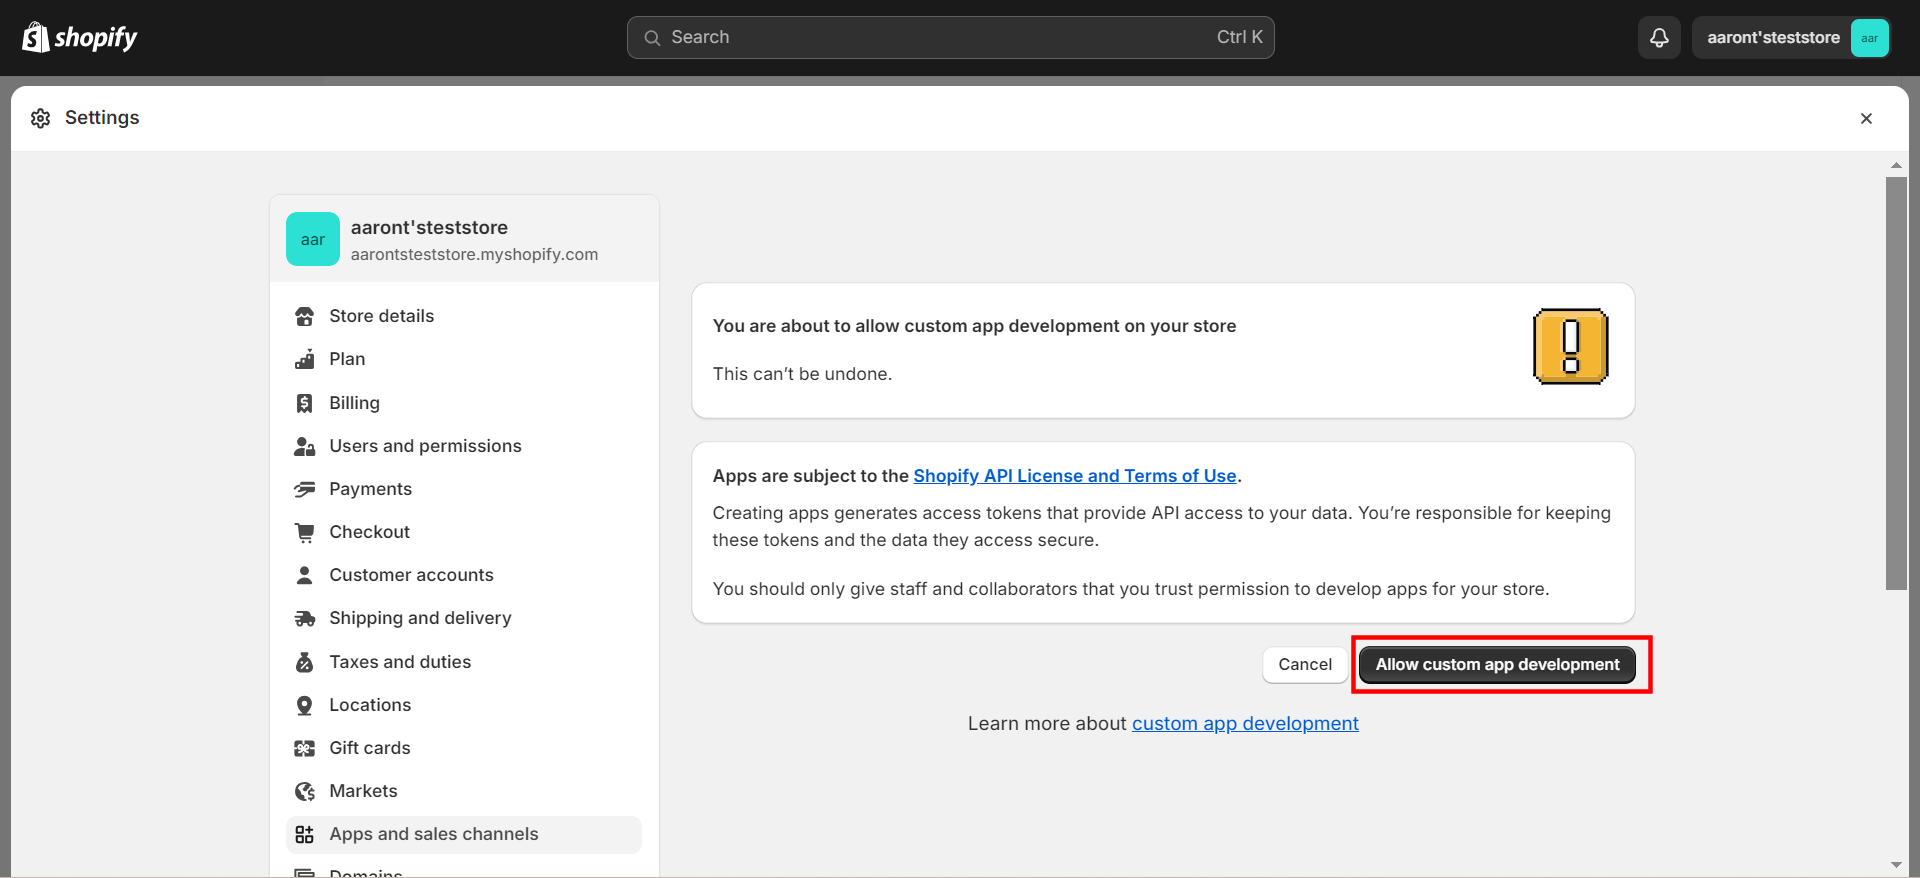
13. Click “Allow custom app development” in the following two successive pages.
14. Click “Create an app”, enter a name for the app, and then click “Create app”.

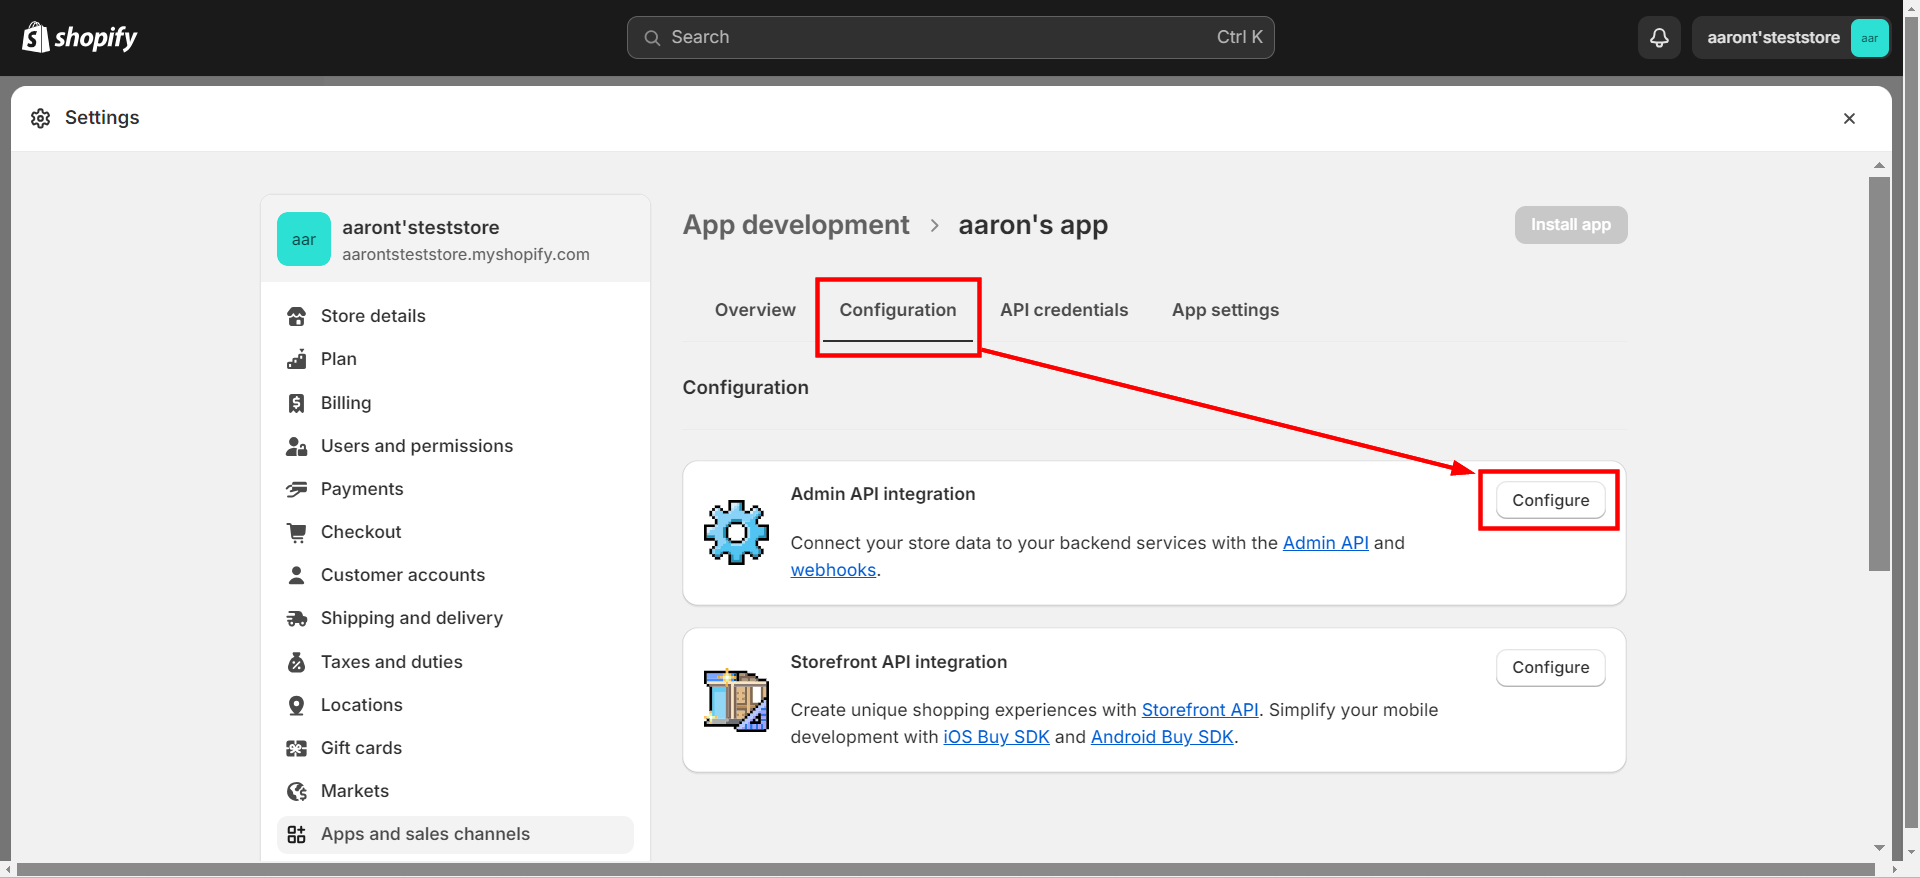
15. Click “Configuration” > “Configure” to the right side of “Admin API integration”.
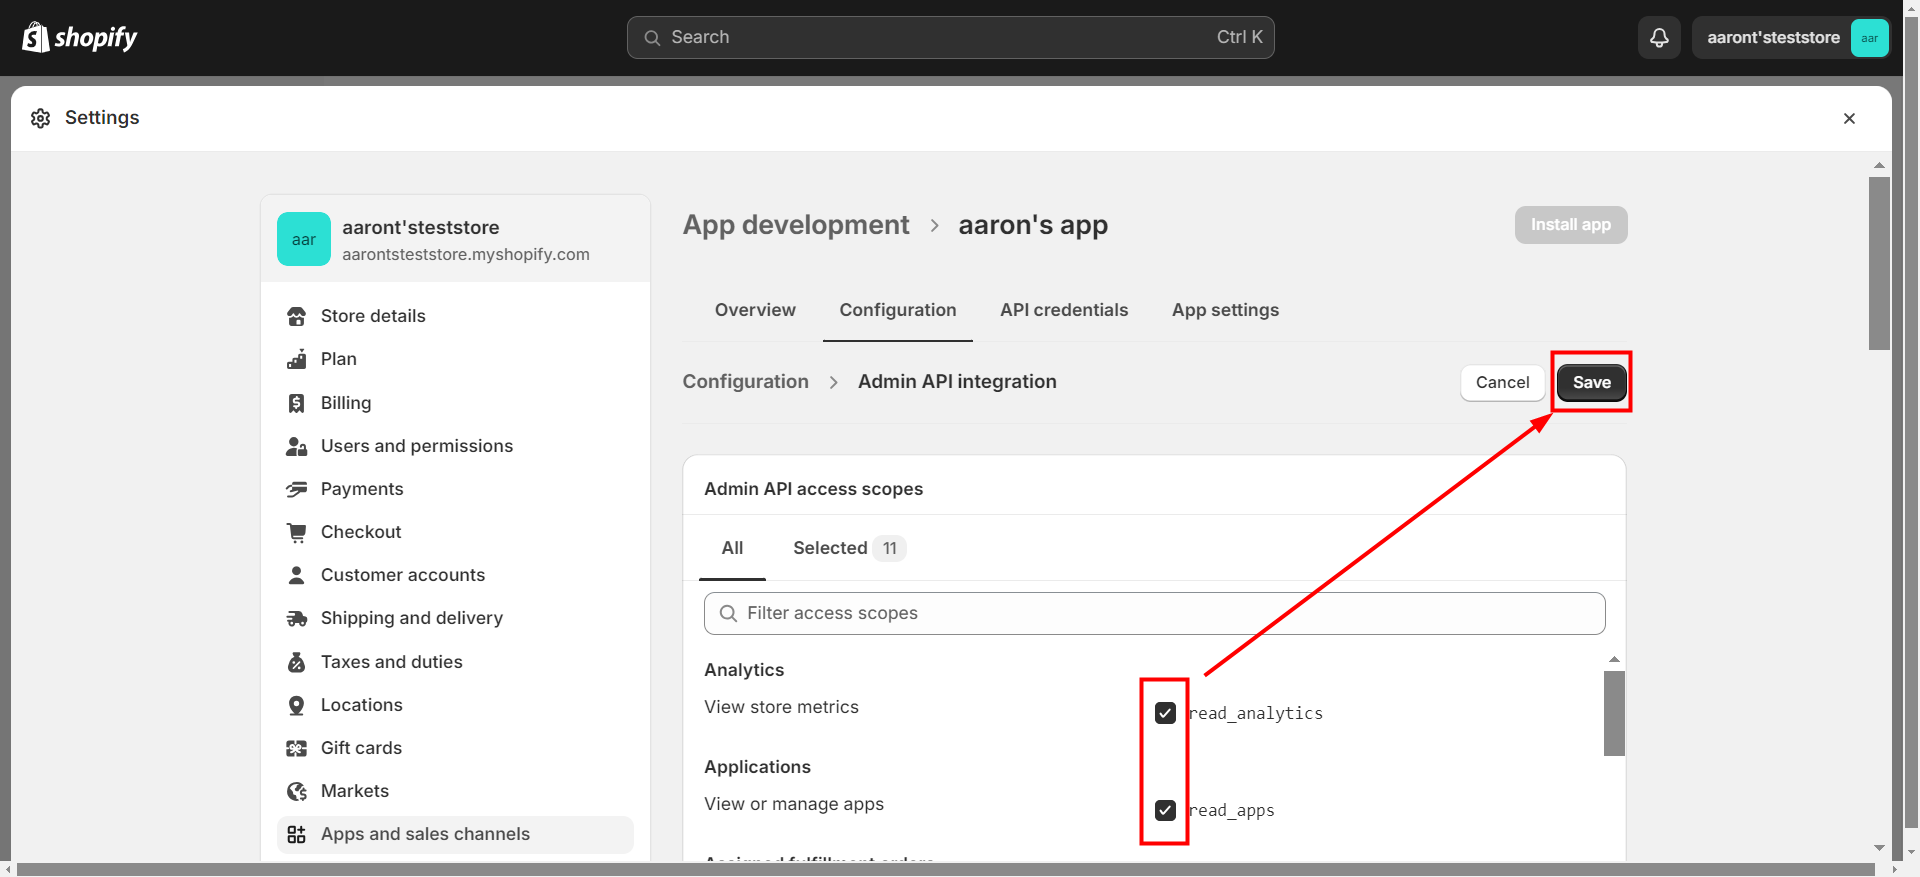
16. In “Admin API access scopes”, select what data to be shared with Item Data Integration. And then click “Save”.
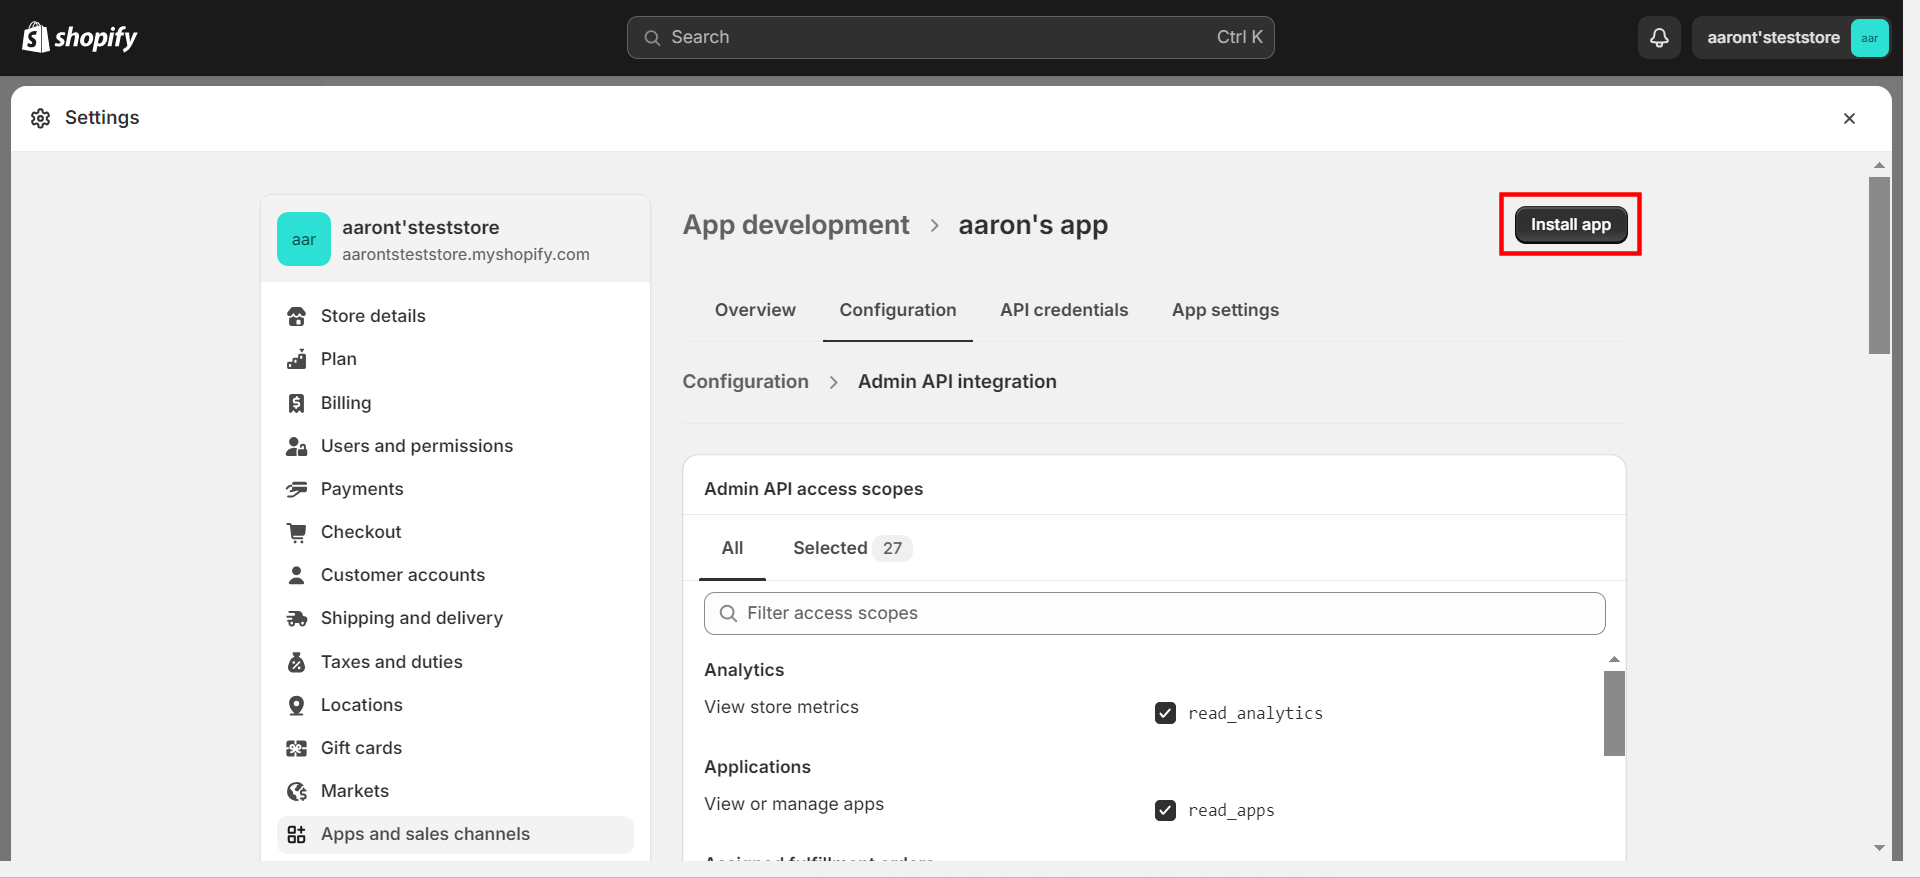
17. Click “Install app”.
18. Review the prompt message in the pop-up and then click “Install”.

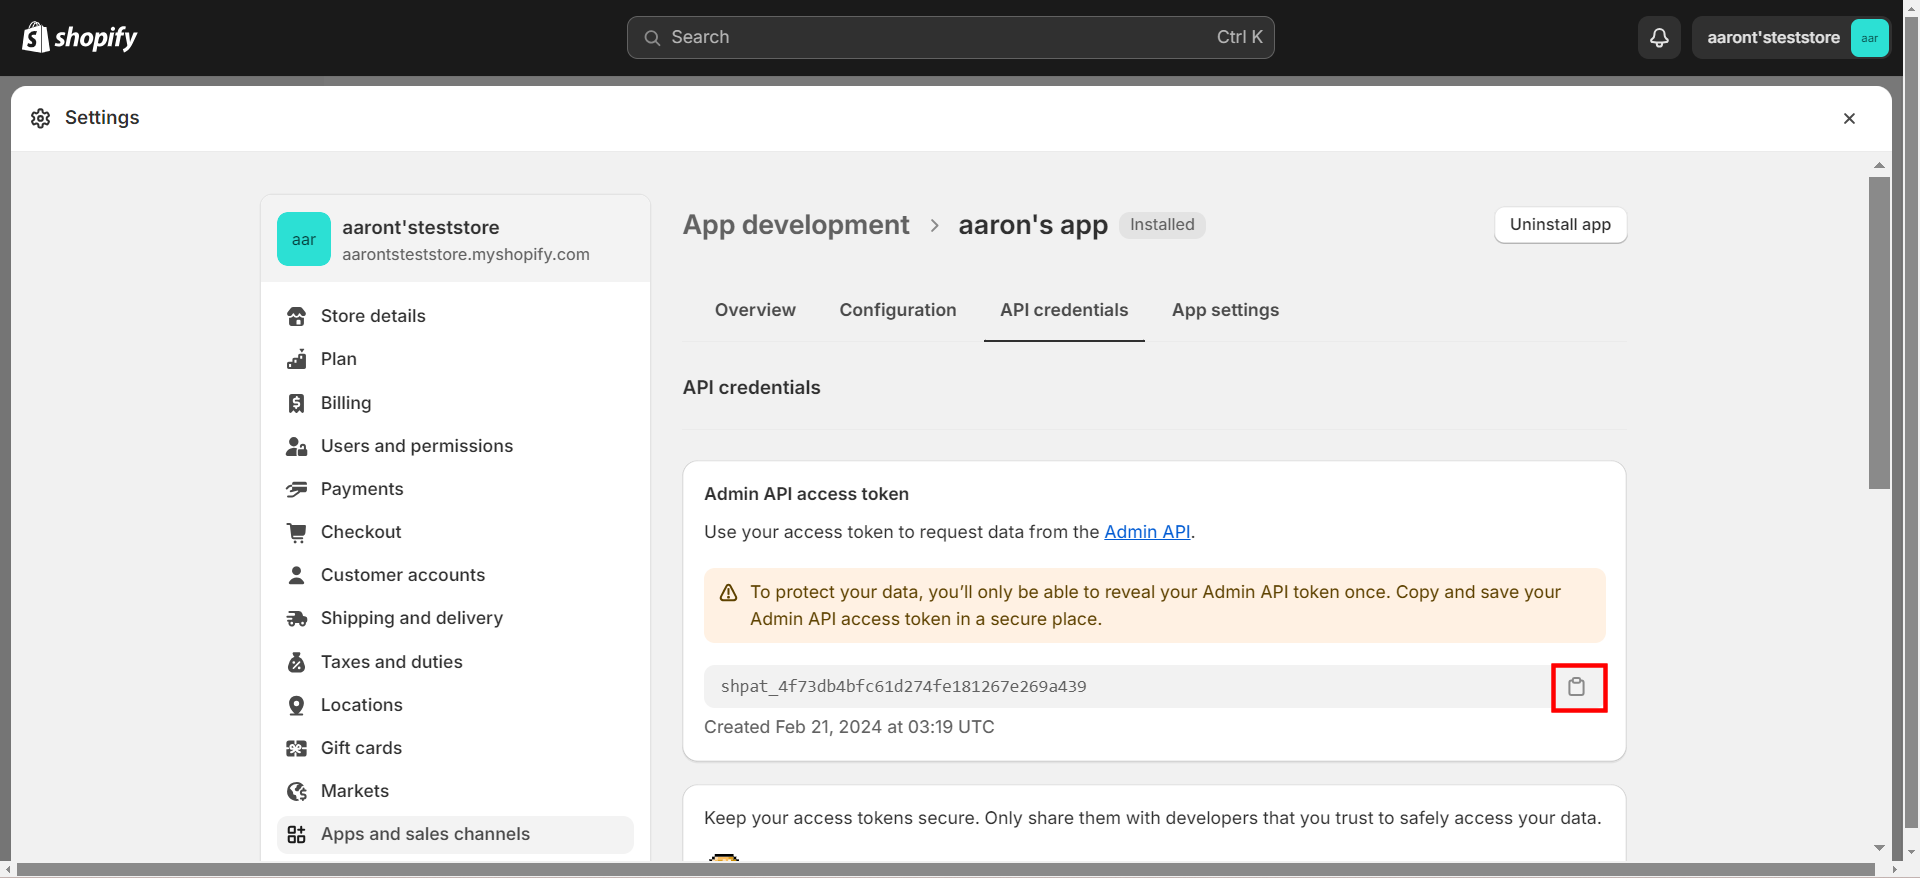
19. Go to “API credentials” and click “Reveal token once”.
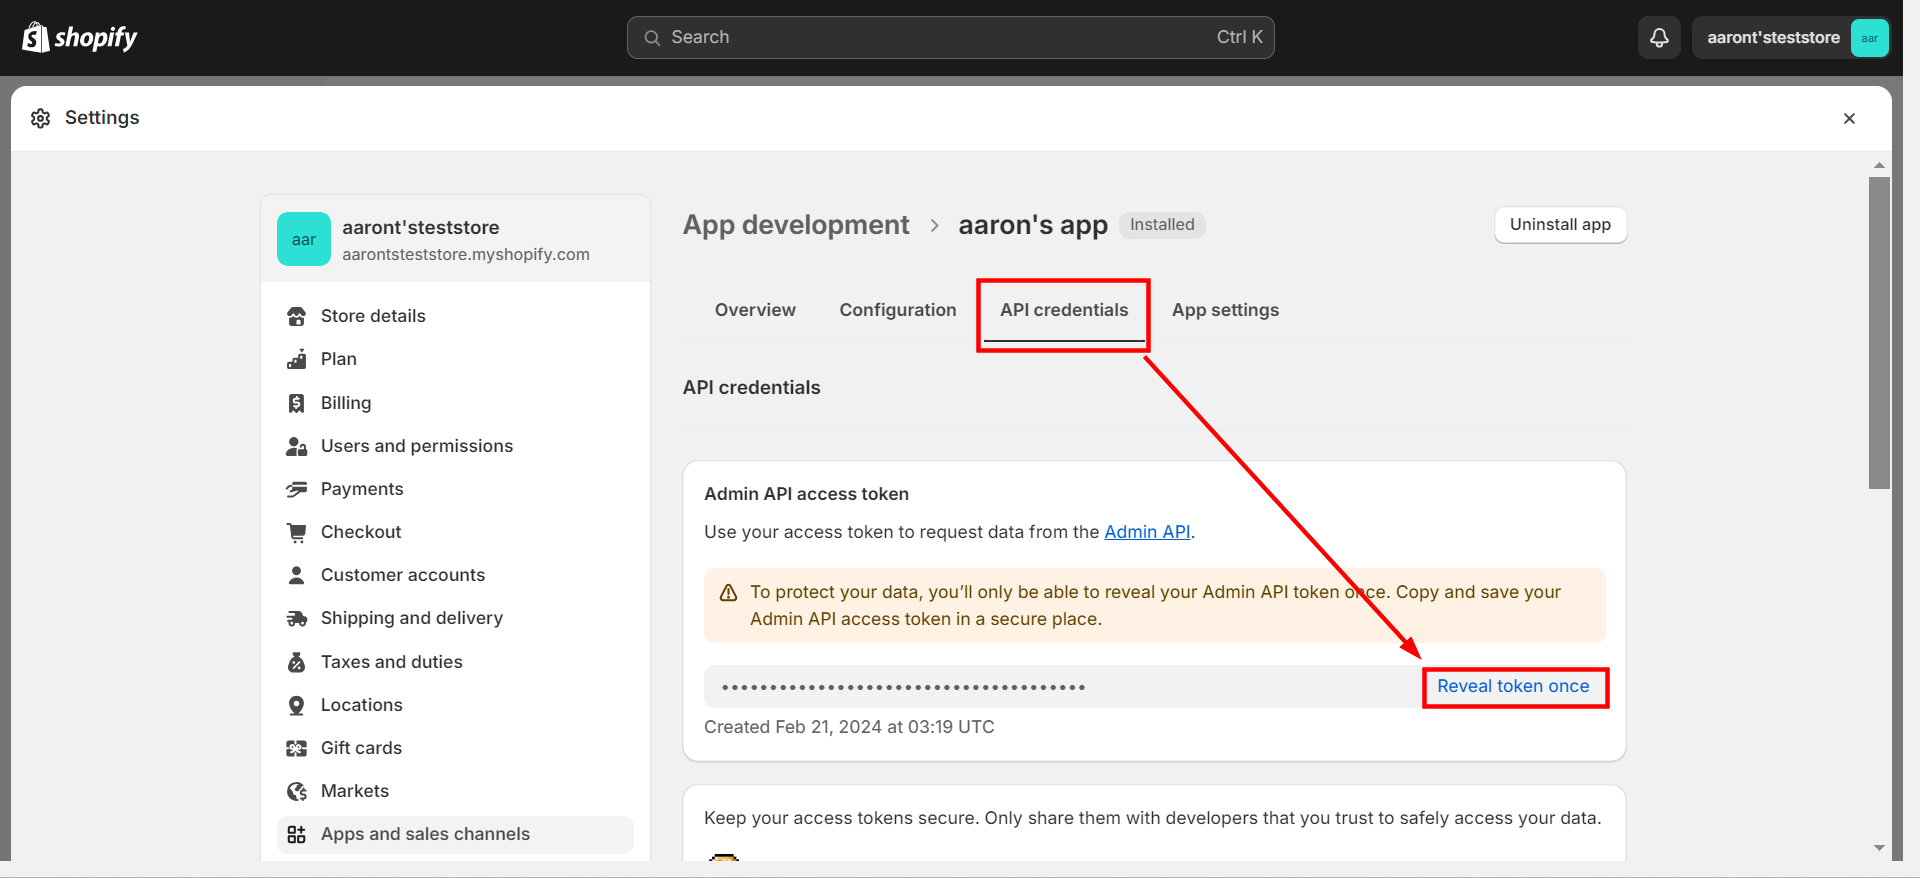
20. Click the notepad icon to copy the API access token. Make sure to back up the token in a secure place because it can only be revealed once.
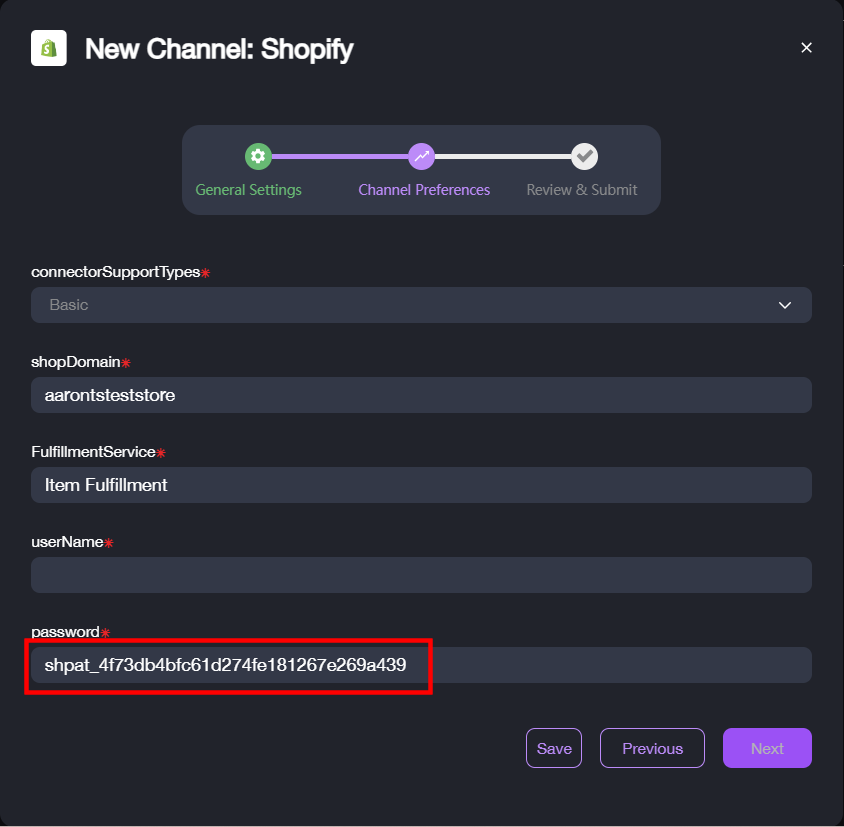
21. Navigate back to the “New Channel” page in Item Data Intelligence and paste the token into the text box under “password”.
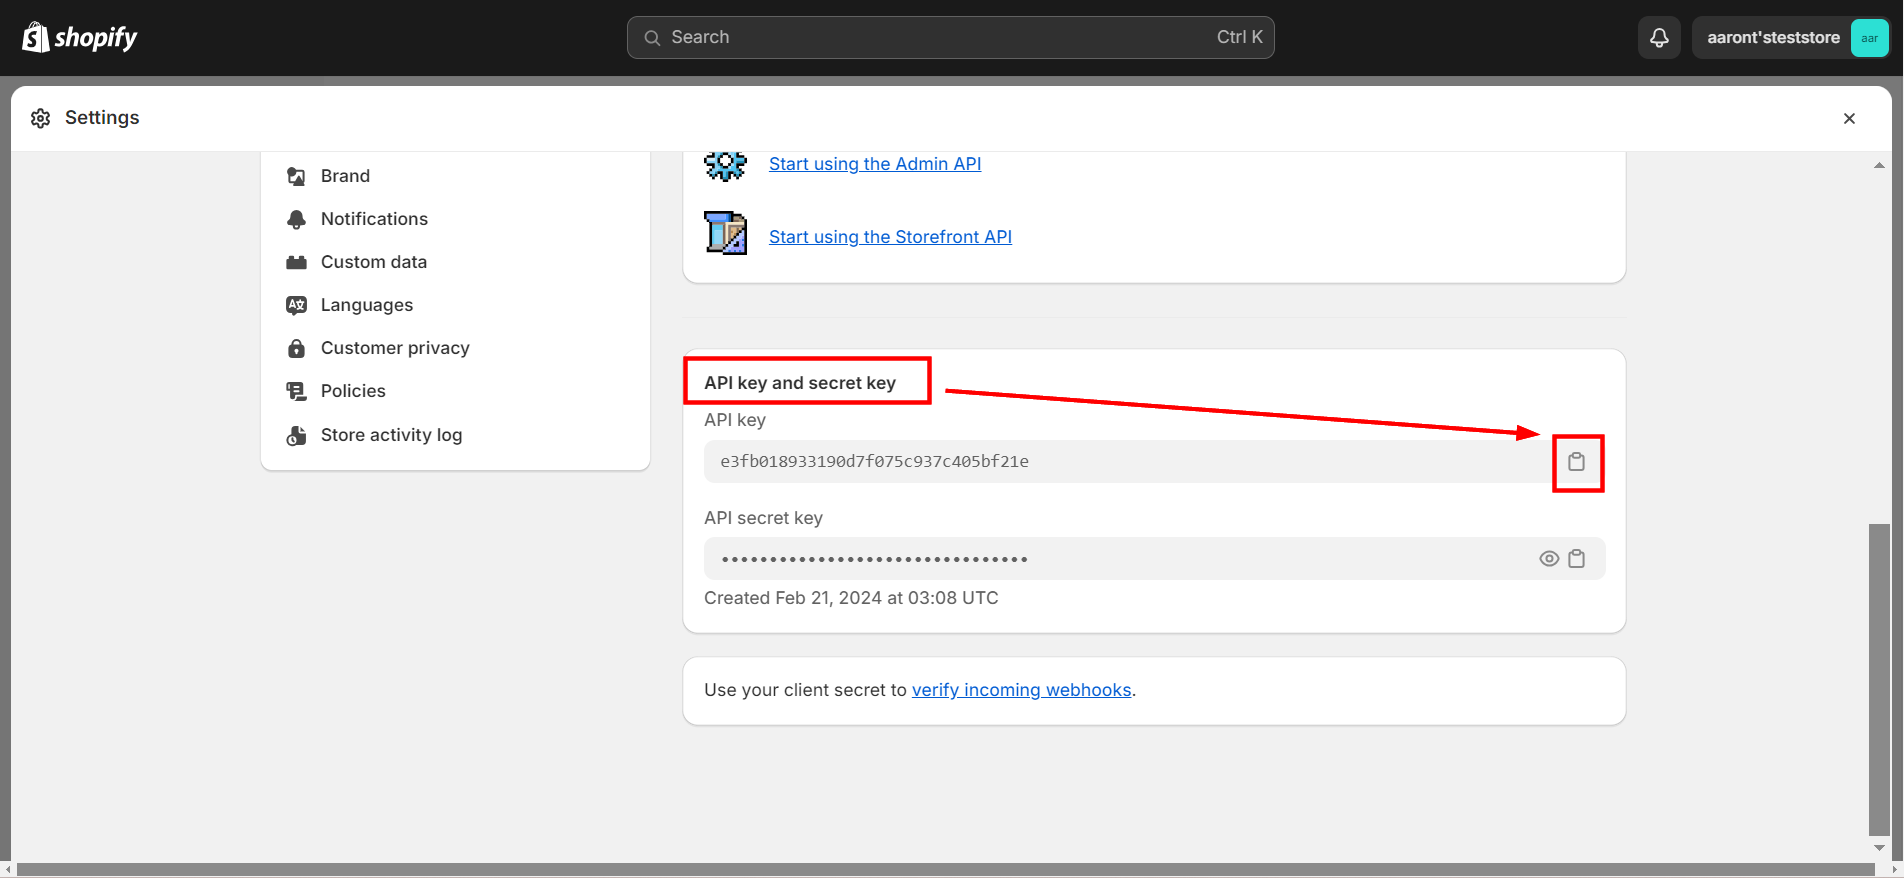
22. In the “App and sales channels” > “API credentials” page in Shopify, click the notepad icon to copy the API key.
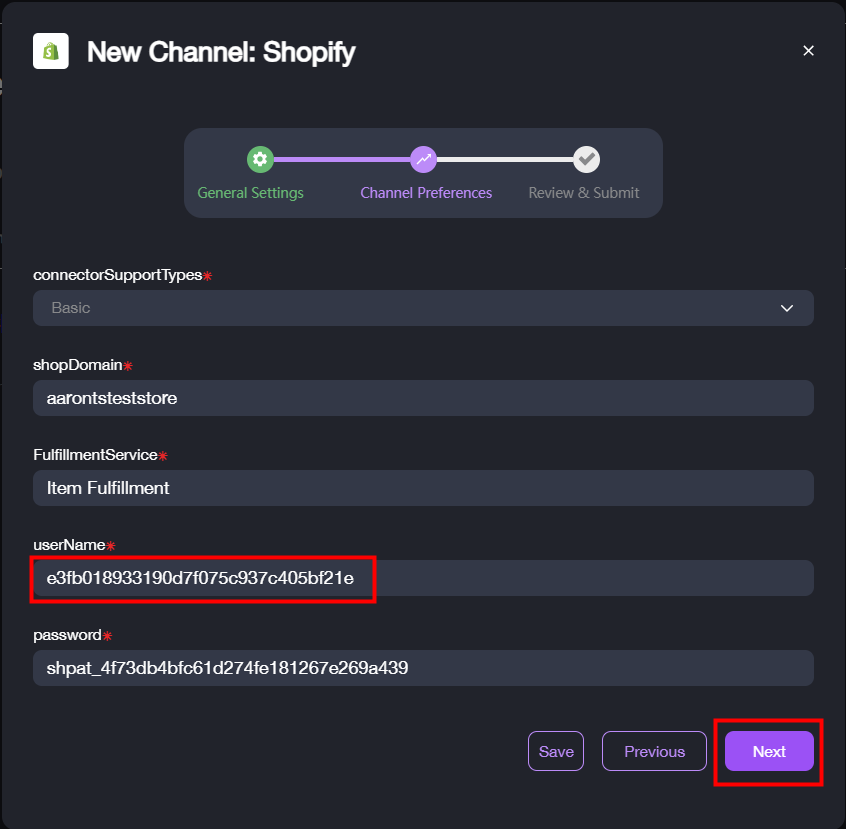
23. Paste the API key in Data Integration under “userName”. Click “Next”.
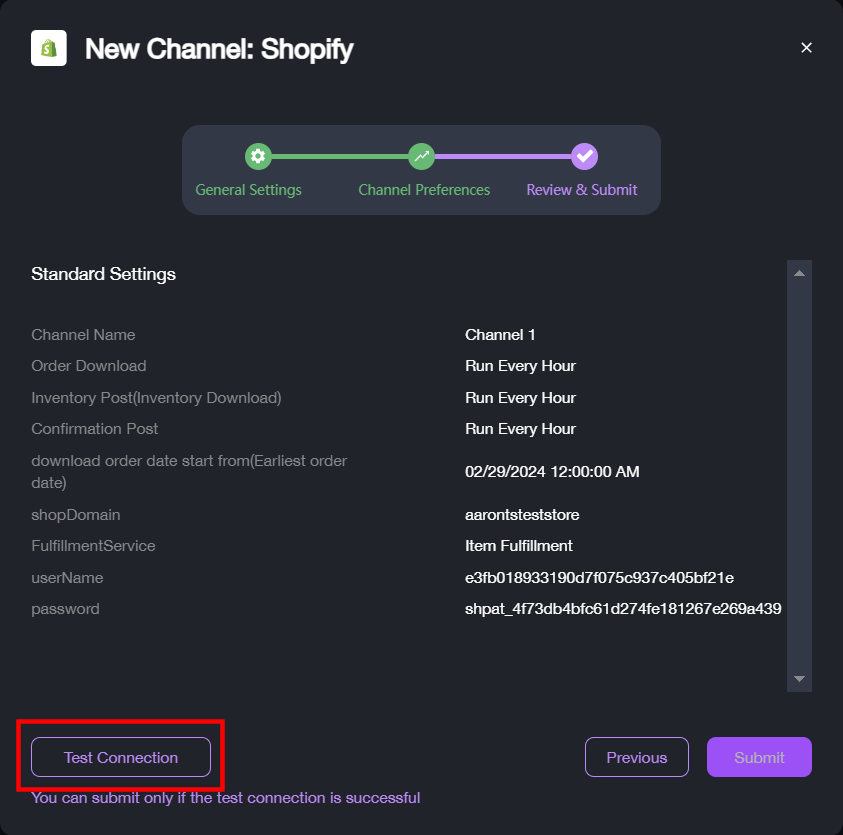
24. Review and confirm all the listed information are correct, and then click “Test Connection”.
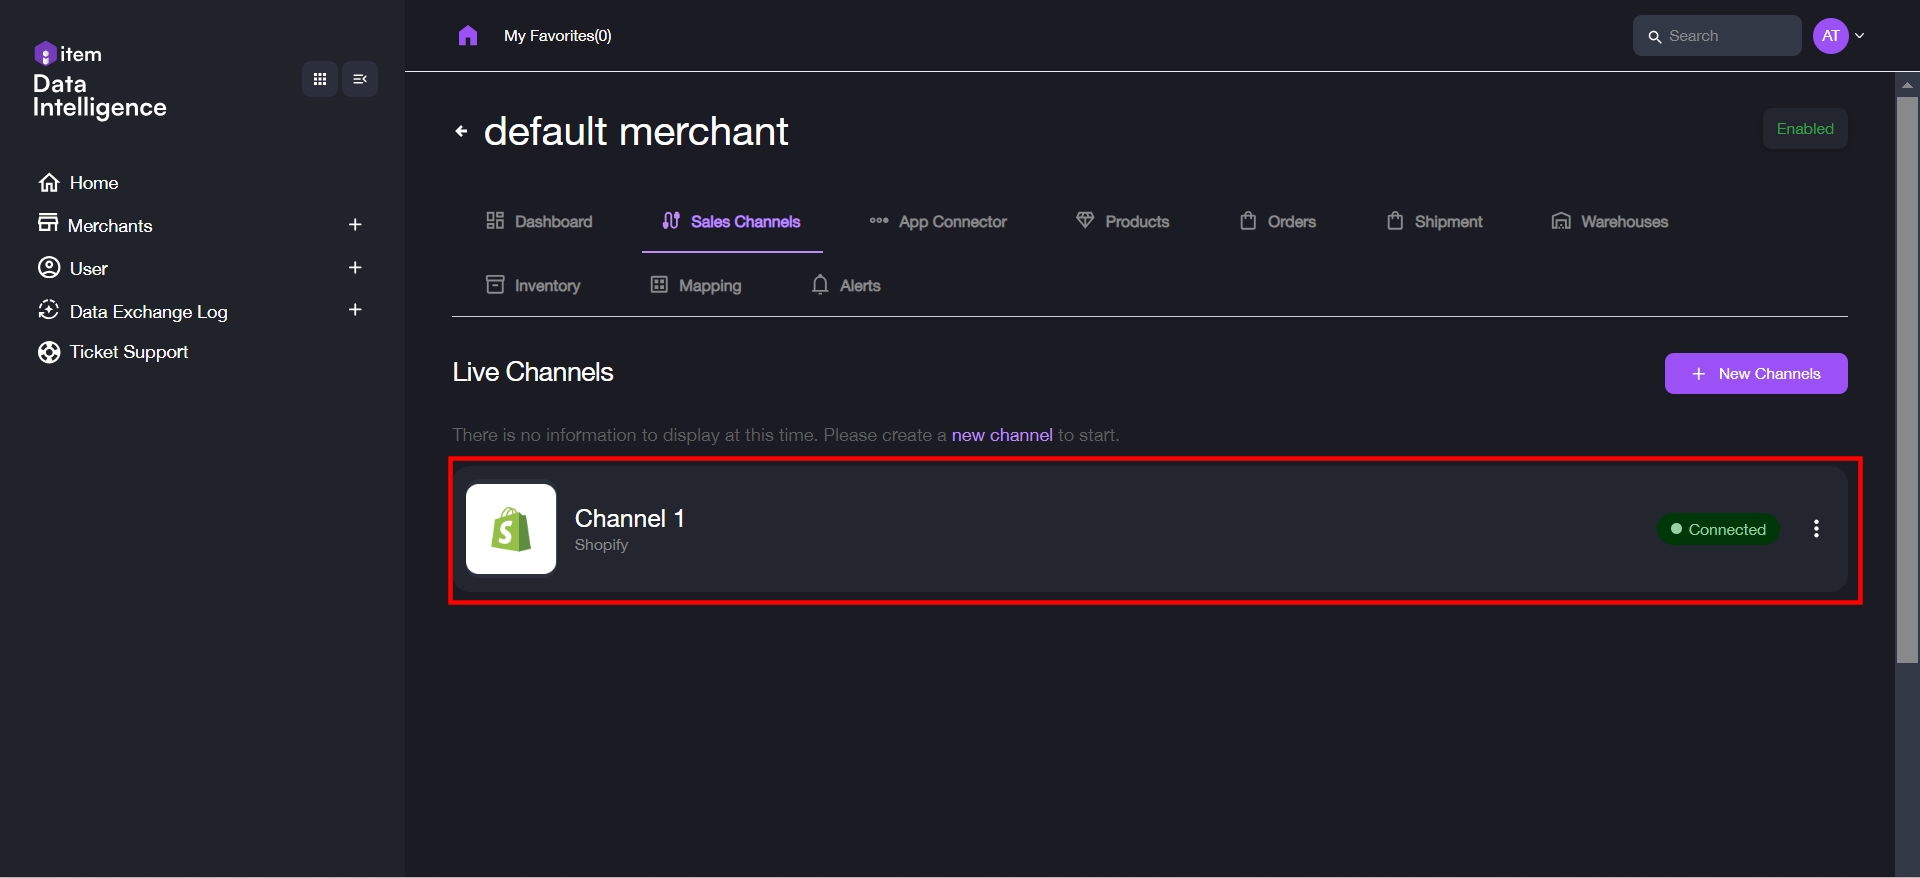
25. If the channel can be connected successfully, a corresponding prompt message is displayed on the top of the dialog box. Then click “Submit”.
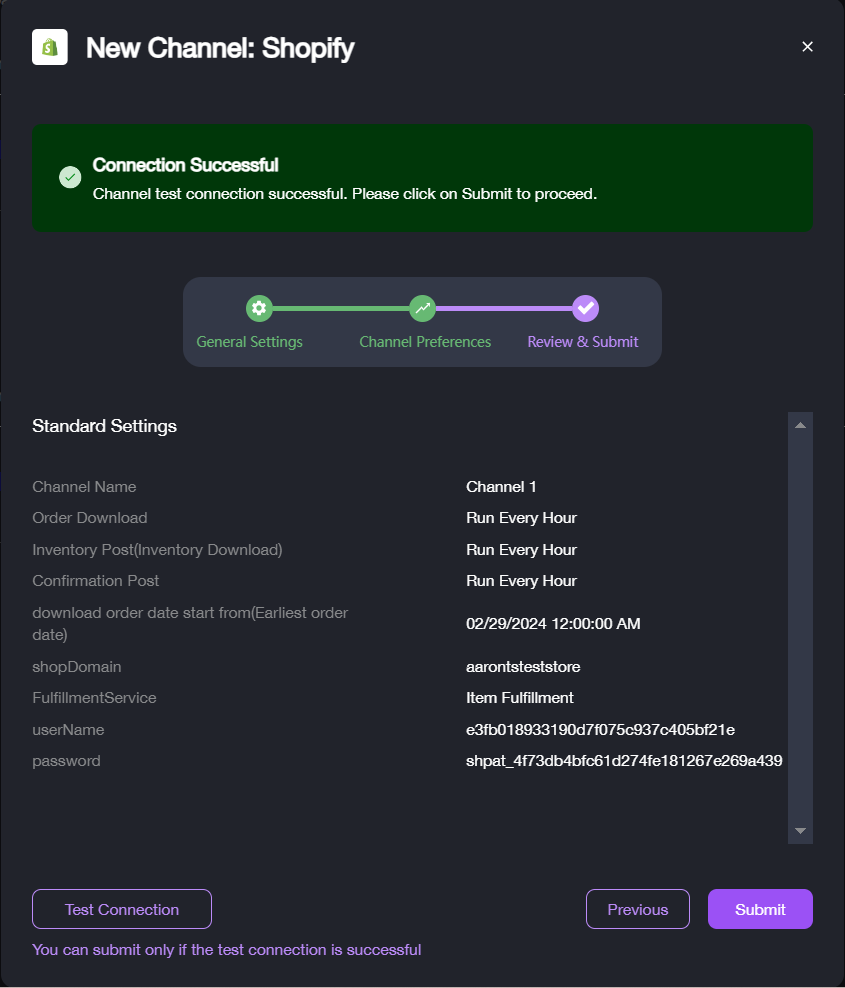
The new channel is then added to the list in “Sales Channels”.